How to Install Exalate for Asana
This article describes how to set up Exalate synchronization with your Asana workspace.
Exalate for Asana: Unlike traditional Asana apps, Exalate for Asana is a hosted service that connects to your workspace via API. Your data remains secure and is only accessed through Asana's official API.
Before you begin
Ensure you have:
- Admin permissions in your Asana workspace
- Access to create Personal Access Tokens in Asana
- Your Workspace GID (we'll show you how to find this)
- An Exalate account
Step 1: Find your Asana Workspace GID
The Workspace GID is a unique number that identifies your Asana workspace.
From any Asana task URL
Open any task in your workspace and look at the URL:
- V0 Format:
https://app.asana.com/0/1208662487042272/1234567890123456 - V1 Format:
https://app.asana.com/1/1208662487042272/project/1234567890123456
The Workspace GID is the first long number after /0/ or /1/
[SCREENSHOT NEEDED: Asana task URL in browser address bar with Workspace GID highlighted]
Step 2: Create an Asana Personal Access Token
- In Asana, click your profile picture in the top right
- Select Settings
- Go to the Apps tab
- Click Manage Developer Apps
- Click Create New Personal Access Token
- Give it a name like "Exalate Integration"
- Copy the token immediately
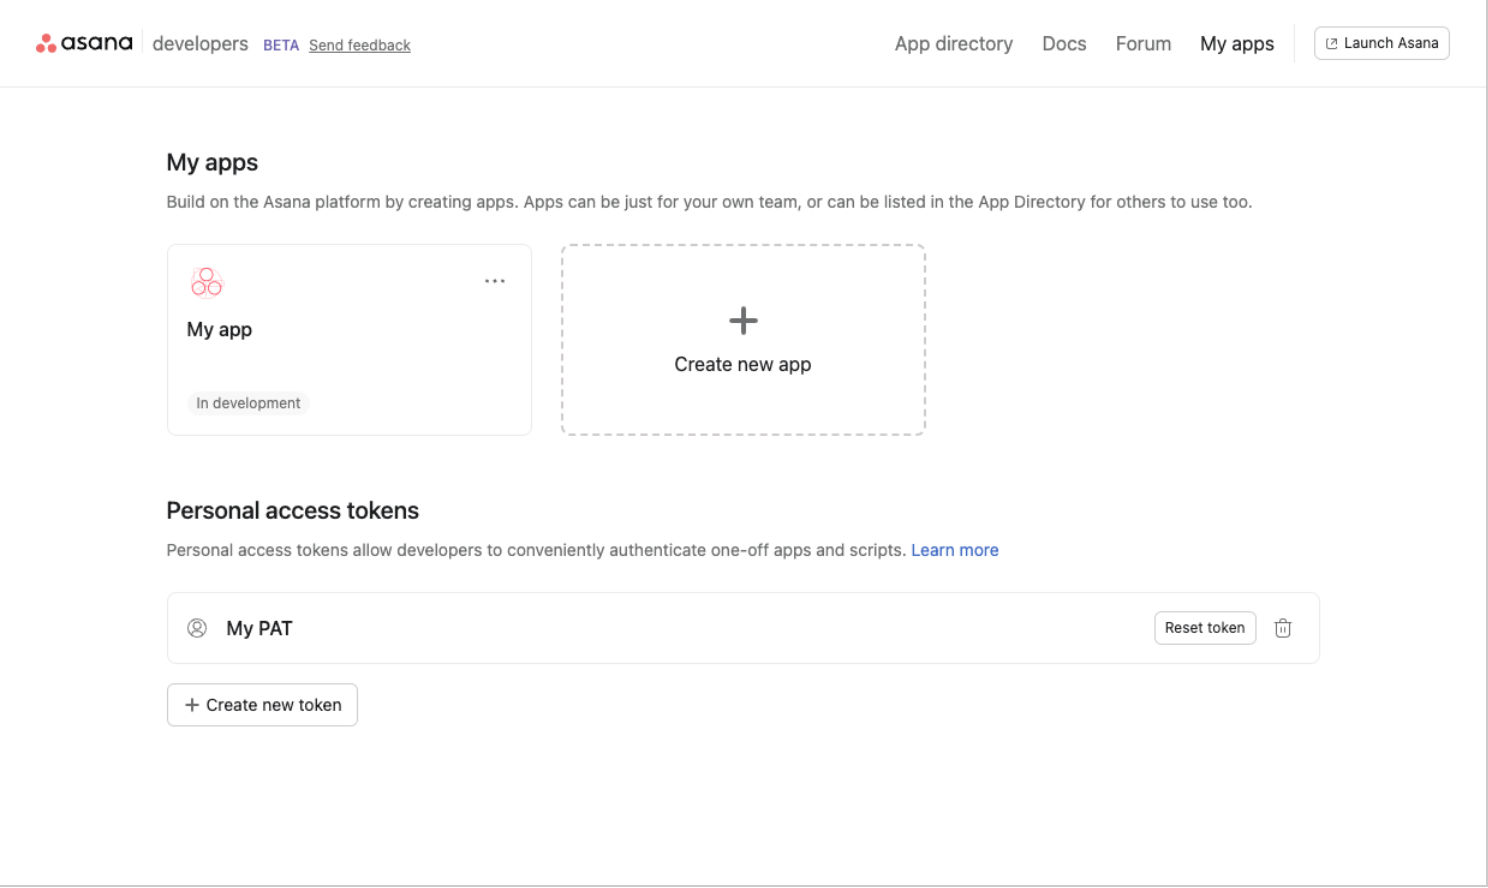

Security: Treat your Personal Access Token like a password. Don't share it or store it in unsecured locations.
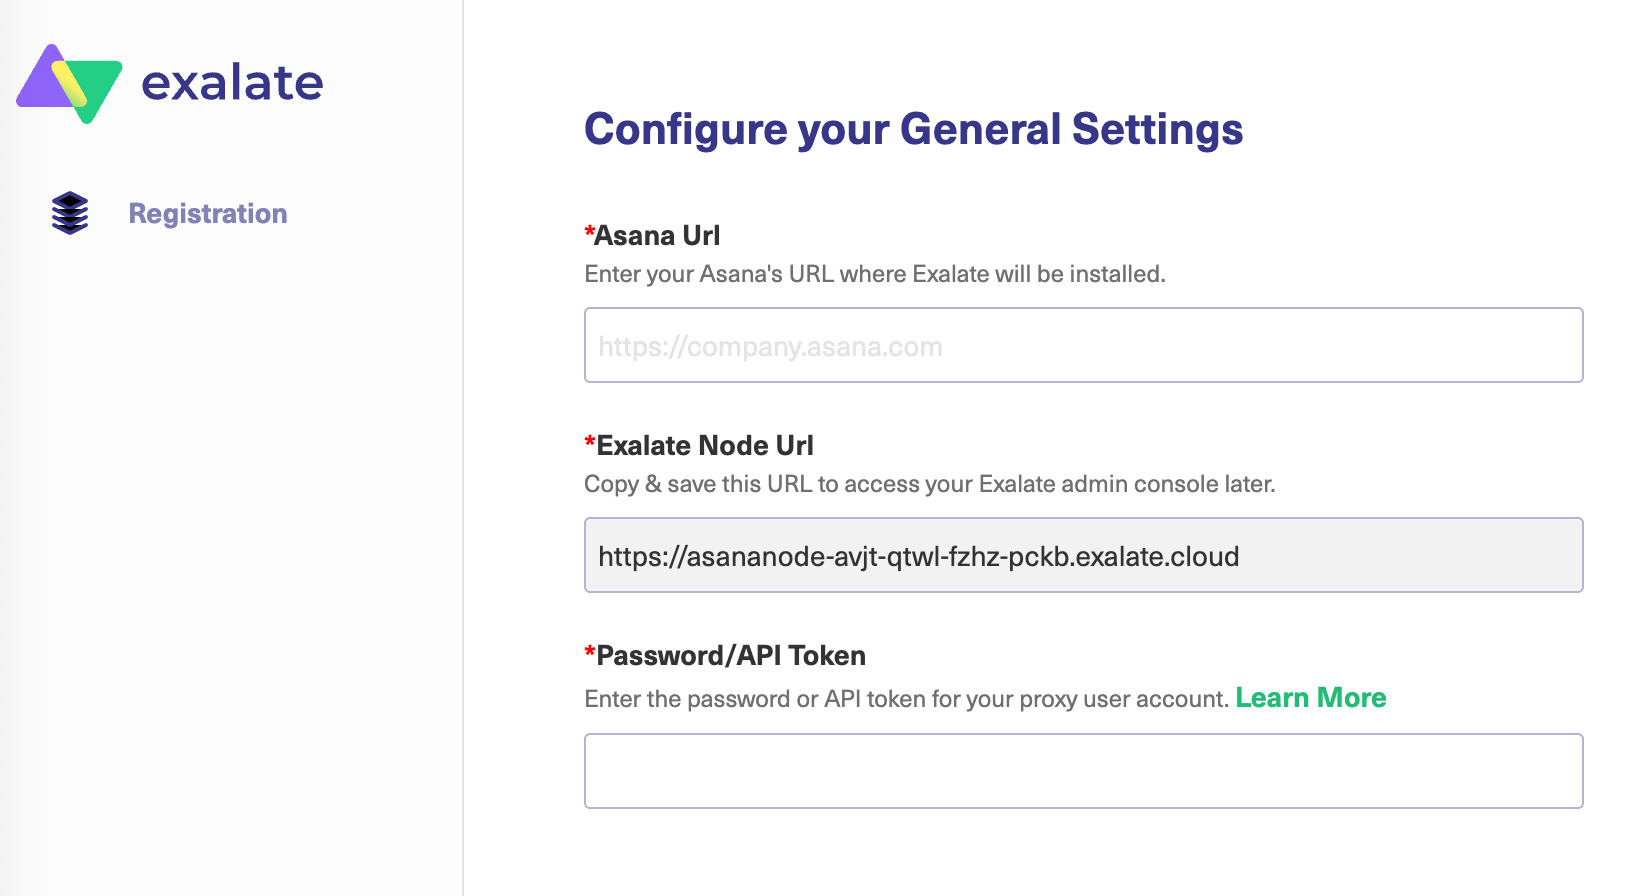
Step 3: Register with Exalate
- Go to the Exalate registration page
- Select Asana as your platform
- Enter your workspace information:
- Workspace URL:
https://app.asana.com/0/YOUR_WORKSPACE_GID - Personal Access Token: The token from Step 2
- Workspace URL:
- Complete the registration process
Step 4: Test the connection
After registration, Exalate will test the connection to your workspace. You should see a success message confirming:
- Workspace access is working
- Token permissions are sufficient
- Basic task and project access is available
Next steps
Have more questions? Ask the community