Next Steps to Install Exalate on ServiceNow
Important: You just deployed the Exalate Bridge from the ServiceNow store or from the update set. But the configuration of Exalate for ServiceNow is not yet complete. You now need to enter the URL of the Exalate for ServiceNow application into the configuration.
To continue with the Exalate installation:
1. Make your user an 'Exalate Administrator'
Add your user to the x_idnv_exa_bridge.admin role. Only users having this role can have access to the Exalate menus in the ServiceNow left navigation bar (Access to the eEalate console is handled differently). To assign your user to the x_idnv_exa_bridge.admin role follow these steps:
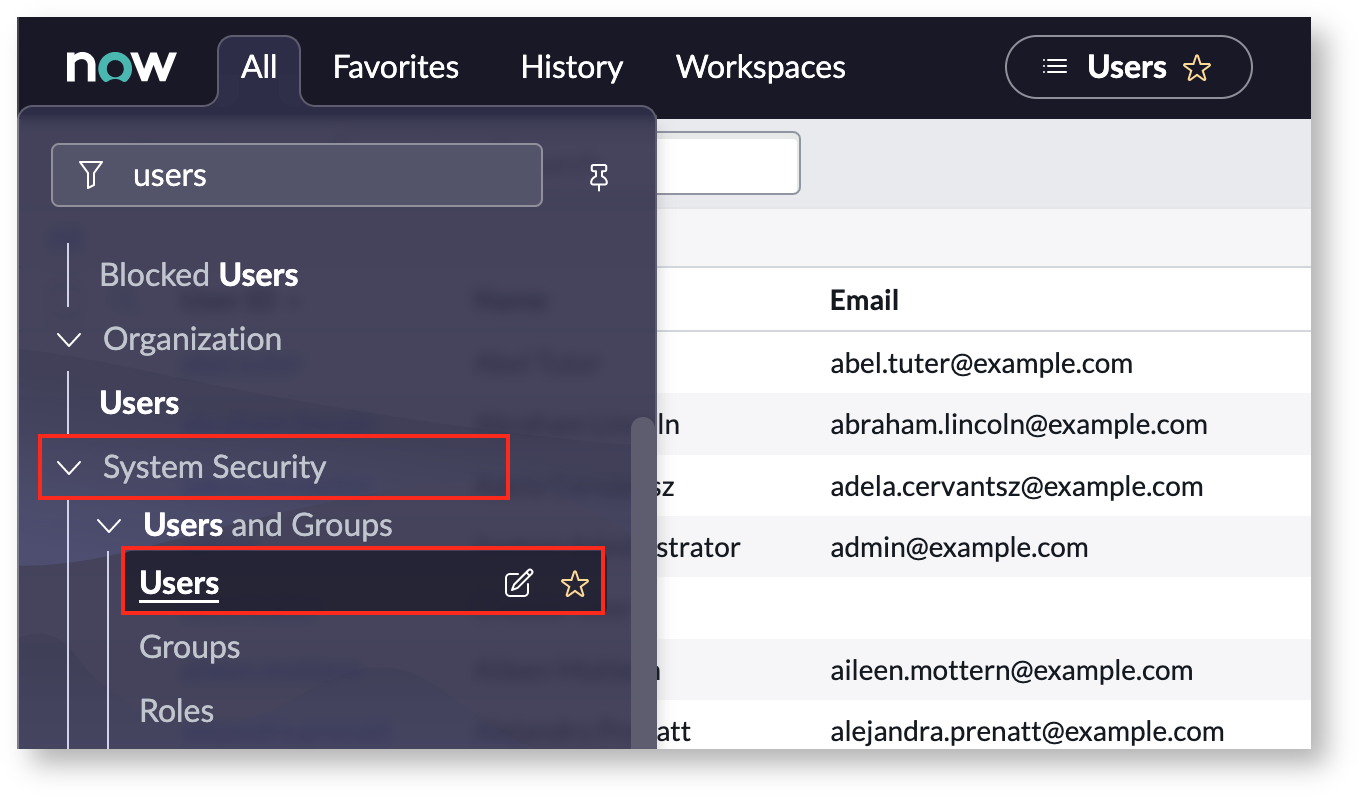
- Go to System Security → Users and Groups → Users.
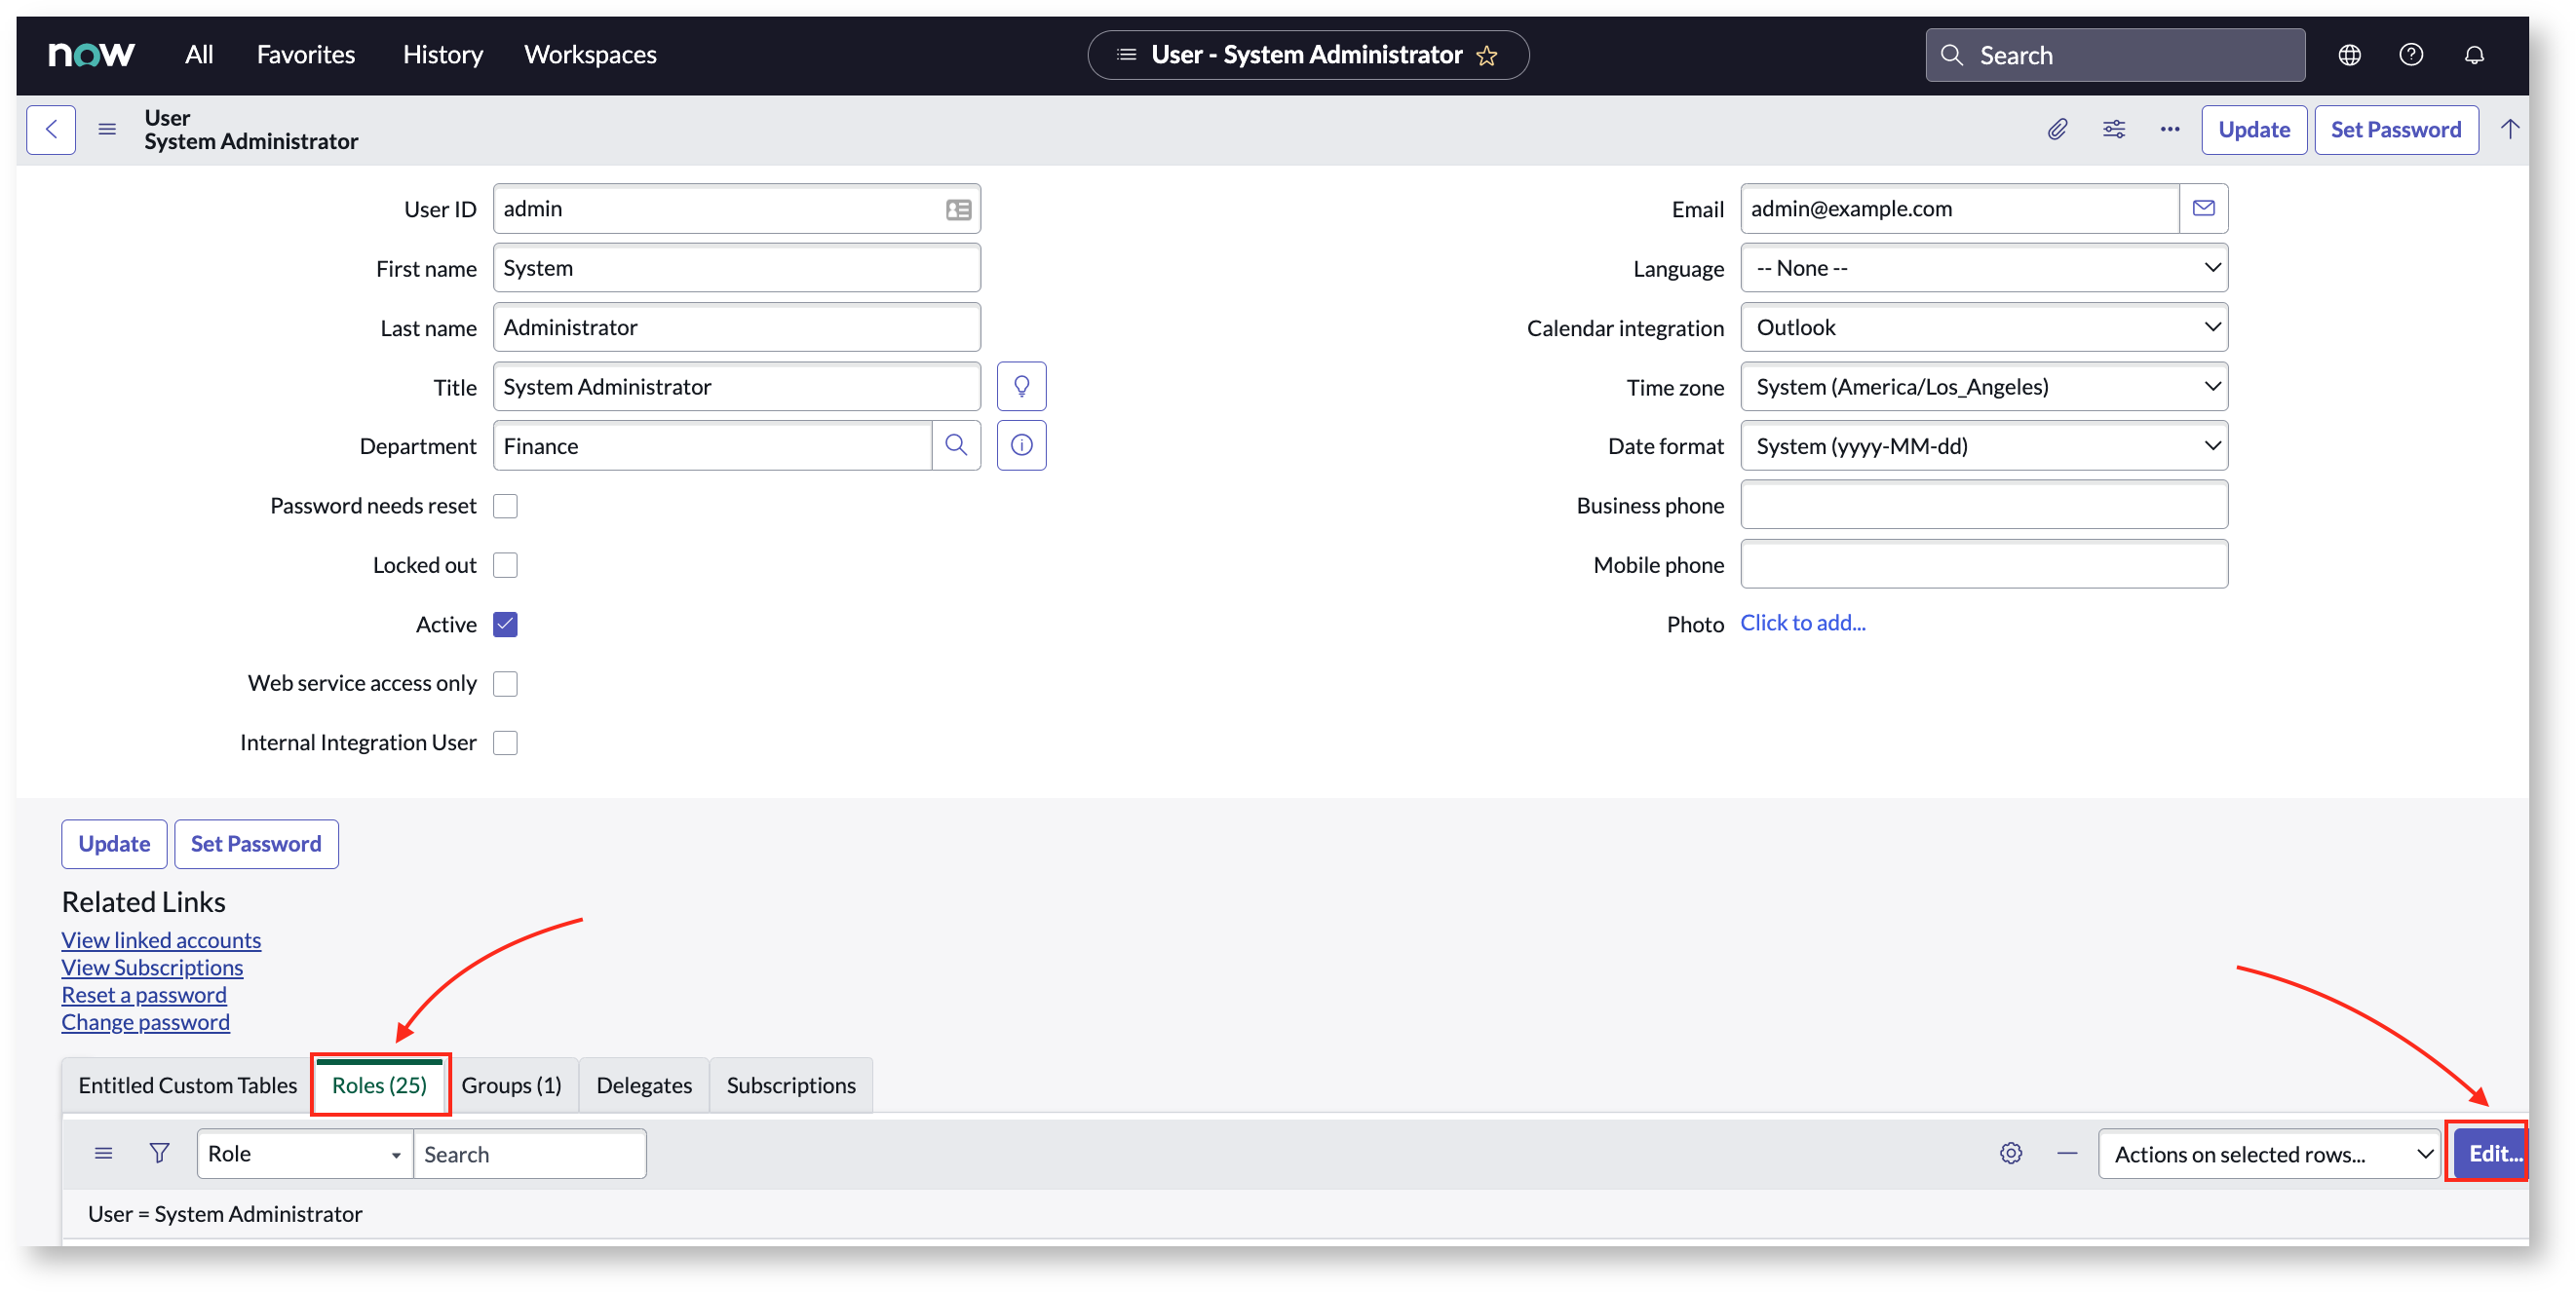
- Find the Roles and click Edit.
- Find the x_idnv_exa_bridge.admin role and add it to your user.
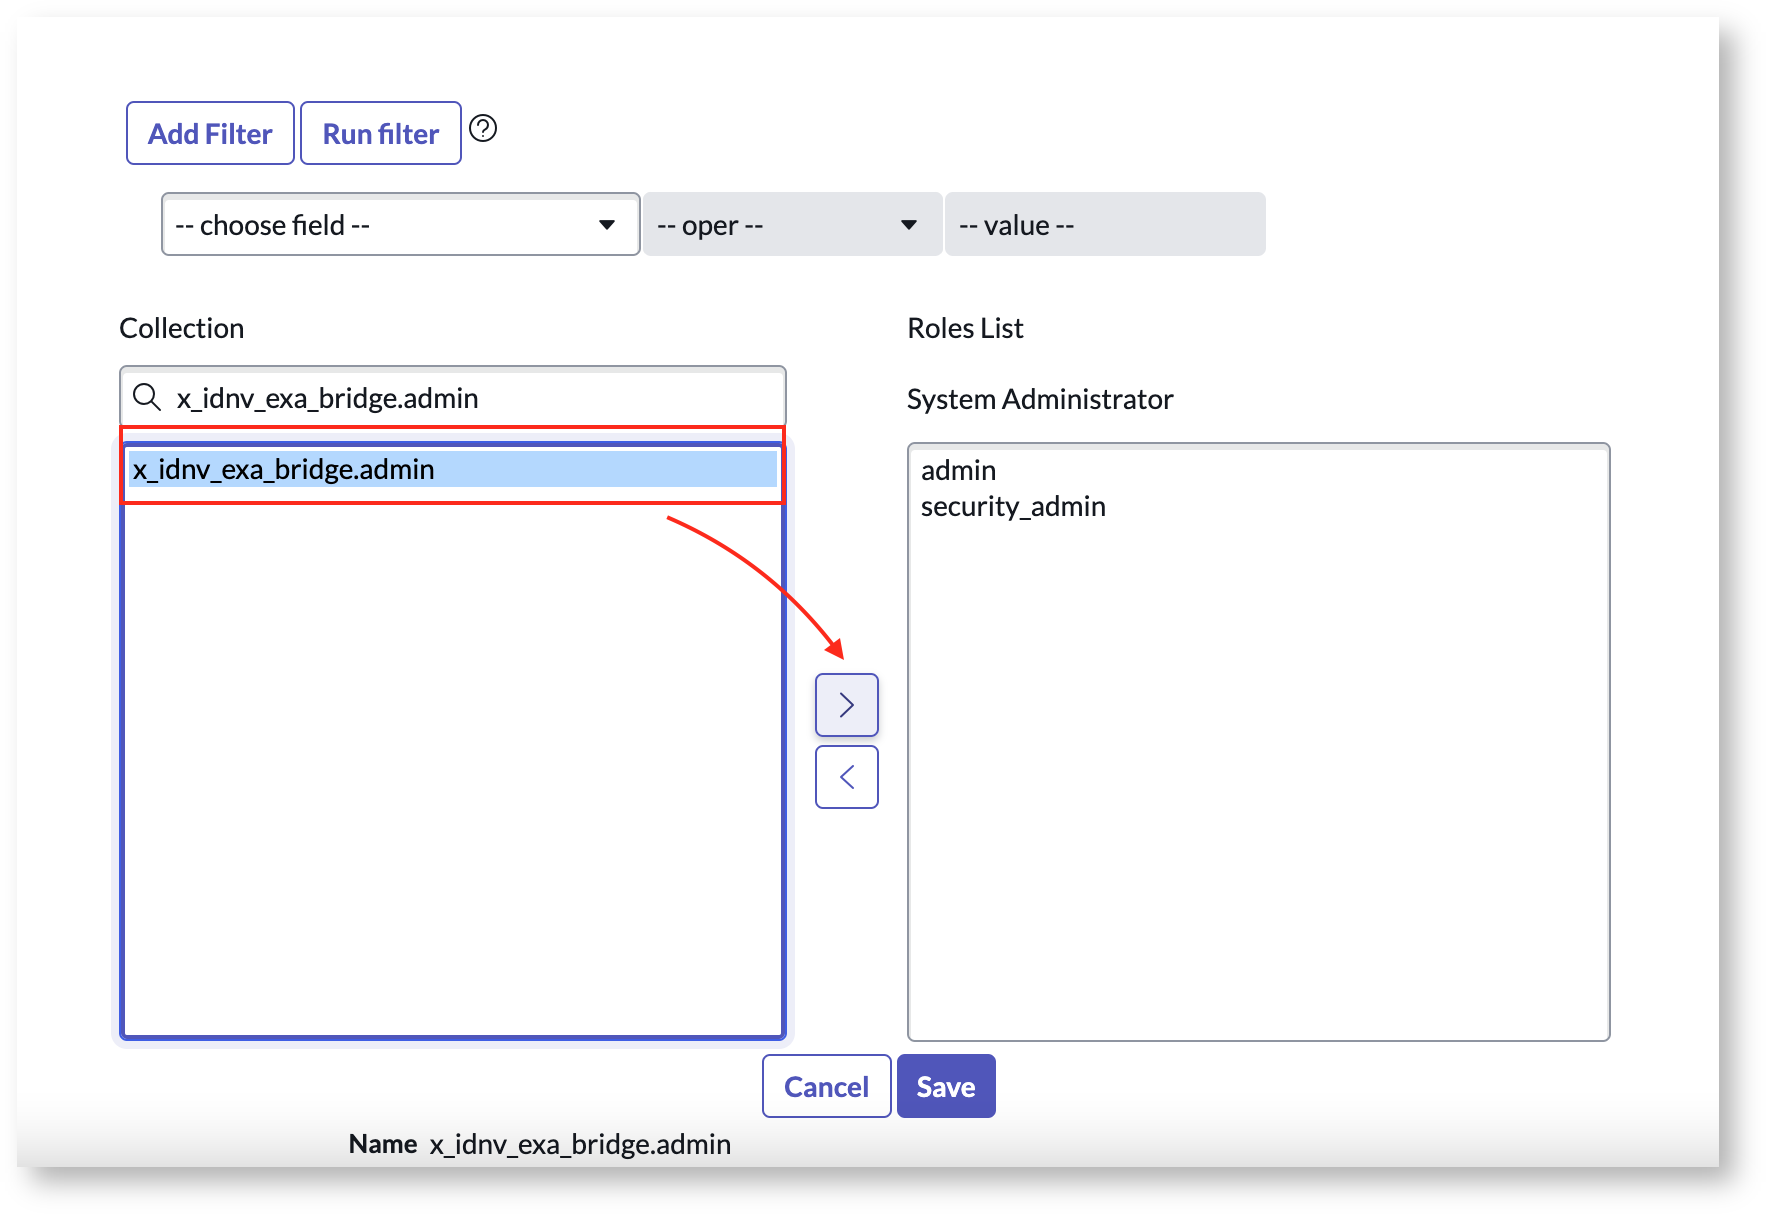
- Click Save and then Update your user profile.
2. Configure the property 'Exalate for ServiceNow URL'
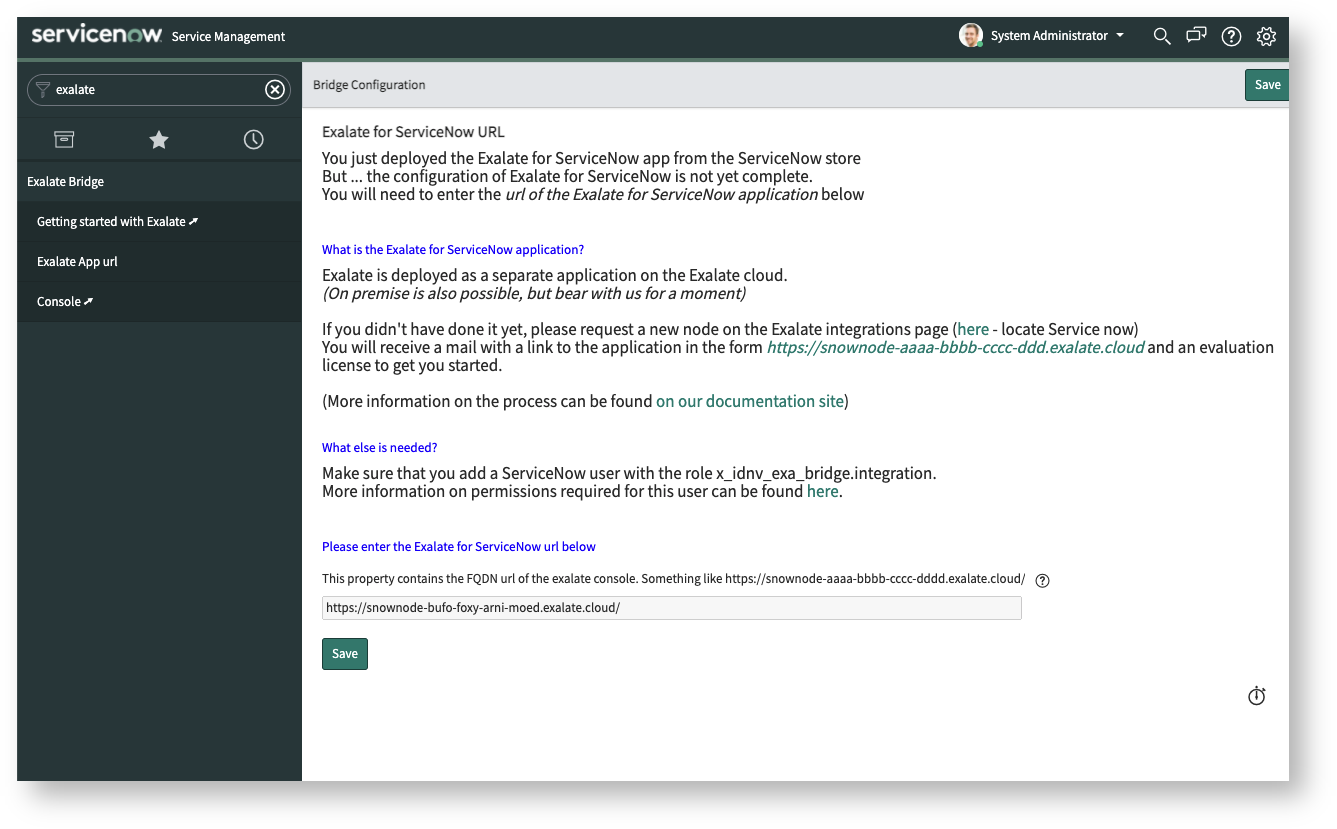
Access the 'Exalate app URL' and paste the URL of your Exalate for ServiceNow node URL into the field.

3. Configure the Exalate Integration user
Next, to link to the node you need a ServiceNow service account which is used by Exalate to search, read, and update entities such as incidents, changes, etc.
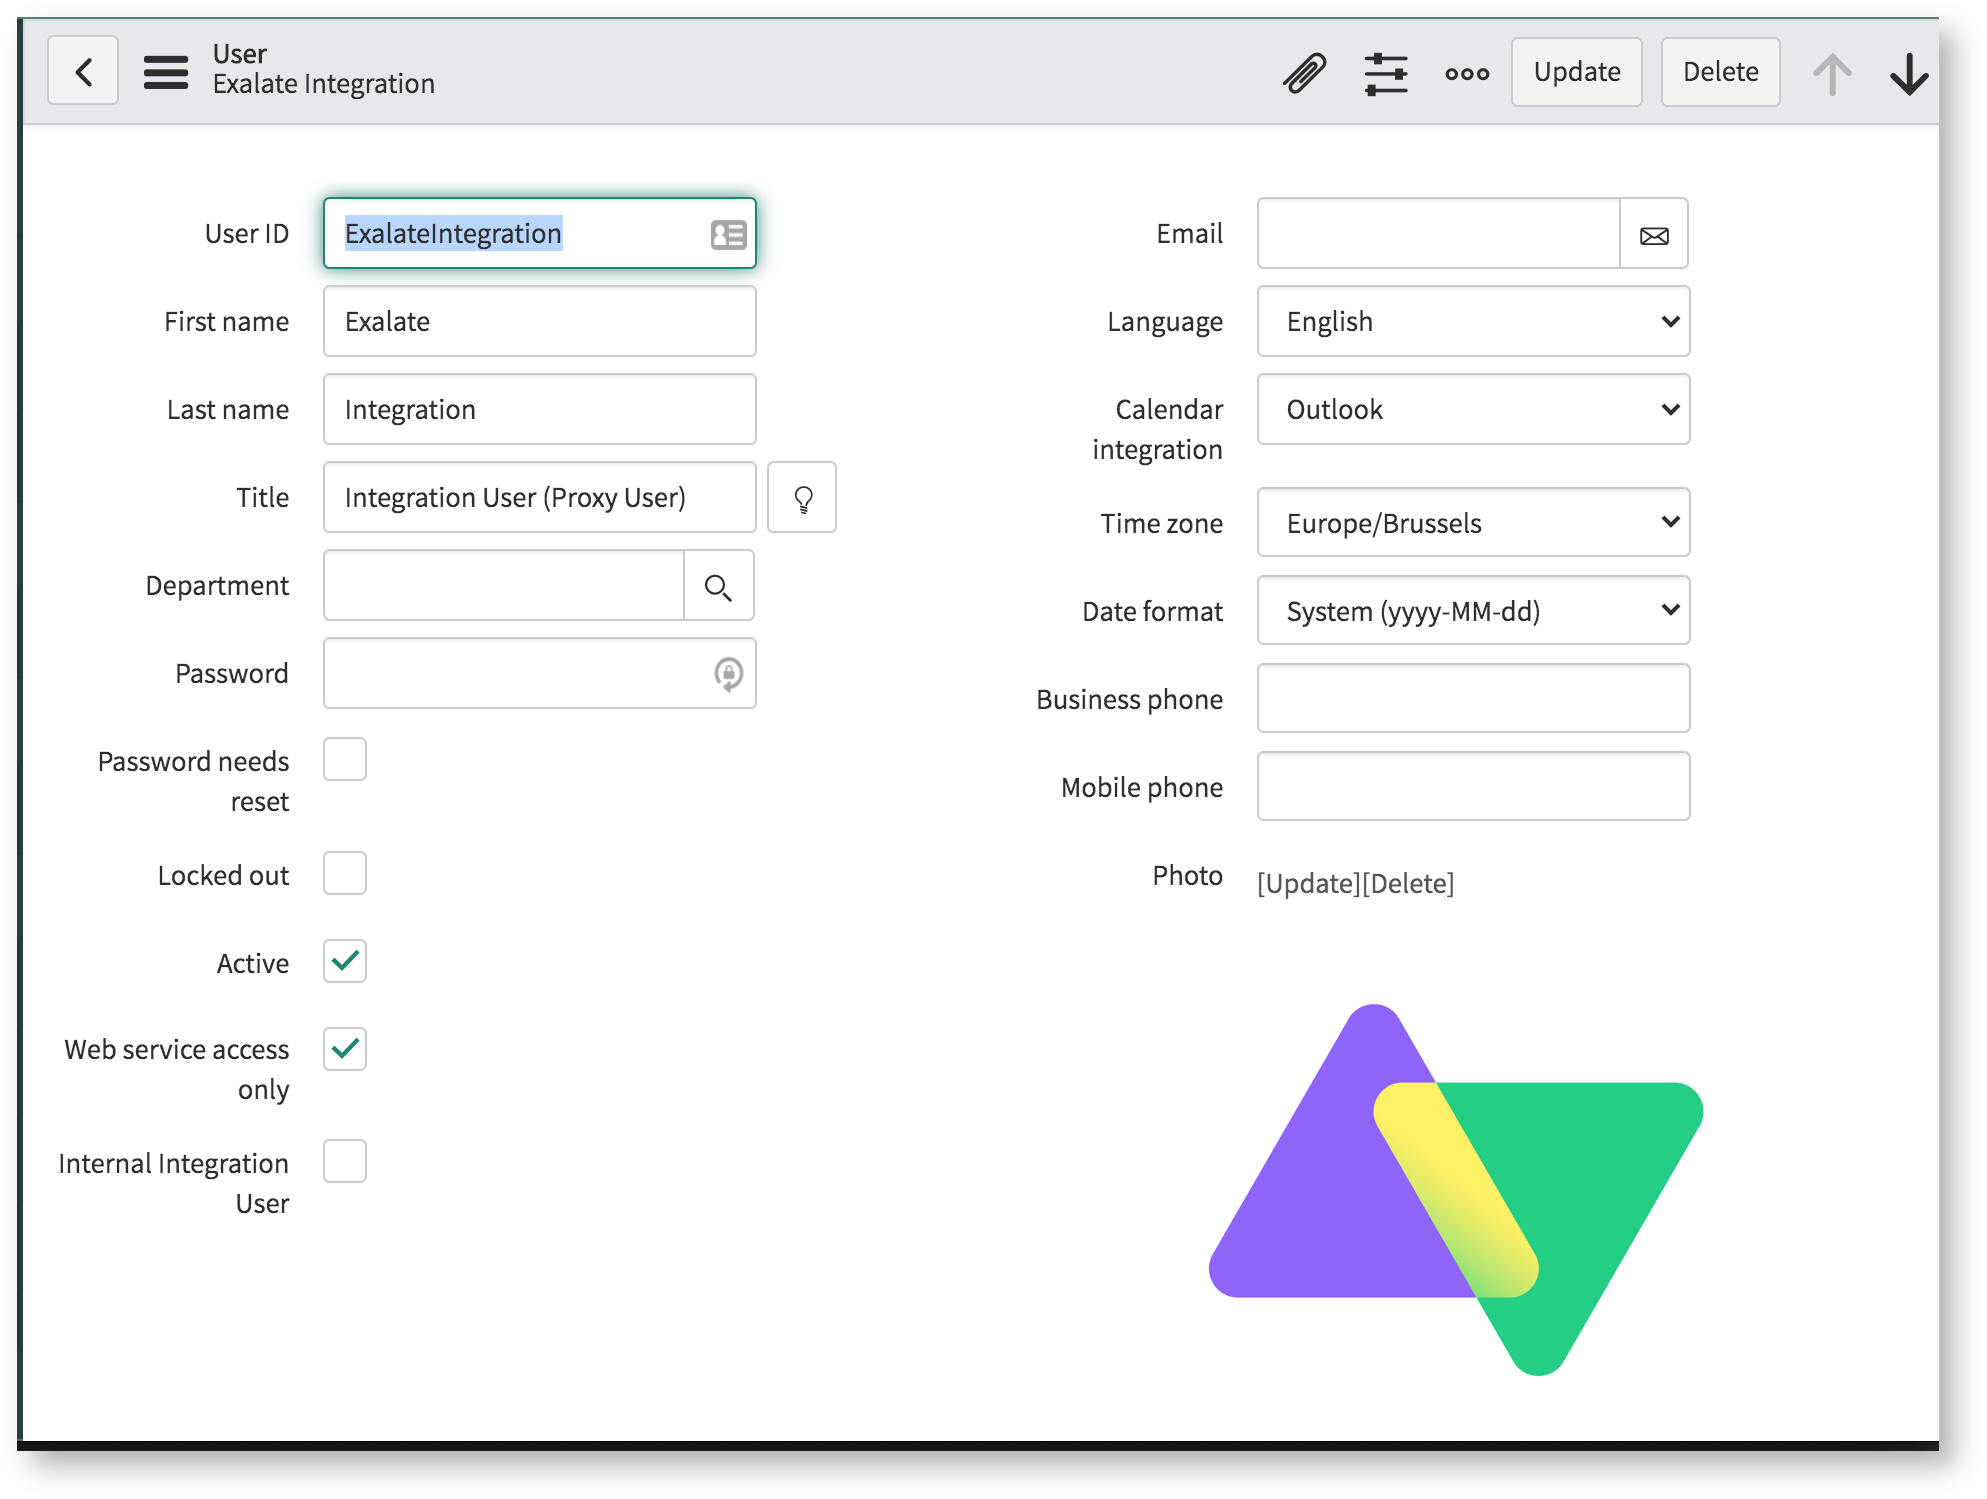
Make sure to set 'Web service access only'.
4. Roles to configure for the Exalate integration user
Add at least the user to the x_idnv_exa_bridge.integration role. This adds the following capabilities:
- import_scheduler, import_set_loader, import_transformer, snc_platform_rest_api_access
- ACL on sys_journal_fields
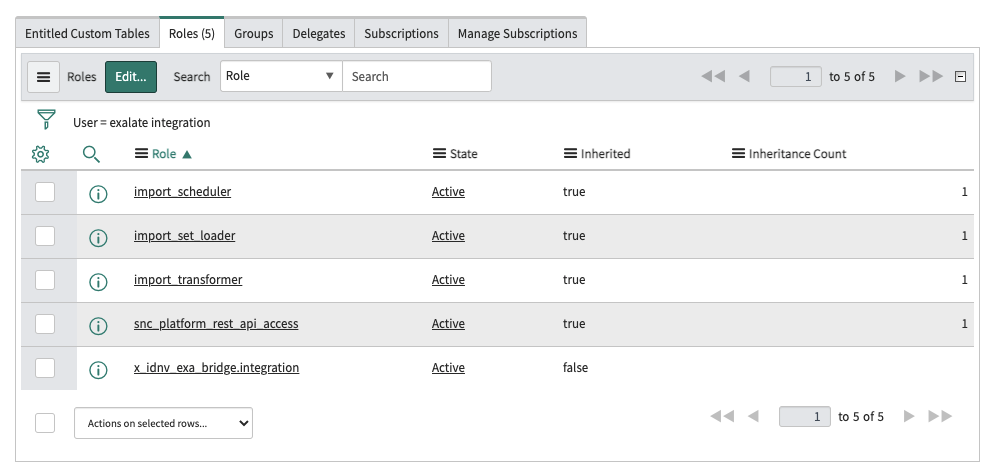
In addition to these roles, also configure the following roles, depending on the entities that need to be accessed:
|
|
Entity |
Role |
|---|---|---|
|
1
|
Incident, problem, request, change, catalogTask, requestItem |
ITIL |
|
2
|
Epics, Stories, Defects, Theme, Scrum Task, Enhancement |
Scrum Product Owner, [feature user] |


