This article applies to Exalate Classic only. For New Exalate, refer to this documentation.
This article describes how to uninstall Exalate from your Salesforce work management system.
To uninstall Exalate:
1. Manage user's permissions:
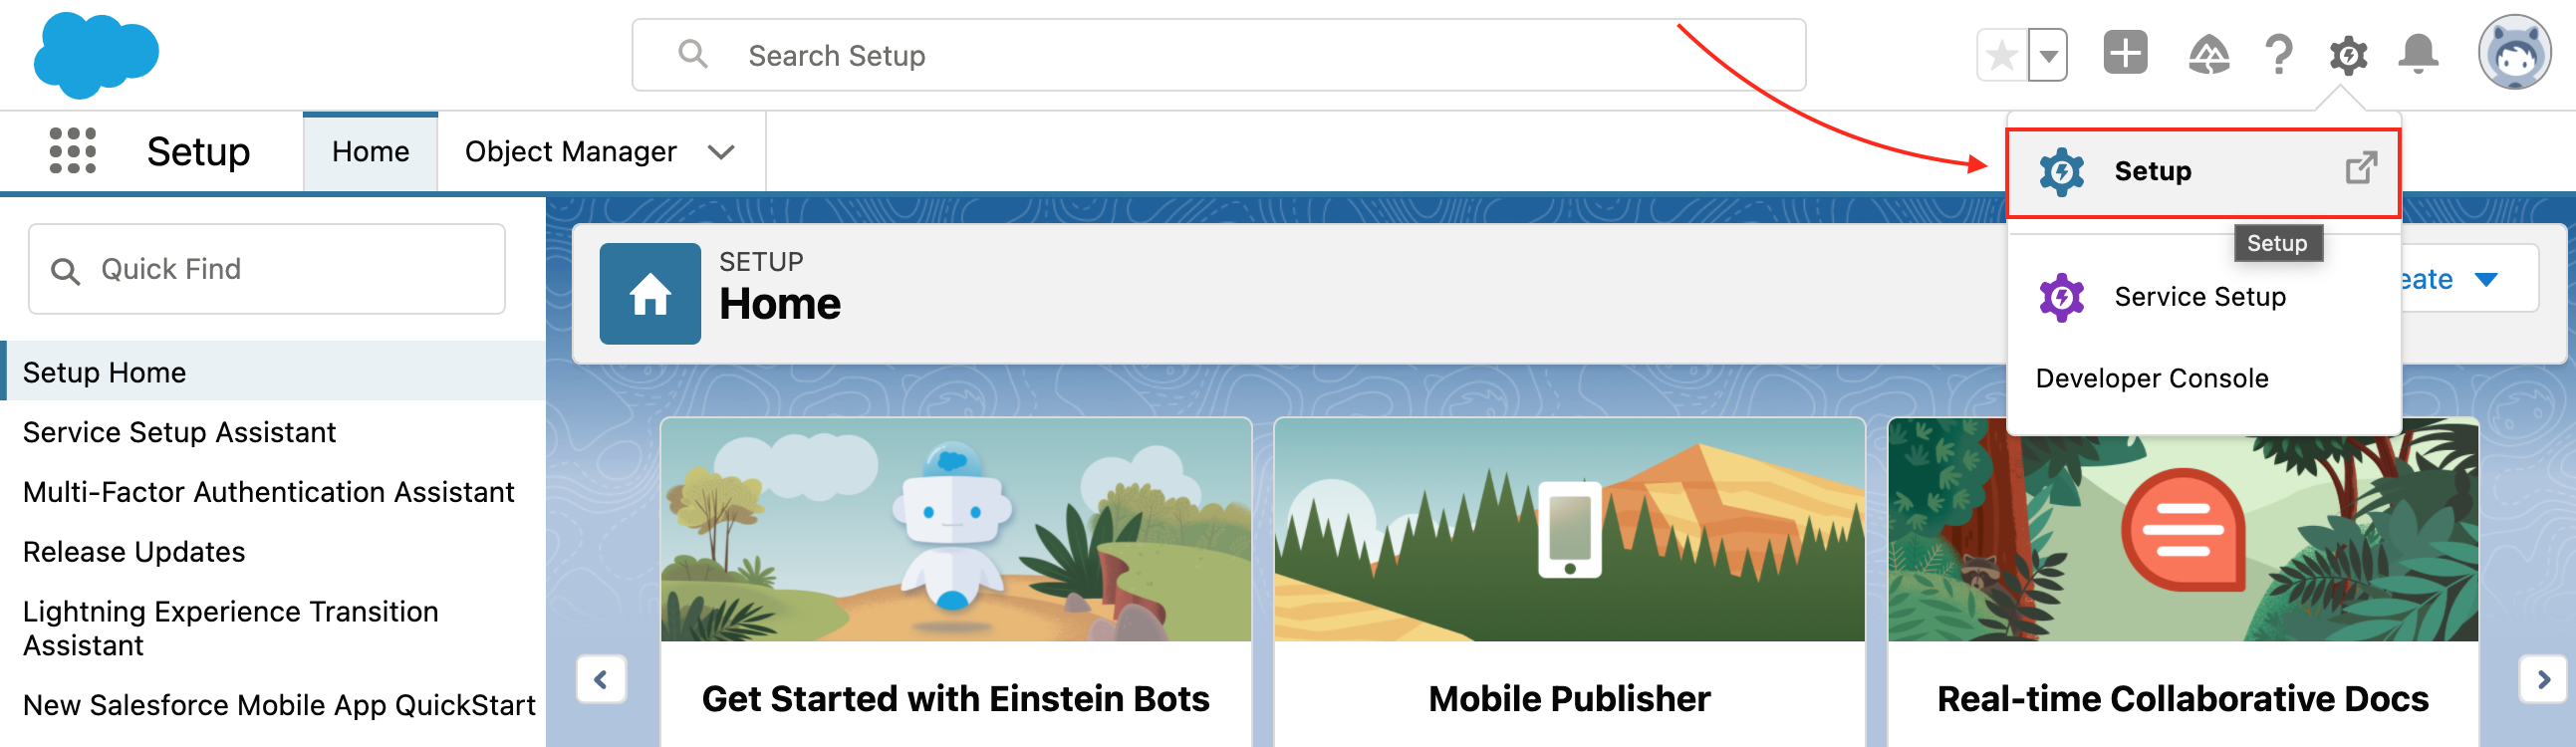
- Access the Salesforce instance and click Setup.
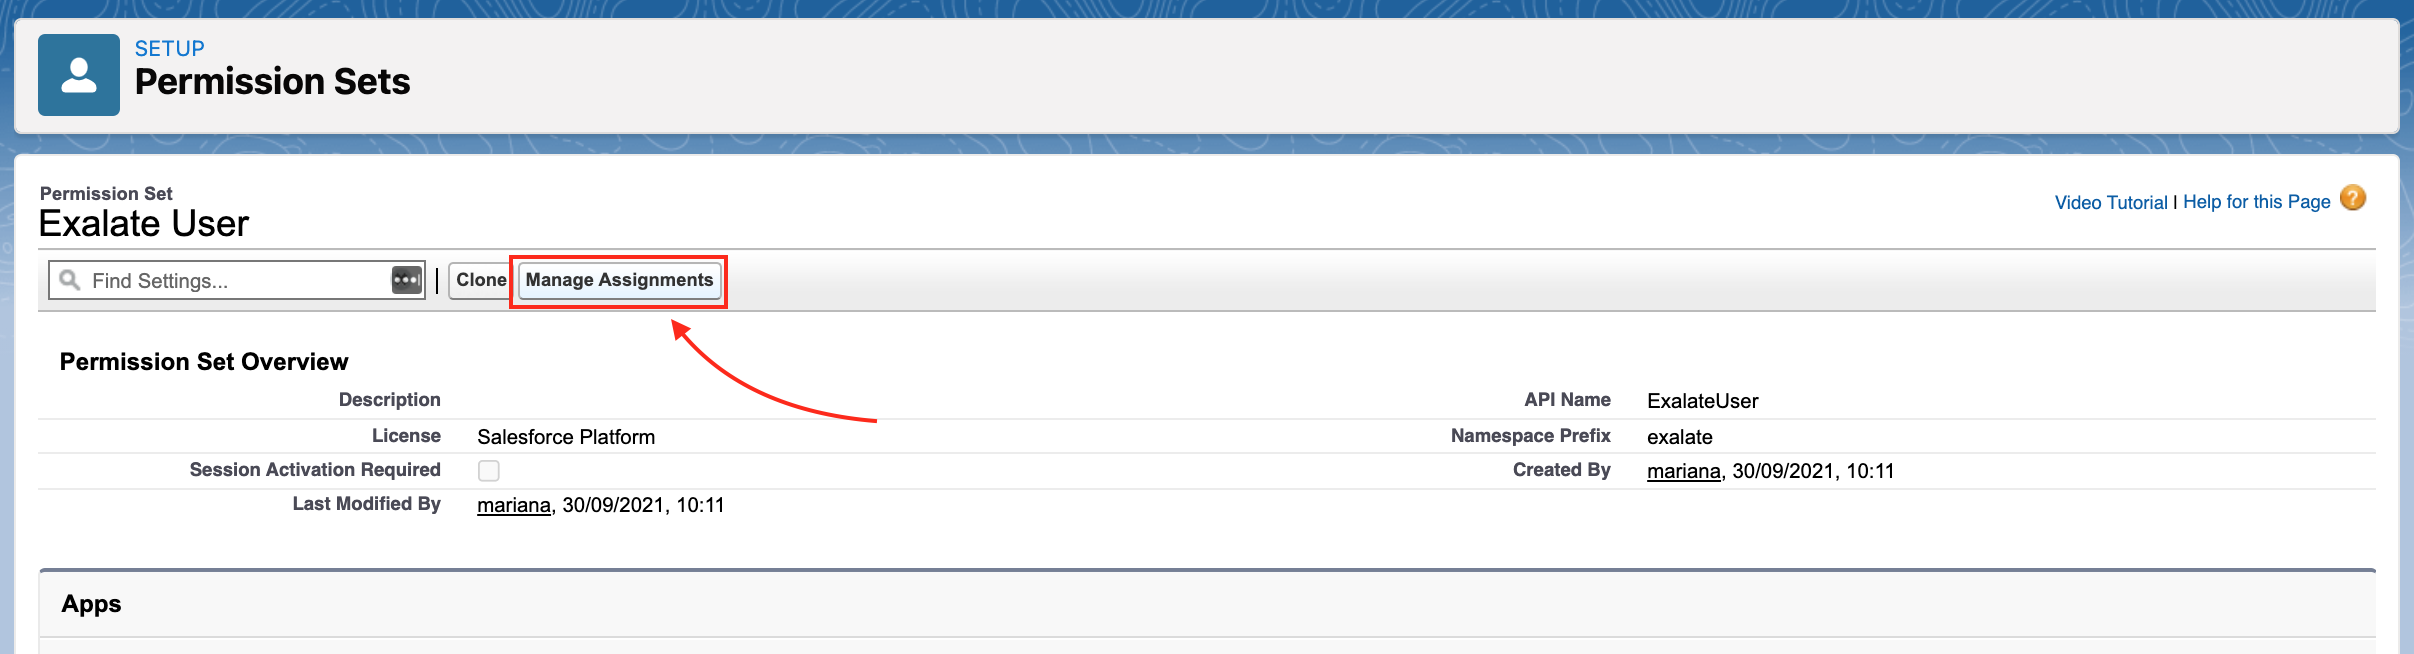
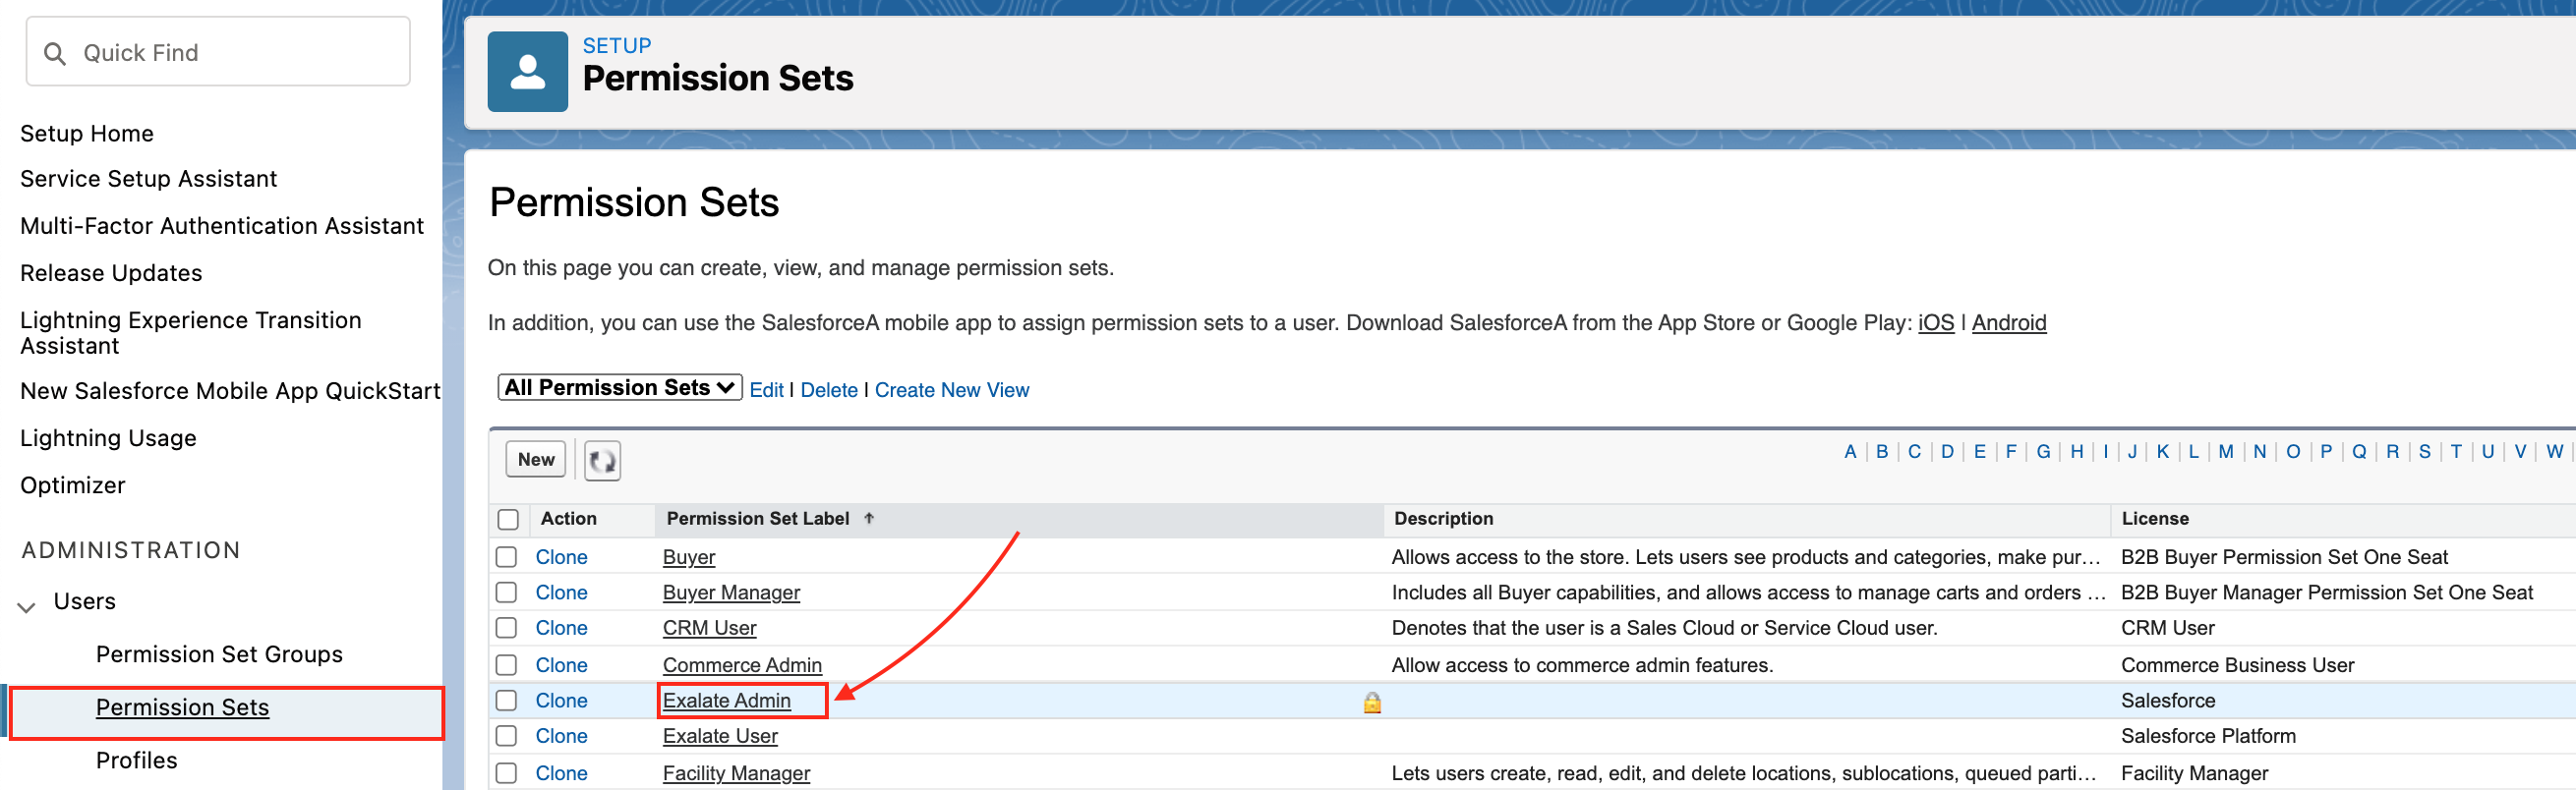
- Go to Users -> Permissions Sets and click Exalate User.


3. Click Manage Assignments.
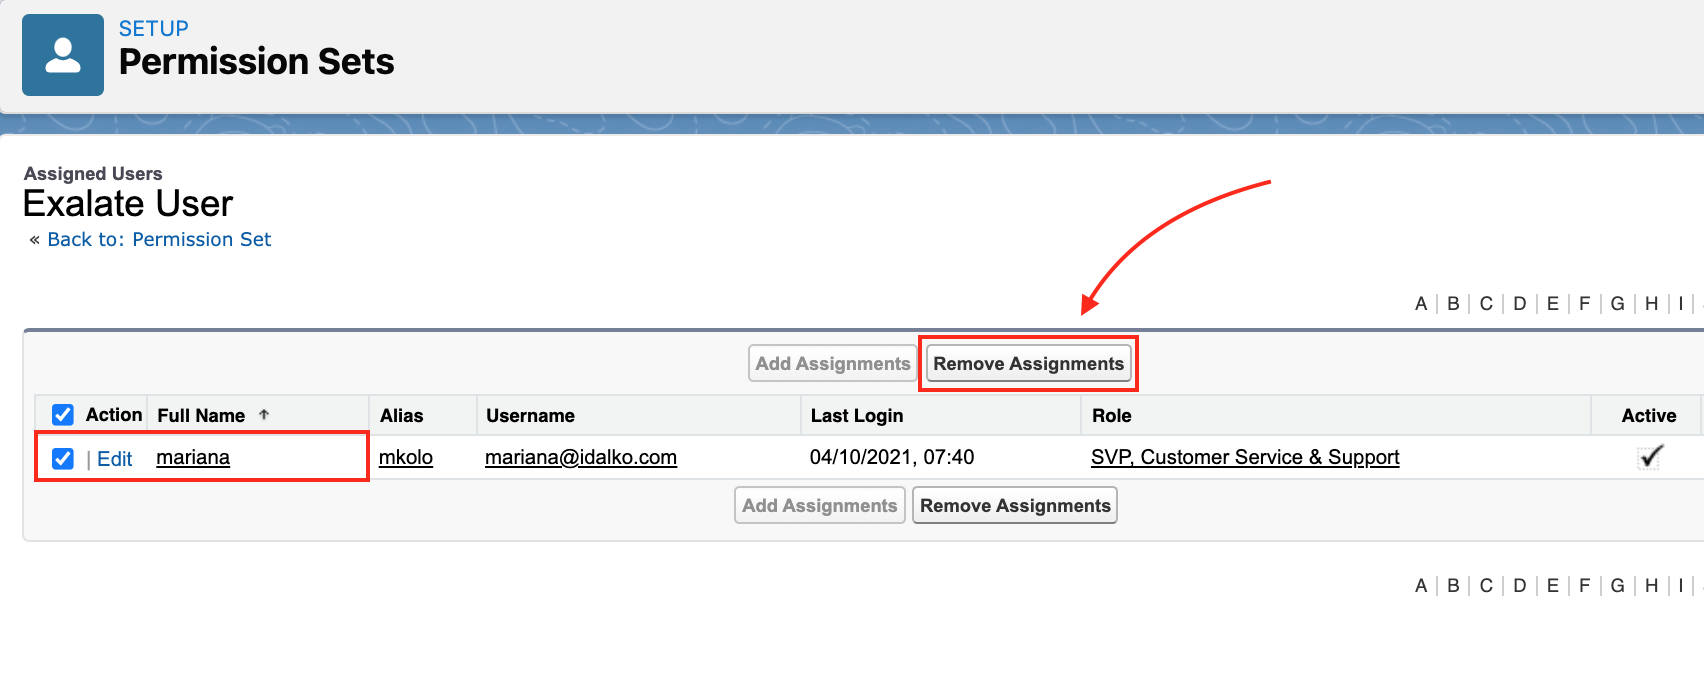
4. Select a user and click Remove assignments.
5. Go back to Users -> Permissions Sets and click Exalate Admin.
6. Click Manage Assignments.
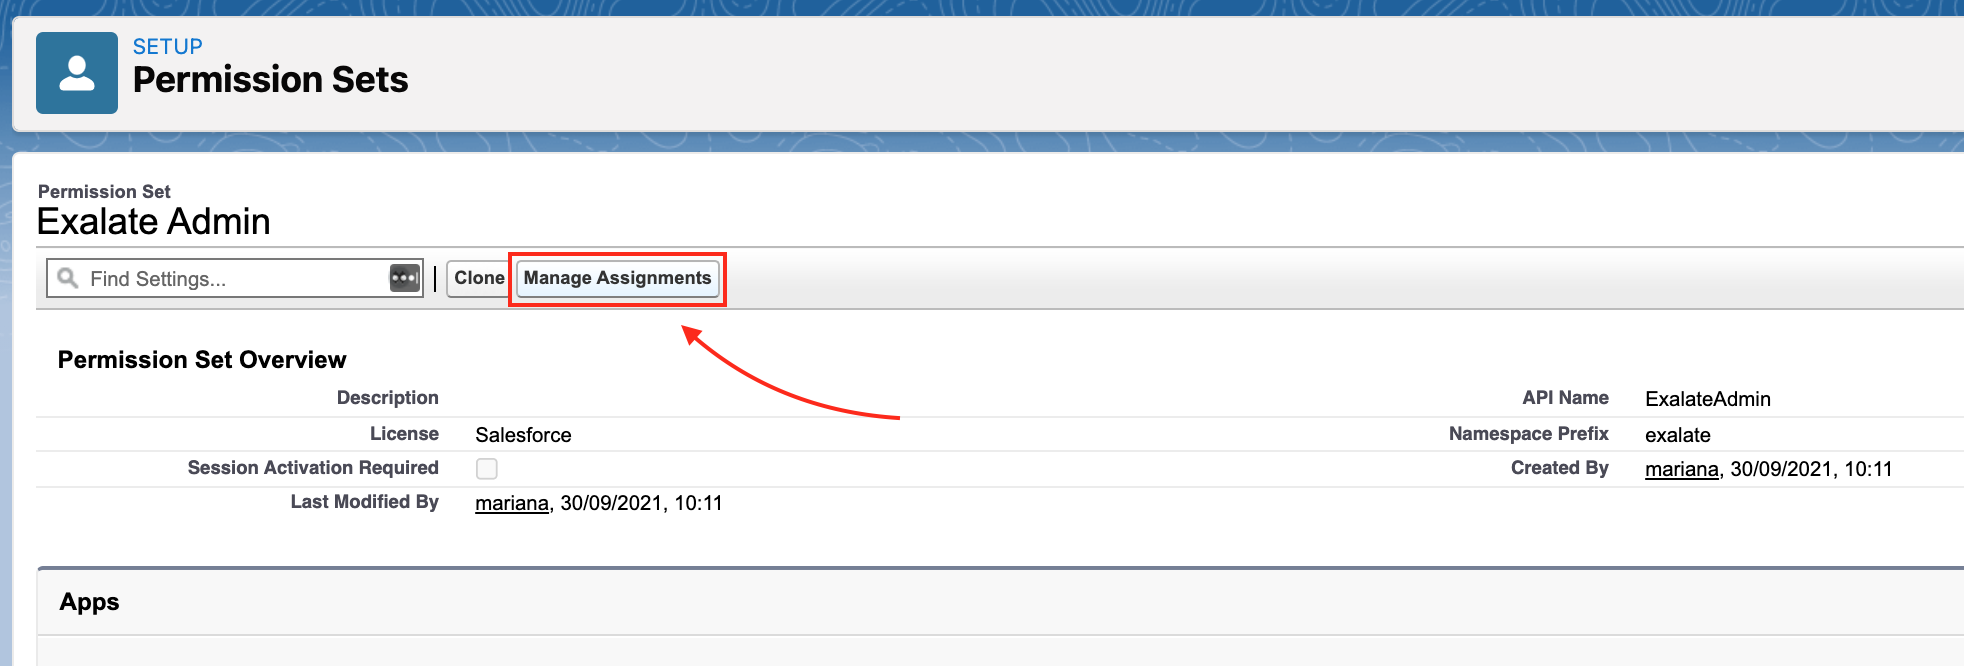
7. Select a user and click Remove assignments.

2. Remove the Exalate Sync panel from the objects view:
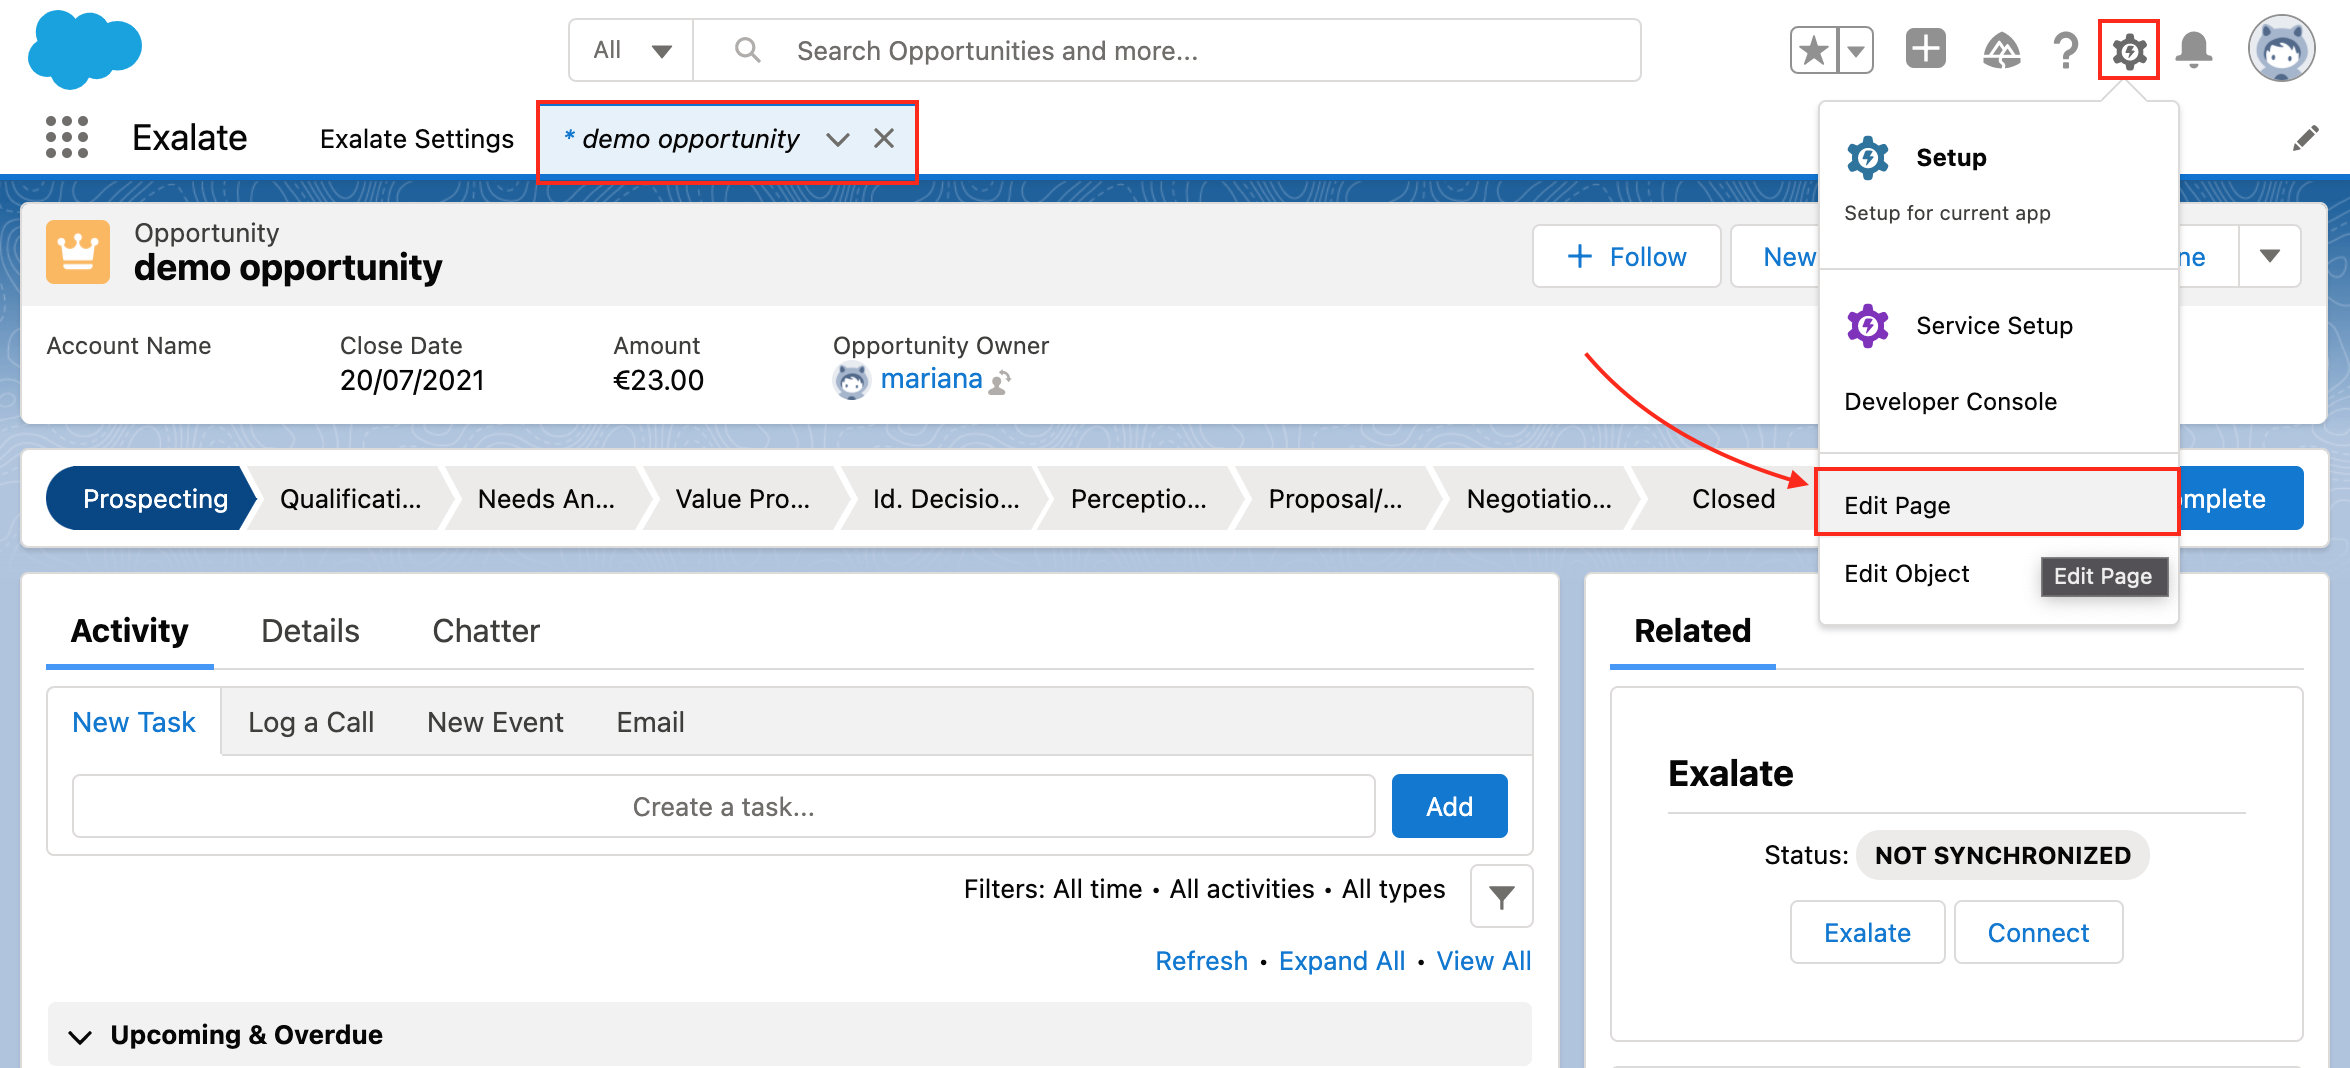
- Open an object where you have previously added a sync panel.
- Click Setup -> Edit Page.
- Remove the sync panel by clicking a trash icon on the component and clicking Save.
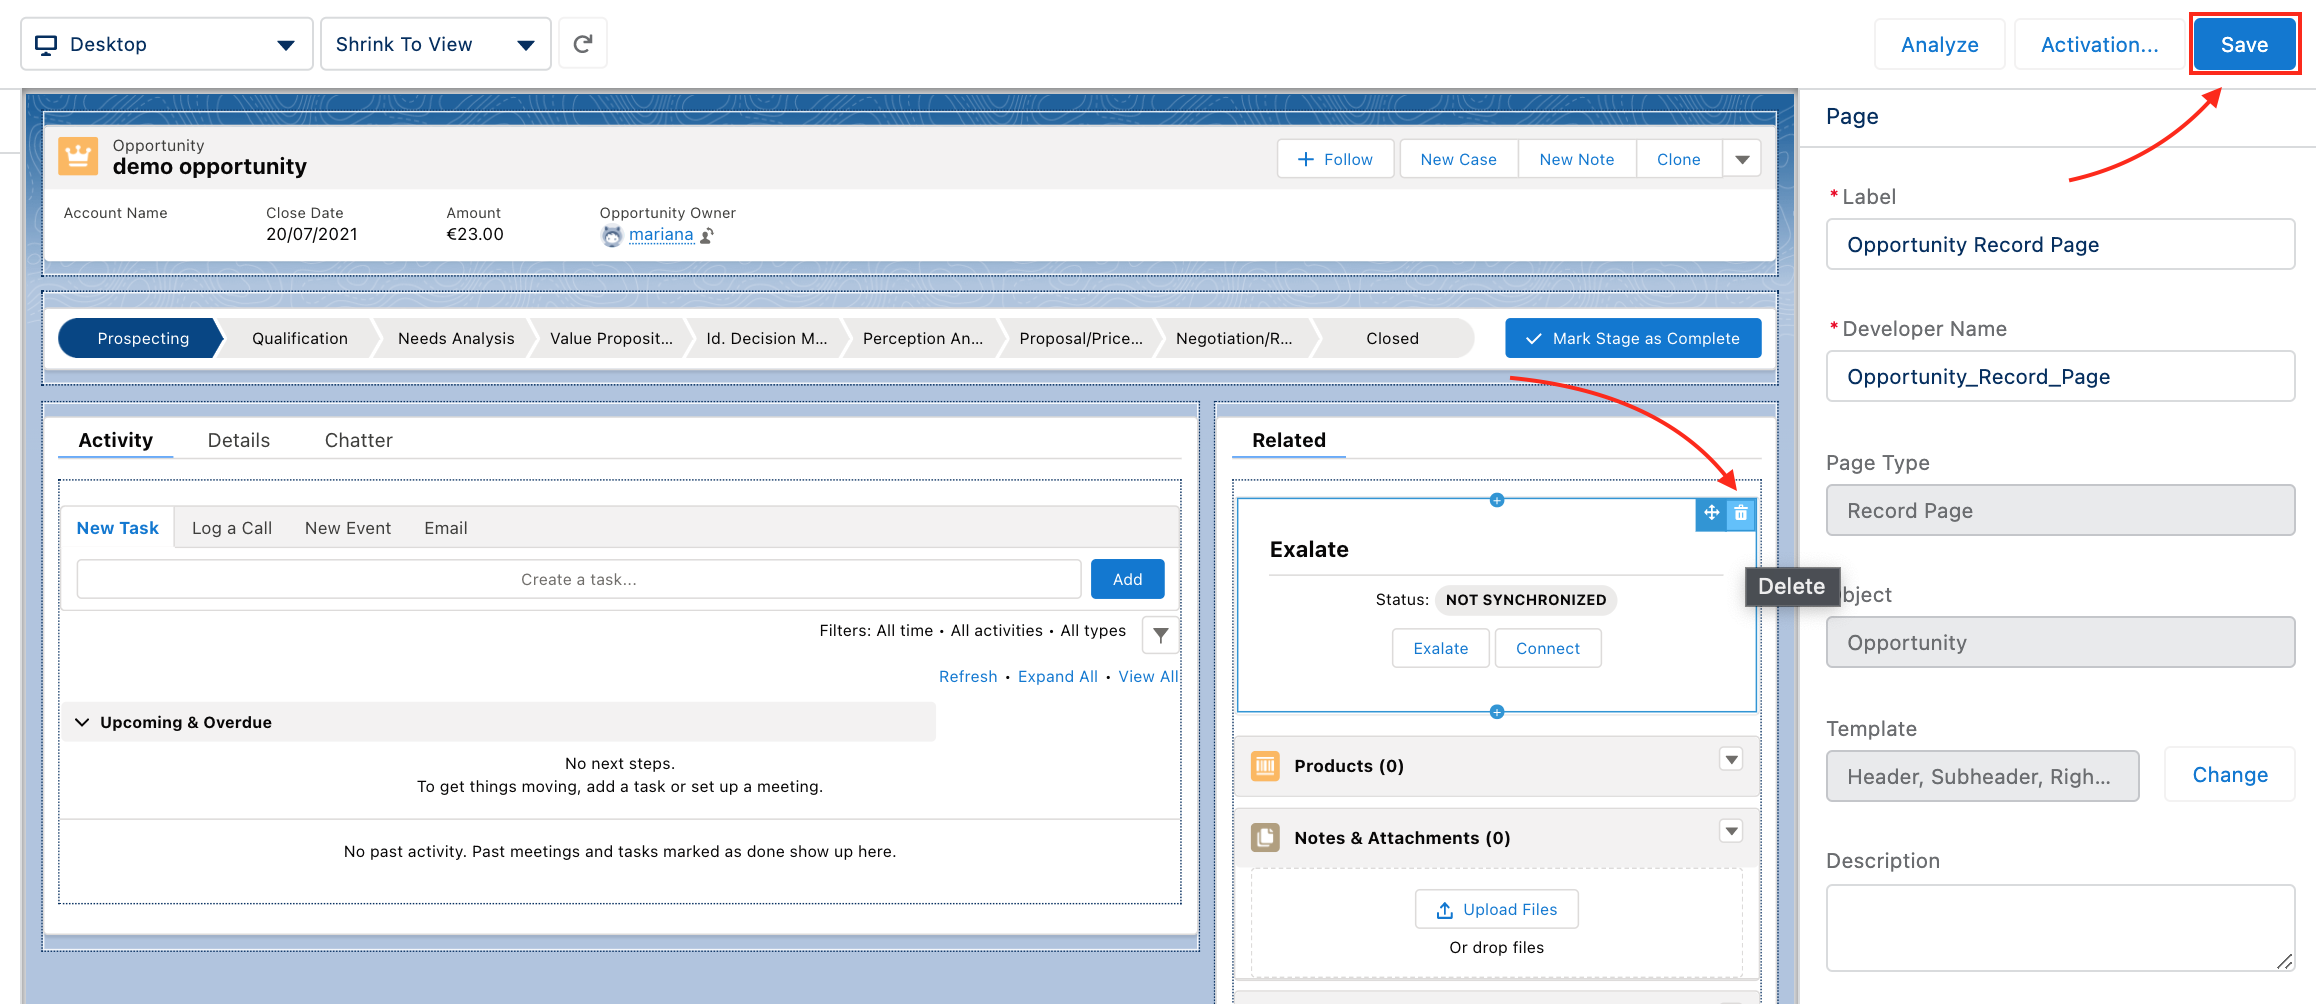
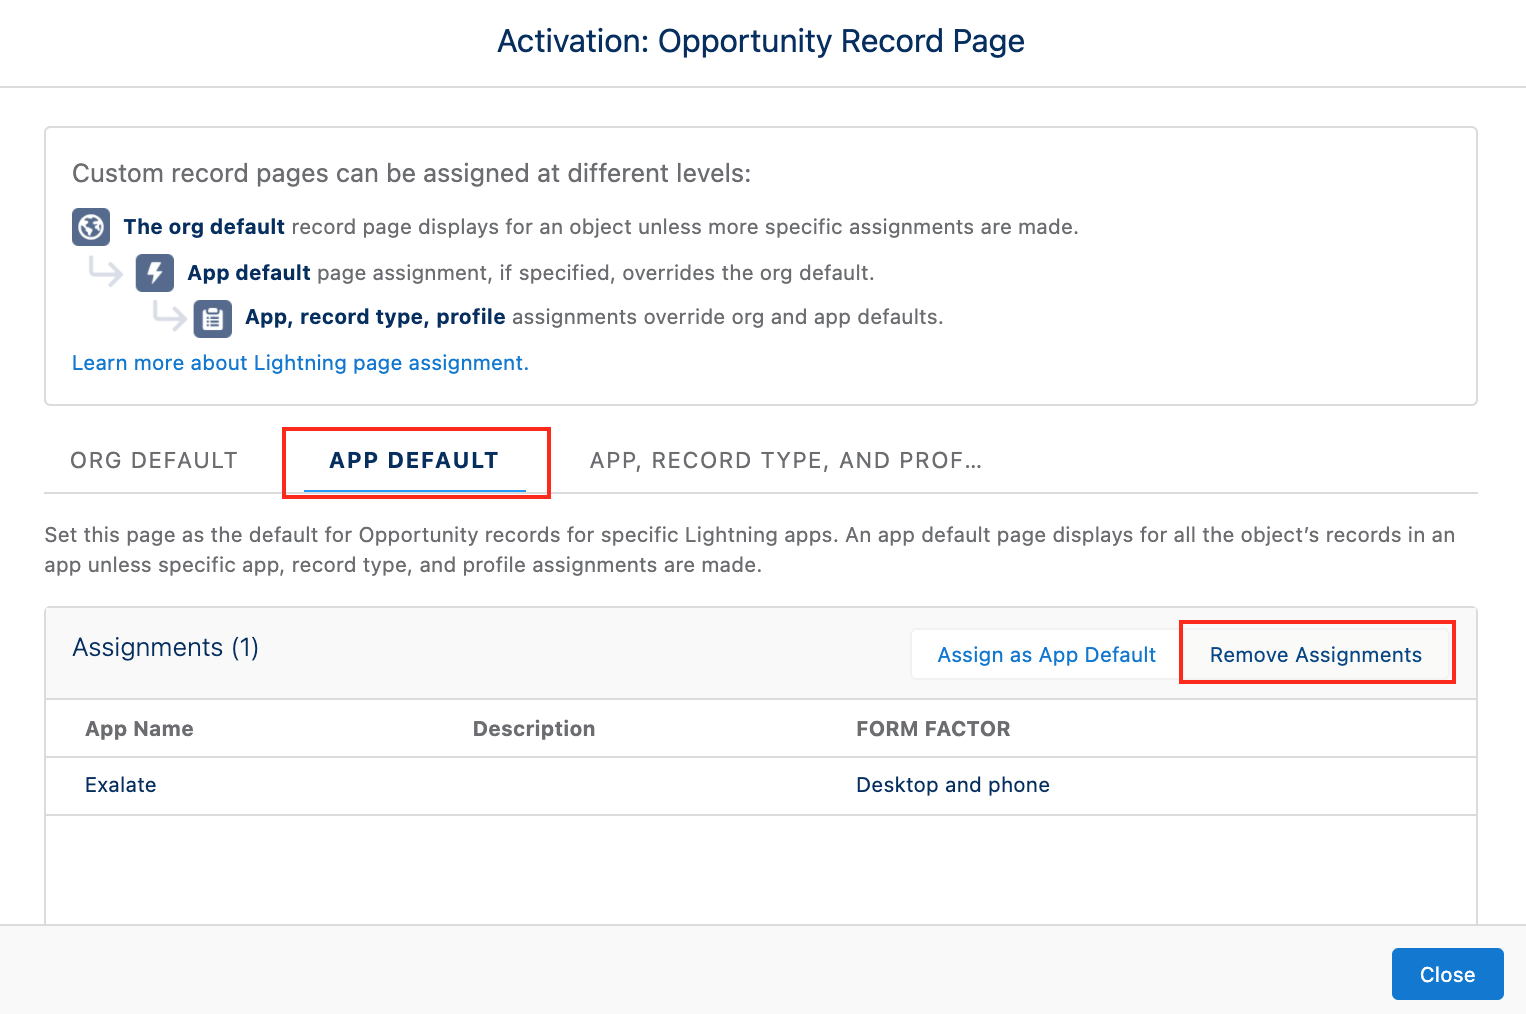
- Click the Activation button.
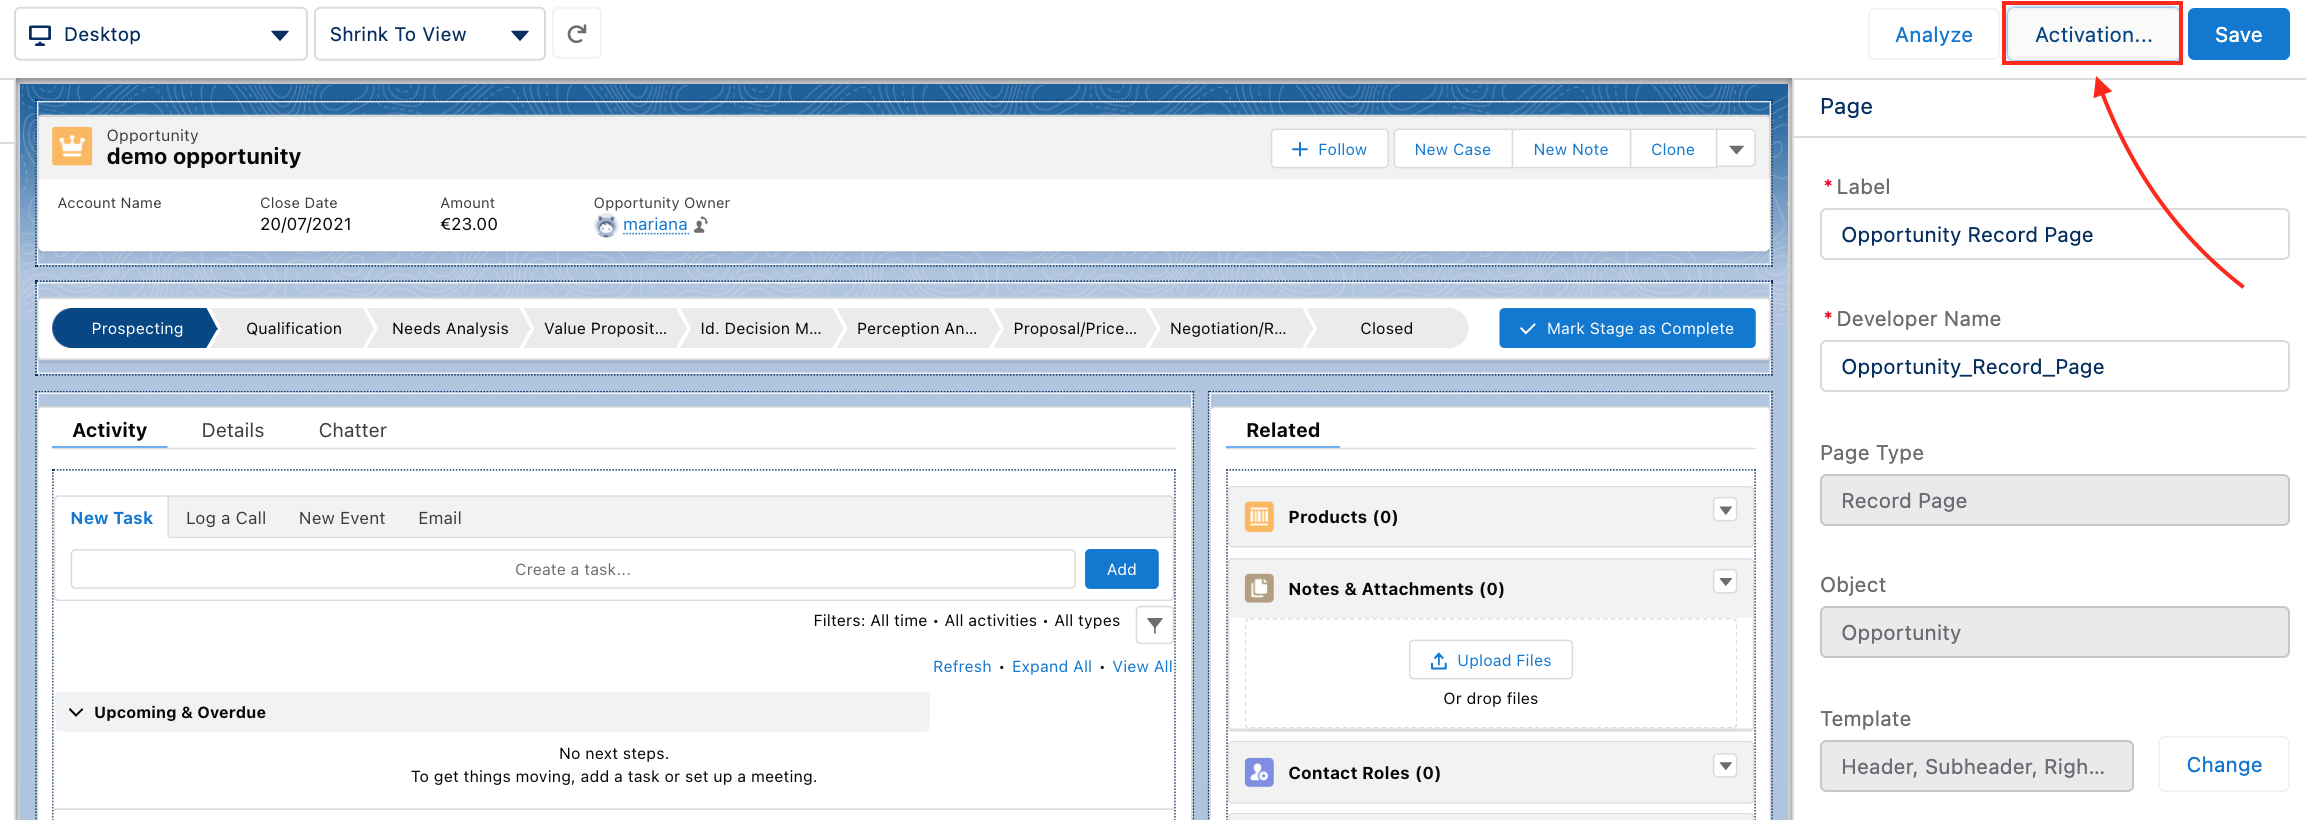
- Move to the App Default tab and click Remove Assignments.
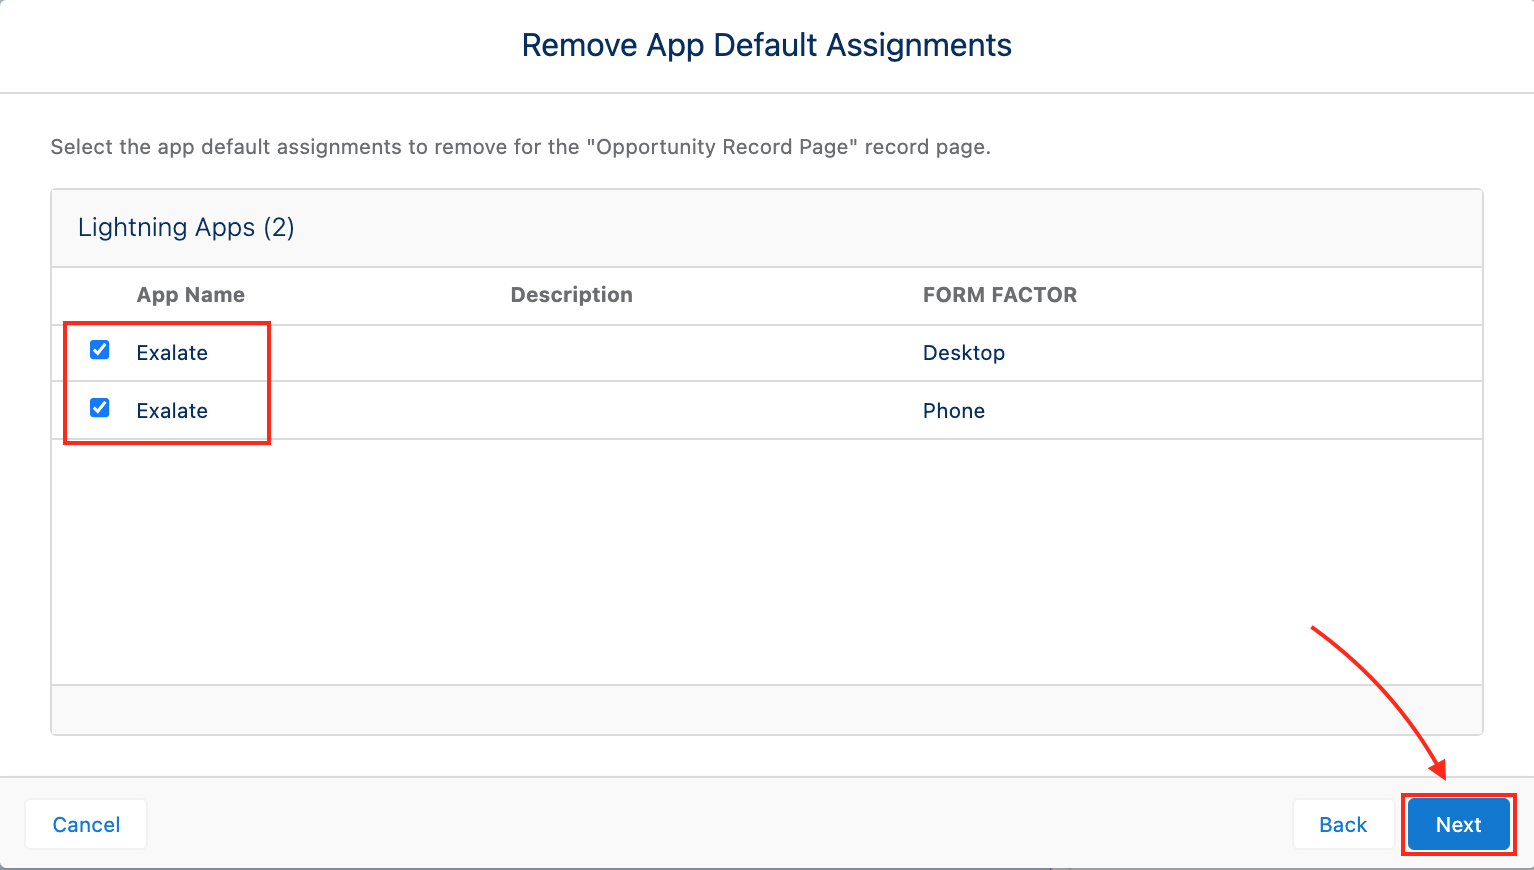
- Select Exalate for phone and desktop and click Next.
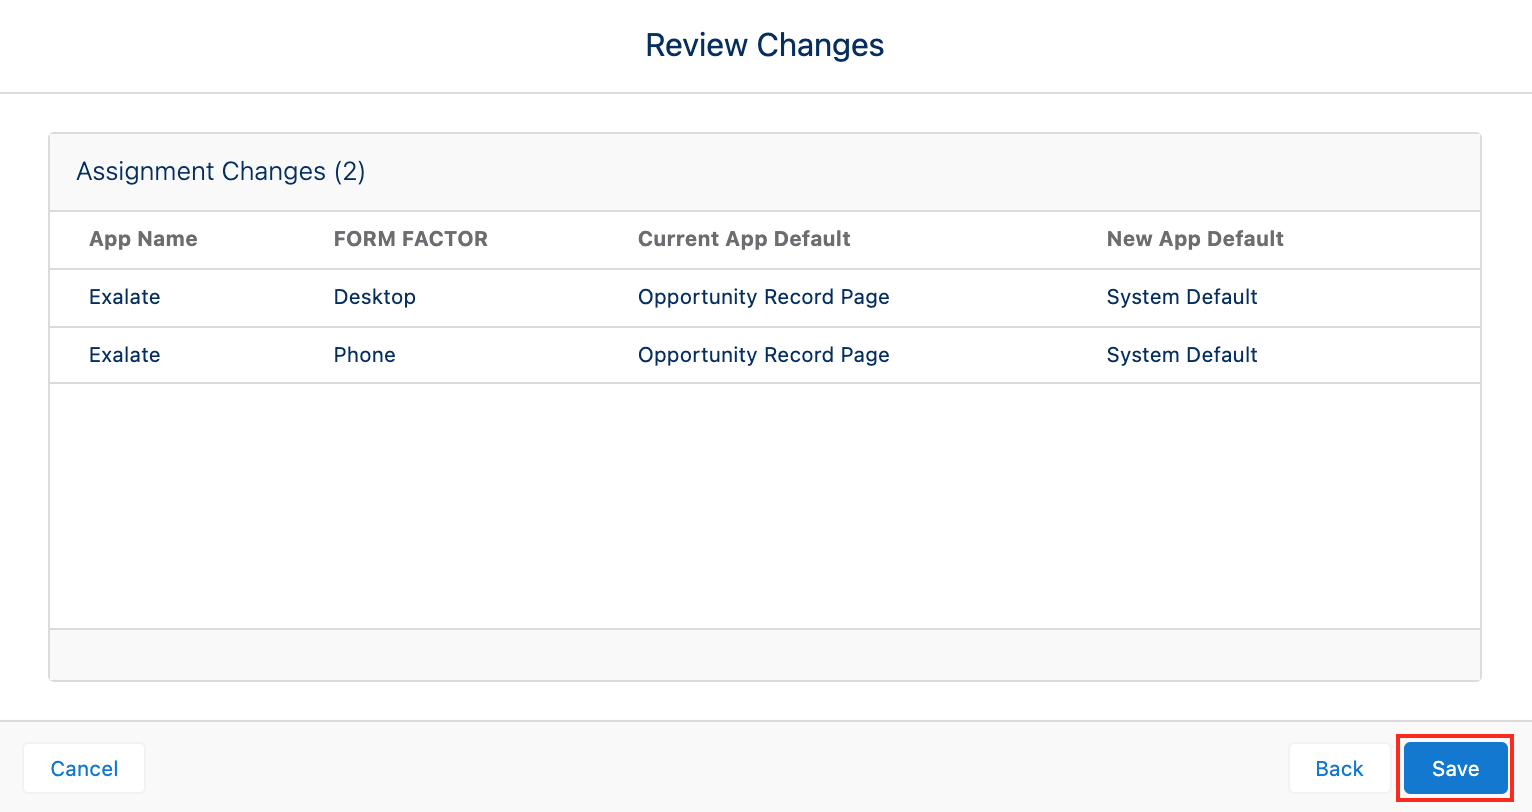
- Review the change and click Save.


Note: You need to remove the sync panel from every object where it has been previously added.
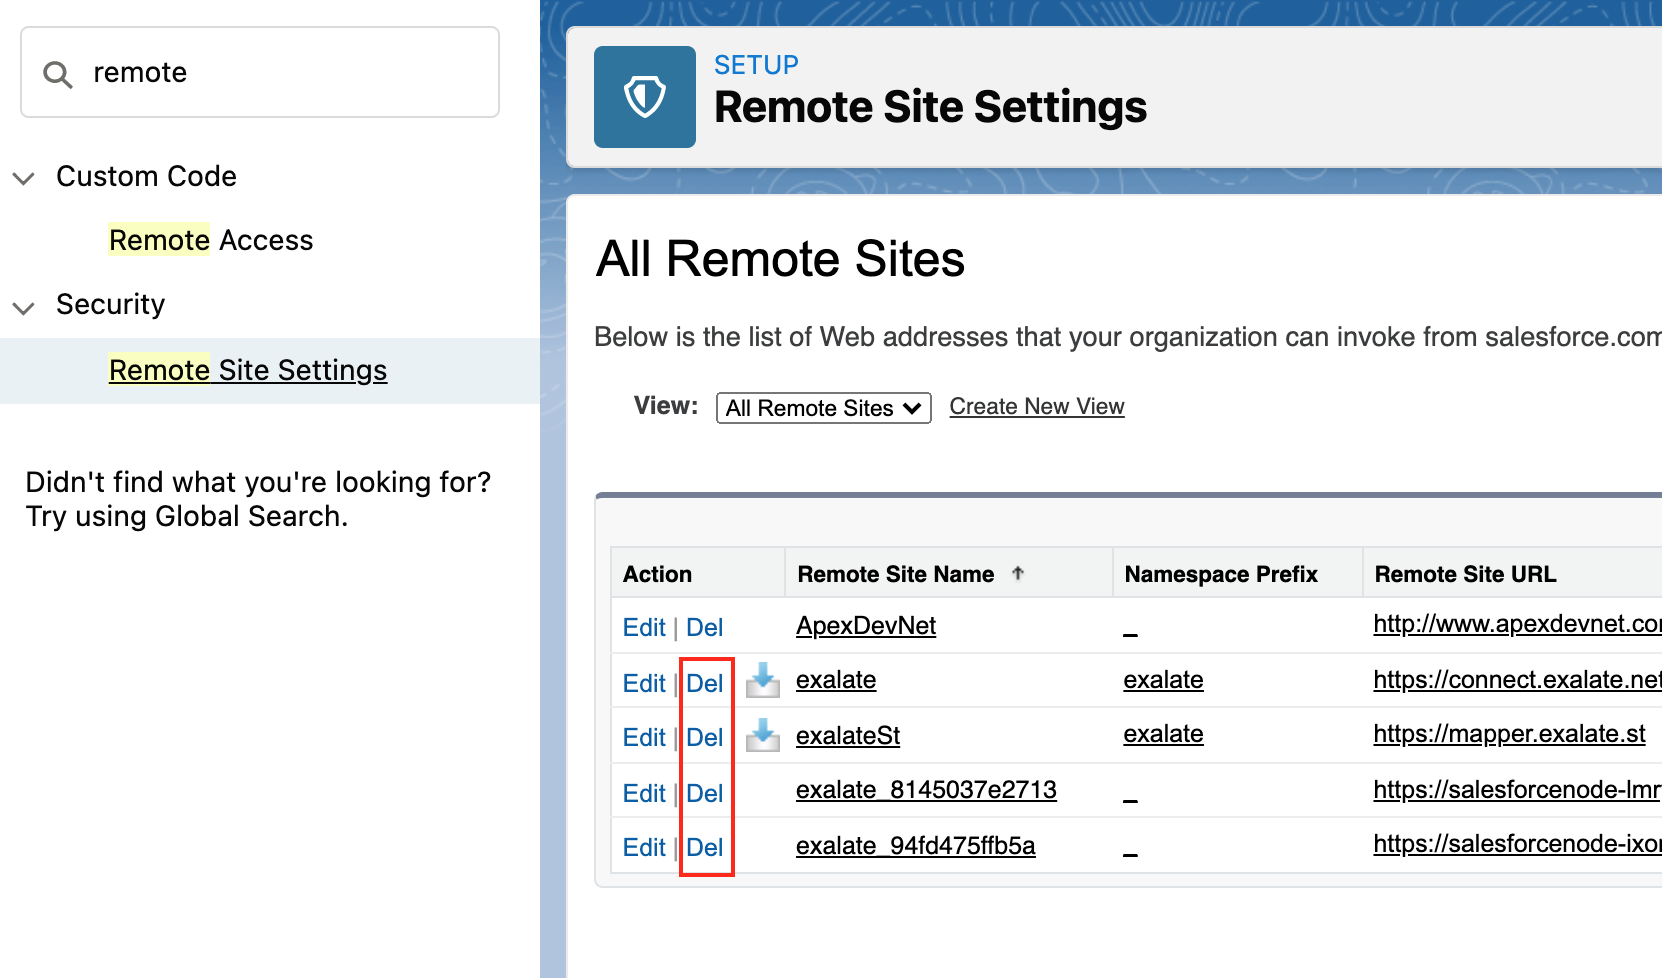
3. Remove Remote Site settings:
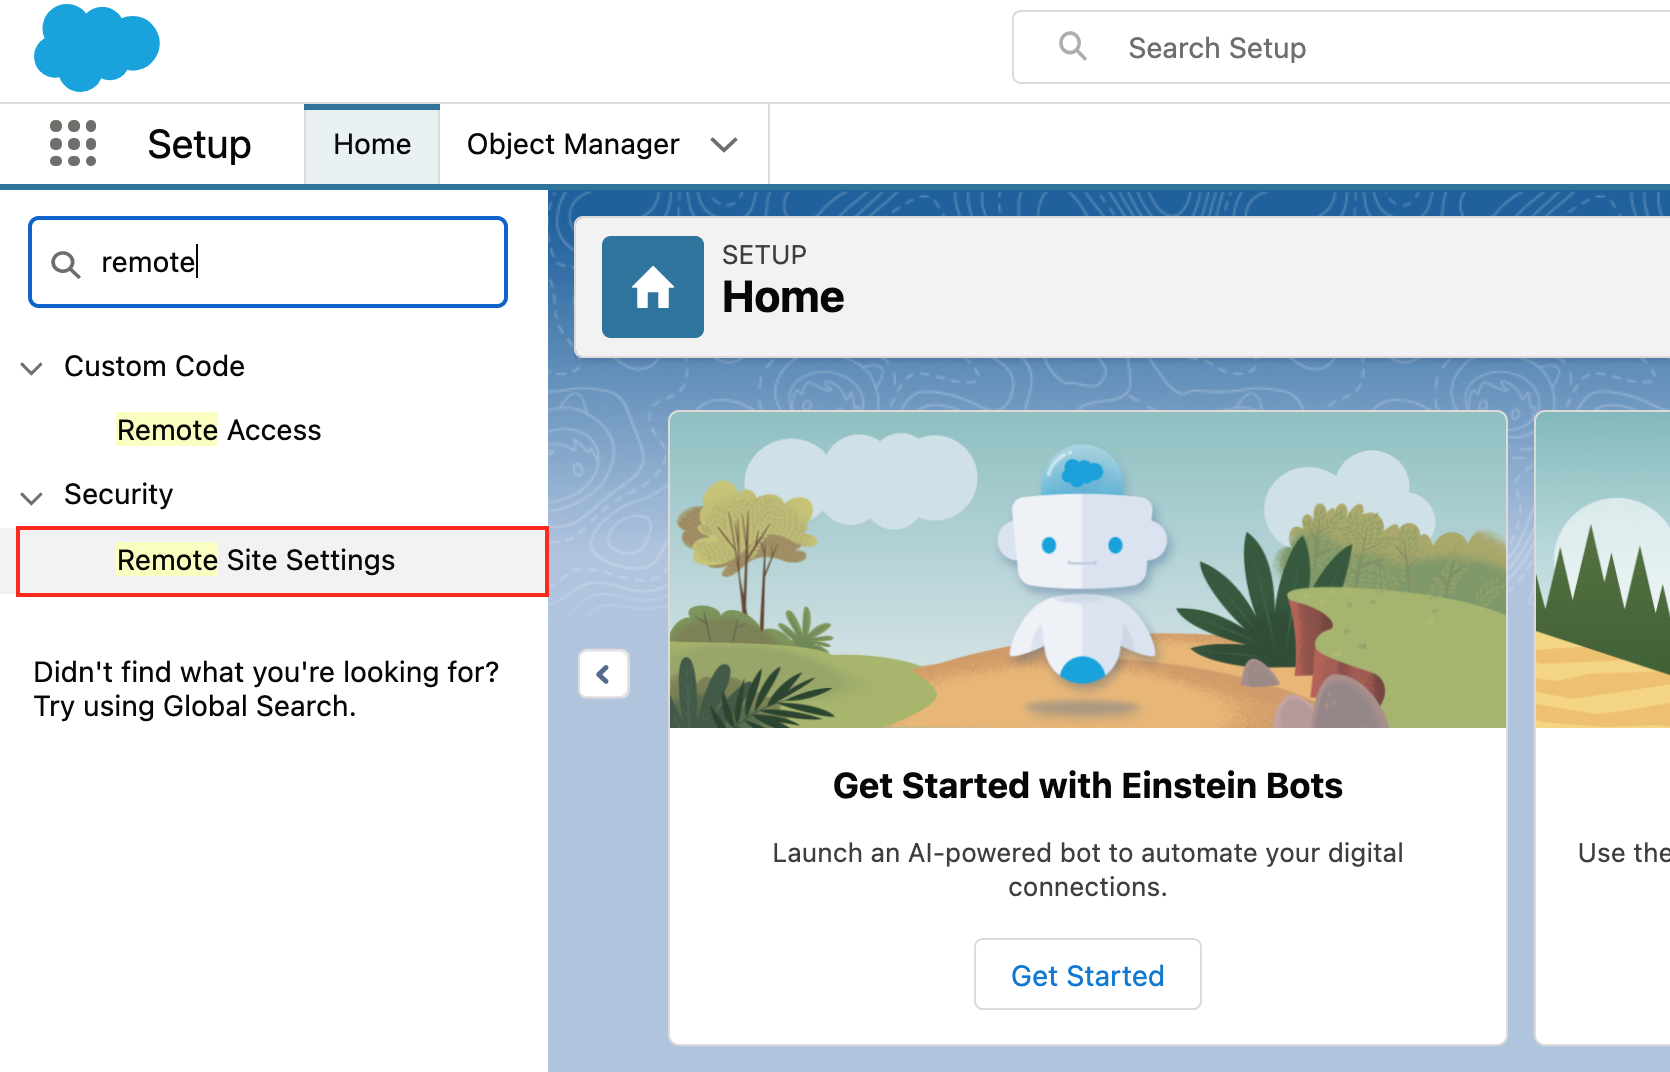
- Click Setup
- Type "remote" in the search field and click Remote Site Settings.
- Delete all the Exalate-related settings.


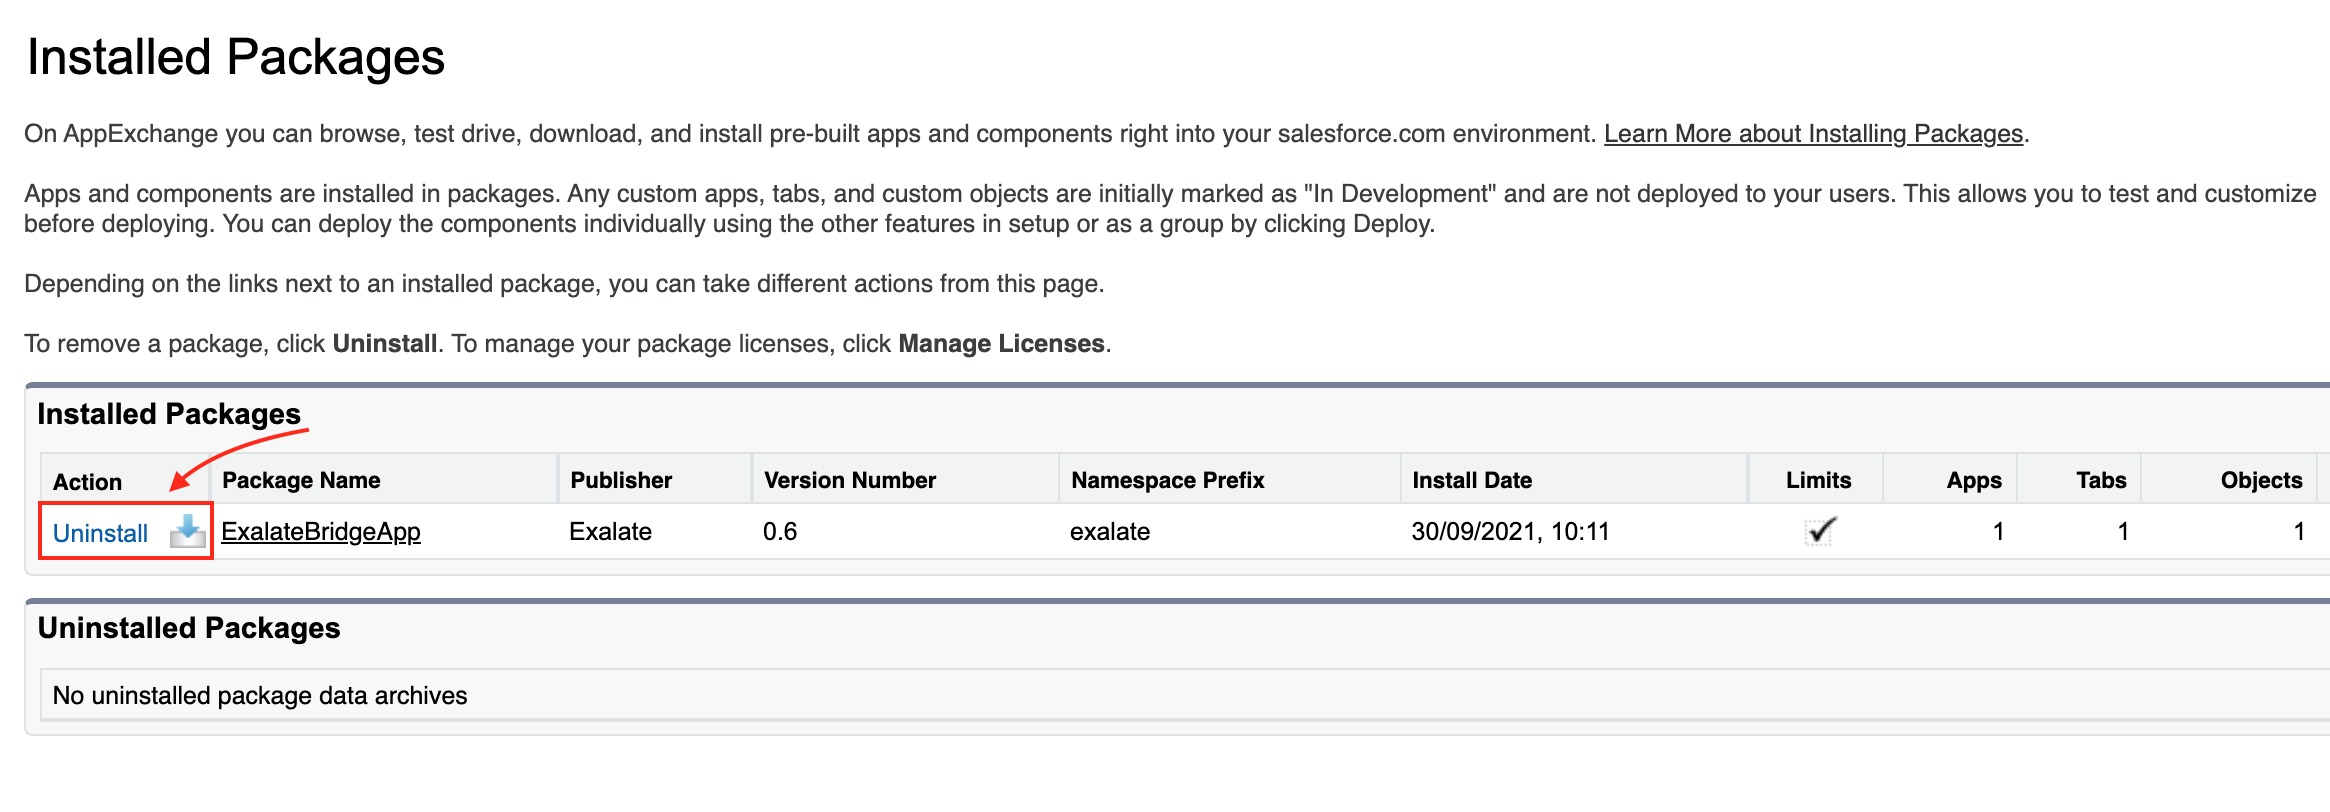
4. Remove Lightning App:
- Go to Setup
- Click Apps -> Packaging -> Installed Packages.

- Click Uninstall next to the ExalateBridgeApp.
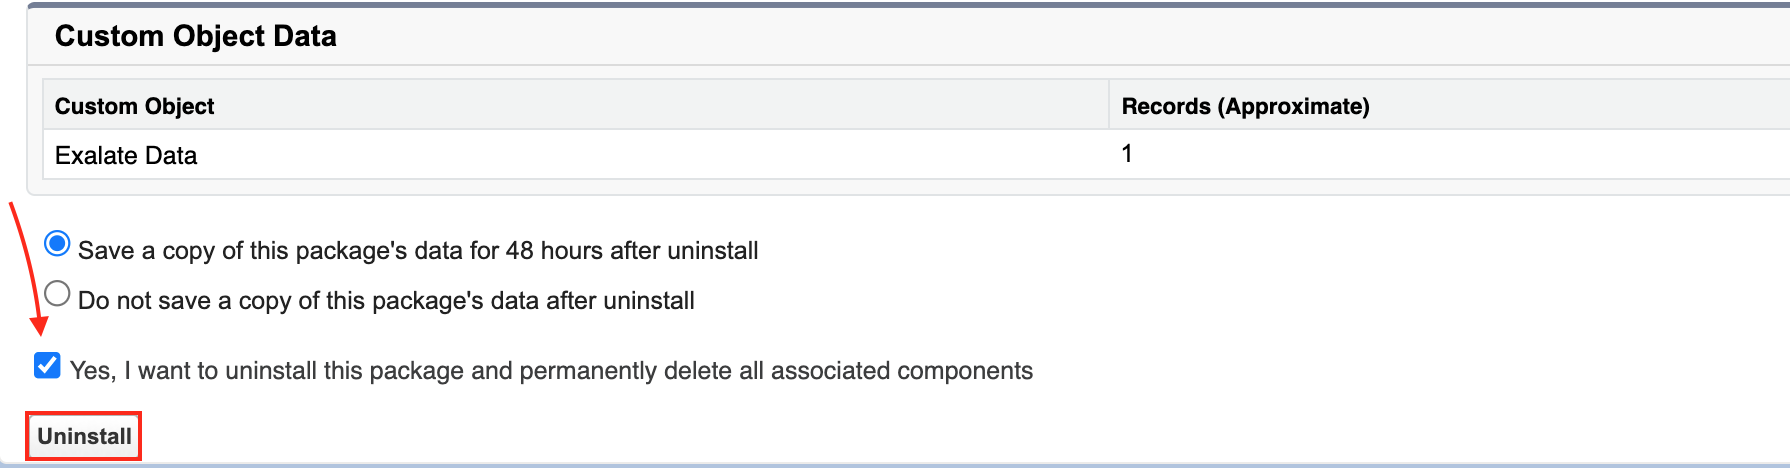
- Confirm that you want to uninstall the package with the checkmark and click Uninstall.
With the help of a radio button, you can choose to save a copy of this package's data for 48 hours after uninstall.


You see the status of the uninstallation changing from In Progress to Uninstall Complete.