Important: You cannot toggle between the different modes. To do so, you need to create a new Connection in Visual mode, Script mode, or Basic mode.
Note: Before you set up a Connection in Script mode ensure that:
- your instance is public.
- you are either in the Evaluation (trial) period or have a Paid license.
Initiate a Connection in Script Mode from Azure DevOps
Note: It doesn't matter which side you start initiating the Connection from. The Exalate UI remains the same. If you are initiating the connection you become the source and the other side becomes the destination.
1. Navigate to the Connections tab in the Exalate console.
Note: You can also access Exalate with this link:
https://dev.azure.com/{your_organization_name}/_settings/idalko-tools.exalate.adnode| To navigate to the Connections tab: |
- Click Organization settings.
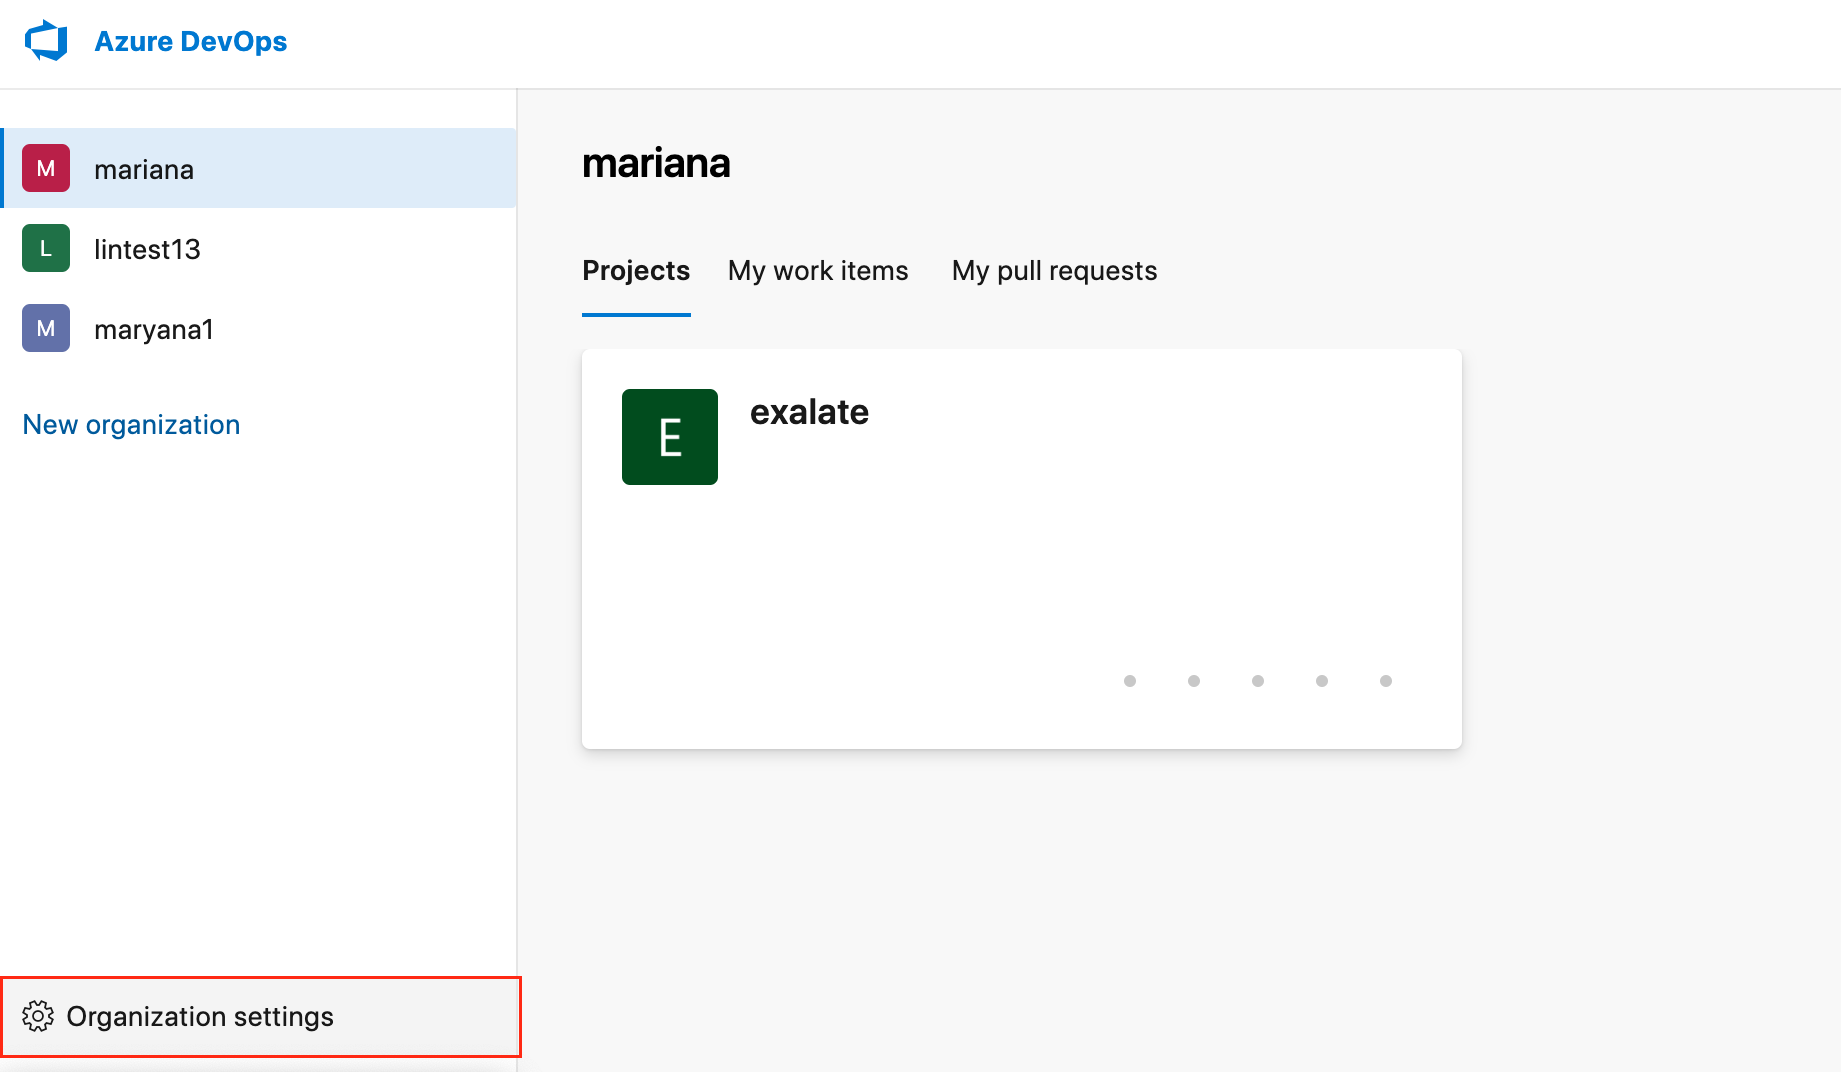
- Click Exalate in the Extensionssection.
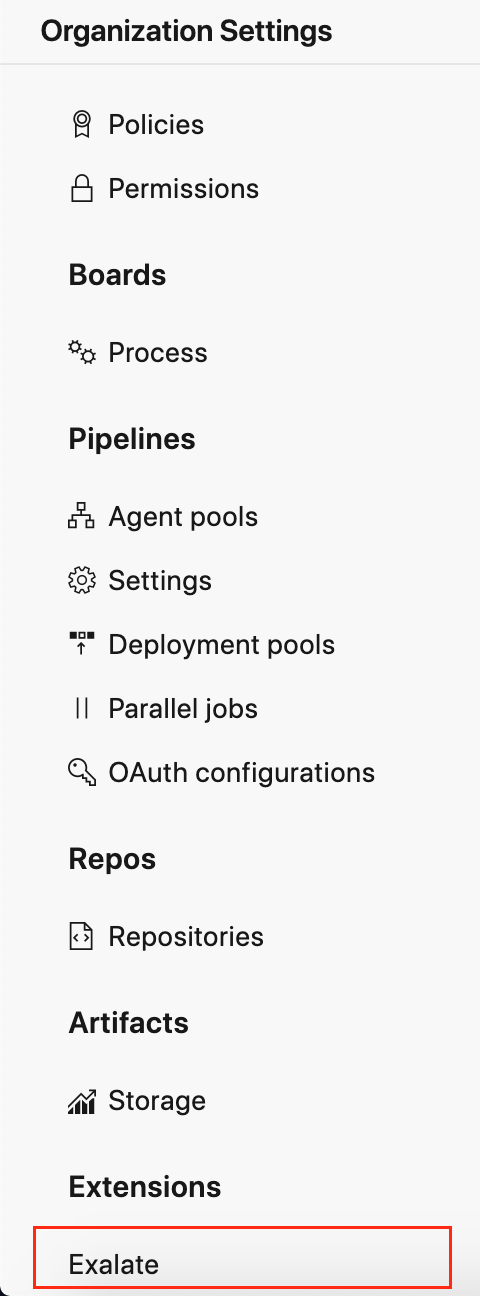
- Click Connections.
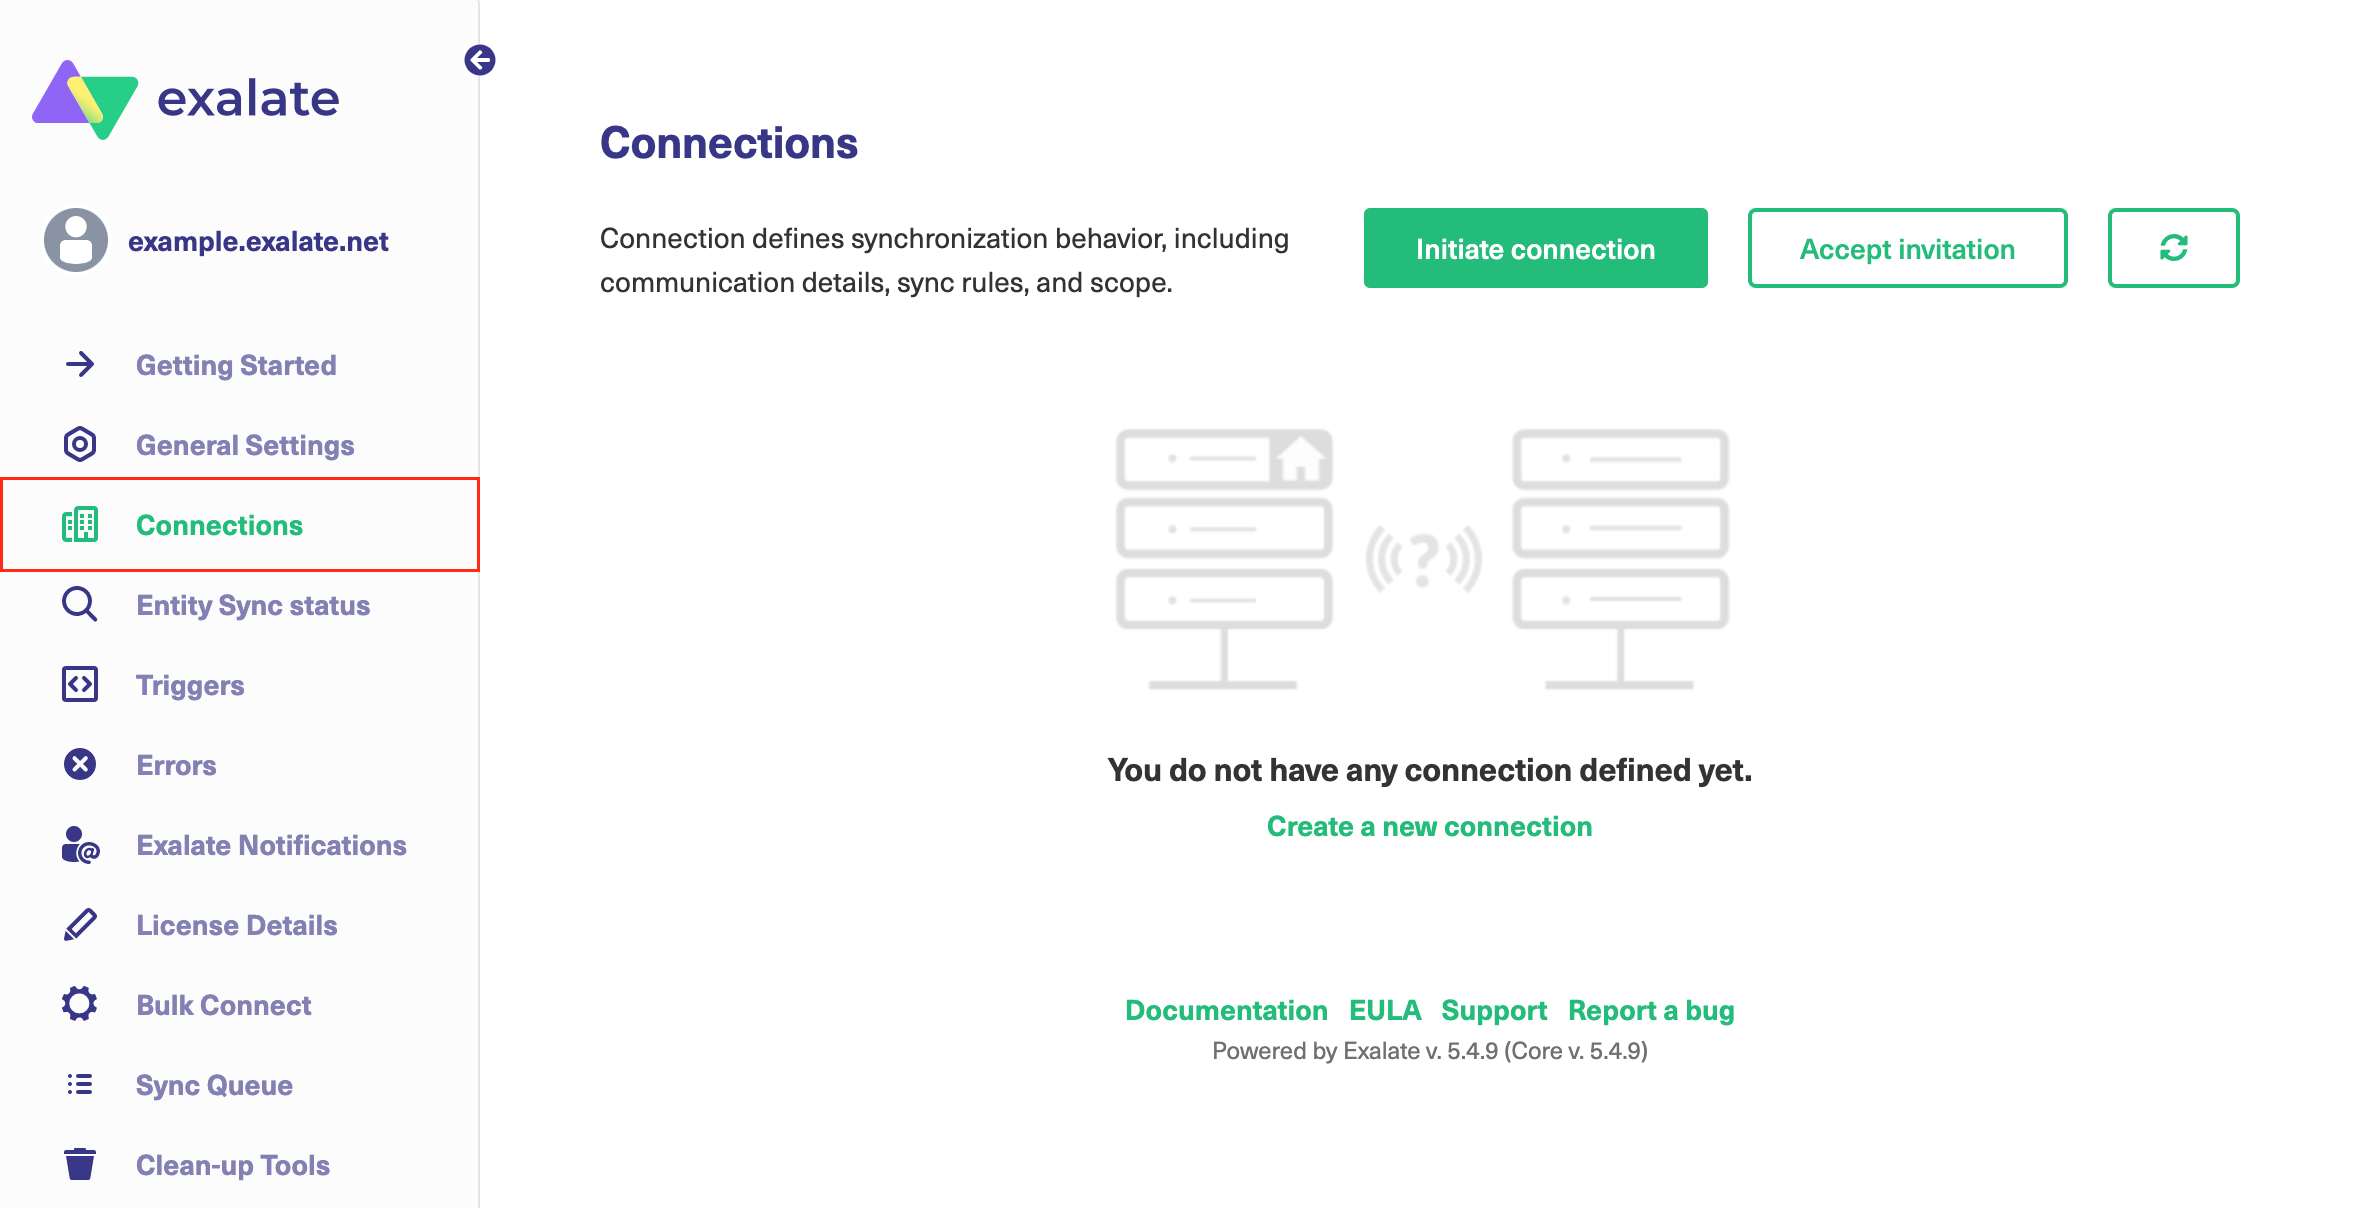


2. Click Initiate connection.

3. Enter the Destination Instance URL. The Destination Instance URL is the link to the instance you want to set up a connection with. You can directly enter the link of that instance or the Exalate URL from the General Settings tab in the Exalate admin panel.
[check image below]
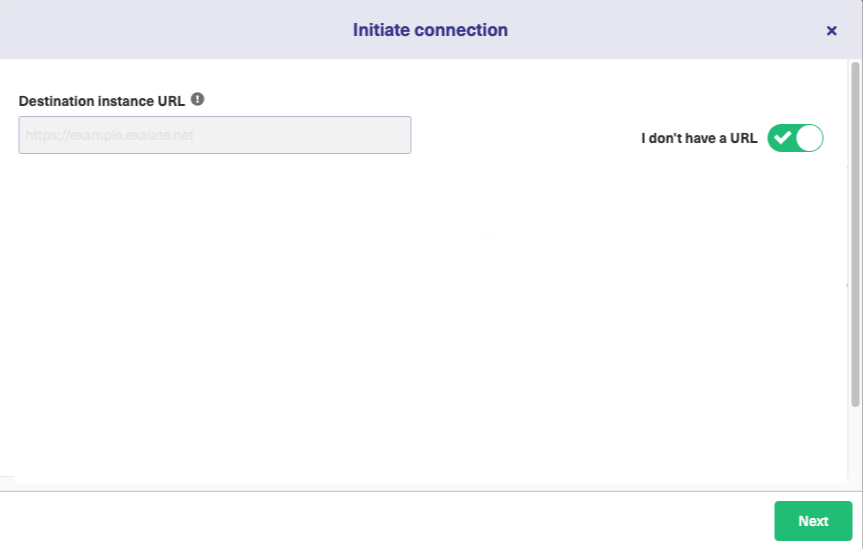
Exalate suggests available Configuration Modes based on the destination instance.
4. Select the Configuration Mode. In this case, Script Mode.
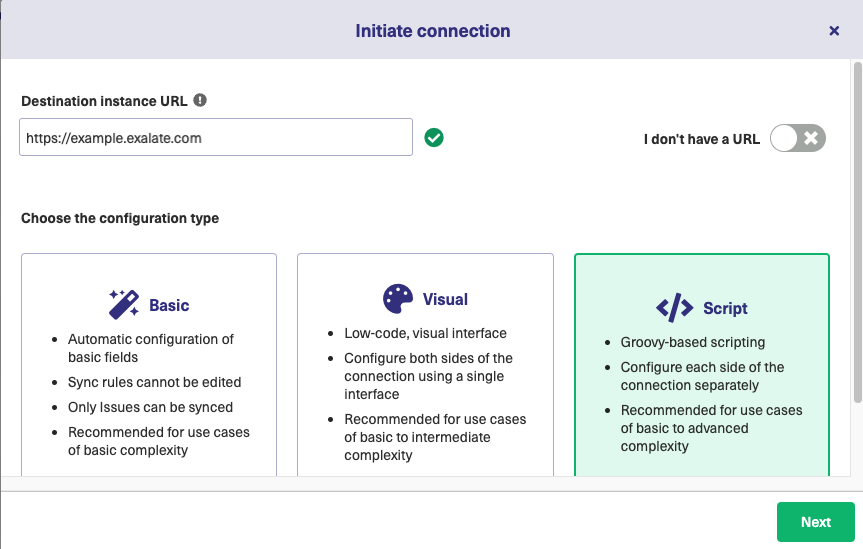
5. Click Next.
6. Enter the Connection Information.
Field | Description |
|---|---|
| Local instance short name | A short name for your instance |
| Destination instance short name | A short name for the destination instance |
| Connection name | Name of the connection |
| Description | Description of the connection |

7. Click Next.
8. Select a project where you would like to sync issues received from the destination side.

9. Click Initiate.
10. Click Copy invitation code.
You can send the invitation code to the destination instance admin.

11. Click Done.
Note: When the other side accepts your invitation your connection is activated. Refresh the Connections page to see the Connection status change.
What's Next?
You need to accept the Connection Invitation on the platform you want to set up an integration with. Go to the Connections tab in the Exalate Admin console on that platform and click the Accept Invitation button. Then paste the invitation code you have copied above.