Important: Dev environments cannot install applications from the ServiceNow store. To access the bridge app on dev environments, follow the steps to deploy the Exalate bridge using an XML-based update set: Set up Exalate in your ServiceNow instance using an update set.
Introduction
- Install Exalate for ServiceNow on Exalate cloud
- Request an evaluation instance of Exalate for ServiceNow
- Deploy the Exalate Bridge app
- Set up Exalate in your ServiceNow instance using an update set
- Next steps to install Exalate for ServiceNow
- Configure Exalate for ServiceNow
- Install Exalate for ServiceNow on your own server
- Install Exalate for ServiceNow on Docker
- Verify your Exalate for ServiceNow
Install Exalate for ServiceNow on Exalate Cloud
This section describes how to request a ServiceNow integration for Exalate.
Request an Evaluation Instance of Exalate for ServiceNow
1. Go to the Exalate Integrations page: https://exalate.com/integrations/.
2. Select ServiceNow.
3. Fill in a form with some basic information.
4. Book a 30-minute call with our integration engineers based on your availability. This call is essential for us to understand your requirements and guide you through the integration in a better manner.
5. After the call, you'll receive an email with your Exalate node for ServiceNow along with the license key.

Deploy the Exalate Bridge app
Important: Dev environments cannot install applications from the ServiceNow store. To access the bridge app on dev environments, follow the steps to deploy the Exalate bridge using an XML-based update set: Set up Exalate in your ServiceNow instance using an update set.
What is the Bridge App?
The Exalate bridge app is a ServiceNow-certified app that allows connecting your ServiceNow environment with the Exalate app.

This bridge app is meant to simplify access to the Exalate for ServiceNow service.
When deployed it:
- Creates 2 Roles
- x_idnv_exa_bridge.admin
- x_idnv_exa_bridge.integration
- Creates 3 ACL on the sync_journal_field table
- read, create, write
- Adds a link to the console in the exalate bridge application menu

To know more about the next steps visit the Deploy Exalate for ServiceNow guide.
Configure Exalate for ServiceNow
Once you've configured the Exalate app in the ServiceNow instance, you can proceed with the app configuration.
Step 1: Set up a Proxy User on ServiceNow
A proxy user is a ServiceNow service account that is responsible for accessing the information stored on your instance and applying any incoming changes.
Create a service account on your ServiceNow environment. This service account requires a number of permissions as documented here.
To simplify this step, you can also use an update package that automatically configures the necessary settings. Details of deploying this updated package are available here.
Step 2: Accept the EULA
To use this product we require explicit approval of the end user license agreement, which can be found here.

Step 3: Connect the Exalate for ServiceNow to Your Instance
In the second step, you need to connect the Exalate for ServiceNow with your instance.
You need:
- The URL of your ServiceNow instance. This URL must be accessible from this application.
- The details of the proxy user: The username and either the password or an OAuth token. (More information on retrieving the OAuth token is documented here).
- The evaluation or production license unlocks the functionality of the application.
You get notified if something fails.
Step 4: Access the Exalate Console
The Exalate console is where integrations are configured. To access the console you need a ServiceNow account with administration permissions.
Prepare your admin username and either the password or an OAuth token.
Step 5: Configure General Settings
You need to specify your ServiceNow instance URL, the proxy user access details, and the evaluation license key.
The proxy user is a dedicated user in your ServiceNow instance. The proxy user must have permission to Create/Read/Update entities on ServiceNow. If you want to Create/Read/Update Incidents, Cases, Problems, or Change Requests in ServiceNow, the user needs to have roles for that.
In ServiceNow, proxy users can sync tables or attributes based on the access from their user role. For more information, please read Exalate for ServiceNow: Proxy user permissions.
You can find the license key in the email along with your Exalate app URL.

6. Save the Configuration
You are redirected to the log-in screen.
7. Log in to the Exalate Admin Console
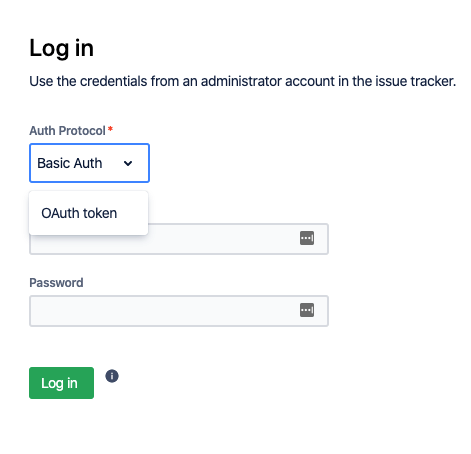
Basic Auth
Use your ServiceNow instance admin access credentials.

Note: We do not store ServiceNow instance access credentials. Exalate only checks if the admin user is valid.
OAuth Token
You need to have a ServiceNow endpoint to log in with an OAuth token.
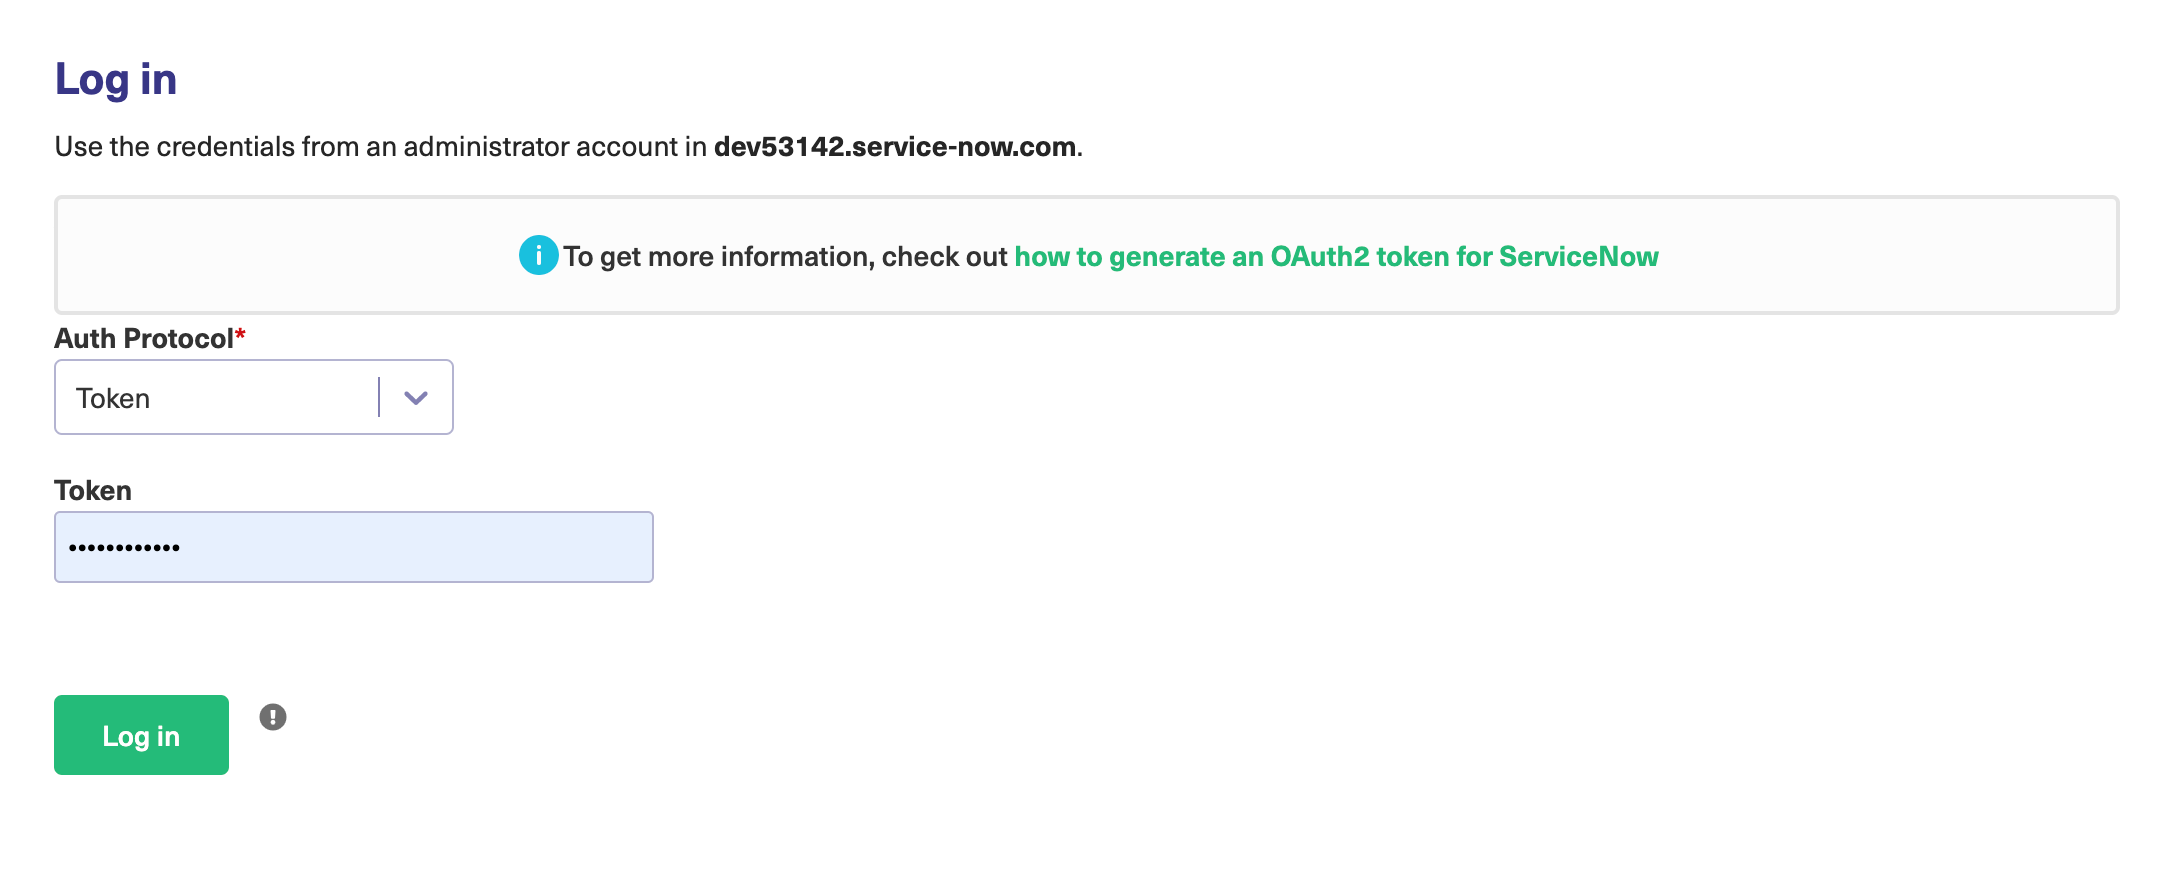
Set Up OAuth Tokens in Exalate for ServiceNow
Here is the detailed procedure to set up the login with OAuth tokens in Exalate for ServiceNow.
Install Exalate for ServiceNow on Your Own Server
You can host Exalate for ServiceNow on your own server. To do so, you need to install Exalate on Docker.
Note: You need to install Docker. Check the docker documentation for more details.
Here is a glimpse of the steps to do that.
- How to install Exalate for ServiceNow
- Preview
- Create or download the docker-compose.yml
- Ensure that a correct database is a setup using a createdb.sh
- Set environment variables if necessary
- Start the application
- Troubleshooting
Please read the detailed procedure in our Install Exalate for ServiceNow on your own server guide.
Configuring Proxy User Permissions
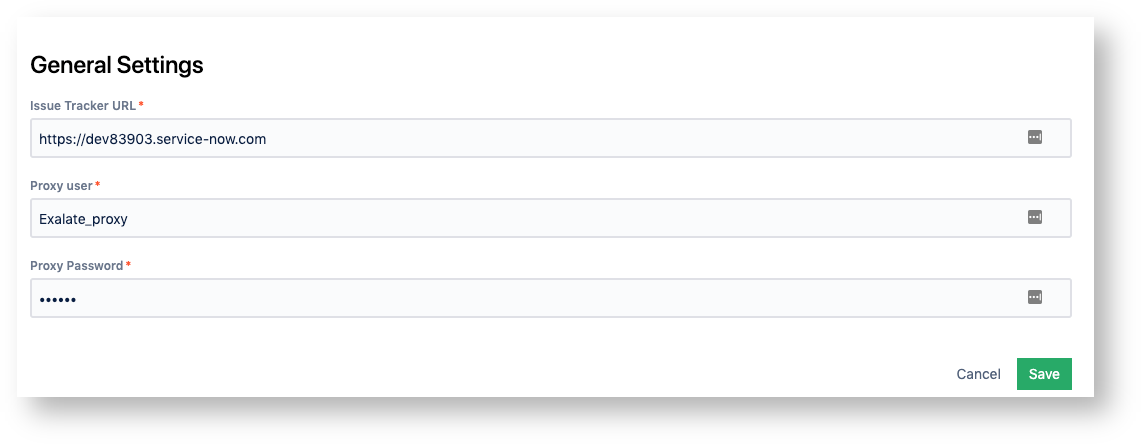
To change the proxy user in Exalate for ServiceNow:
- Log in to the Exalate admin console.
- Navigate to General Settings.
- Input details:
- ServiceNow instance URL.
- Proxy user name.
- Proxy user password.
Users and Permissions
Note: For security reasons, it is better to create a separate role with specific permissions for a proxy user instead of giving him an administrator role.
To integrate Exalate with ServiceNow you need 2 ServiceNow user accounts:
- The ServiceNow user account fetches information from the ServiceNow instance and updates the ServiceNow entities with incoming changes.
The proxy user can integrate various tables or attributes depending on the permissions defined by his user role in ServiceNow. - The ServiceNow user is authorized to configure the Exalate app for ServiceNow. The Exalate console user must be an admin in your ServiceNow instance or the proxy user. Exalate uses REST API to communicate with the ServiceNow issue tracker. By default, ServiceNow REST APIs use basic authentication or OAuth to authorize user access to REST APIs/endpoints. Therefore, the Exalate console users must have access to the ServiceNow instance admin configuration.
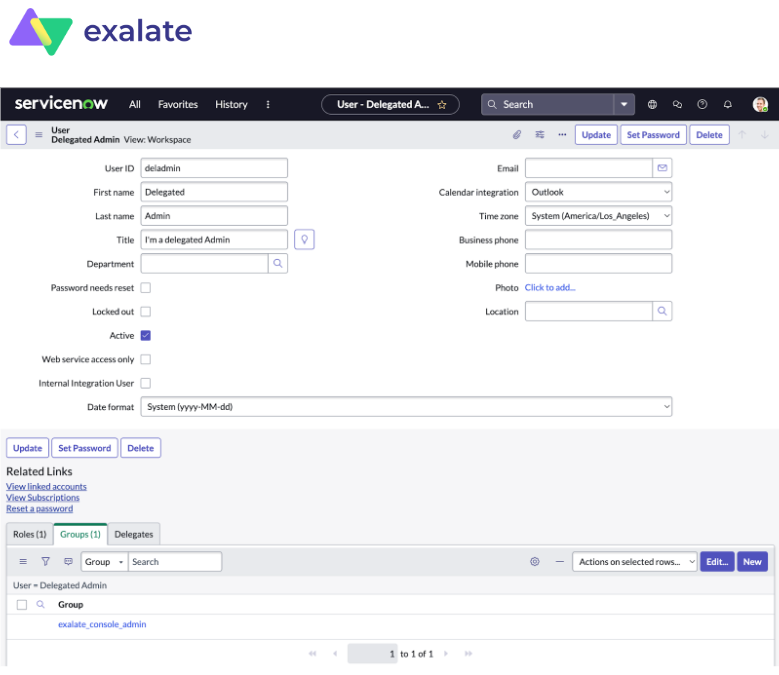
- A user as shown below (basic user that is Active) with a set password.
- Create a user group called exalate_console_admin
- The user needs to be assigned to this user group.
Proxy User
Exalate Console User
Delegated Admin Access for Non-System Admins
In some situations, you may need to grant non-system admins access to the Exalate Admin Console without giving away system-wide admin permissions. This would allow you to delegate admin maintenance tasks, such as adding, editing, and deleting Exalate configurations, create connections for all projects, as well as view and manage Errors, Sync Queue, Triggers, Clean-up, and Bulk Connect.
To create a delegated admin in ServiceNow, you need the following:
Note: Uncheck the “Passwords needs reset” if the user can not be logged in to the ServiceNow interface.
Important: The system tracker admin must create the exalate_console_admin group.
Important: Role Management V2 REST API plugin must be installed and activated on your ServiceNow instance.
Starting from the New York version this plugin is included by default. But if you've recently updated your ServiceNow instance to the latest version you need to activate the Role Management V2 REST API plugin manually. Check the ServiceNow contextual security document.
Configuring Access on ServiceNow
You can access the ServiceNow instance in one of these ways:
- Basic Login
In order to log in you use a username and a password. Exalate does not store the password in the database but uses the REST connection to attempt to log in to the ServiceNow node. - OAuth Token
Authentication takes place with a username and an OAuth token. Exalate stores the token and uses it for access. The token is refreshed every time its lifespan ends.
Note: OAuth token can be used as long as the refresh token is valid. Read more about setting up the refresh token in the article Access the Exalate app in ServiceNow.
You need to generate a new refresh token after the old one has expired. We suggest setting a longer lifespan for the refresh token.
Video Tutorial