This article applies to Exalate Classic only. For New Exalate, refer to this documentation.
To sync your data, Exalate requires access to your ServiceNow instance. To avoid storing sensitive information, we provide an alternative way to authenticate to a ServiceNow instance without storing usernames and passwords. Exalate supports the Oauth2 protocol of ServiceNow.
How to Authenticate and Set Up Exalate with OAuth2
1. Enable OAuth on ServiceNow
To use OAuth API in ServiceNow, make sure the com.snc.platform.security.oauth.is.active system property is in true.
Note: For more information, please see the ServiceNow documentation.
2. Create an endpoint for clients to access the instance
- After logging in - navigate to System OAuth → Application Registry → New.
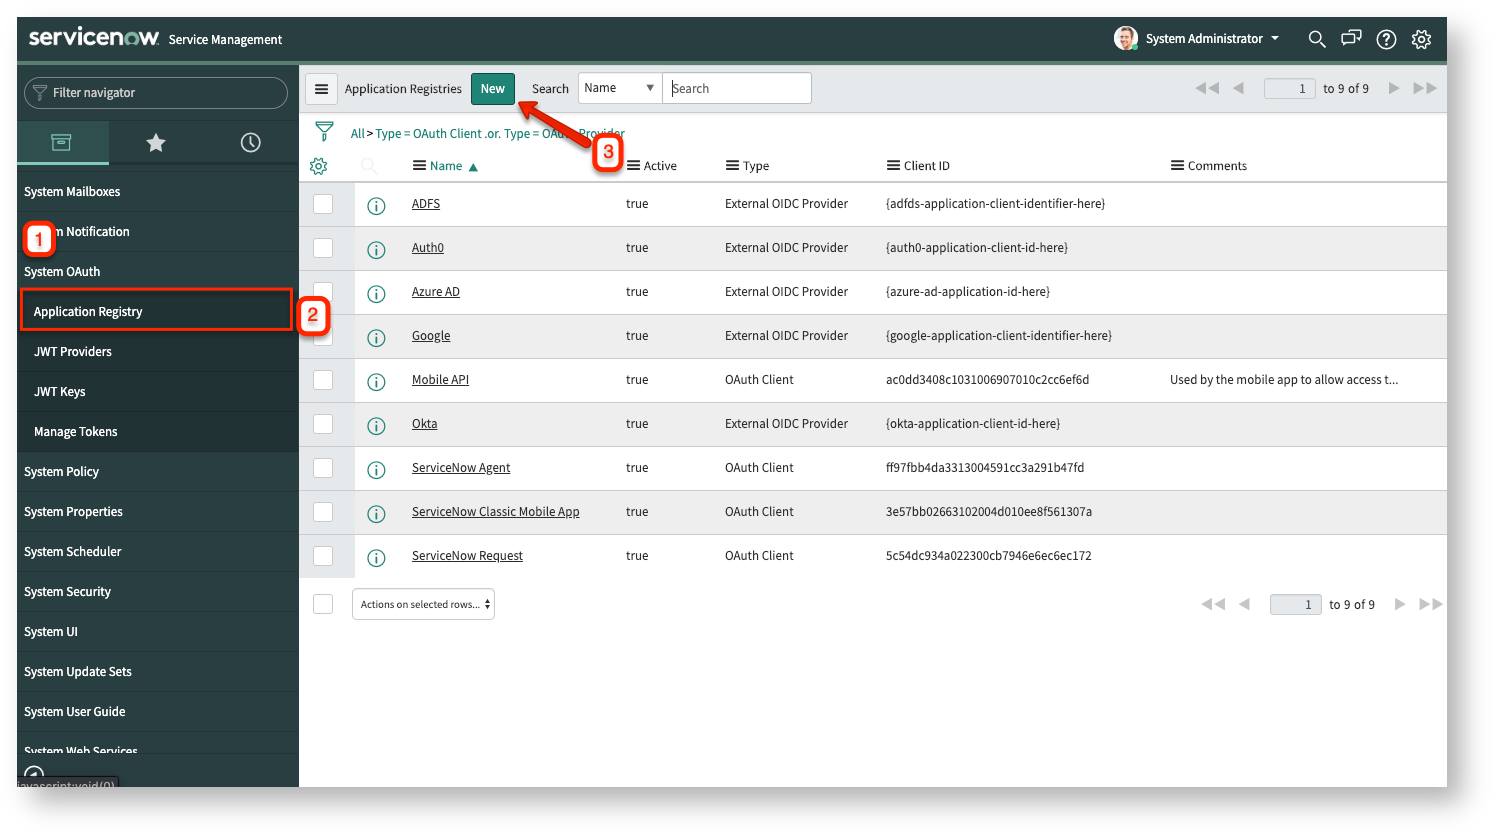
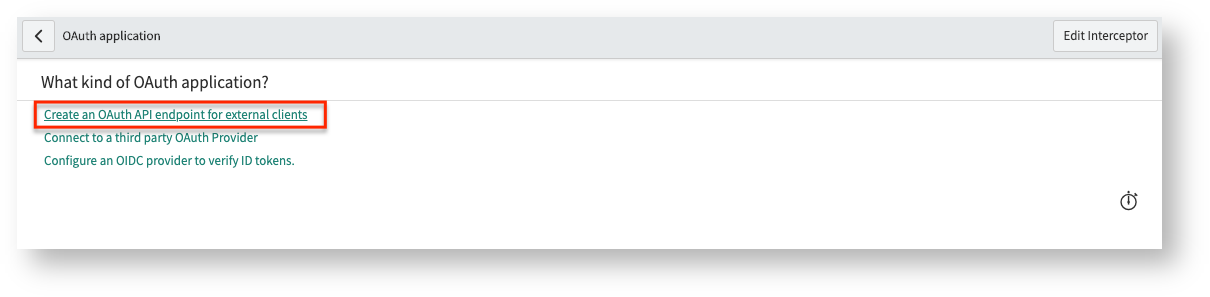
- Select Create an OAuth API endpoint for external clients.
- Provide a name for the application registry and extend the access token lifespan.


The name is used to identify the application registry.
Exalate auto-renews the access token whenever the application lifespan expires. The lifespan is expressed in seconds, 7200 seconds is 2 hours.
Set the following fields:
- Token Format: Opaque
- Scope Restriction: Broadly Scoped
4. Submit the entry, reopen the registry and then copy client_id and client_secret

read -r -d '' CSECRET <<'EOF'

EOF
read -r -d '' PASS <<'EOF'

EOF
curl --data-urlencode "grant_type=password" --data-urlencode "client_id=" --data-urlencode "client_secret=$CSECRET" --data-urlencode "username=" --data-urlencode "password=$PASS" /oauth_token.do


# where
# *  - The clientid from the application registry copied in step 4
# *  - the clientsecret from the application registry copied in step 4
# *  - the name of the proxy user
# *  - the password of the proxy user
# *  - the url of your servicenow instance
For instance,
read -r -d '' CSECRET <<'EOF'
fooobar!aslkfj!0
EOF
read -r -d '' PASS <<'EOF'
ExalatePWD
EOF
curl --data-urlencode "grant_type=password" --data-urlencode "client_id=1234567890" --data-urlencode "client_secret=$CSECRET" --data-urlencode "username=ExalateIntegration" --data-urlencode "password=$PASS" https://dev12345.service-now.com/oauth_token.do
|
It returns a JSON structure |
{
"access_token":"tqIvTscjoS2lV1yrasu-1234455443NUes4YEm1IBdX0EjHUmVB-Y3u6Zur8UgzLj_eTUeEBBmWtEgmw",
"refresh_token":"fygKJXPAy3bl9tVaXk-1234455443LiMUeOH7RPYuWg1N2UKnUlZMzzm6UPsZ7DG4jeXPwlBaEw",
"scope":"useraccount",\
"token_type":"Bearer",
"expires_in":7199
}
|
Copy the access_token and refresh_token |
6. Access your exalate node at https://snownode-aaaa-bbbb-cccc-dddd.exalate.cloud
You can log in using the access_token copied from step 5
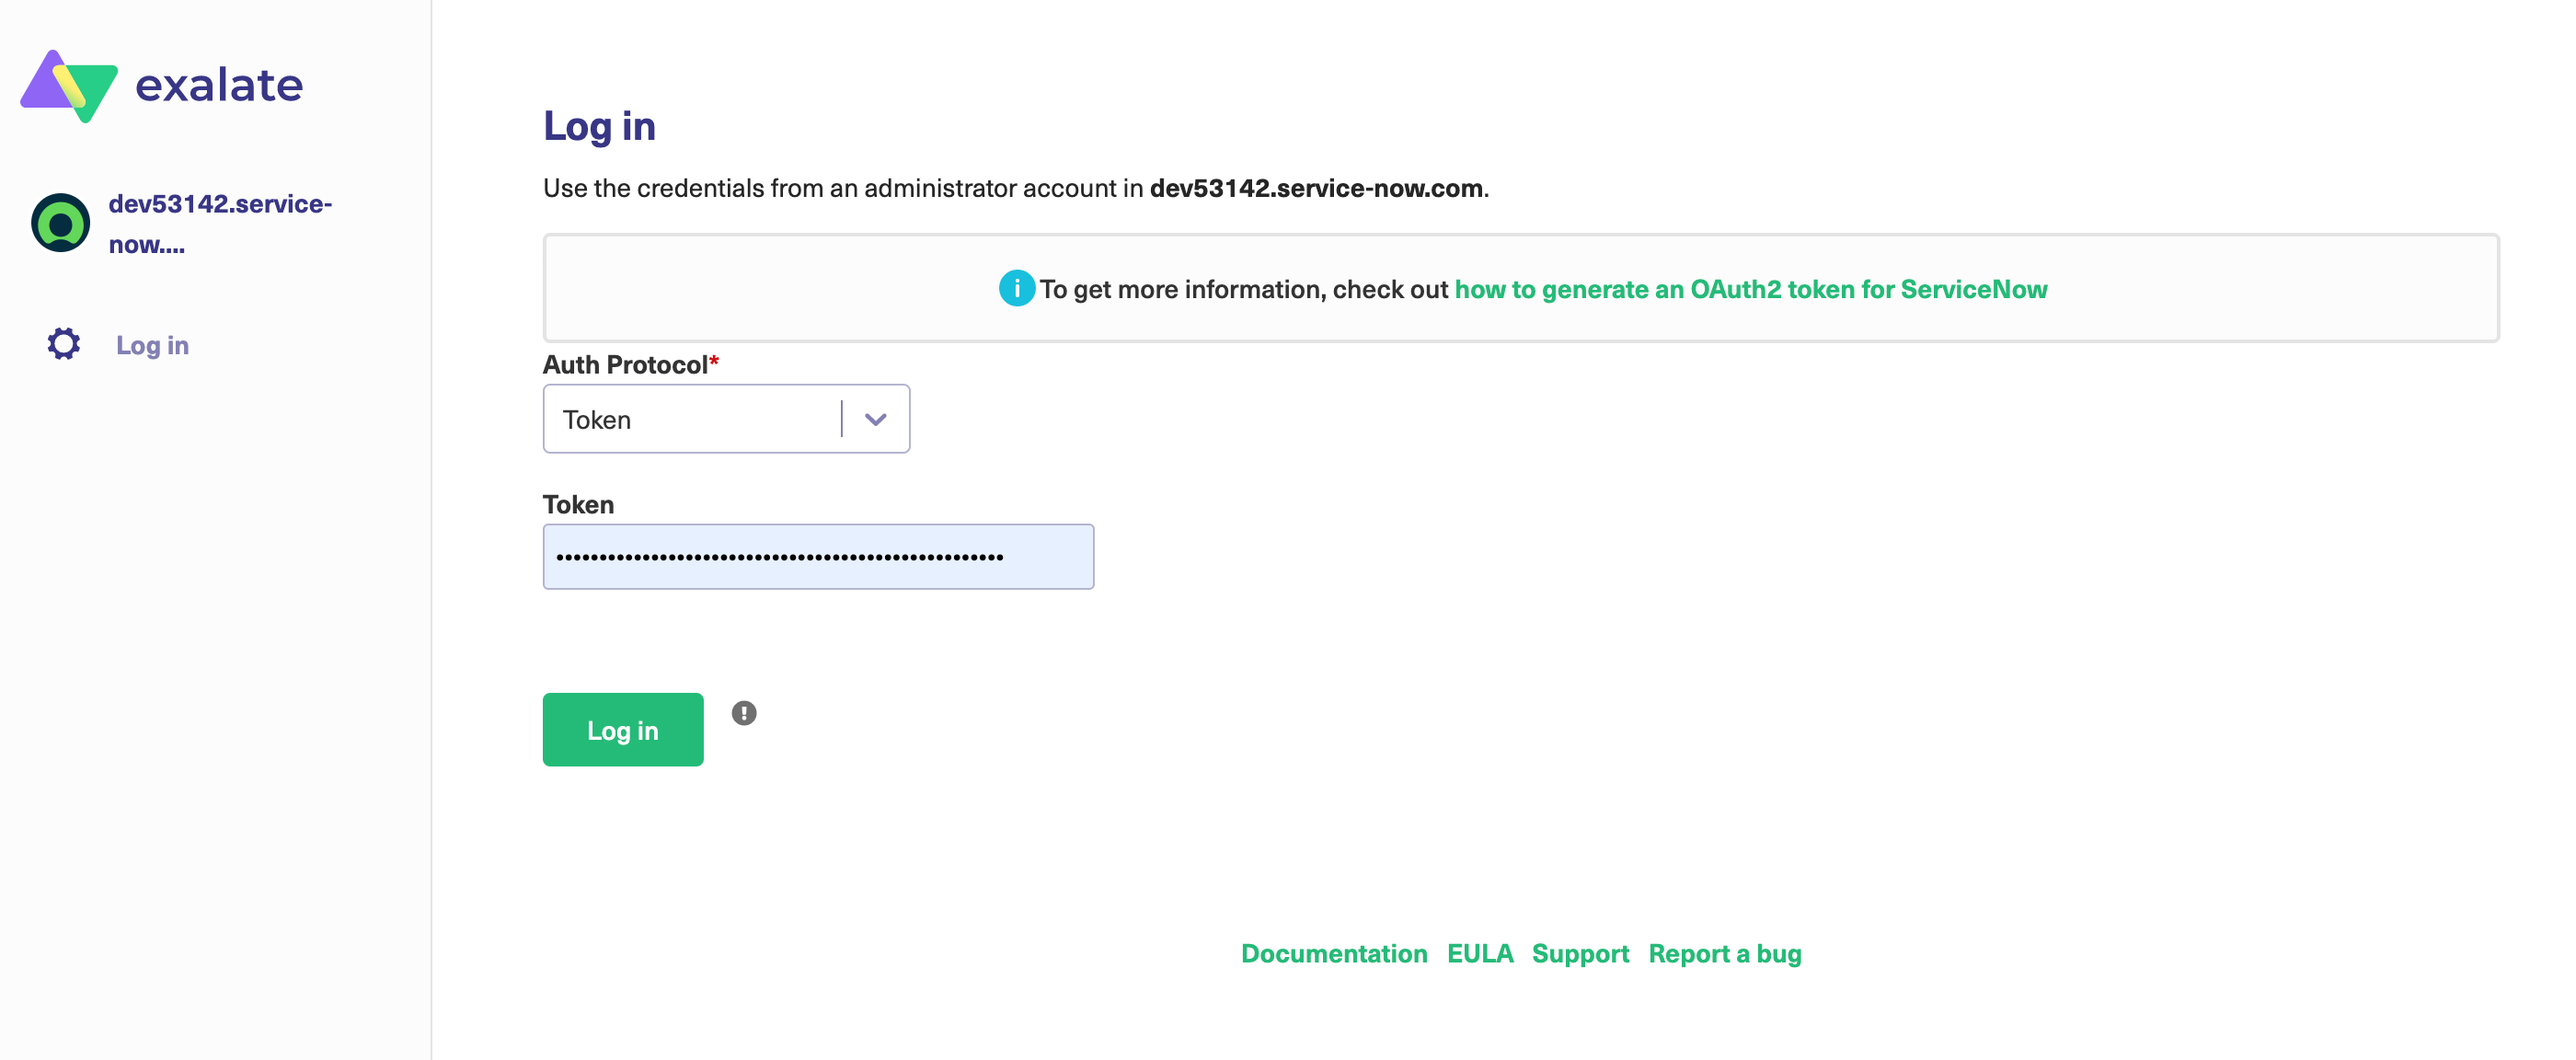
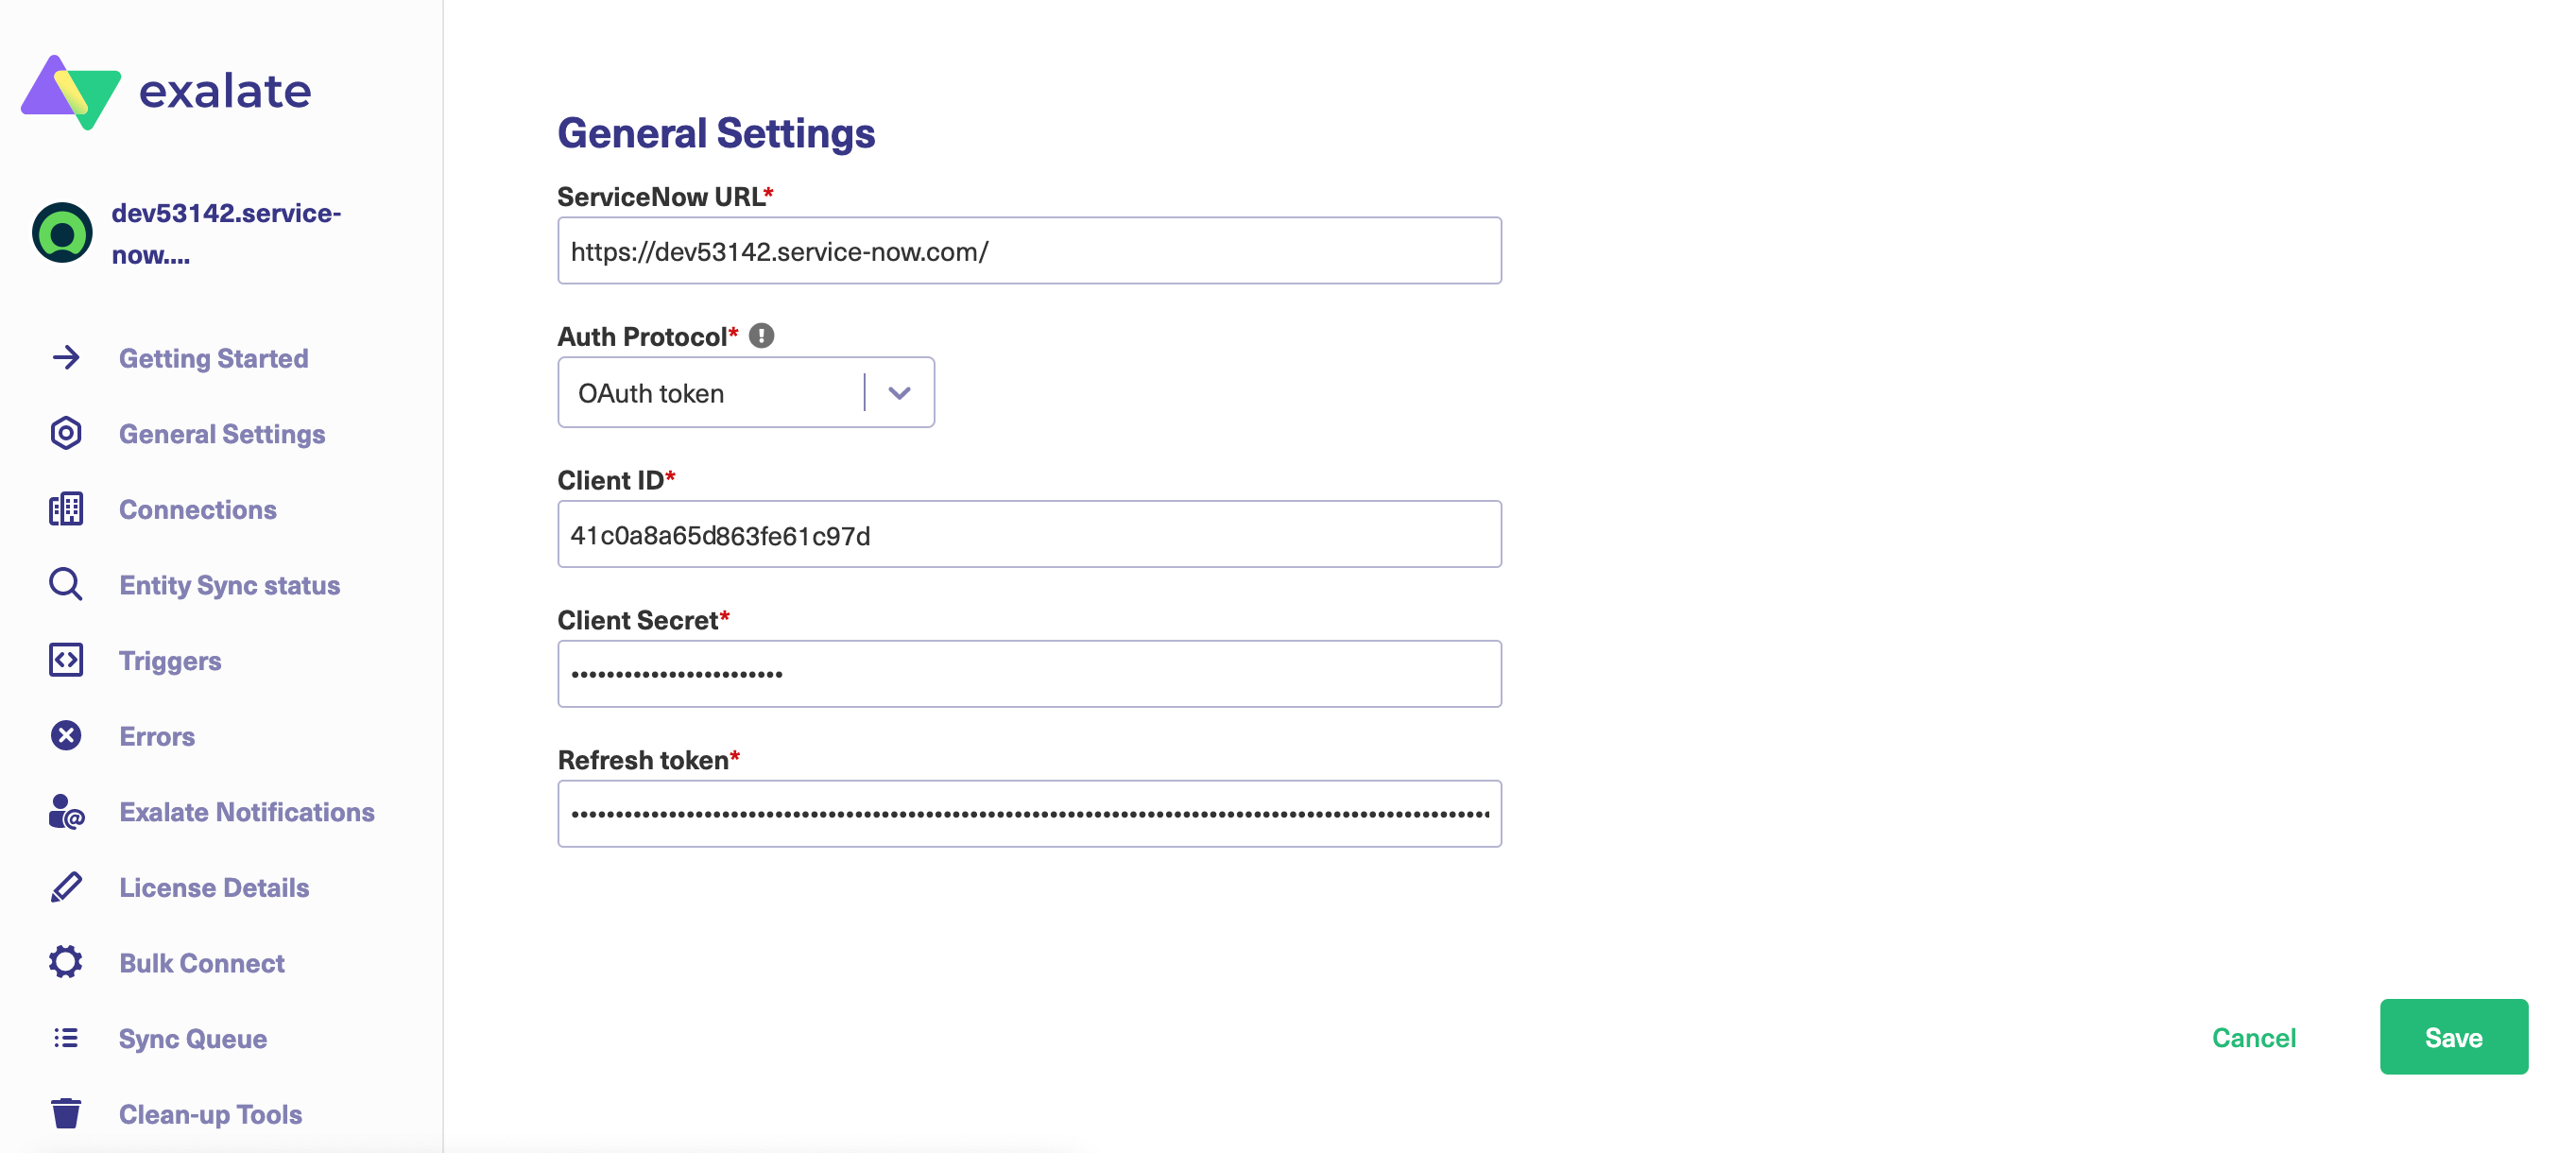
7. Access general settings and hit configure
Enter the clientid and clientsecret copied in step 4, and the refresh_token in step 5 in the different fields, and save
8. Get confirmation
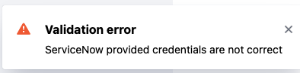
A flag is raised in case no access is possible
9. All reads/searches/updates are now done with the proxy users
Note: This authentication can be used as long as the refresh token is valid. You can configure the token when setting up the endpoint on the first step. You can generate a new refresh token following step 2 once it is expired. We recommend setting a long lifespan on the refresh token. The default setting (8640000) equals100 calendar days.
What to do if the Refresh Token is Expired?
- Repeat the steps as detailed above (from step 1)