This article applies to Exalate Classic only. For New Exalate, refer to this documentation.
Introduction
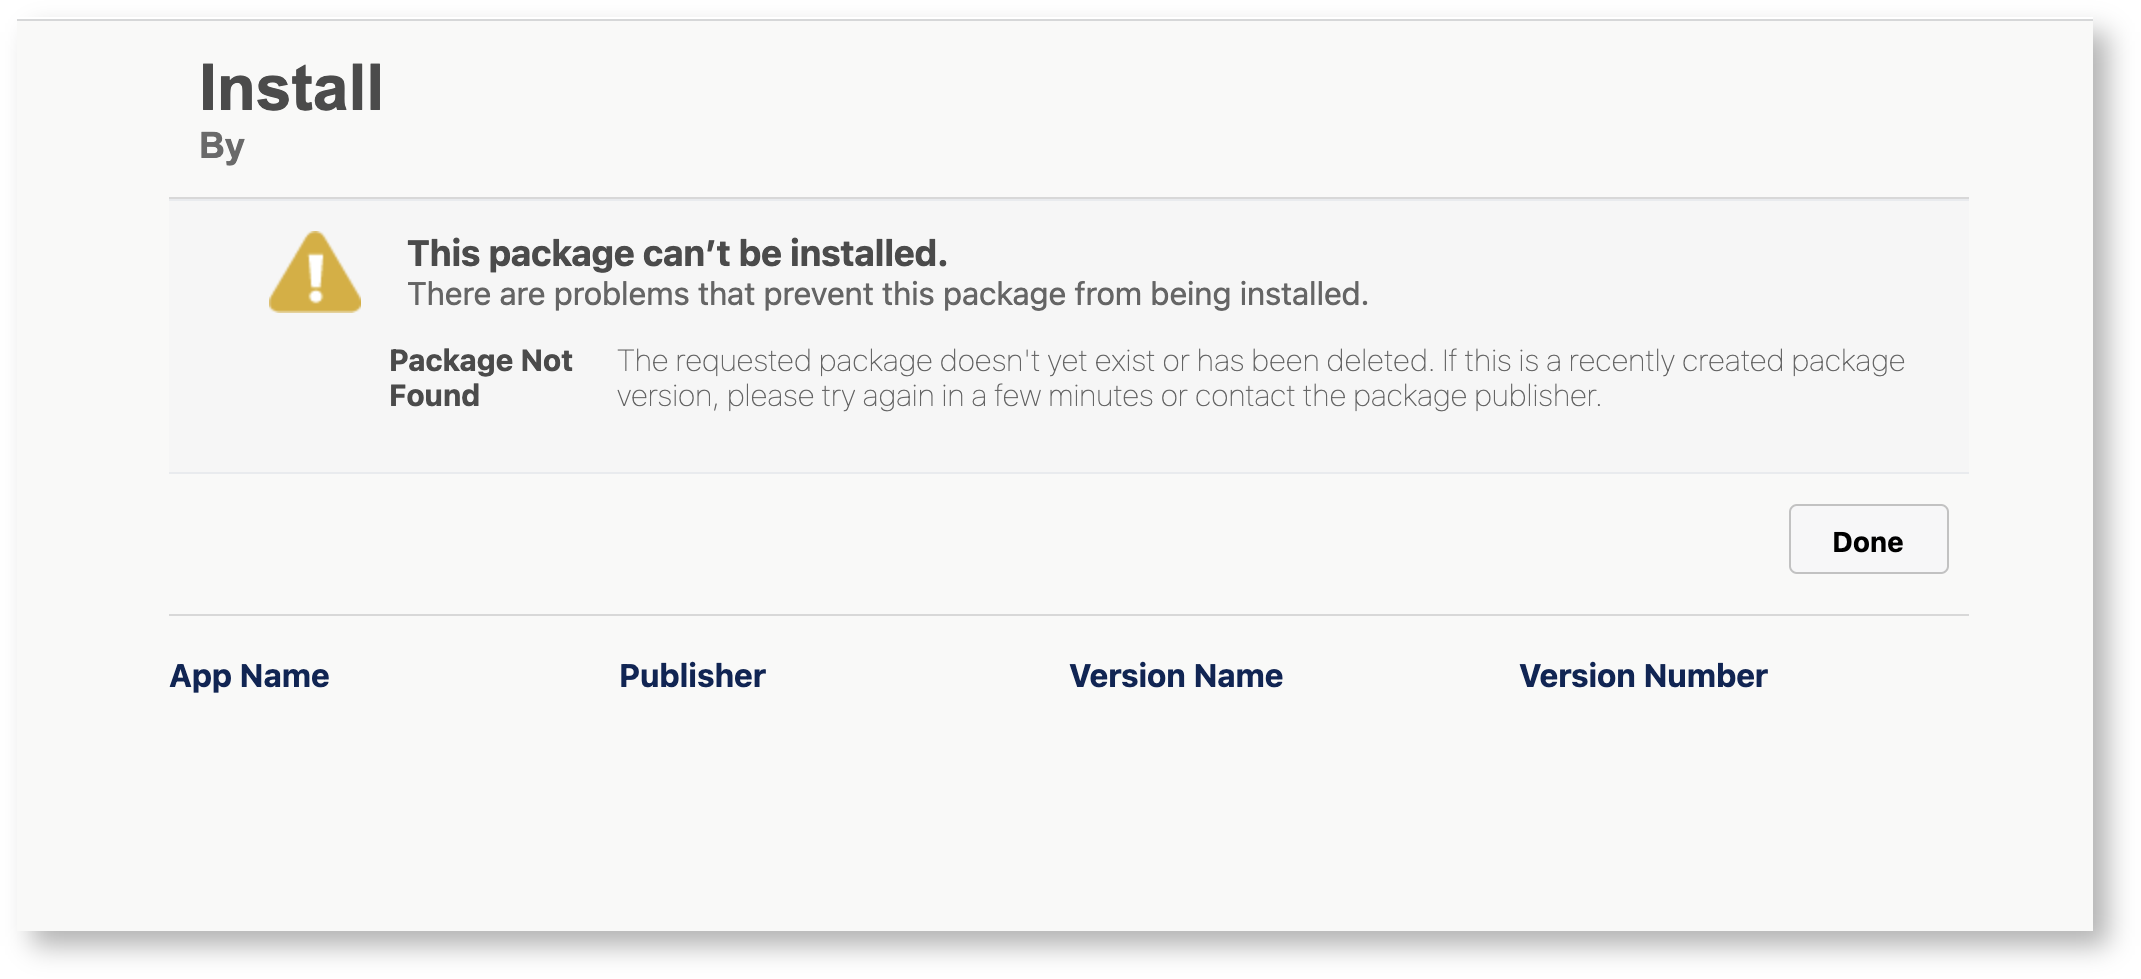
There is a reported problem where users are not able to install Exalate for Salesforce Bridge App.
As a user, you encounter the following error.
We have created the "Version 2: Exalate Bridge App" for Salesforce to solve this problem.
The new version fixes installation issues from the previous "Version 1: Exalate Bridge App" caused by the deletion of the underlying Salesforce Org.
This document provides a series of steps to install version 2 of the Exalate Bridge App.
Note: The security review is ongoing, so the App is not yet published on the AppExchange.
Steps to Install Version 2: Exalate Bridge App for Salesforce
Important: Before installing the new version, make sure you follow the instructions outlined here to uninstall the previous instance.
1. The new App can be installed from the following link:
https://login.salesforce.com/packaging/installPackage.apexp?p0=04t68000000Lb7SAAS.
Note: When deploying on a sandbox please use
https://test.salesforce.com/packaging/installPackage.apexp?p0=04t68000000Lb7SAAS
Salesforce displays an installation page.
2. Select Install for All Users if you want to give all Salesforce users the capability to view the Exalate sync panel.

3. Approve third-party access
A confirmation dialog box appears asking if a third-party website is allowed to access the environment.
Confirm by clicking the checkboxes and click Continue.
Note: There is an additional authorization form further down the line.

4. Confirm installation
The next screen confirms the installation or indicates that an email is sent to your user email address.
Click Done either way.

Note: The email looks like this:

5. Access the Exalate console.
Now, you can access the Exalate console by searching for the App under the Apps launcher in Salesforce.

6. Select Exalate

7. Allow migration
Click Skip Migration if you have installed the Exalate App for the first time. However, if you wish to migrate, you can contact our support.
Note: Migration is for customers that need to switch to the new App.

8. Request an Exalate node.
Click Request Node to reserve an Exalate node for your Salesforce instance.

9. Confirm the type of access allowed for Exalate.
Note: Ensure that only 3 entries are present.
Click Allow to grant access.

10. A pop-up with the error message Page doesn't exist is displayed.
This is a result of a bug in our App that refers to the old URL of the console. You can ignore this error by closing the window. 
11. Go back to the App launcher and select Exalate again.
Registration starts. To continue further, skip to step number 11 on this page.