This article applies to Exalate Classic only. For New Exalate, refer to this documentation.
In Exalate, there are multiple ways to start syncing issues in Jira:
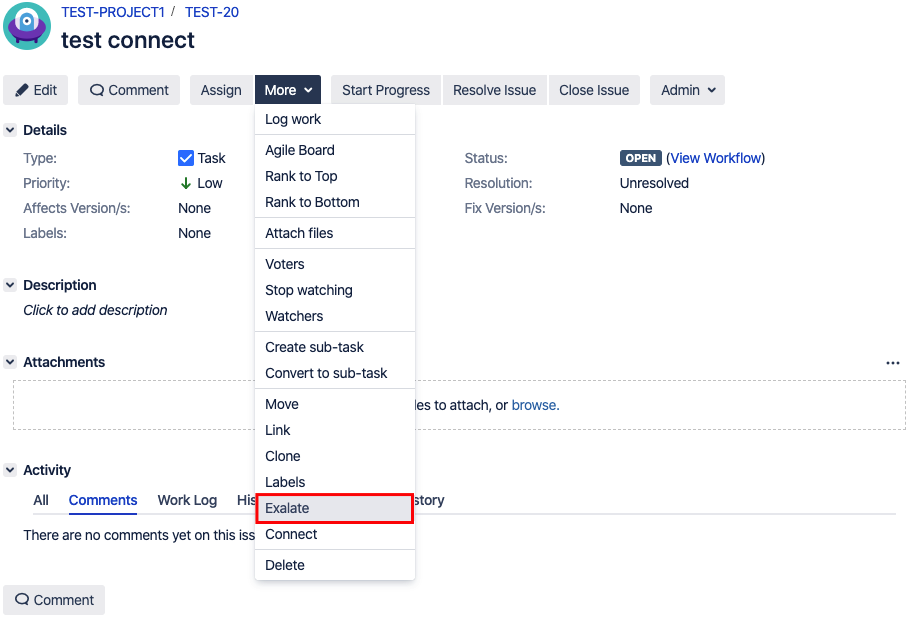
Exalate Button
After you install Exalate, every issue has a new issue action Exalate. To start the issue synchronization click the Exalate button, then select a connection that should be used to use to synchronize issues.
Jira on-premise
The Exalate issue operation is located under More tab on the issue view.
Exalate Now Post Function
You can start the synchronization automatically with the help of Exalate Now post function in Jira. Follow the steps below to configure the Exalate Now post-function:
1. Navigate to edit the workflow in Jira admin.
You can edit a Jira workflow under ![]() -> Issues -> Workflows
-> Issues -> Workflows
For more information, pleas read advanced workflow configuration in Jira.
2. Click on the transition and select Post Functions.
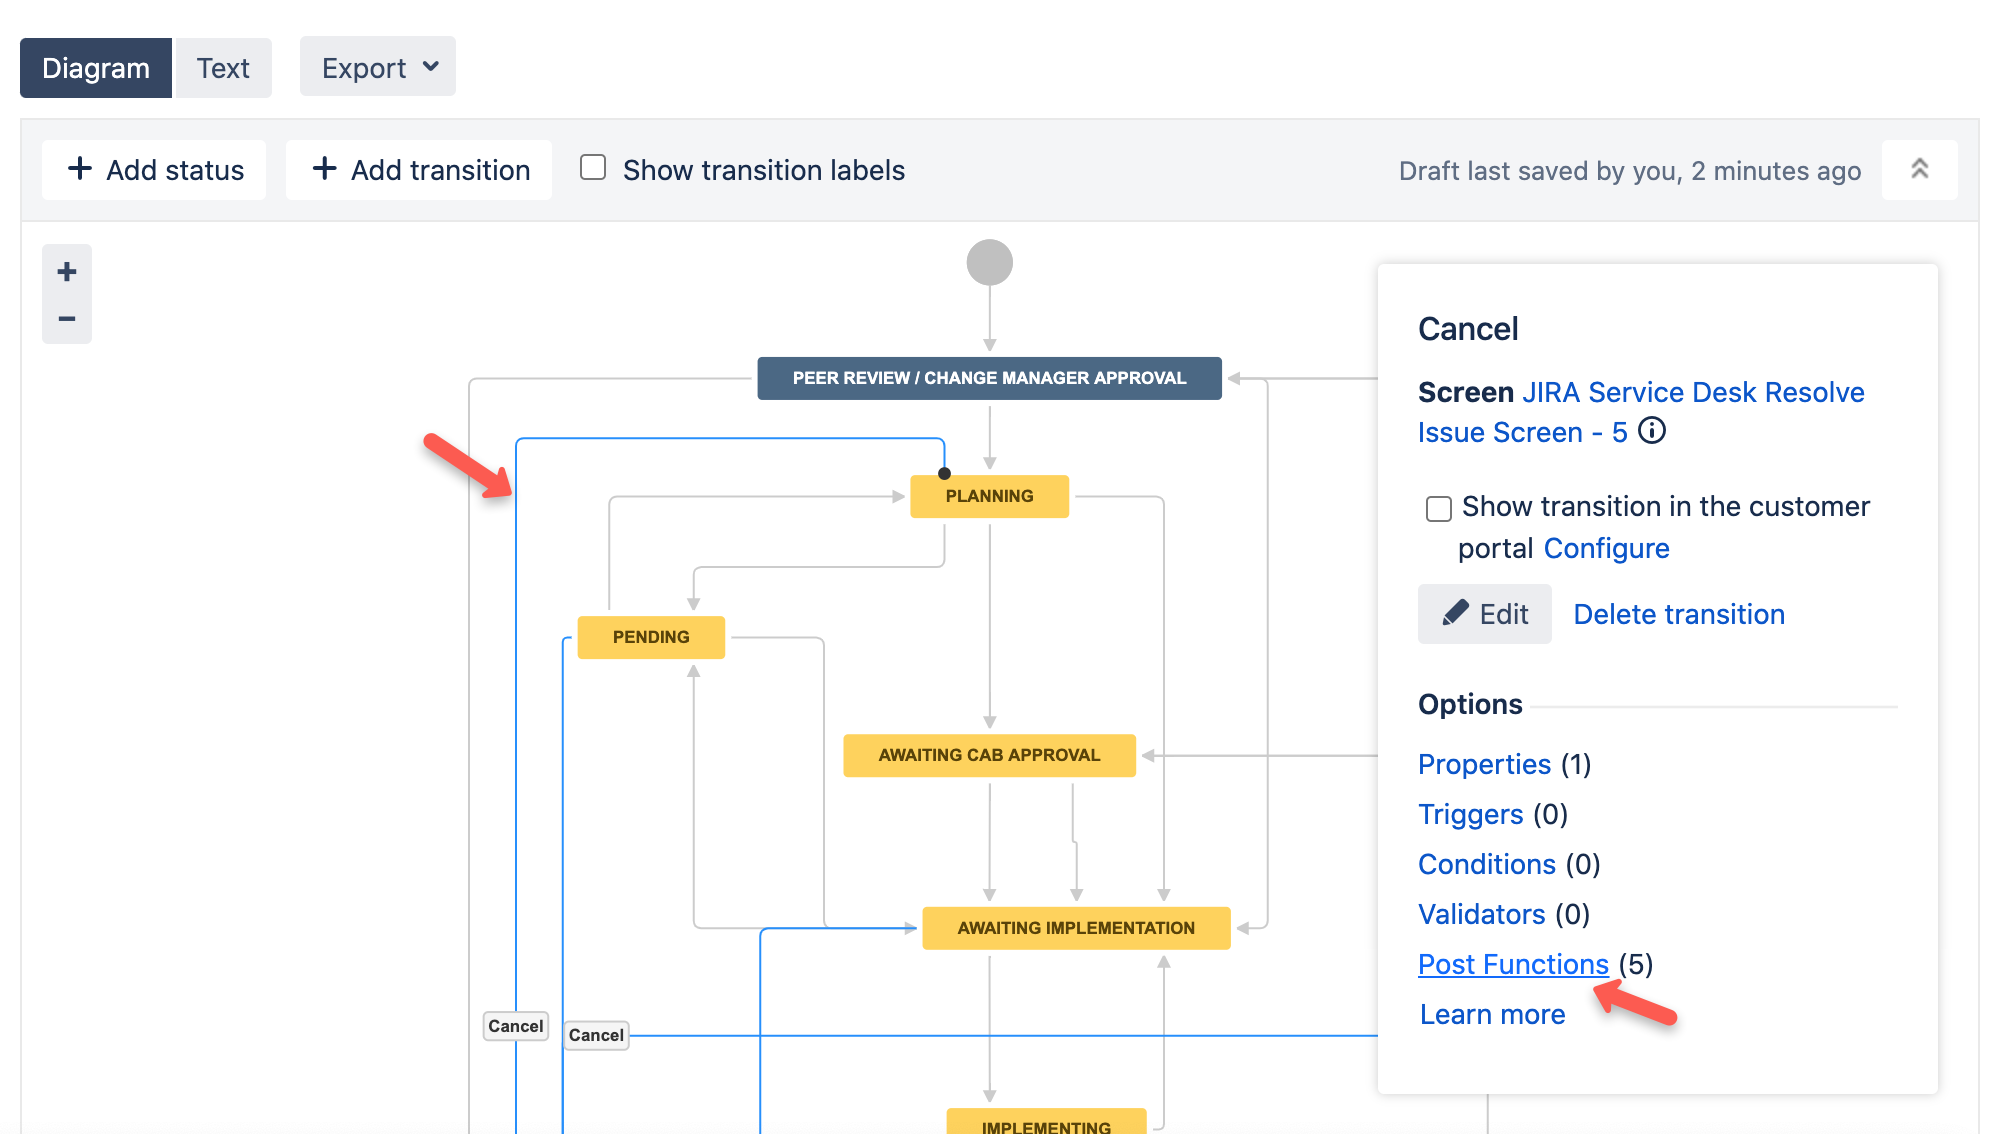
3. Add a post-function to your workflow.
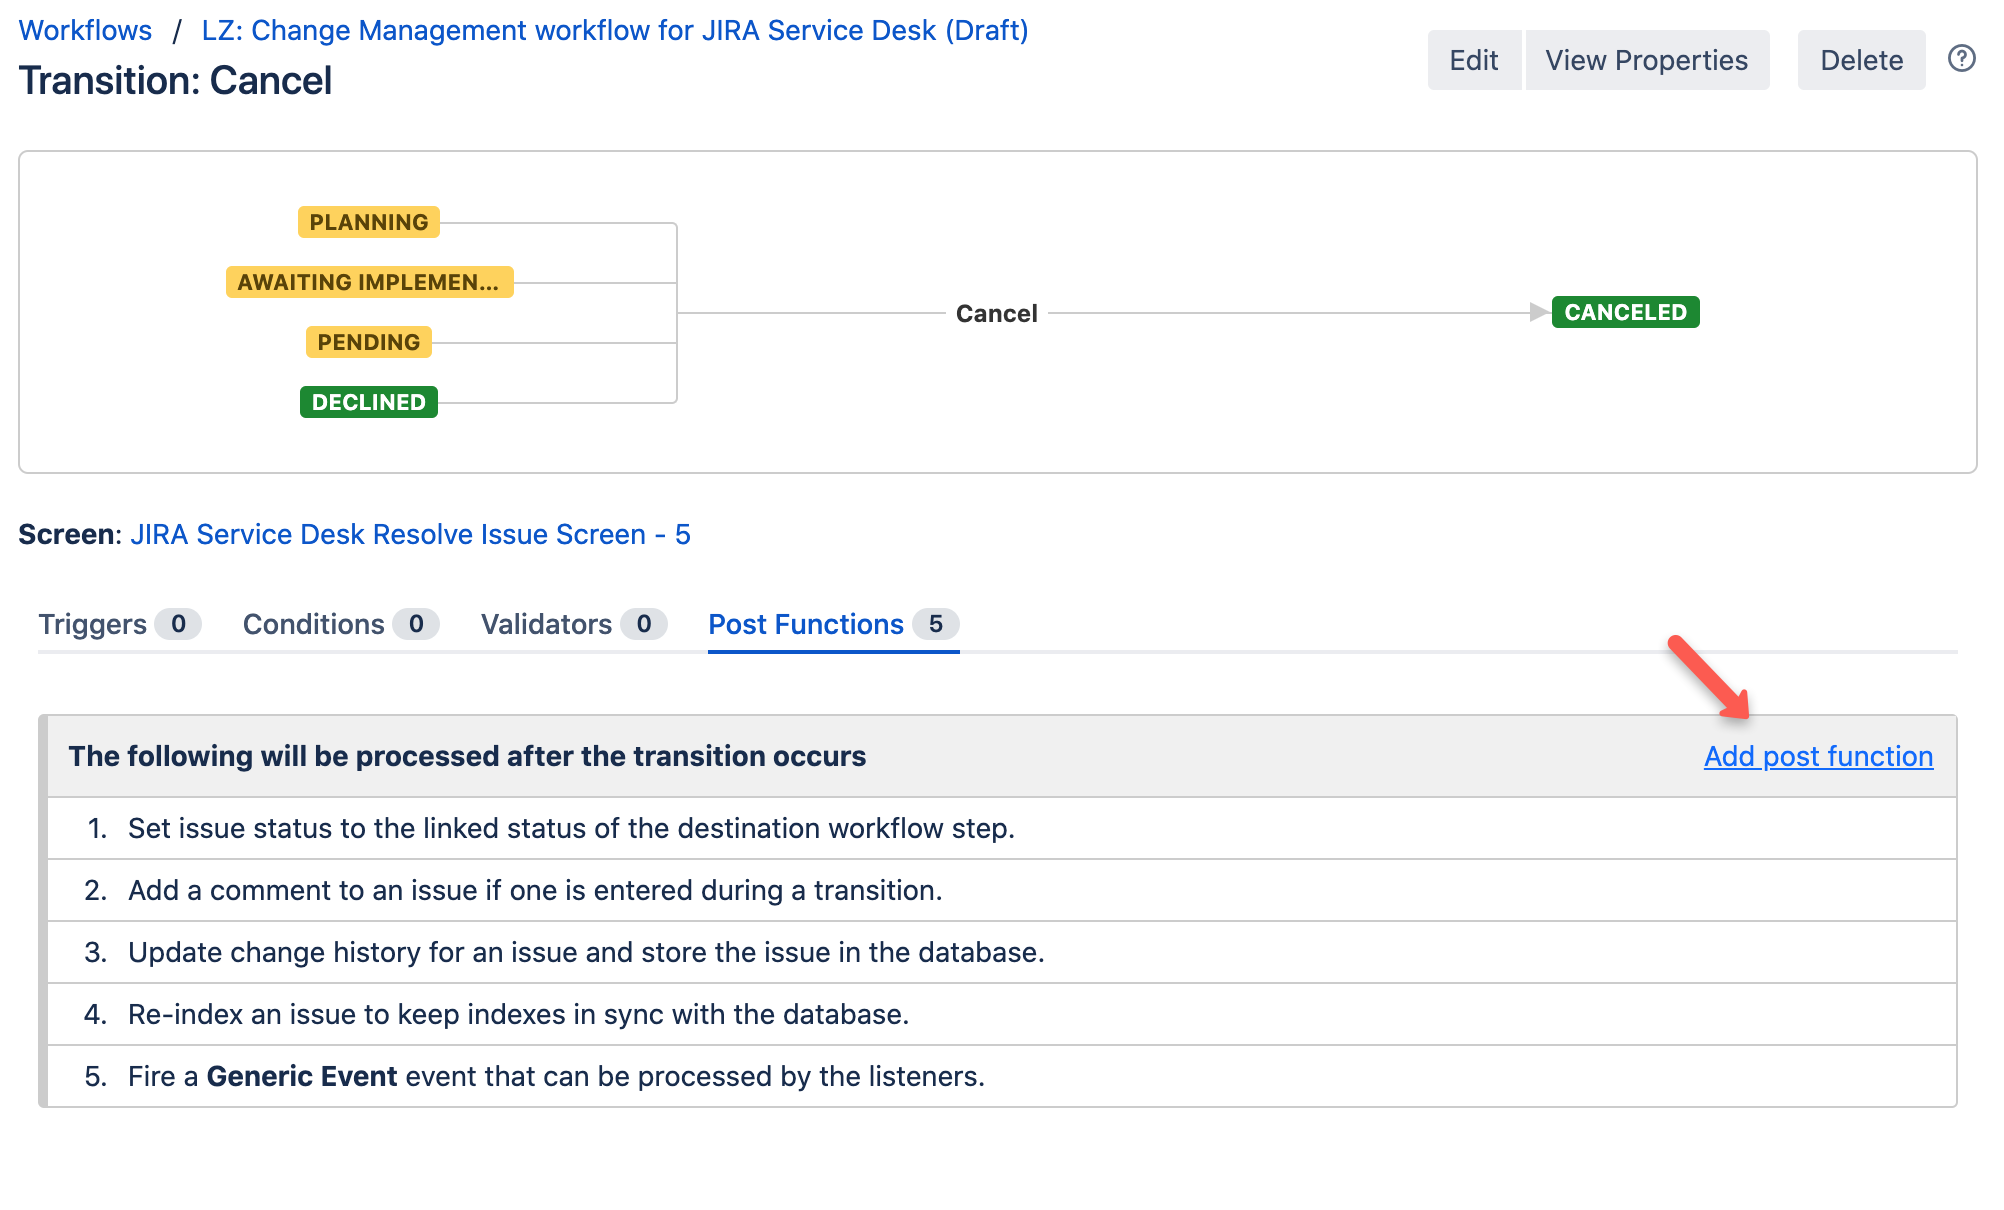
4. Select Exalate Now post function.
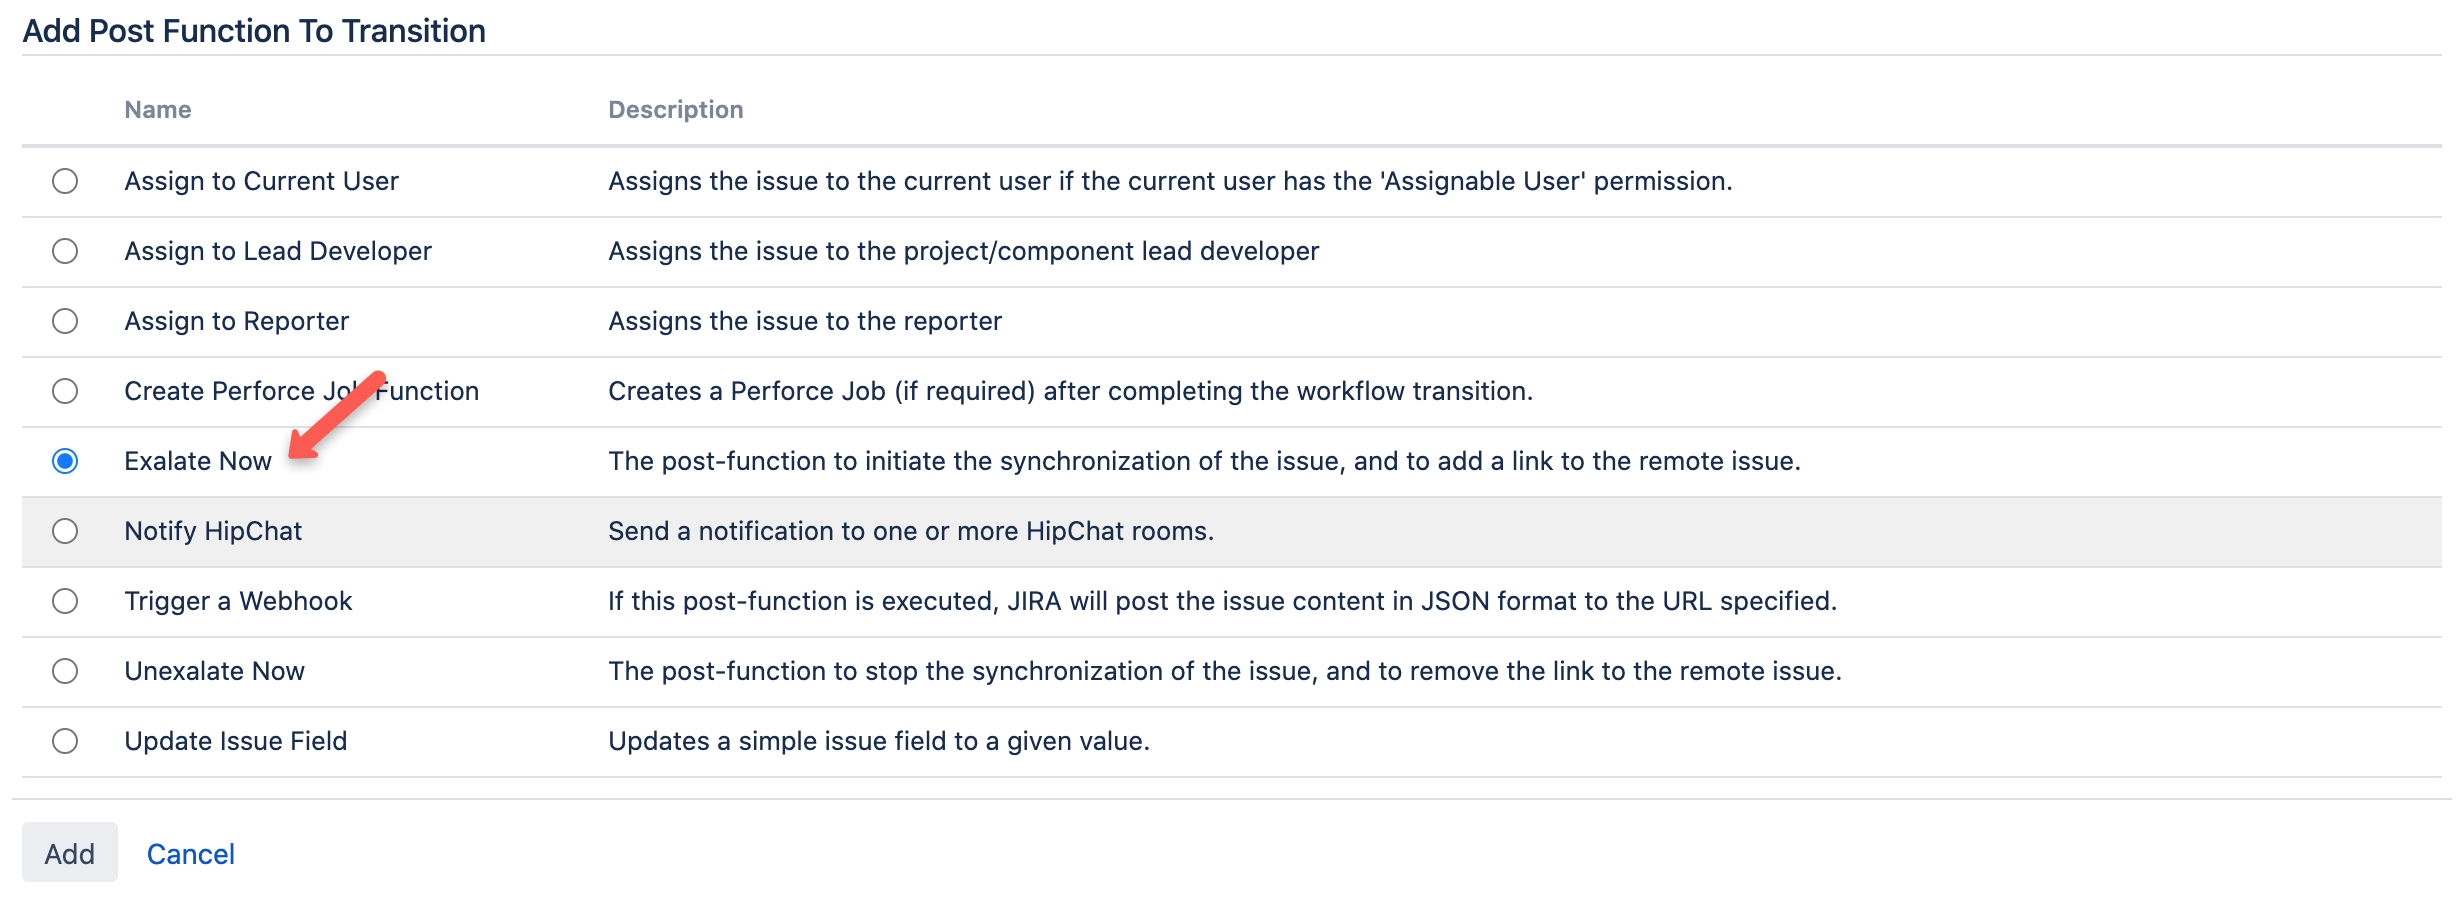
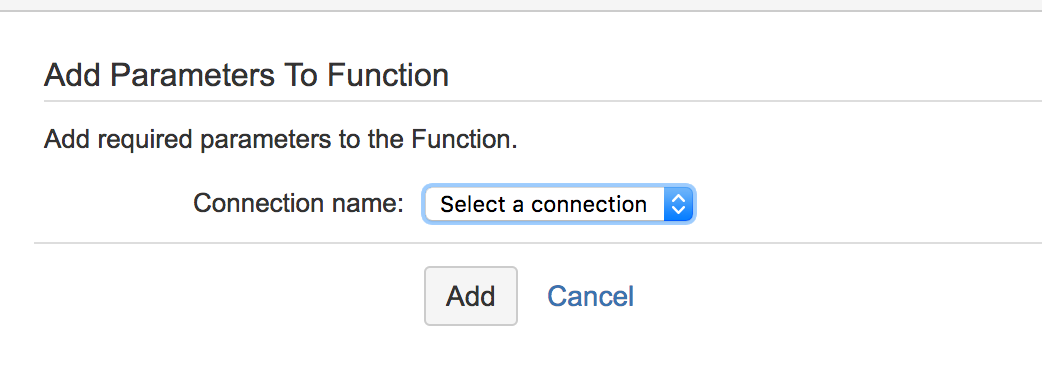
5. Select a connection.
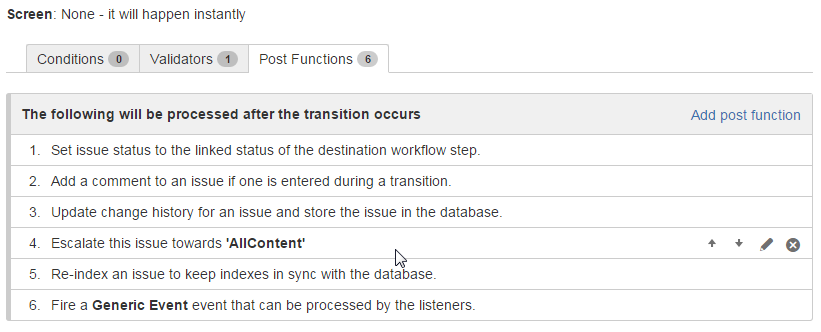
6. Ensure that the Exalate Now post function is in the correct order.
You need to make sure that the post function is executed once the issue has been updated otherwise, the issue is transferred to the wrong status.
JQL Trigger
You can start issue synchronization automatically according to a specified search query with the help of a trigger.
If the issue fits a search query it is triggered for synchronization automatically. Once someone updates the issue which is under sync the changes are synchronized automatically. Check the example of the JQL trigger query below.
When you create an issue in project = BLUE with labels = sync issue is synchronized automatically. Also, the same trigger starts the synchronization if any issue in project BLUE has been updated with label sync.
project = BLUE AND labels = sync
Note: You can use JQL saved filters in trigger configuration. Please makes sure that the filter is shared with the proxy user. Filters can be shared with other users via user groups, projects, and project roles. They can also be shared globally. Any filter that is shared is visible to users who have the Administer Jira global permission. Use filter ID (filter = 10500) or name (filter = "My filter") to configure a trigger
Changes due to compliance with GDPR
JQL query containing user identifiers such as username, display name or email stops working starting from 29th of March due to Atlassian compliance with GDPR. Update your JQL query to use account IDs instead. Find more details in REST API migration guide and deprecation notice - userName and userKey. You can get the user account IDs with the help of JIRA Cloud REST API.
Example
JQL with userNames
issuetype = Bug AND assignee in (mia) AND reporter in (alana) order by lastViewed DESC
JQL with account IDs
issuetype = Bug AND assignee in (abcde-12345) AND reporter in (abc551-c4e99) order by lastViewed DESC
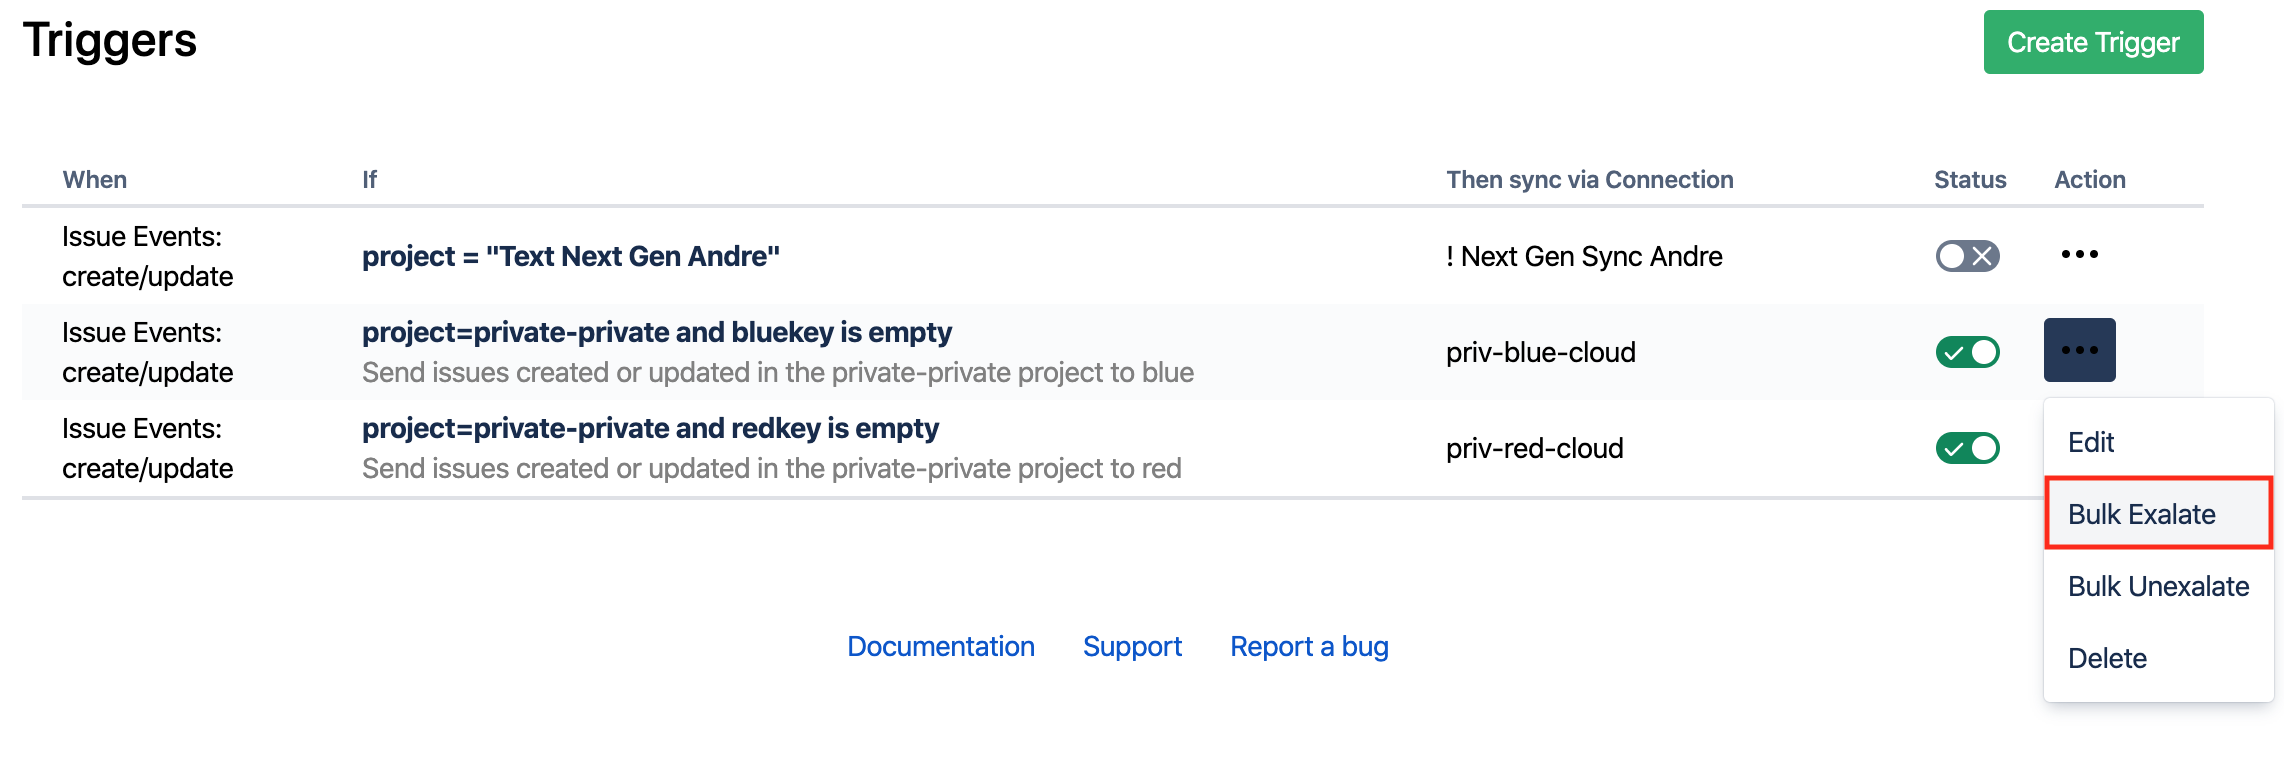
Bulk Exalate
Bulk Exalate allows you to synchronize a set of issues at a time.
Note: Before doing any bulk operation it is recommended you validate the configuration. You can test it by syncing one issue before you do Bulk Exalate to make sure the configuration works as expected.
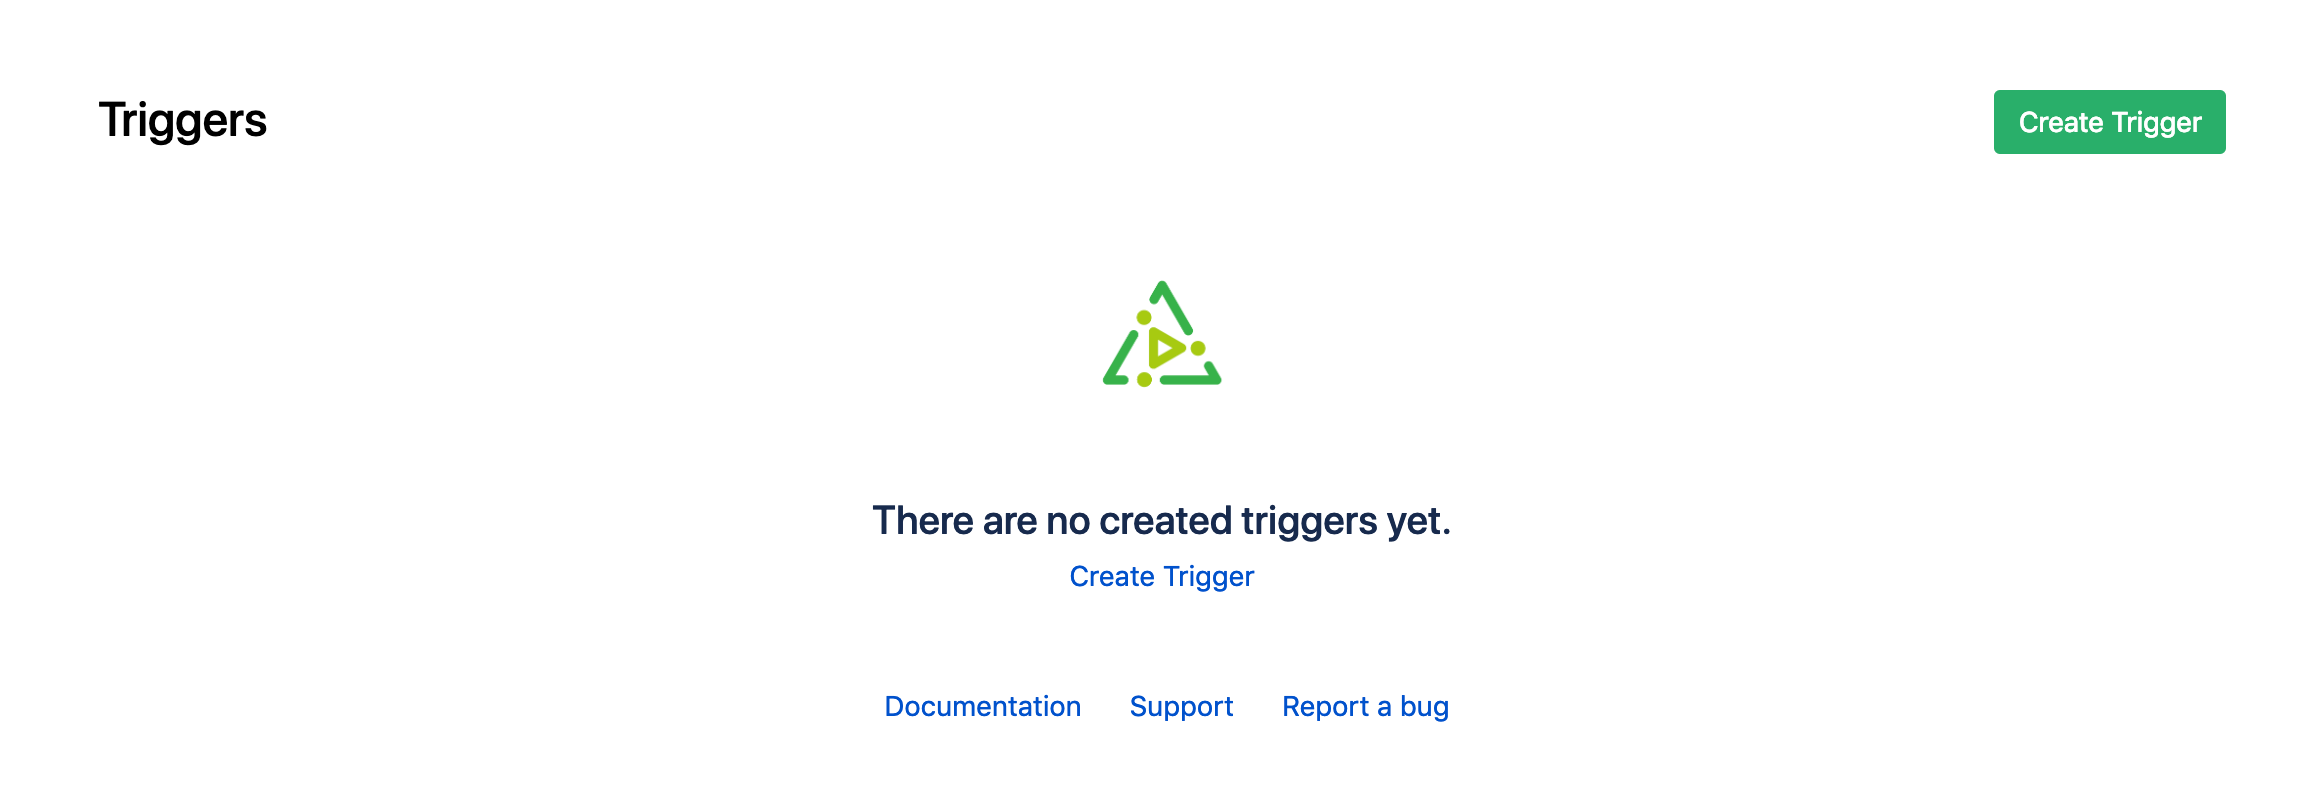
1. Navigate to the Triggers tab in the Exalate admin menu.

2. Click Create Trigger.
3. Select the type of entity you want to synchronize.
If you want to synchronize multiple entities, create separate triggers for every entity type.
4. In the If field, enter the desired filter to decide which issues get automatically synced to the other side.
Use the platform search syntax to specify the filter query.
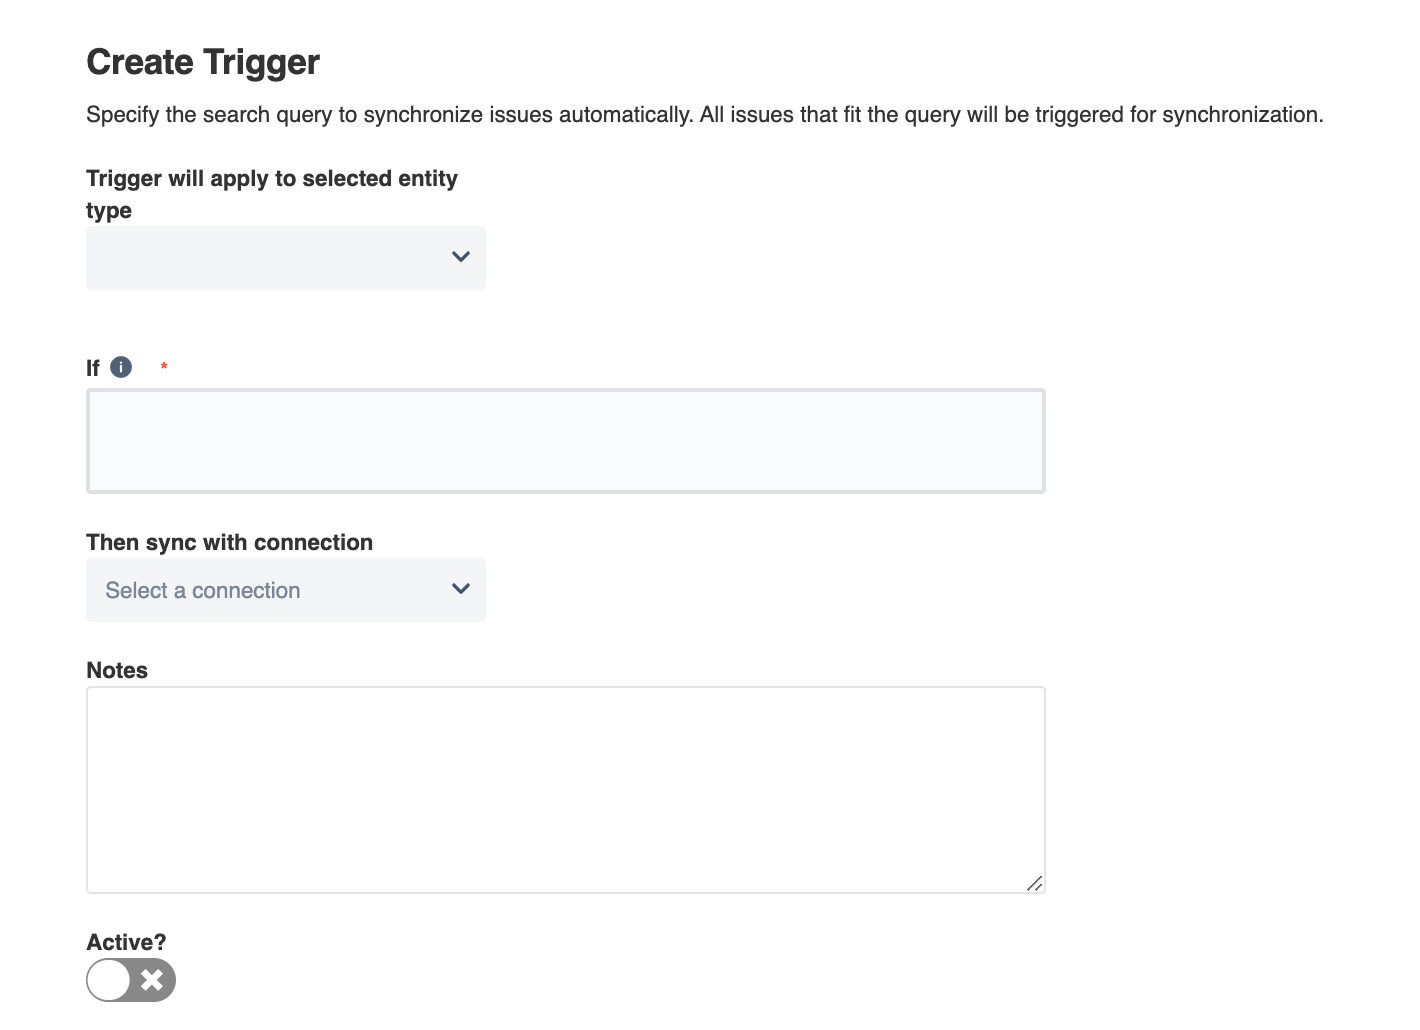
5. Select the Connection you want to sync with in Then sync with connection list.
6. Optionally, input information to keep a reference for the trigger in the Notes field.
7. Enable the toggle to activate the trigger. In case the toggle is disabled, the trigger won't work.
8. Create trigger.
Exalate starts the synchronization of all issues that fit the search query specified in this trigger.