The guide is specifically designed for organizations that manage their identities and access through Microsoft Entra ID (formerly Azure Active Directory). This article will walk you through the essential steps for configuring your Exalate node with OAuth 2.0.
Register a New App
1. Navigate to Azure Portal
2. Sign in using an organizational account that has sufficient permissions to register applications within your Microsoft Entra ID tenant
3. Once signed in, in the Azure portal search bar, type App registrations and select the App registrations service.

4. Fields to fill:
- Name
- Who can use this application or access this API?
- Accounts in this organizational directory only (Default Directory only - Single tenant)
- Redirect URI
- select Web
- append
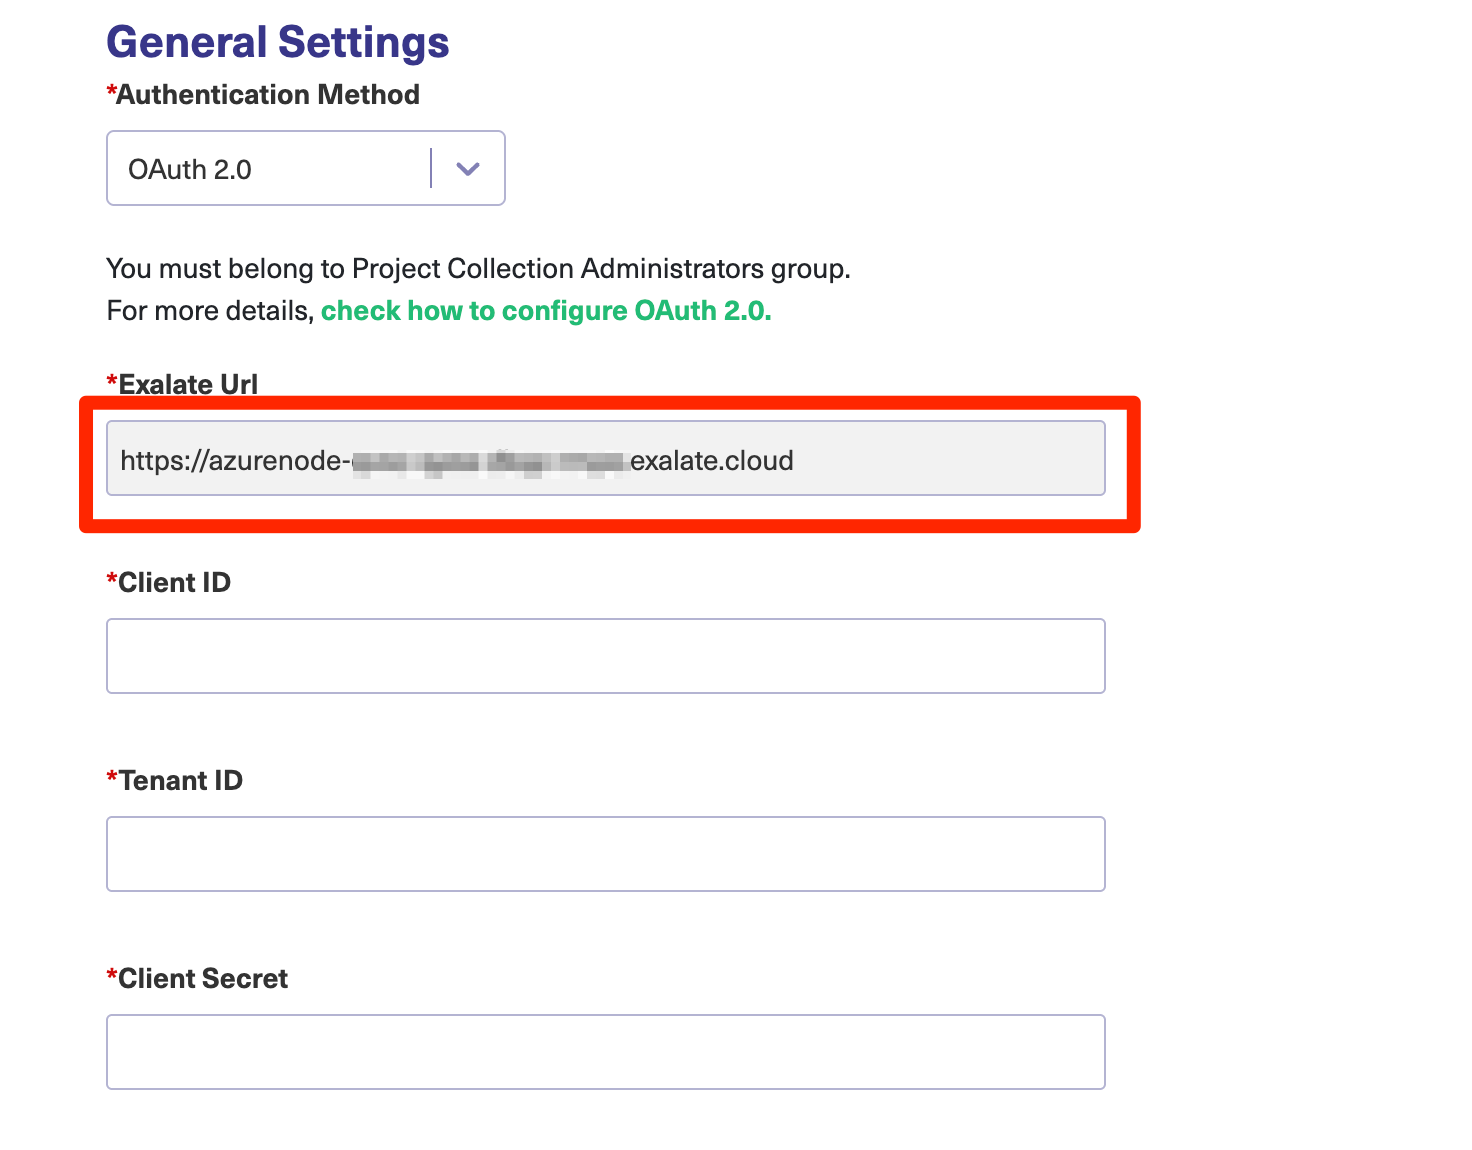
/azure/callbackto your Exalate URL ( you can find the Exalate URL on the Registration page) Example: https://azurenode-xxxx-xxxx-xxxx-xxxx.exalate.cloud/azure/callback

5. After filling in all the required fields, click the Register button at the bottom of the page to create your application registration.
Note: Client ID and Tenant ID values will be required when you proceed with registering your Exalate node.

Add the API Permissions in the App
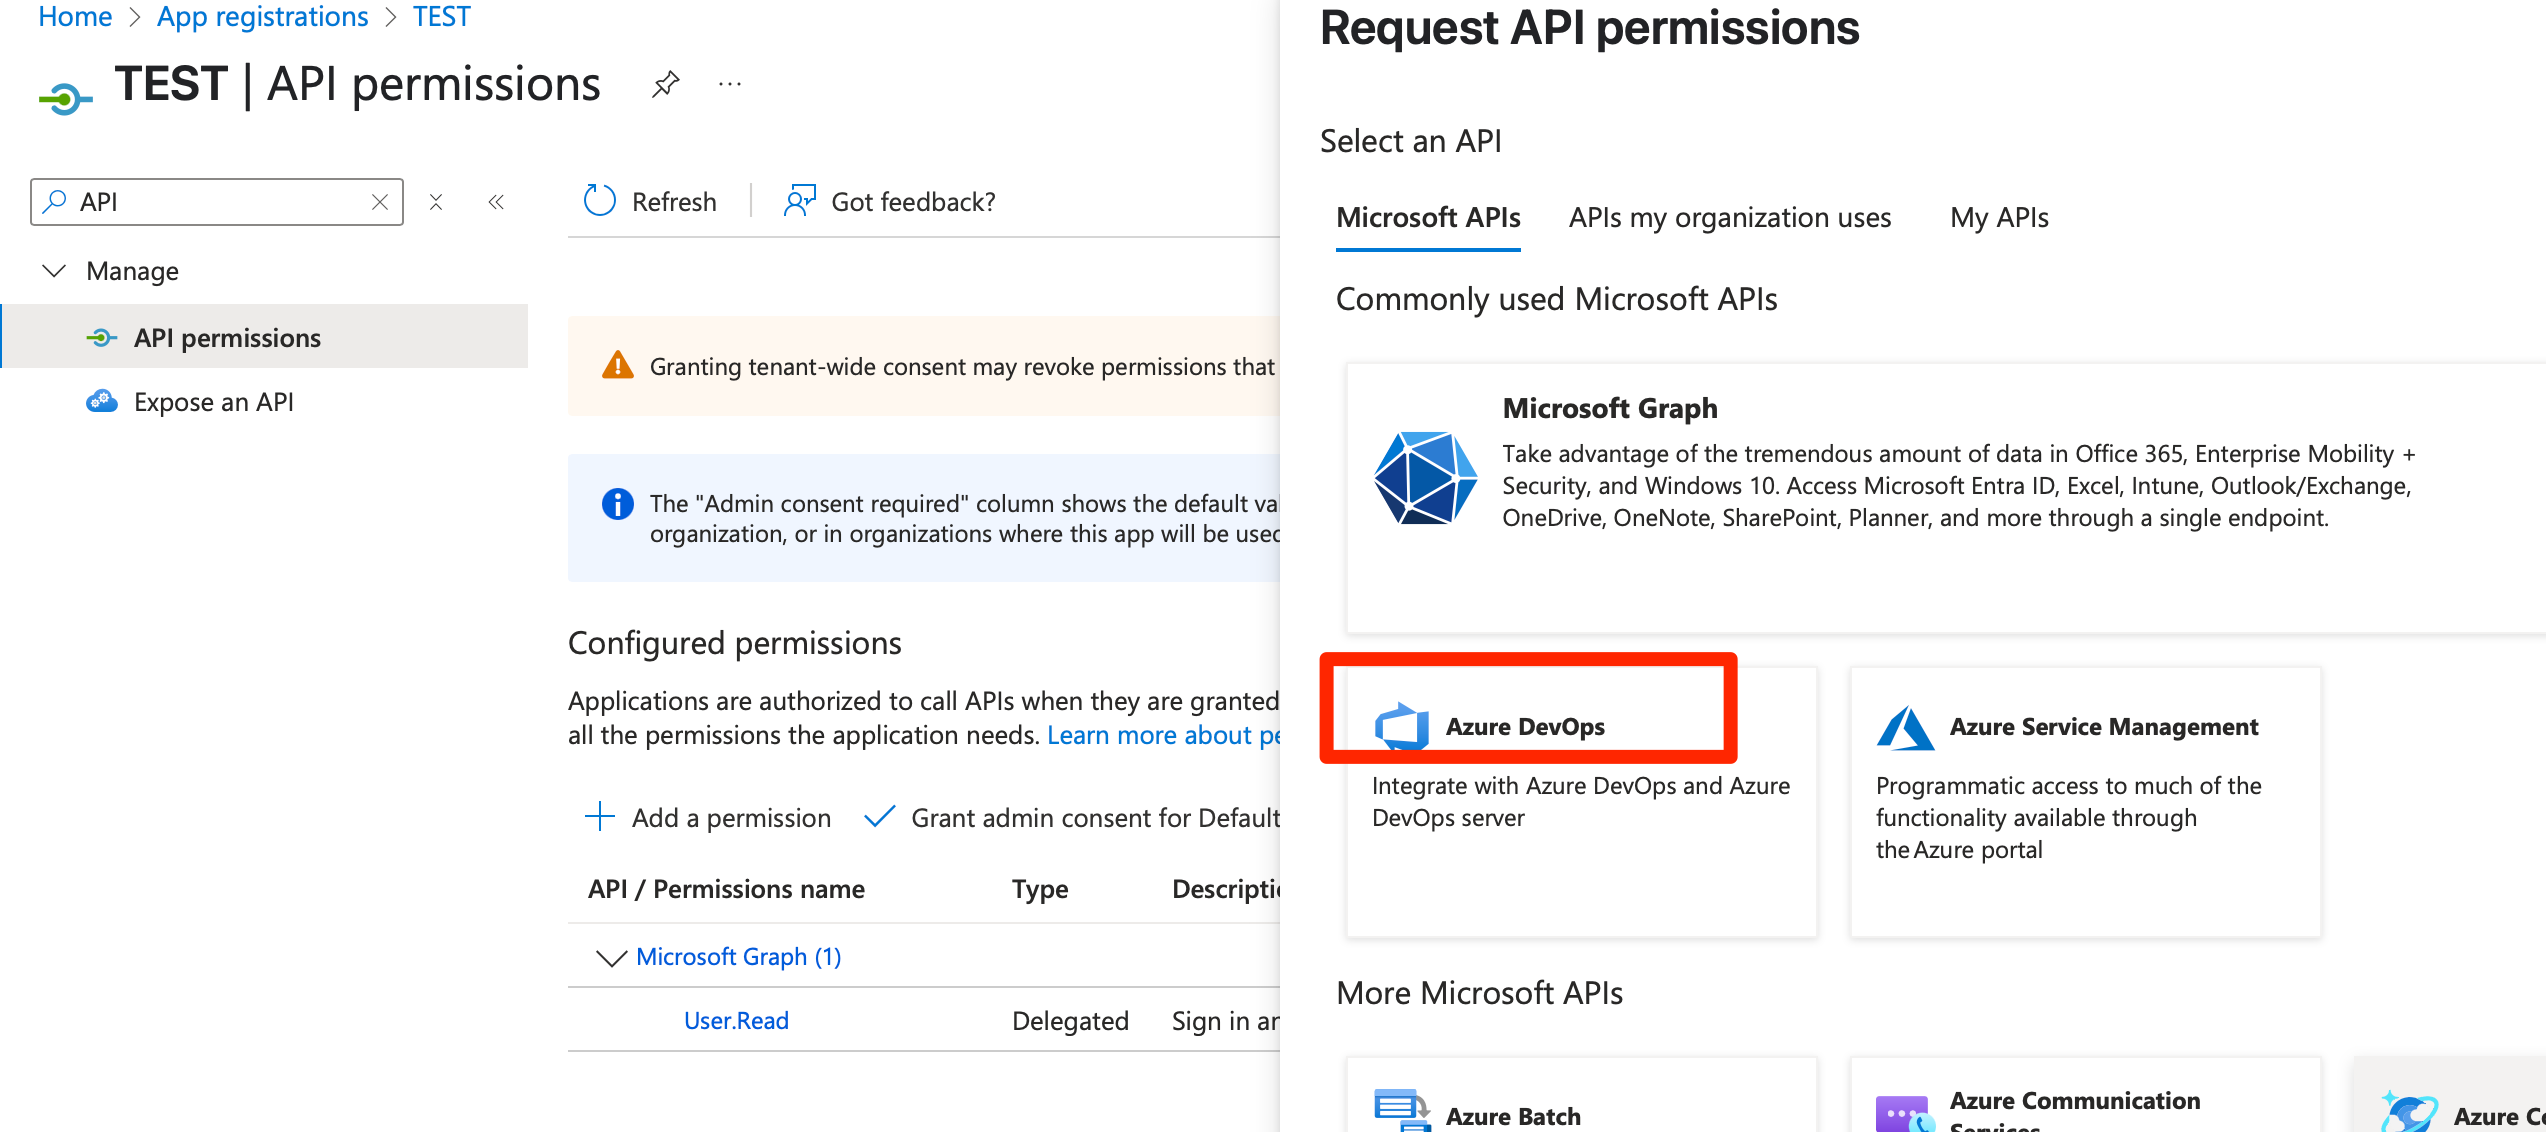
1. Search for API

2. Click on Add permission
- Click on Azure DevOps

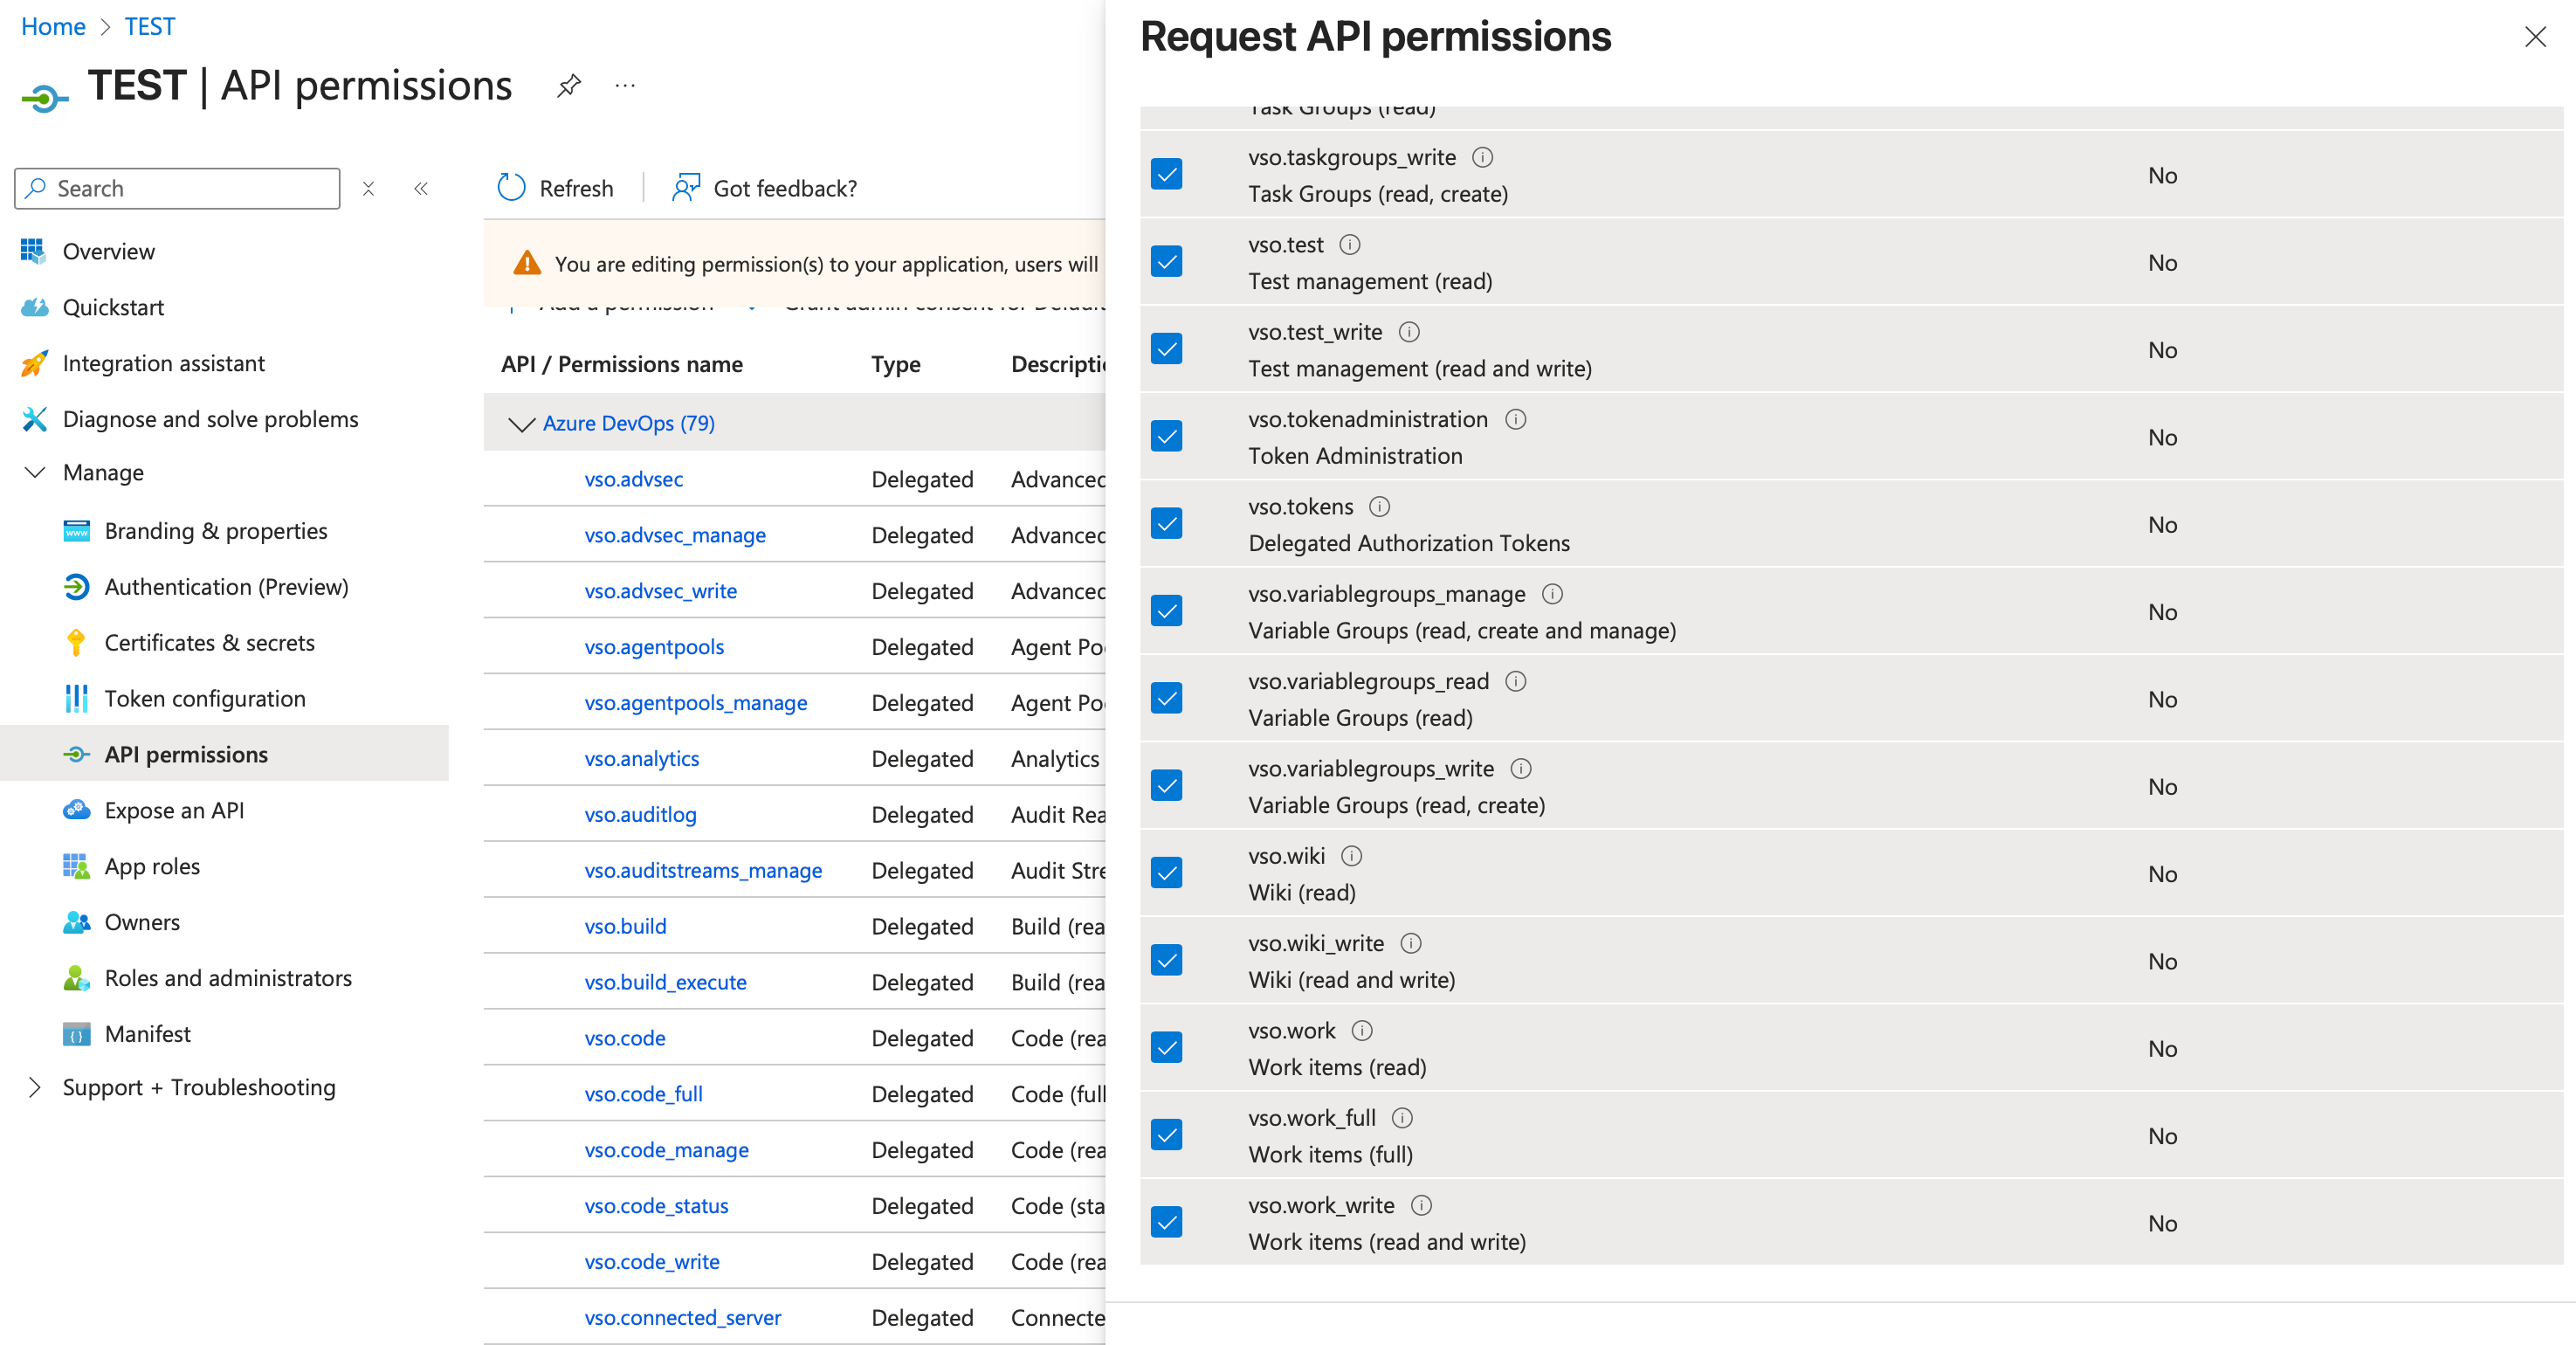
- Give all permissions related to VSO

- Click on Microsoft Graph and give permissions related to Application and User, as shown in the screenshot below.
-
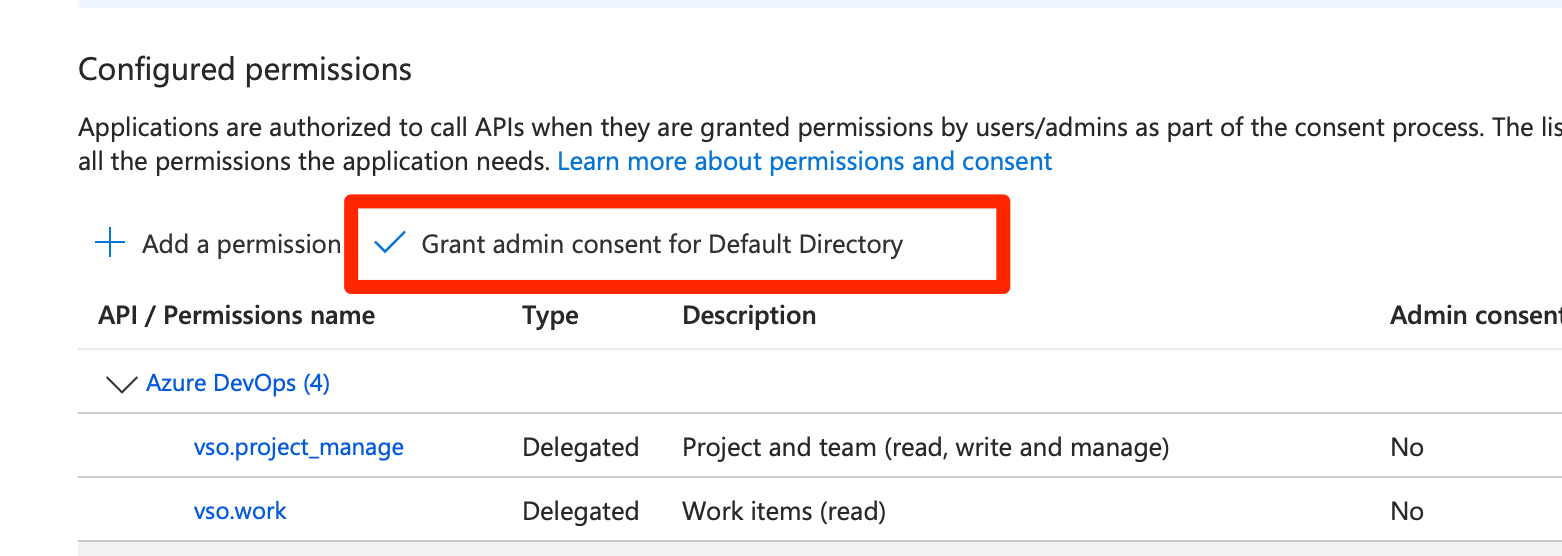
Grant Admin consent 
Generate Client Secret
Note: Check the How to Generate Client Secret for more details.
Note: Make sure your organization is connected to the default directory.

 Example:

