This article applies to Exalate Classic only. For New Exalate, refer to this documentation.
Note: To accept the Connection invitation you need an Invitation Code. The Invitation Code includes pre-populated Connection details such as Connection name, instance short names, and Destination instance URL. You are only required to finish the configuration by accepting the invitation.
Accept the Connection Invitation in Script Mode from Jira On-premise
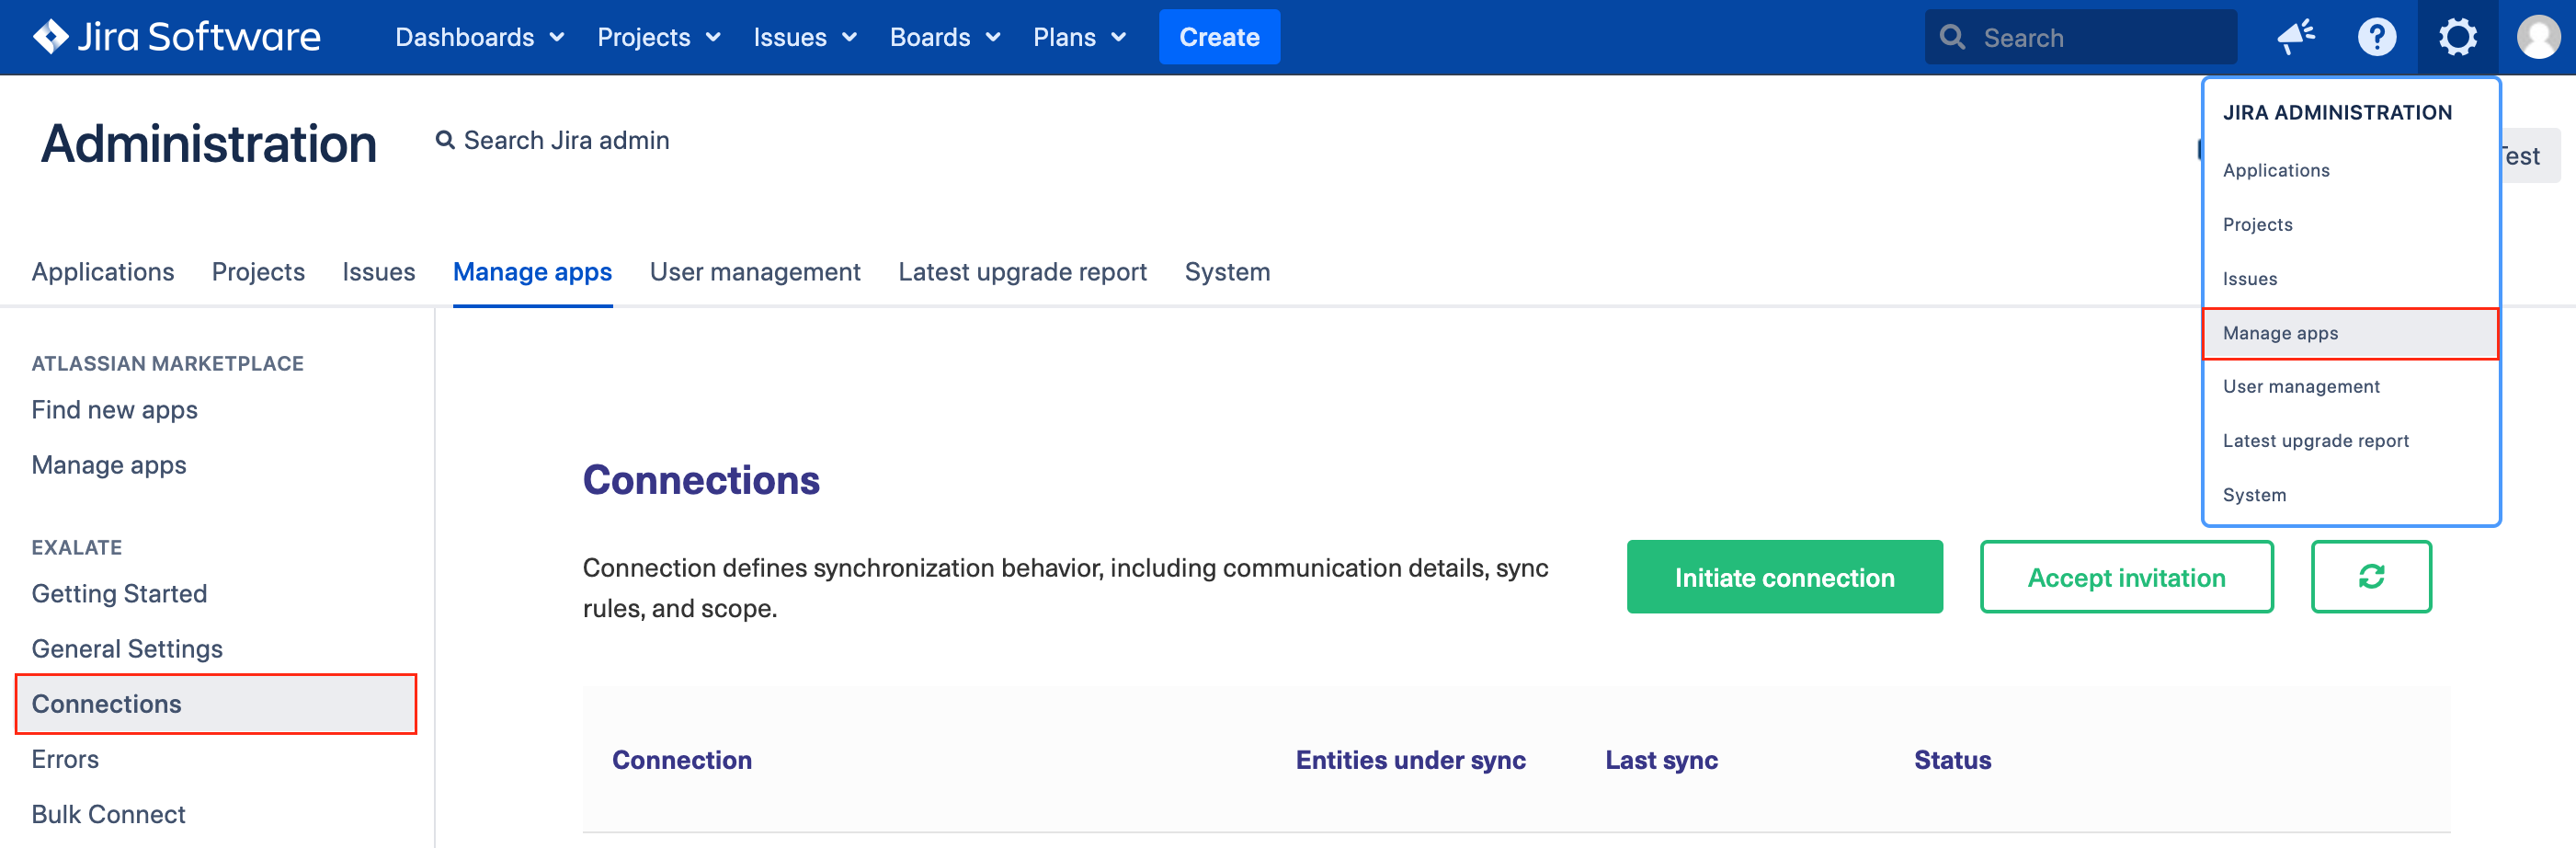
1. Navigate to the Connections tab in the Exalate console.
Click Settings → Apps & click Connections under the Exalate menu.
2. Click Accept the invitation.

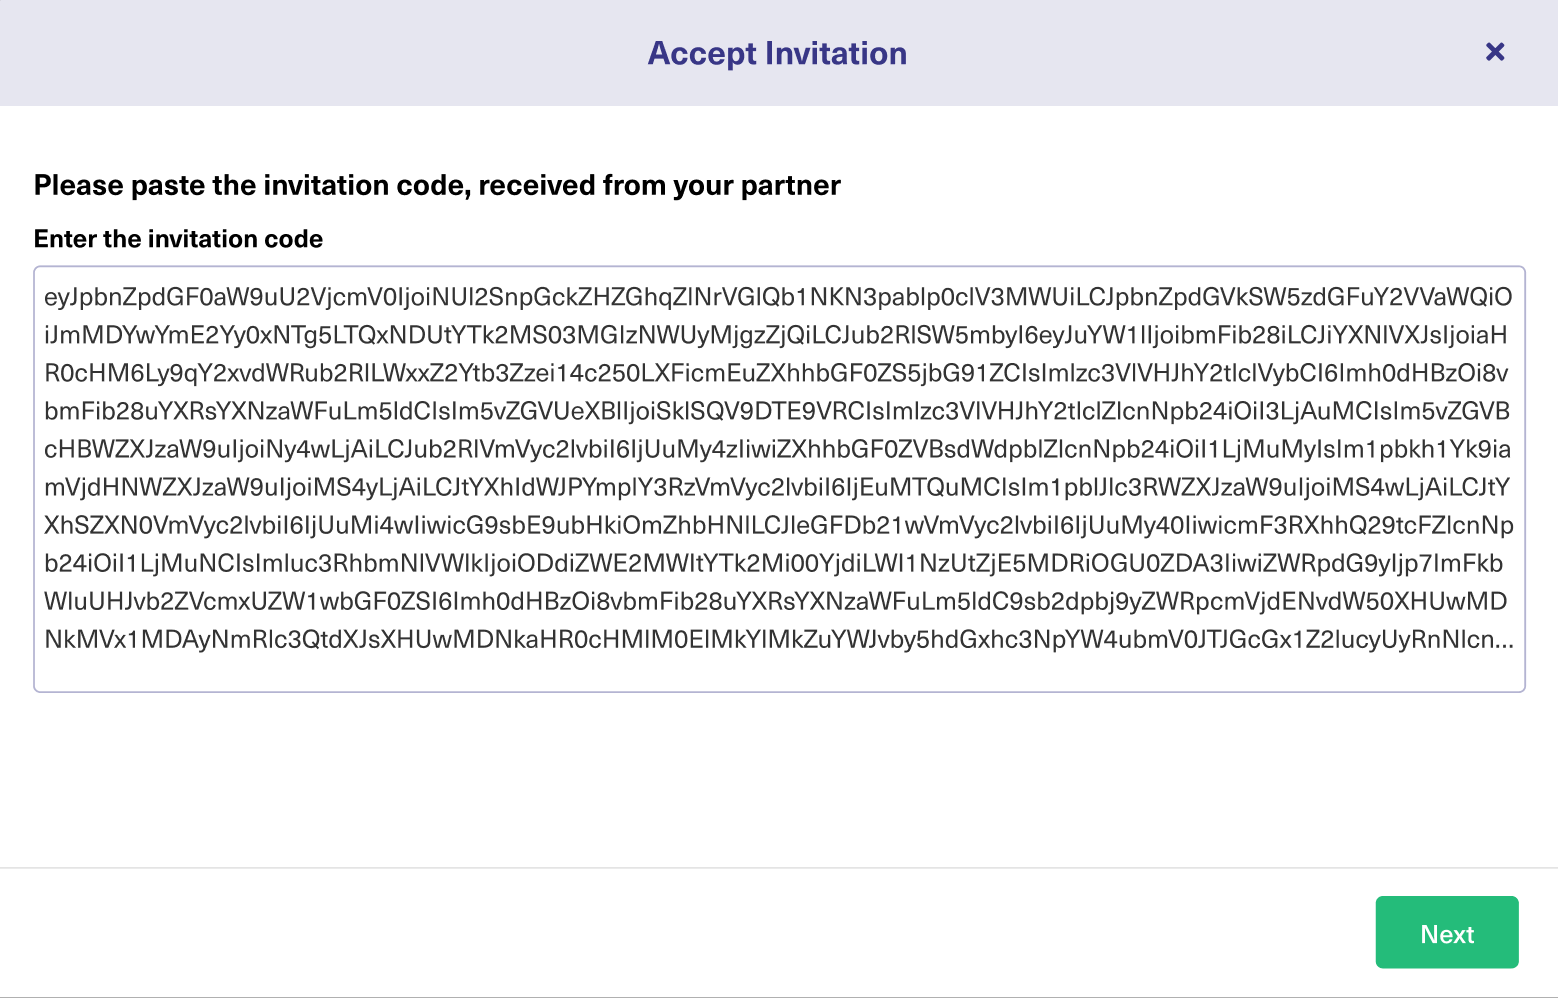
3. Paste the invitation code.
Paste the invitation code that you received from the other side.
And click Next.
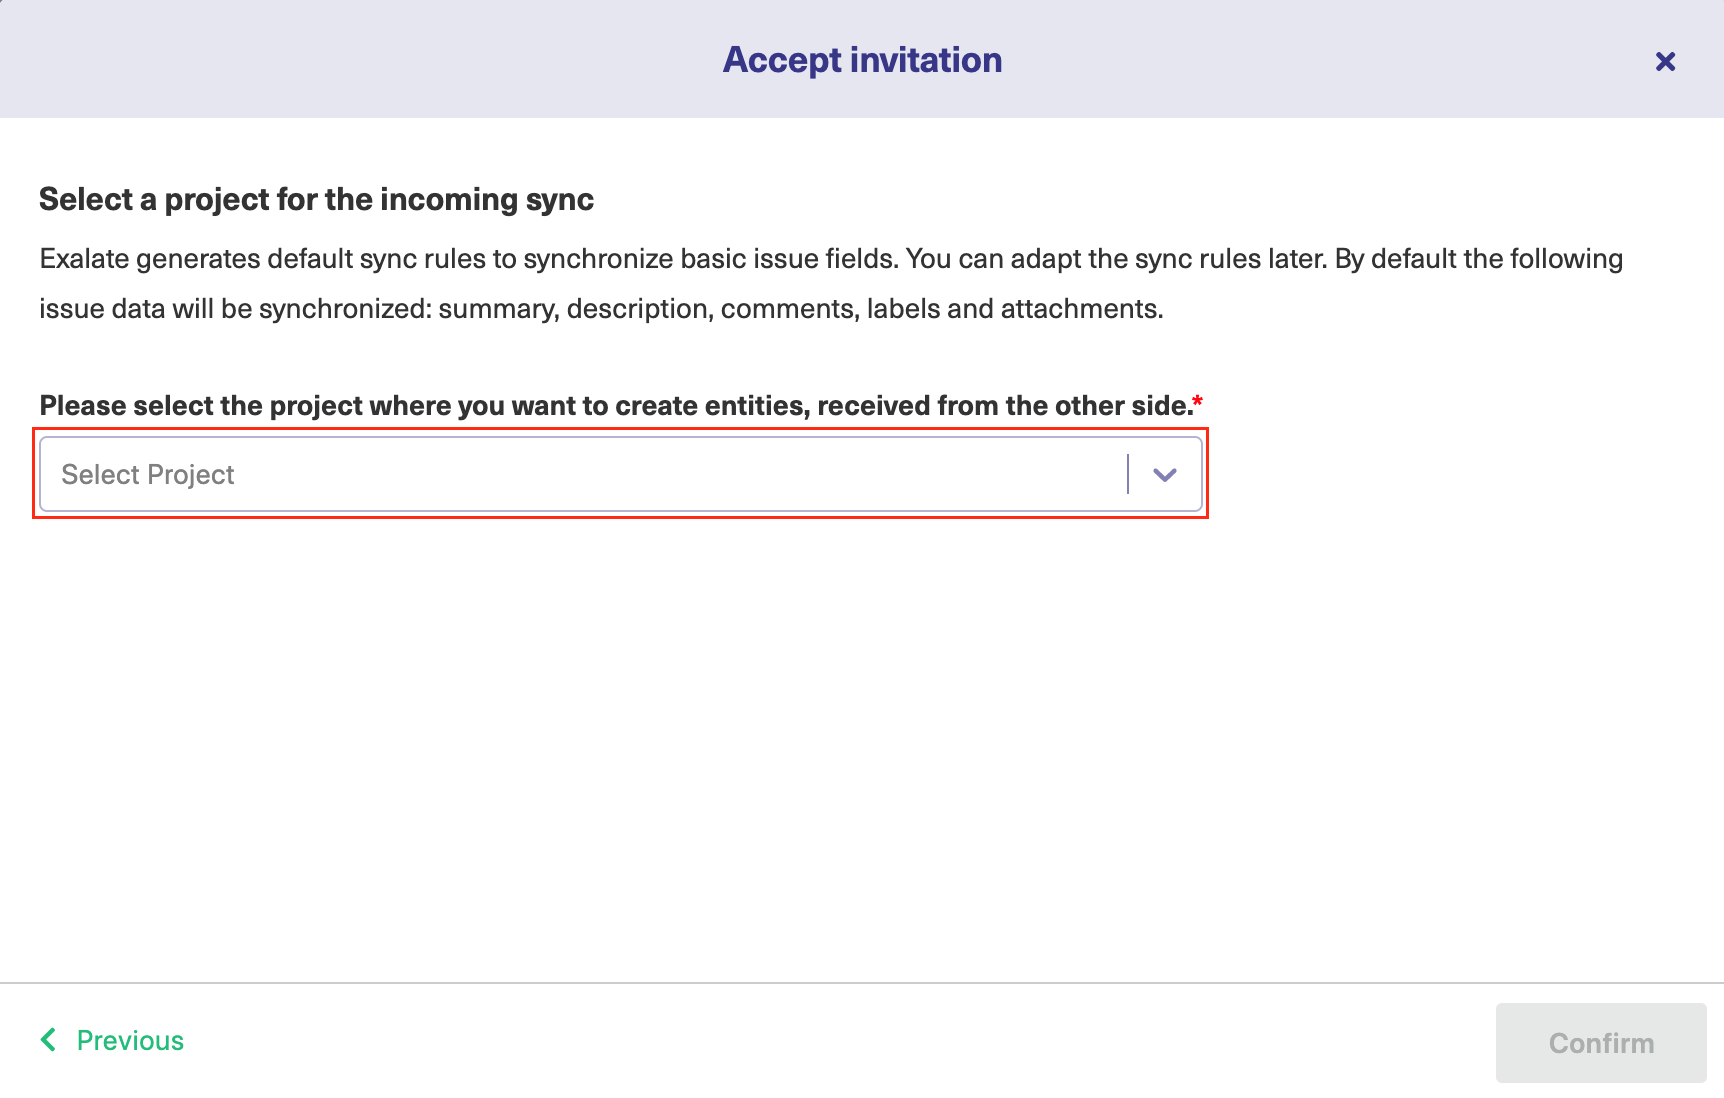
8. Select a project where you would like to sync issues received from the other side.
And click Confirm.
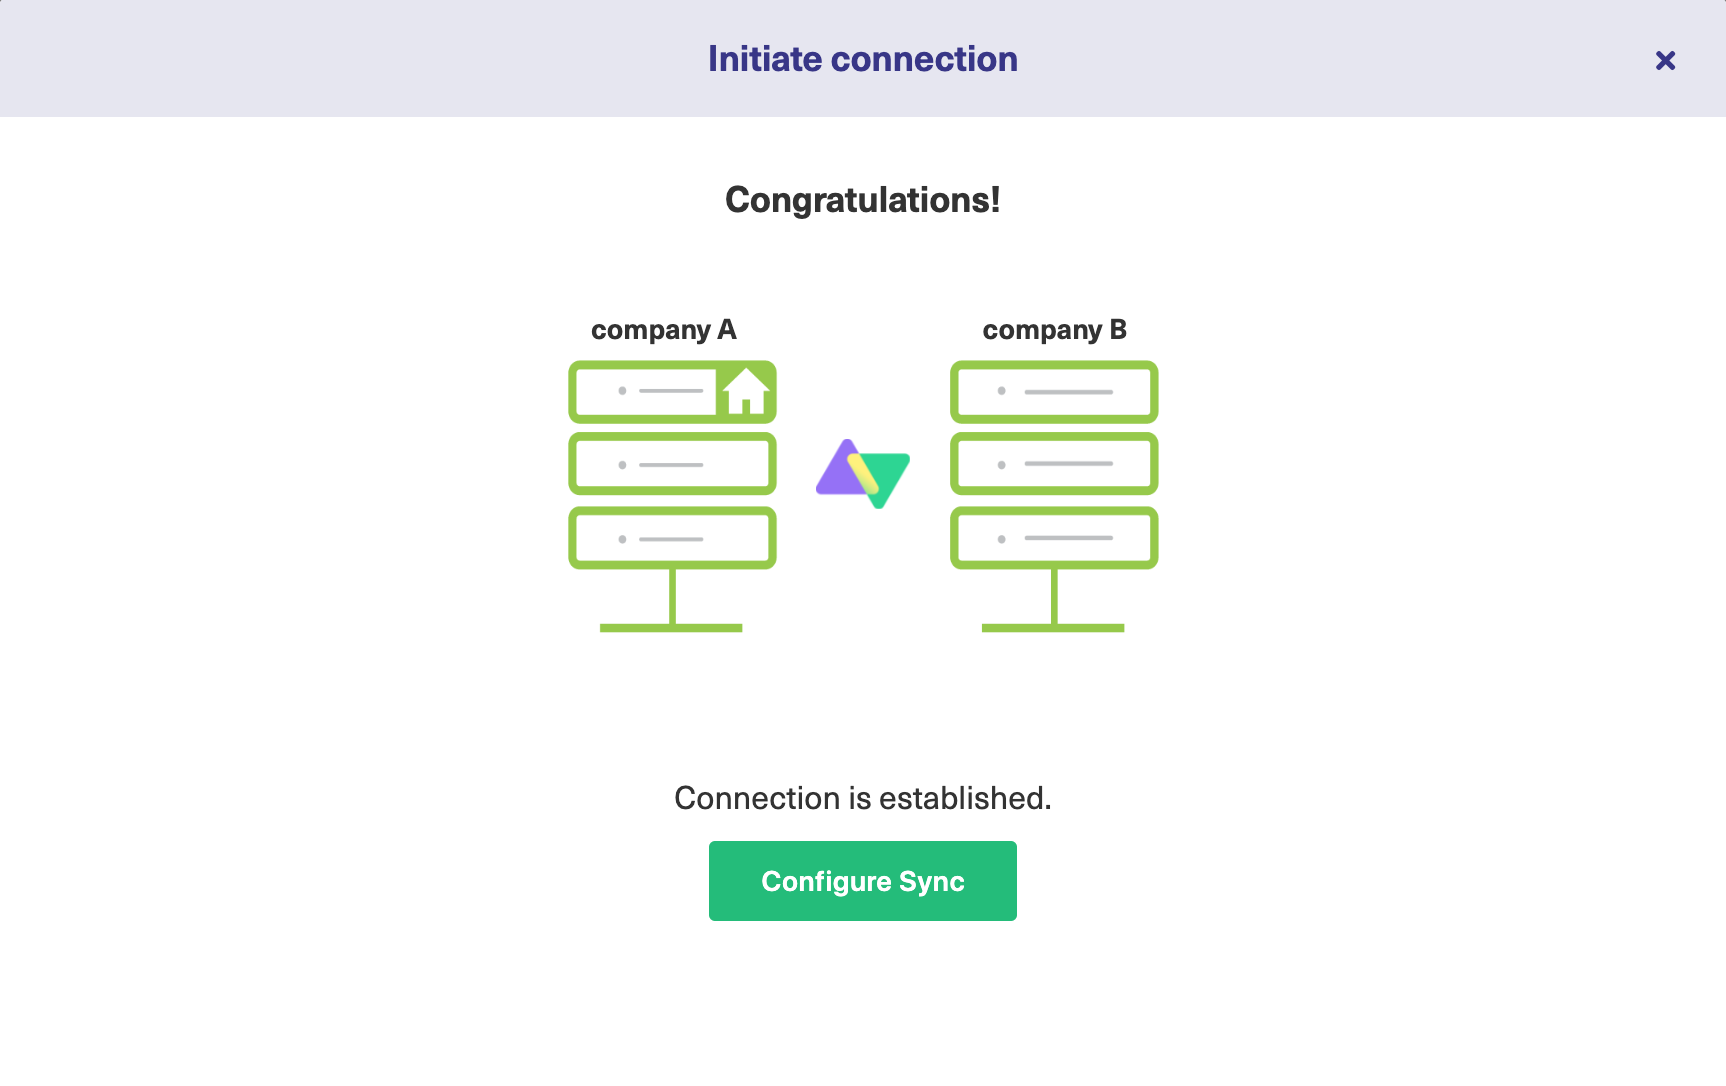
 Congratulations! The connection is set up.