This article applies to Exalate Classic only. For New Exalate, refer to this documentation.
This article describes how to grant users permission to use Exalate on Salesforce.
When installing Salesforce from the AppExchange marketplace you can choose whether to install the app for all the users, admins only, or some specific profiles.
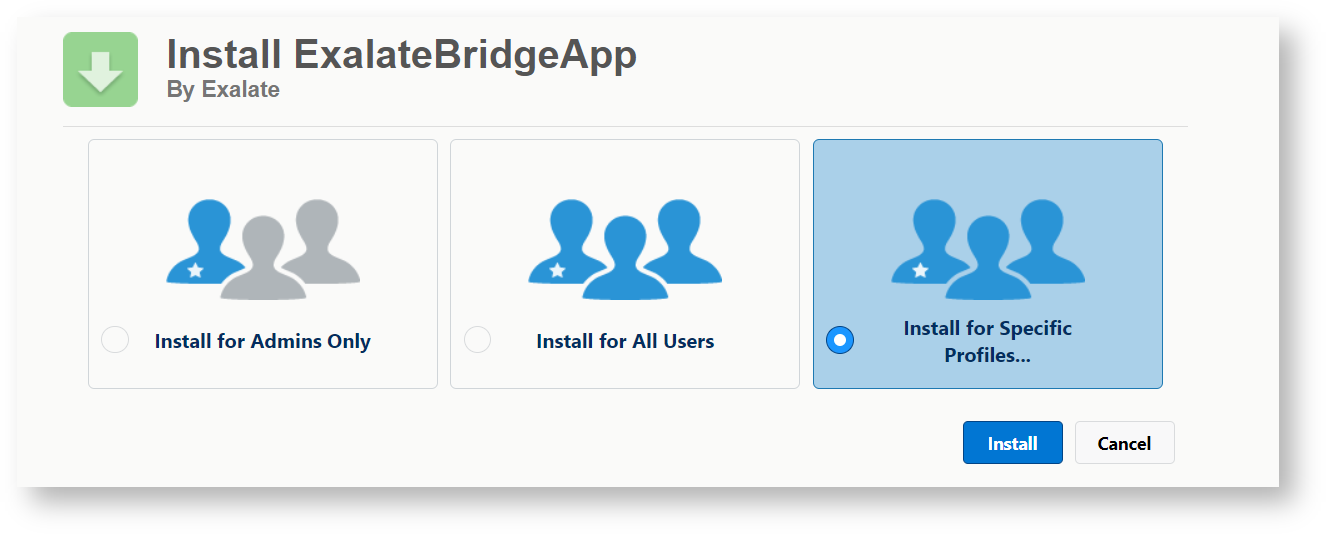
If you later change your mind, you can grant permissions to specific user profiles to use Exalate.
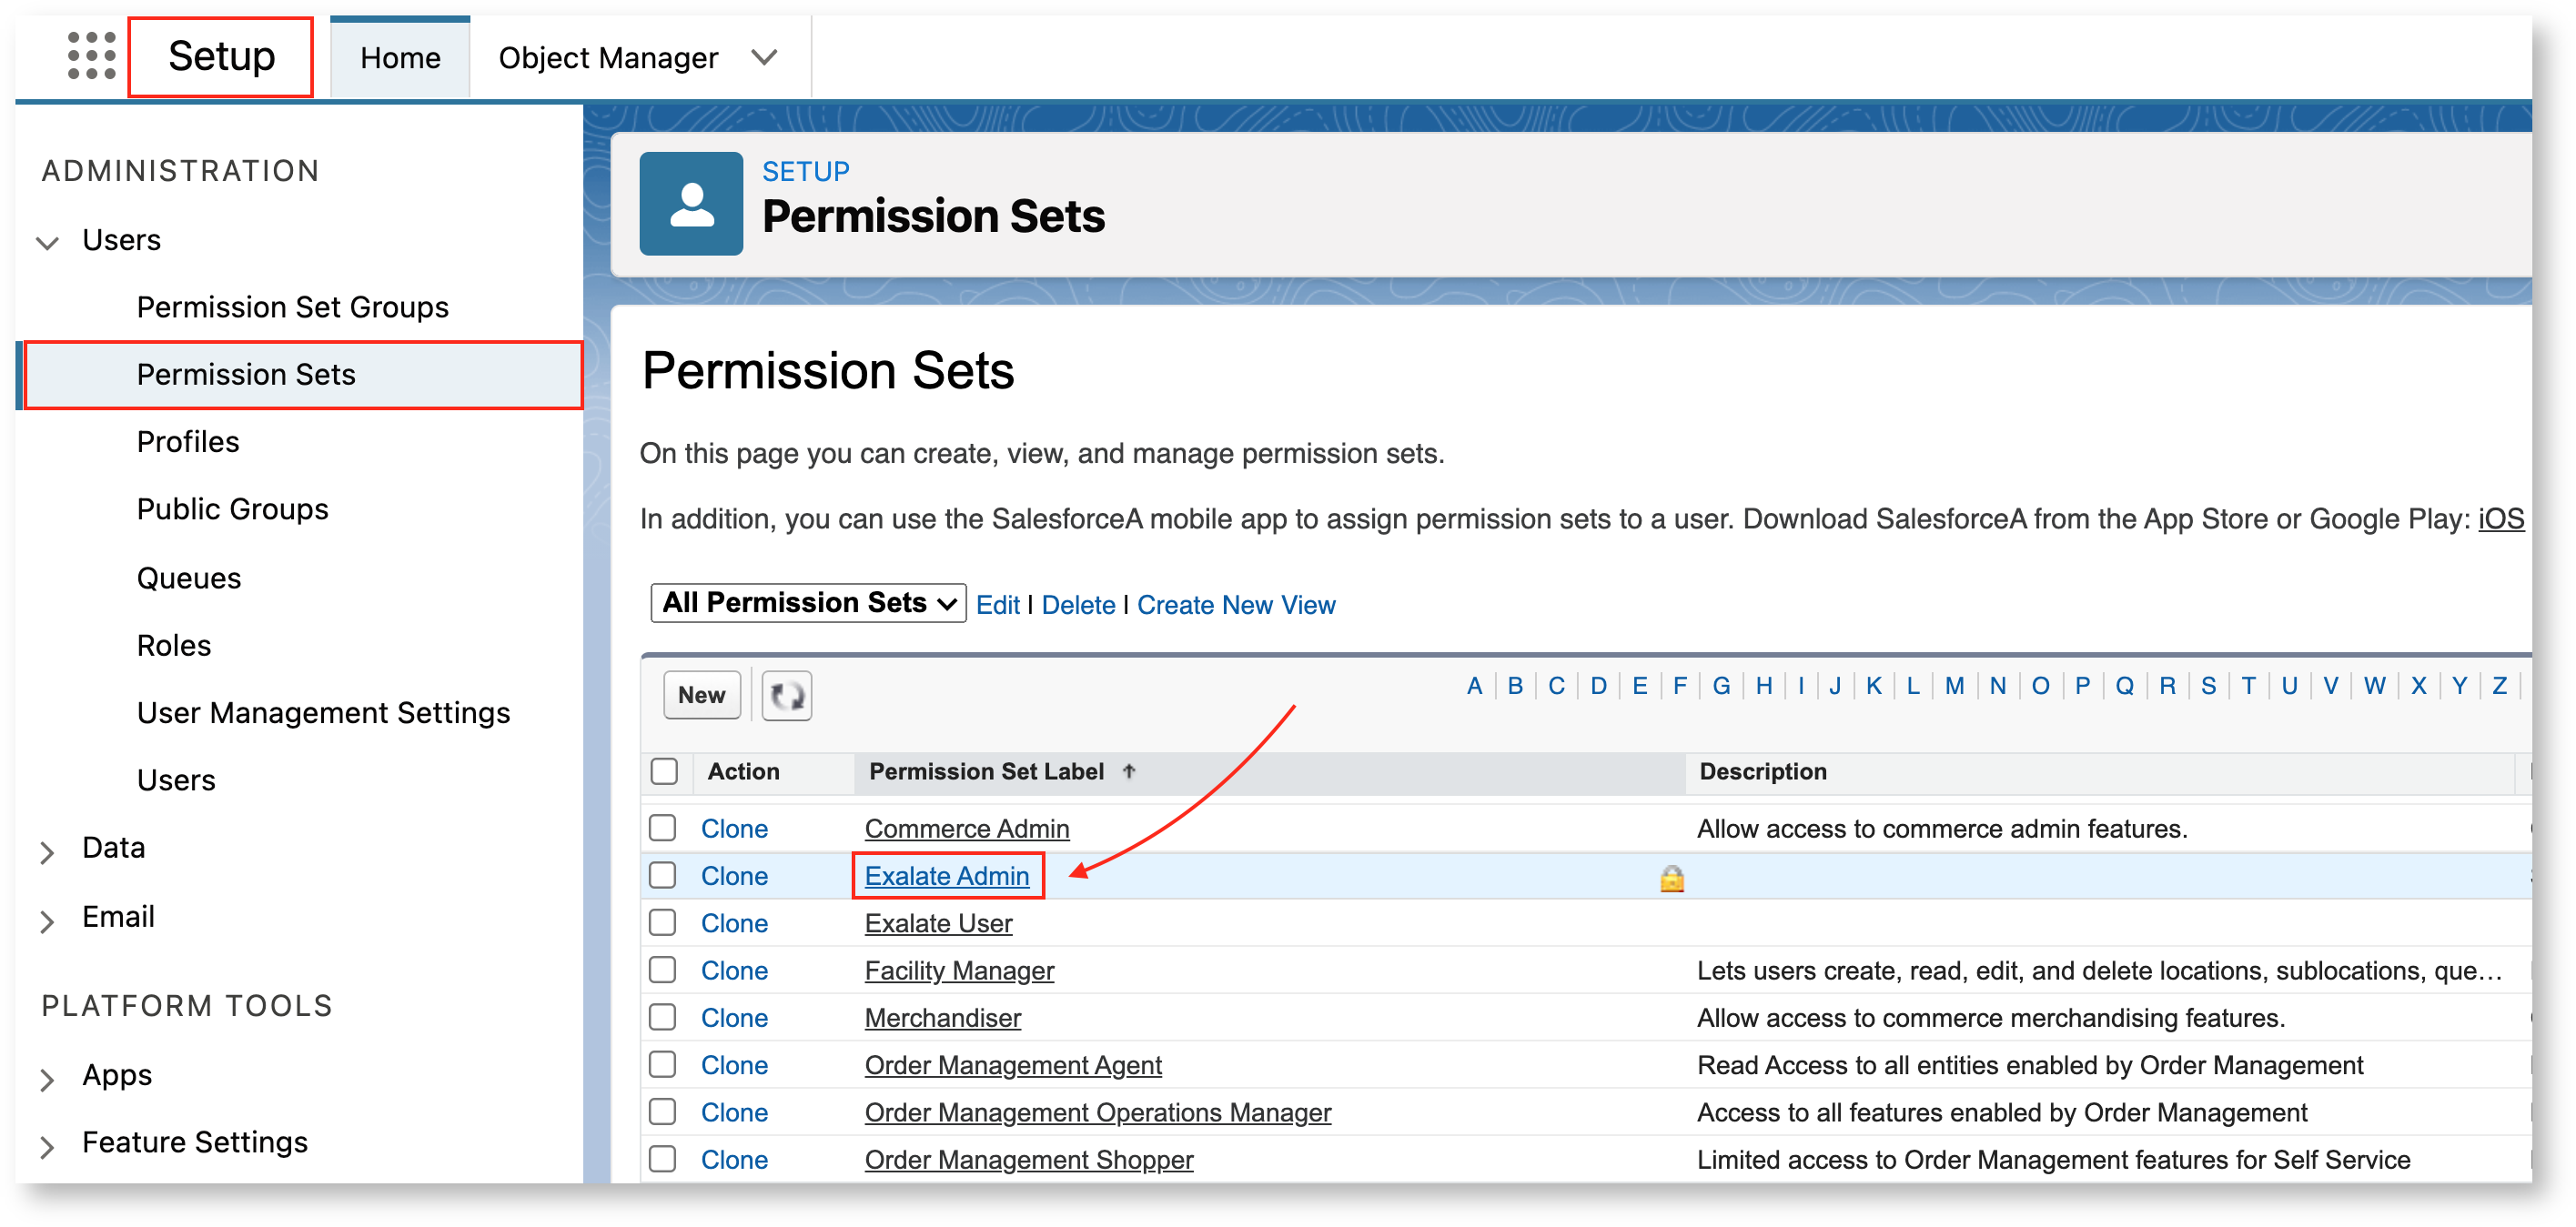
Follow the steps below to assign Exalate Admin permissions:
- Go to Setup -> Users -> Permissions sets -> Exalate Admin.
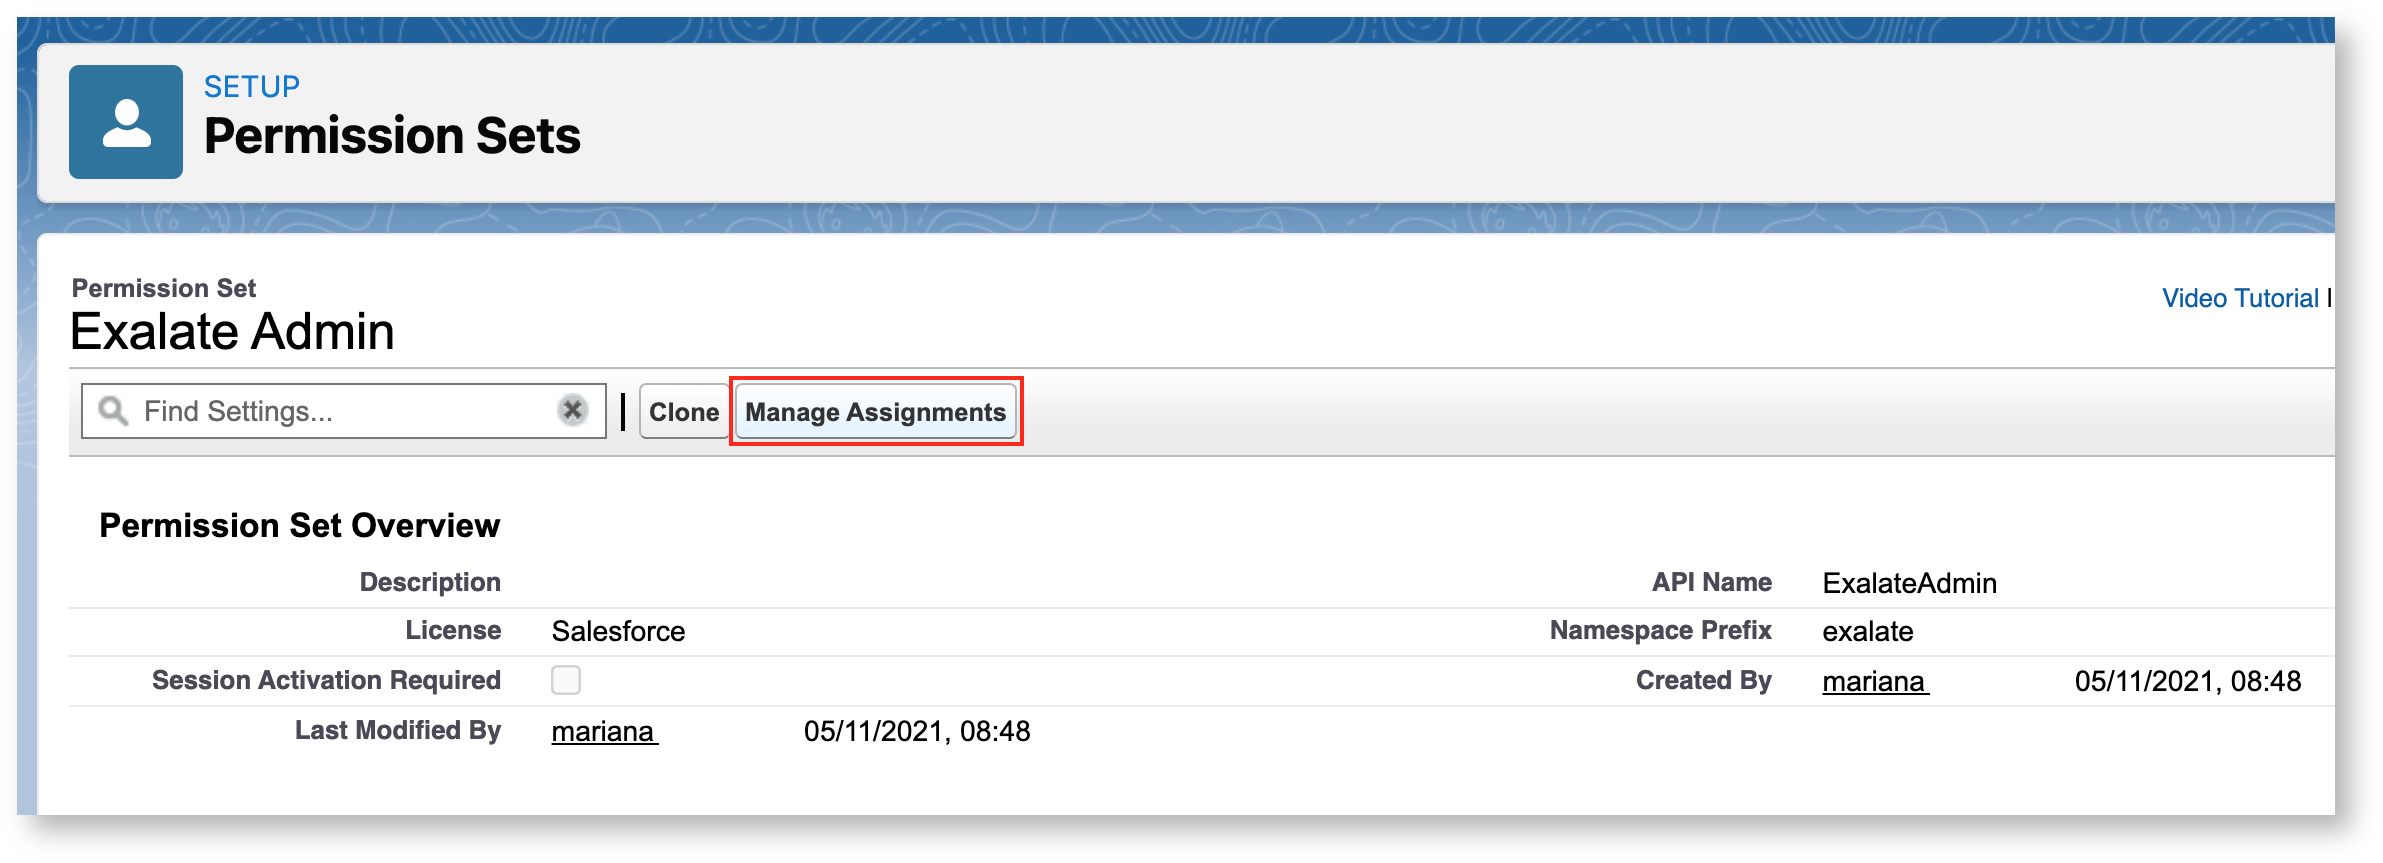
- Click Manage Assignments.
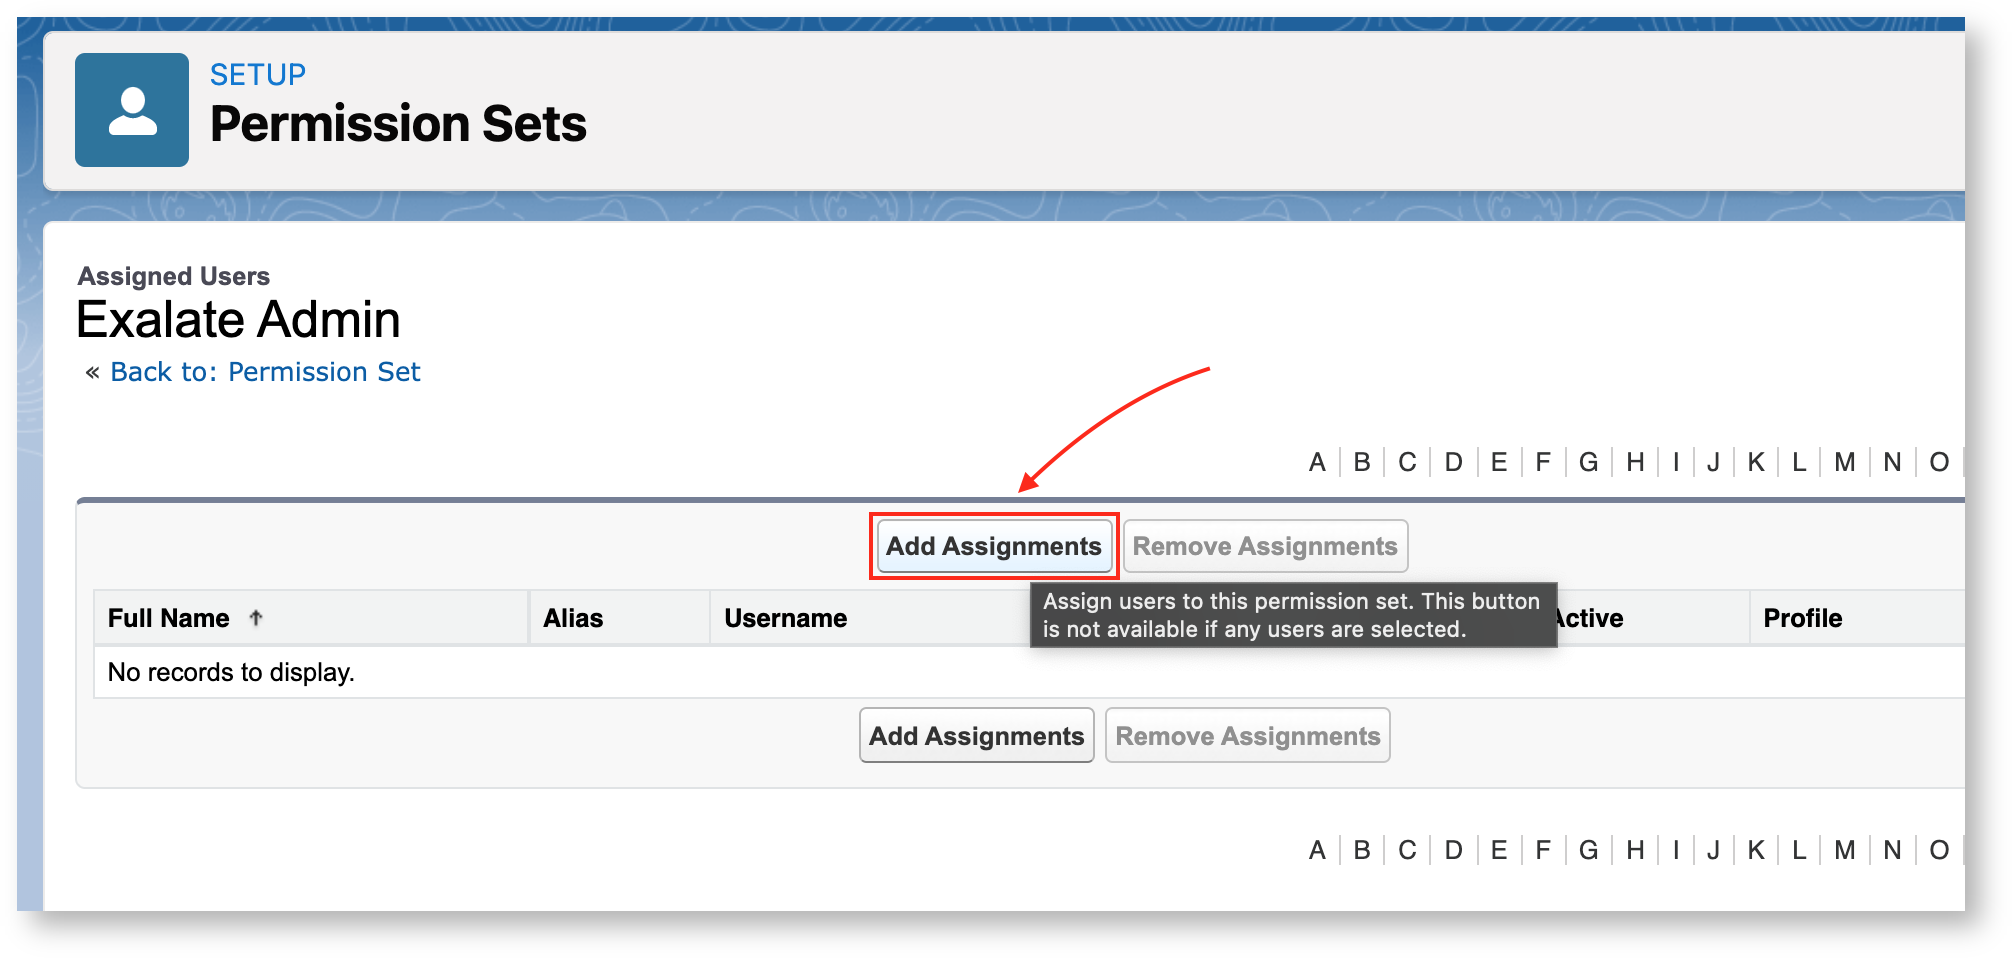
- Click Add Assignments.
- Select a user you want to give permissions to and click AssignExalate admin permissions to grant access to the Exalate console. With Exalate user permissions, a user can only access the sync panel.
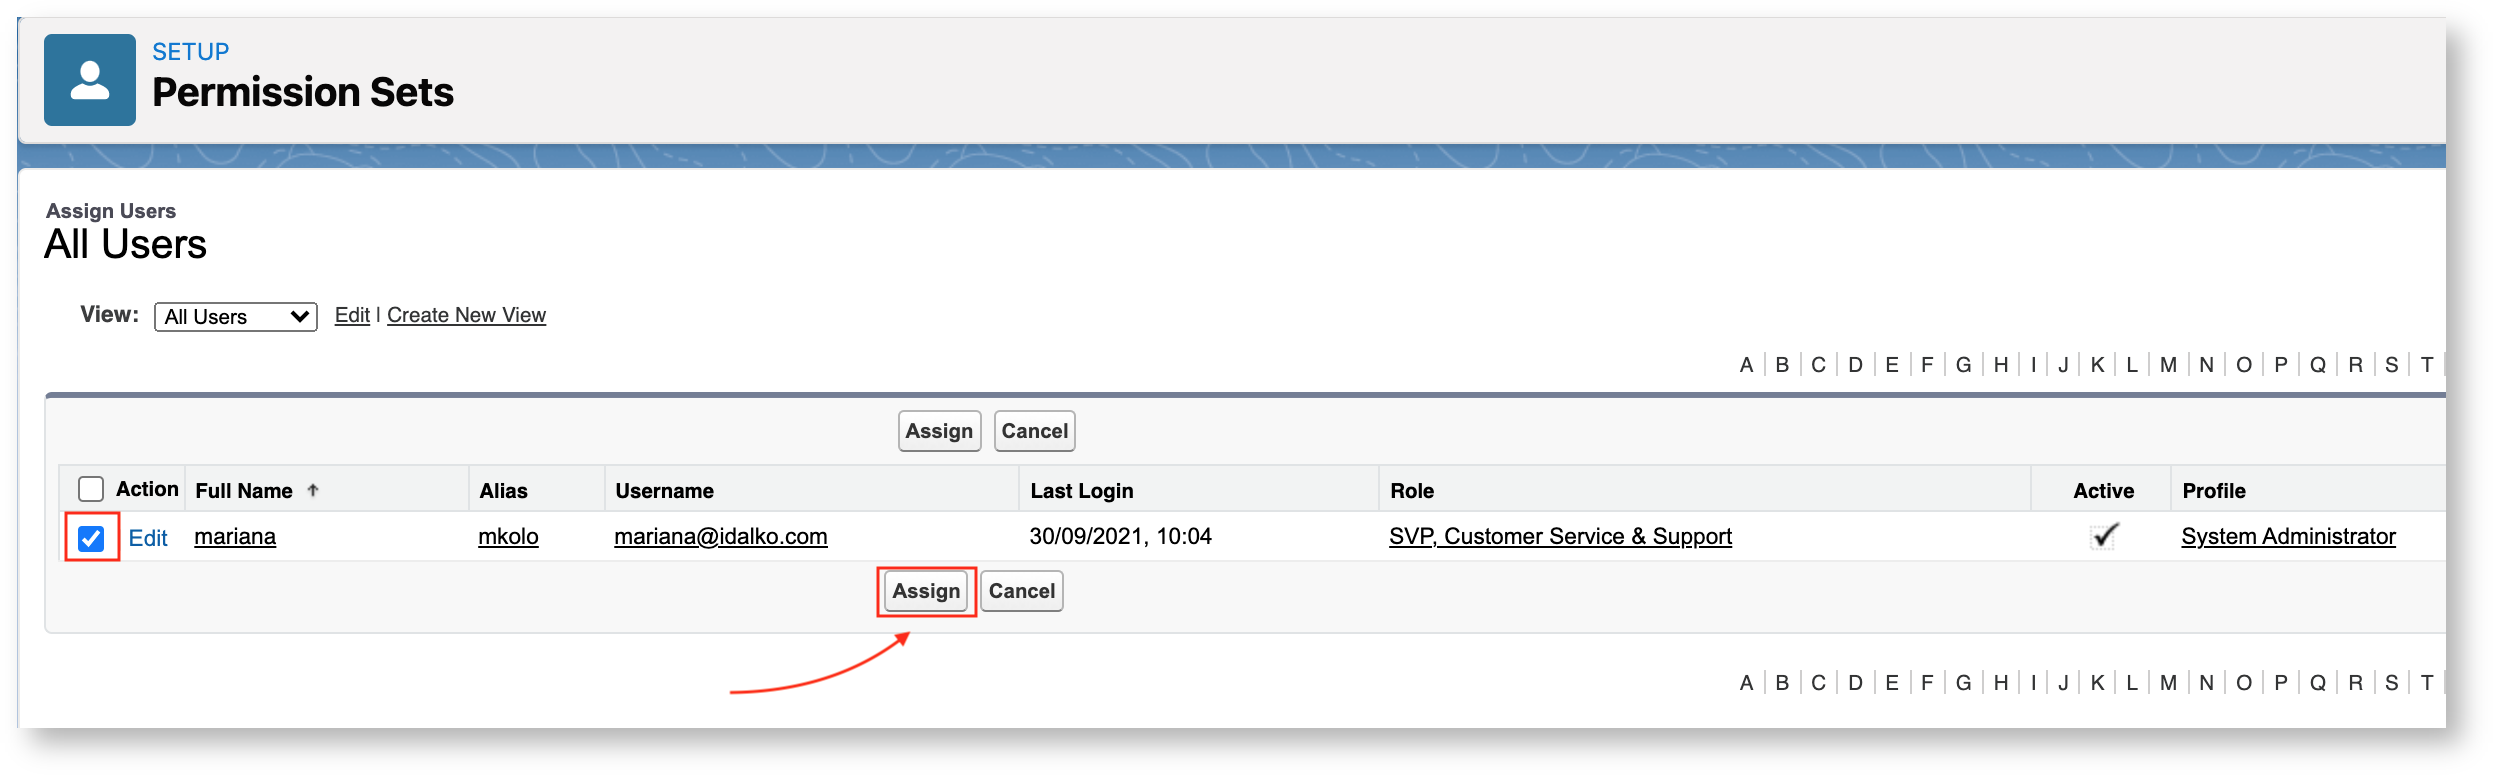
- Click Done.


Delegated Admin Access for Non-System Admins
In some situations, you may need to grant non-system admins access to the Exalate Admin Console without giving away system-wide admin permissions. This would allow you to delegate admin maintenance tasks, such as adding, editing, and deleting Exalate configurations.
For Salesforce, it is possible to install the app for specific profiles and the system admin can configure a specific profile to access the app configuration. This is done by assigning the “Exalate Admin” permission set to the salesforce user with Standard User Profile.