This article applies to Exalate Classic only. For New Exalate, refer to this documentation.
With the Connect operation, you can sync 2 existing entities with each other. These entities can be in different projects or instances.
Once you connect issues using the Connect operation, all updates are synchronized automatically according to the sync rules specified in the connection. This article describes how to connect entities from the sync panel.
Note: At the moment, the sync panel is available only for Azure DevOps Service, Jira Cloud, Jira on-premise, Salesforce, and Zendesk. Use the Bulk Connect menu in the Exalate admin console for other platforms. You can also use it to sync entities in bulk in Exalate for Azure DevOps, Jira Cloud, Jira on-premise, Salesforce, Freshdesk, Freshservice and Zendesk. For more information, please read Bulk Connect.
Note: For the Connect operation in ServiceNow and GitHub, use the Entity Sync Status on the left side of the screen.
Note: At the moment, there is a security vulnerability related to the Connect operation. To avoid it, we recommend making sure that the proxy user doesn't have access to private projects.
For more information read Security Vulnerability -- You can access private project data with the Connect operation
Connect Issues in Jira on-premise
There are 2 ways to Connect issues in Exalate for Jira on-premise:
- Connect button on the issue view.
- Bulk Connect option in the Exalate admin menu.
Important: If the issues you want to connect existing comments, please use the Bulk Connect option in the Exalate admin menu.
To connect issues with the Connect button in Jira on-premise:
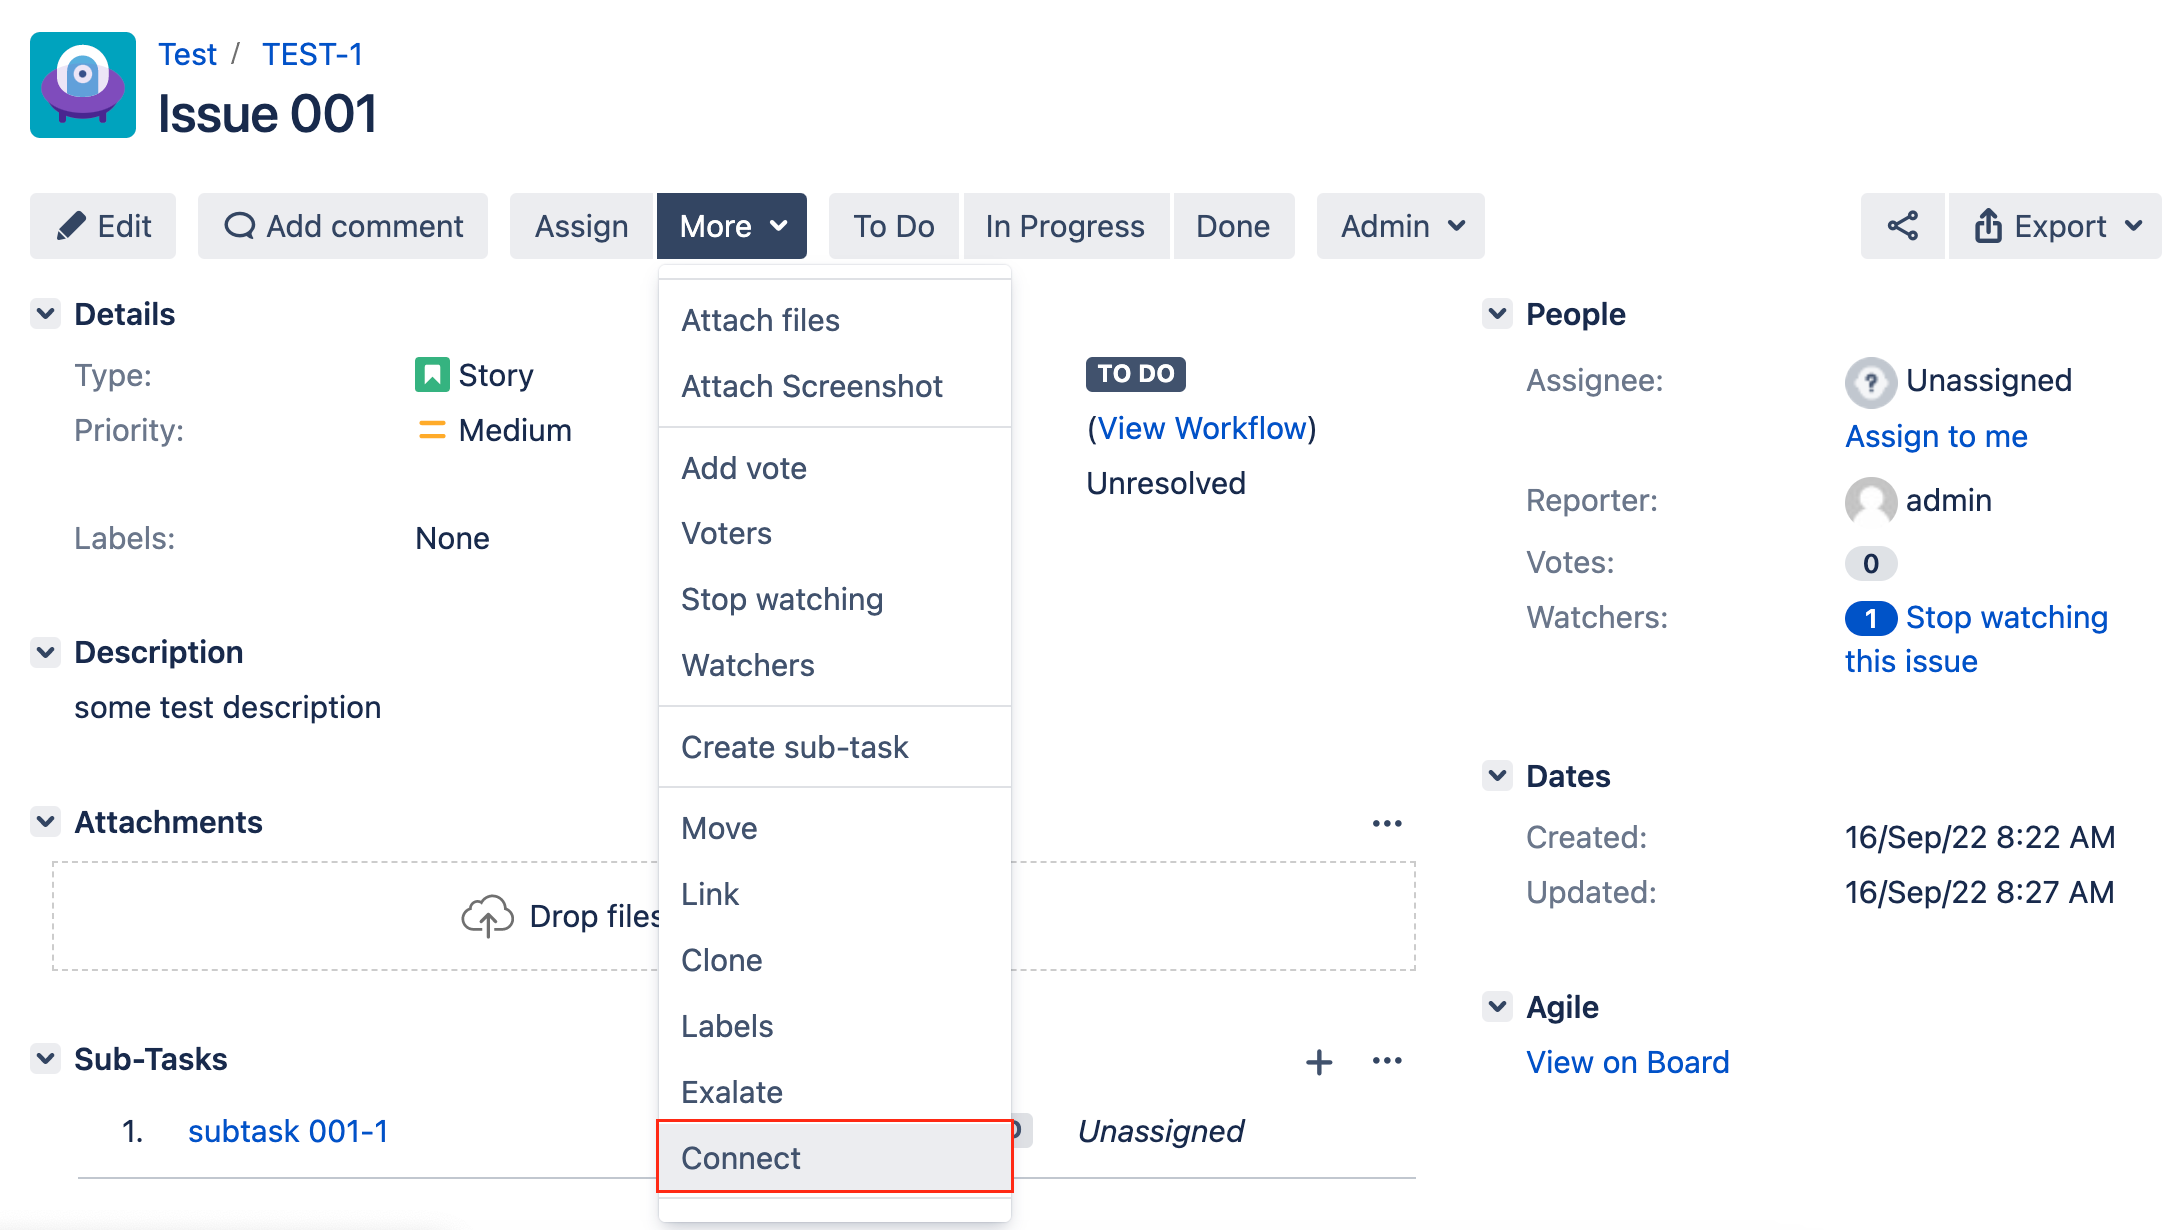
- Open an issue you want to connect with an issue on the other side.
- Select More-> Connect from the drop-down.
- Enter the key of the remote issue you are connecting this issue within the Remote issue URN field.
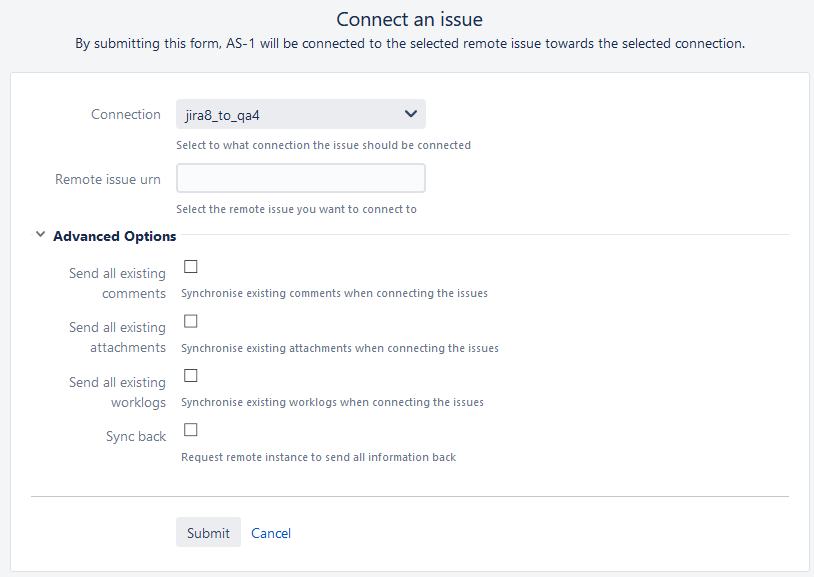
- Set up Advanced options if necessary.
This section allows specifying if existing comments, attachments, and work logs should be synced:-
- Send all existing comments
The comments which existed before the issue is connected are sent over to the remote issue. The local data filter or remote change processor behavior is applied. For instance, if the relation specifies that local comments should remain local, then these is not sent over. - Send all existing attachments
All attachments that existed before the issue is connected are sent over. The local data filter or remote change processor behavior is applied. For instance, if the relation specifies that local attachments should remain local, then these are not sent over. - Send all existing worklogs
All existing work logs are sent over. The local data filter or remote change processor behavior is applied. For instance, if the relation specifies that local worklogs should remain local, then these are not sent over. - Sync back
When this option is selected, all information available on the other side is synced back to the local issue.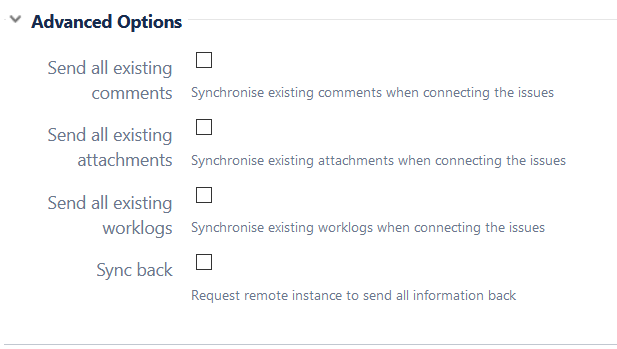
- Send all existing comments
-
- Click Submit to connect issues.


Note: If you want to sync the existing comments, attachments, or worklogs, make sure you have configured advanced options before submitting.
Connect issues in Jira Cloud
There are 2 ways to Connect issues in Exalate for Jira Cloud:
- Connect button on the issue view.
- Bulk Connect issues option in the Exalate admin menu.
Important: In case the issues you want to connect have existing comments, please use the Bulk Connect issues option in the Exalate admin menu.
- Open an issue you want to connect to another issue.
- Use the Connect button on the right sidebar (the operation is available only if the issue was not synchronized before).
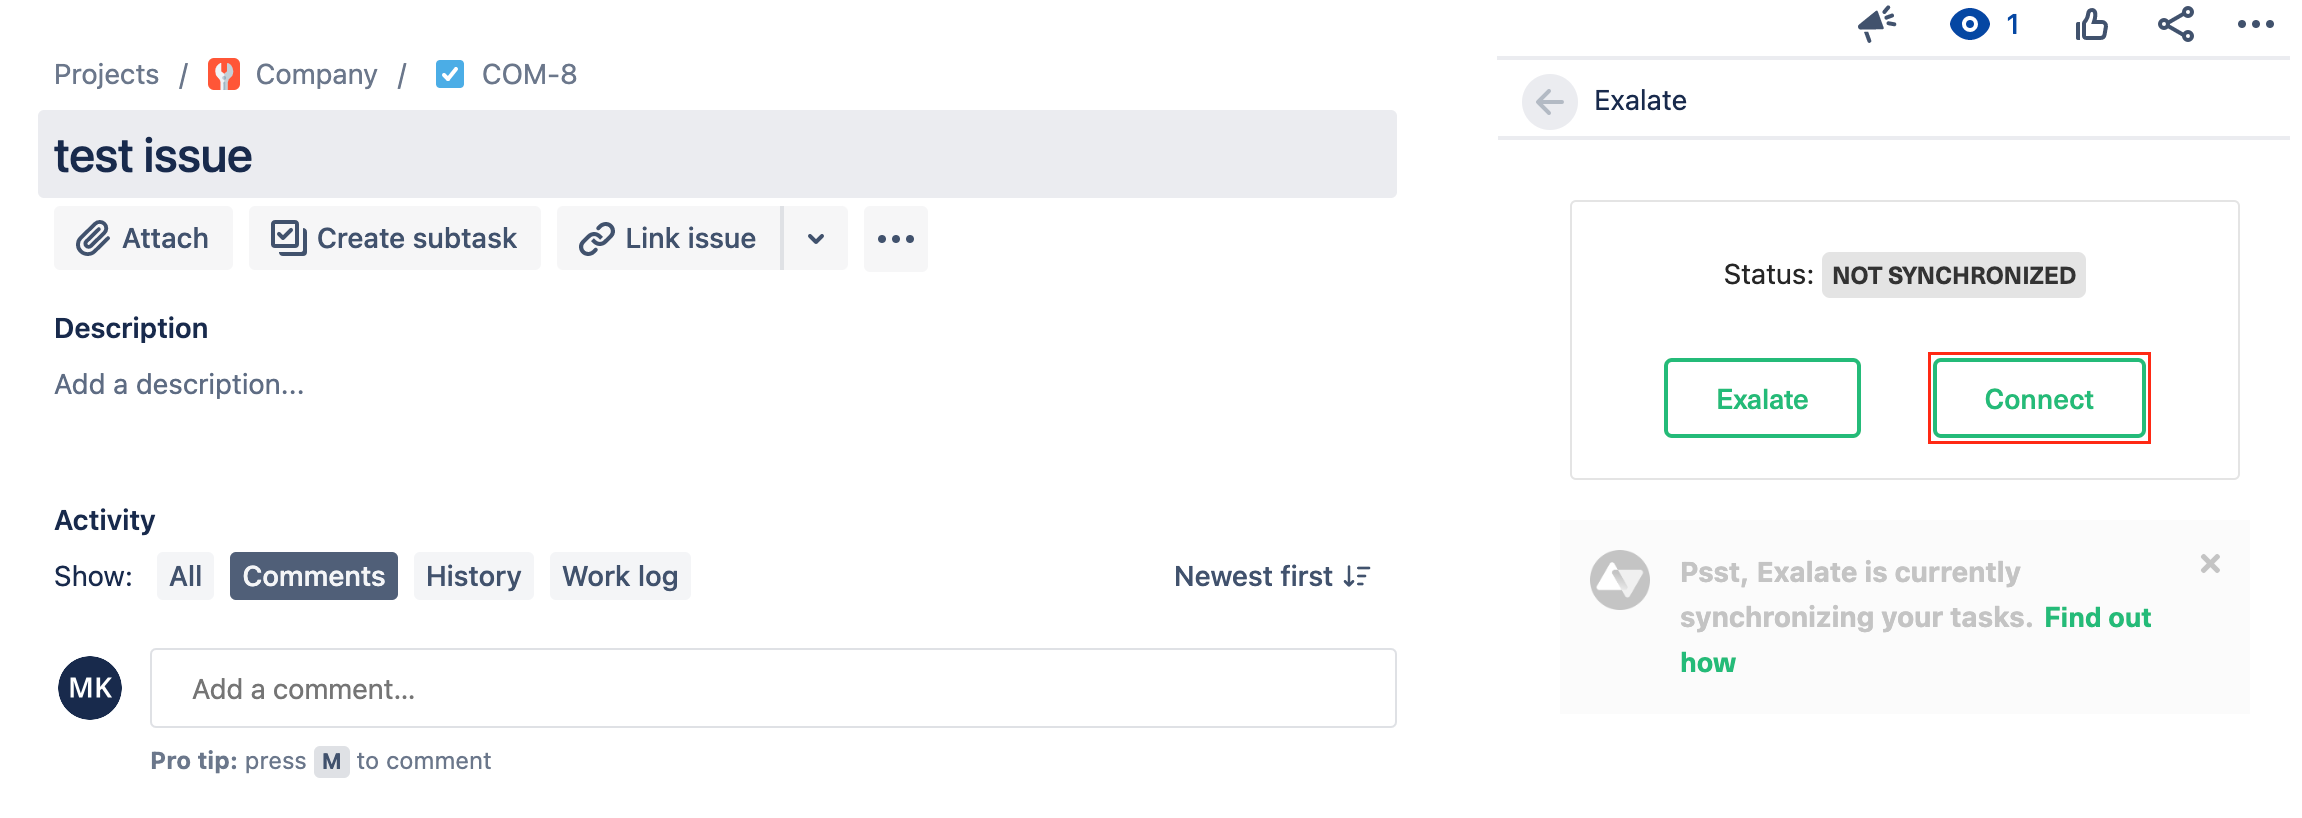
- Select a Connection from the drop-down.
- Specify the key of the remote issue you are connecting with.
- Activate additional sync options if necessary.
- Click the Connect button to connect issues.


Connect Work Items in Azure DevOps
Note: Sync Panel is not available for Azure DevOps Server.
There are 2 ways to connect work items in Exalate for Azure DevOps:
- Connect button on the work item view.
- Bulk Connect issues option in the Exalate admin menu.
You can connect Azure DevOps work items directly from the work item view.
To connect work items with the Connect button:
- Open a work item you want to connect.
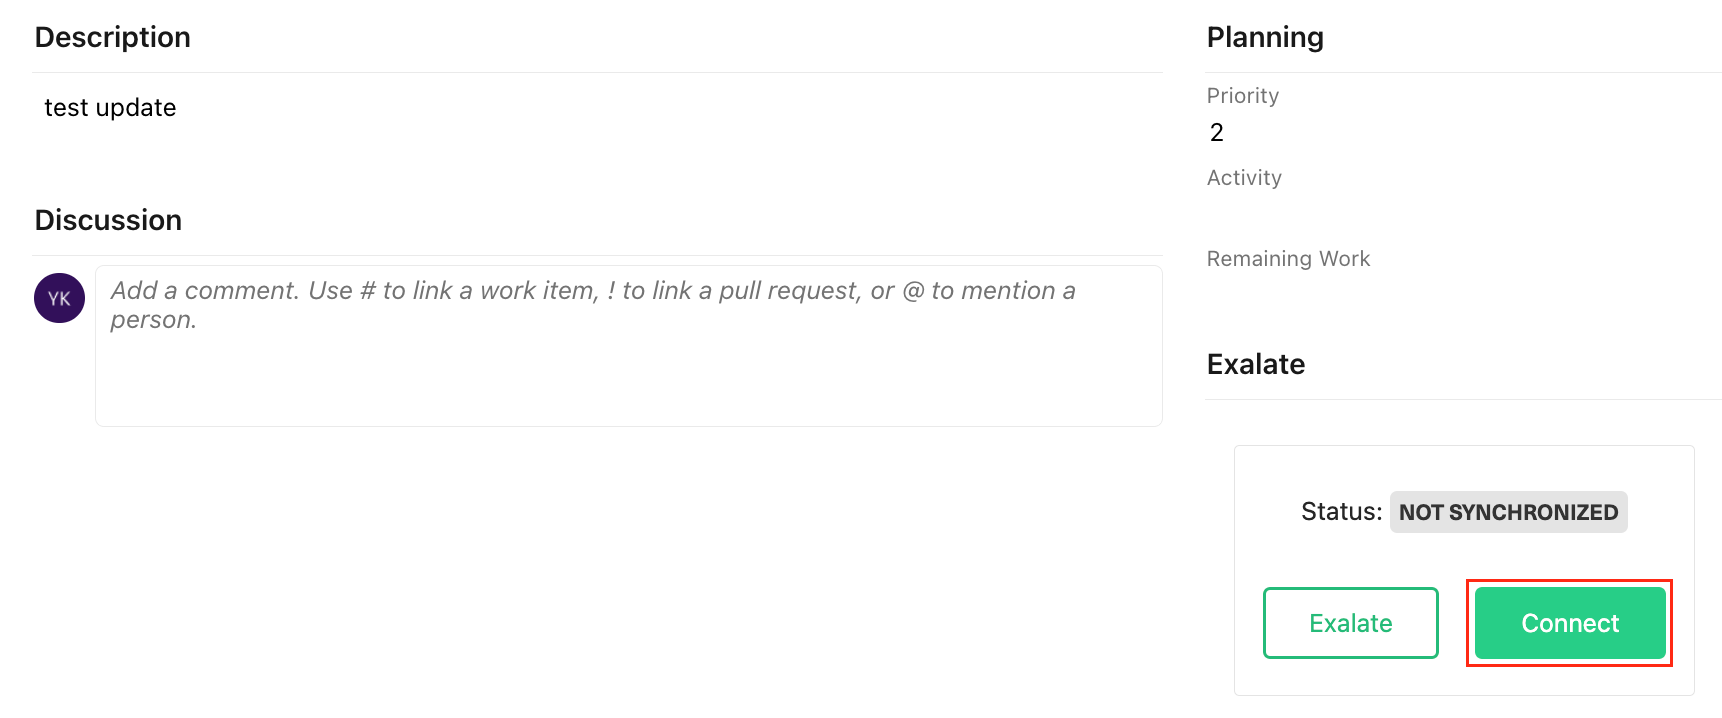
- Select the Exalate dropdown in the Details tab.
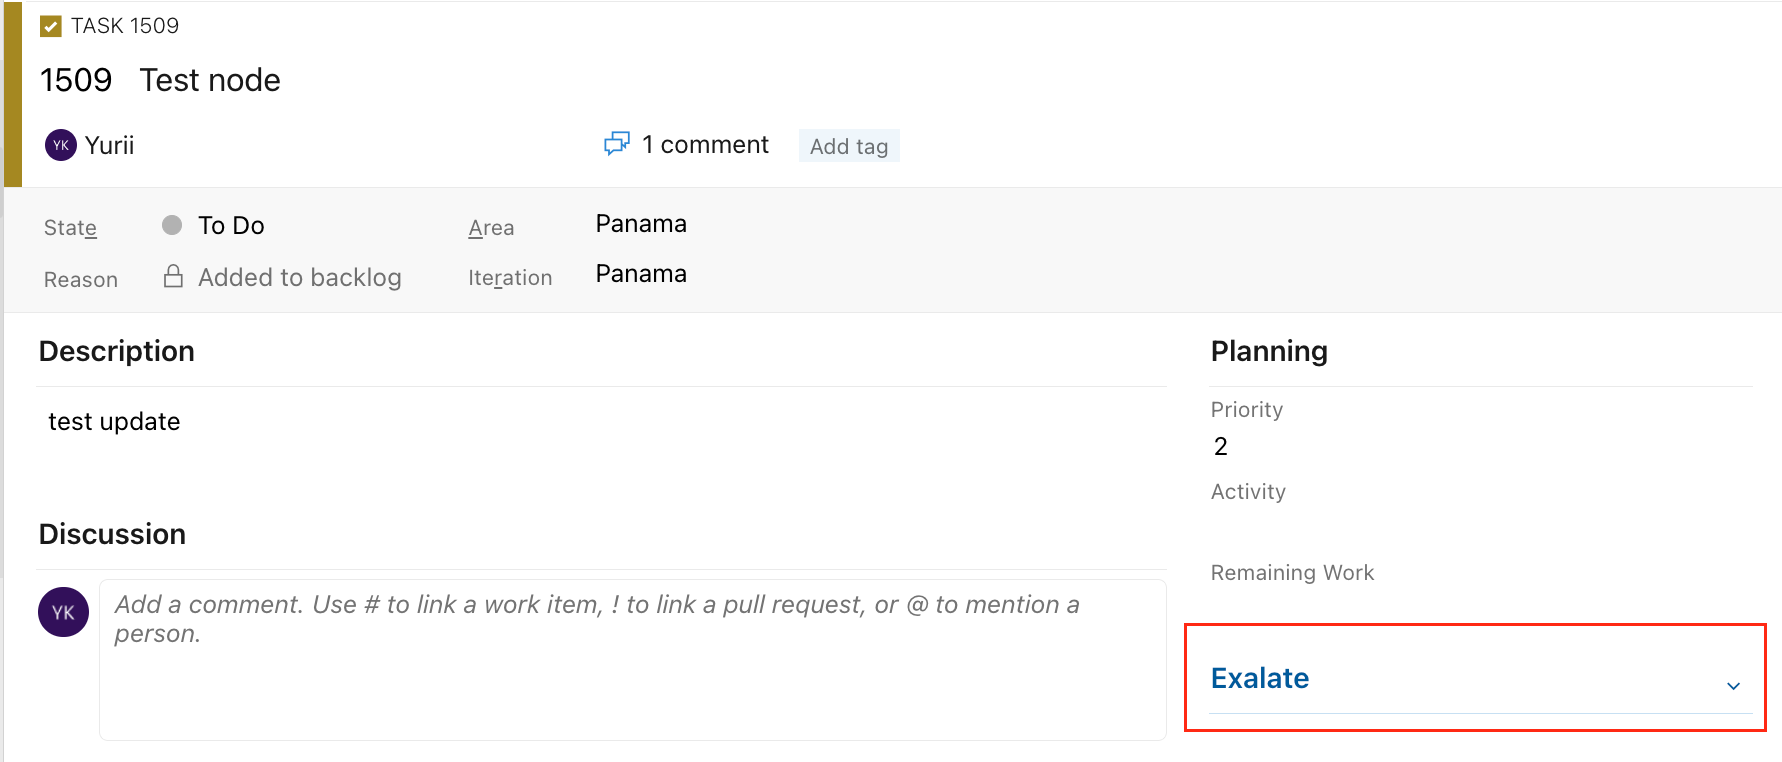
- Click Connect.
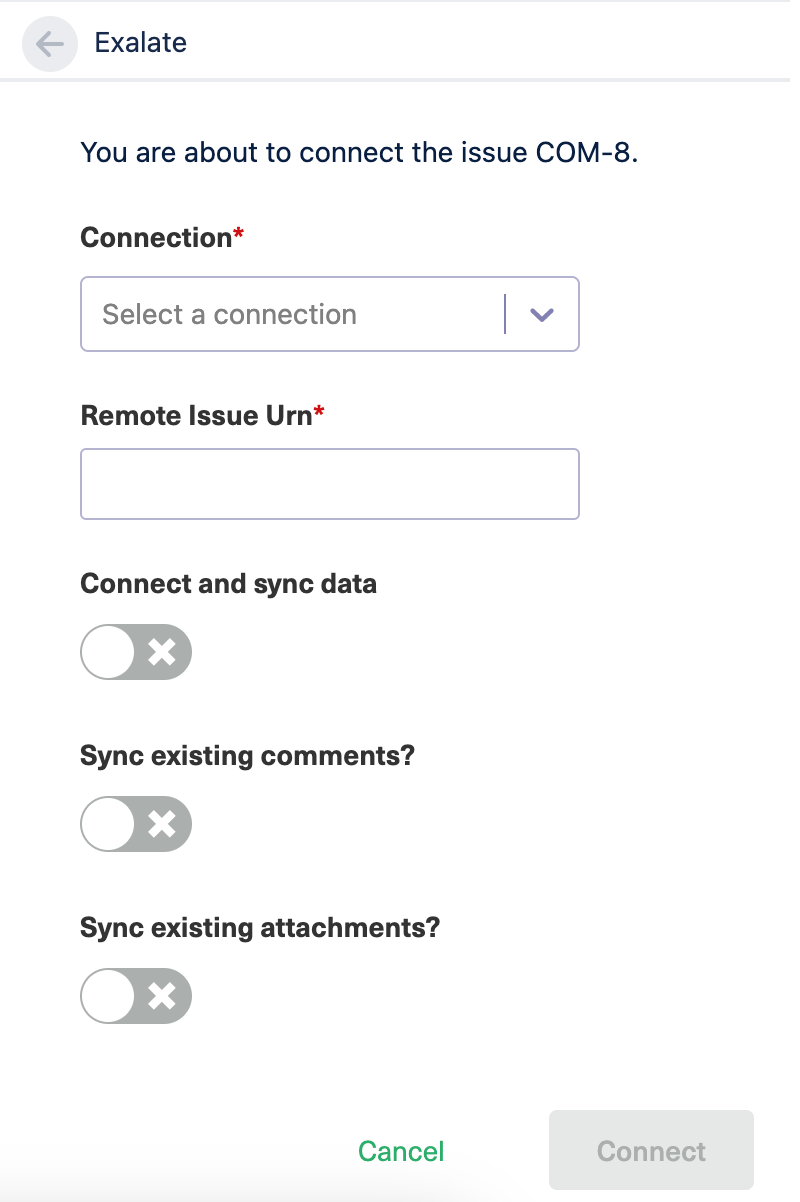
- Select a Connection from the dropdown.
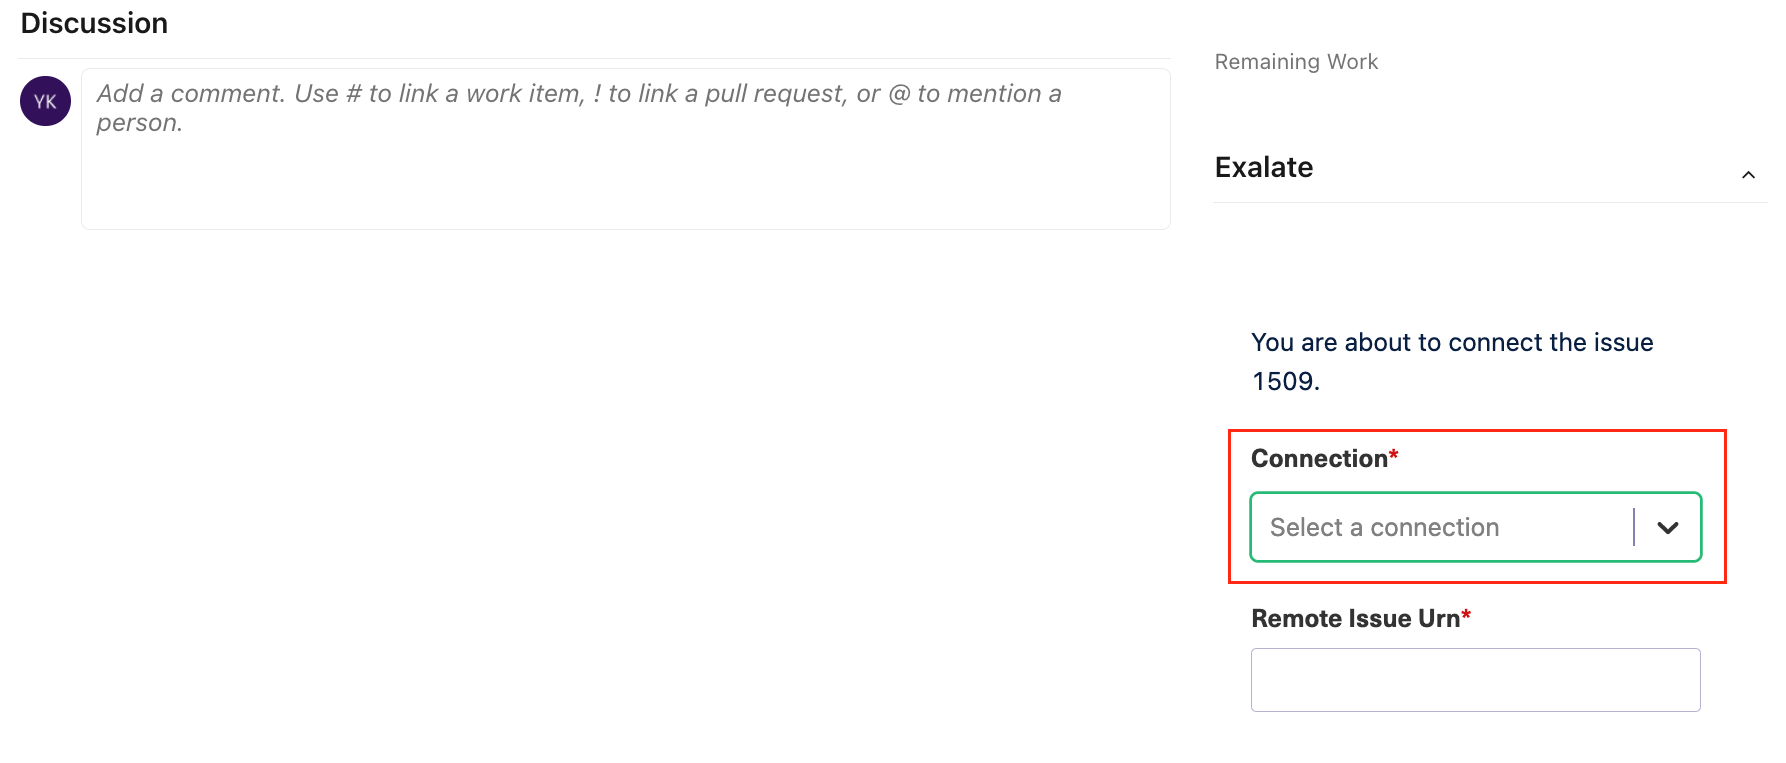
- Enter the key of the remote issue you are connecting to in the Remote Issue URNfield.

- Specify advanced options if necessary.
- Connect and sync data
If enabled, the local issue data is sent to the destination instance during sync. - Sync existing comments?
If enabled, all existing comments are sent over. The source data filter or destination change processor behavior is applied. For instance, if the connection specifies that source comments should remain local, then these are not sent over. - Sync existing attachments?
If enabled, all existing attachments are sent over. The source data filter or destination change processor behavior is applied. For instance, if the connection specifies that source attachments should remain local, then these are not sent over.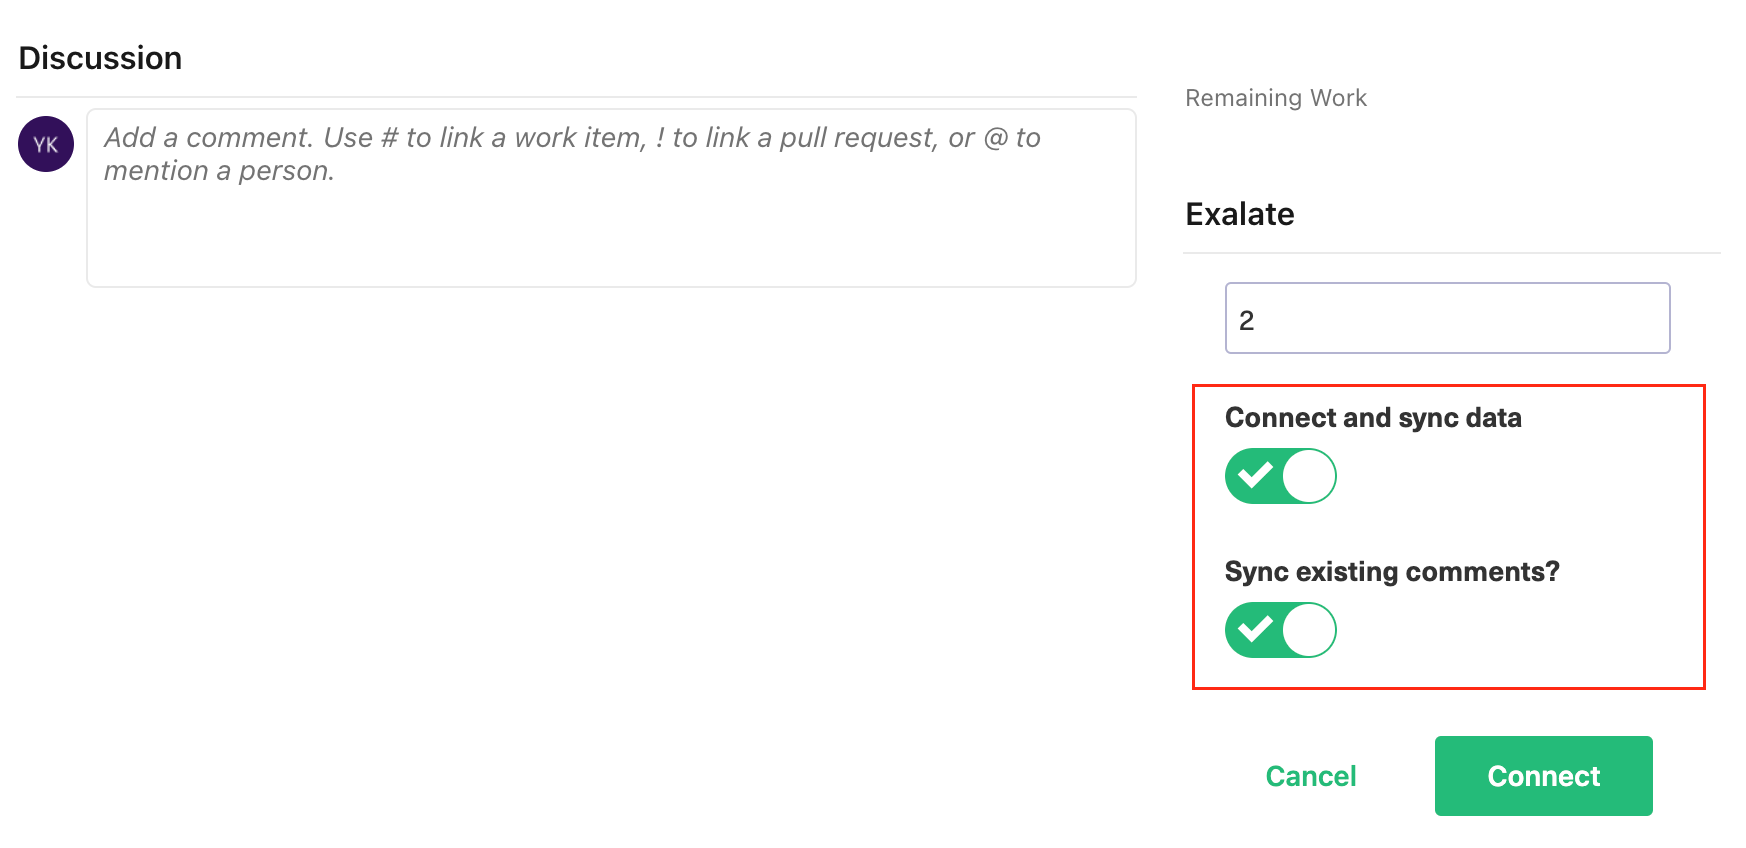
- Connect and sync data
- Click Connect.


Connect issues to GitHub
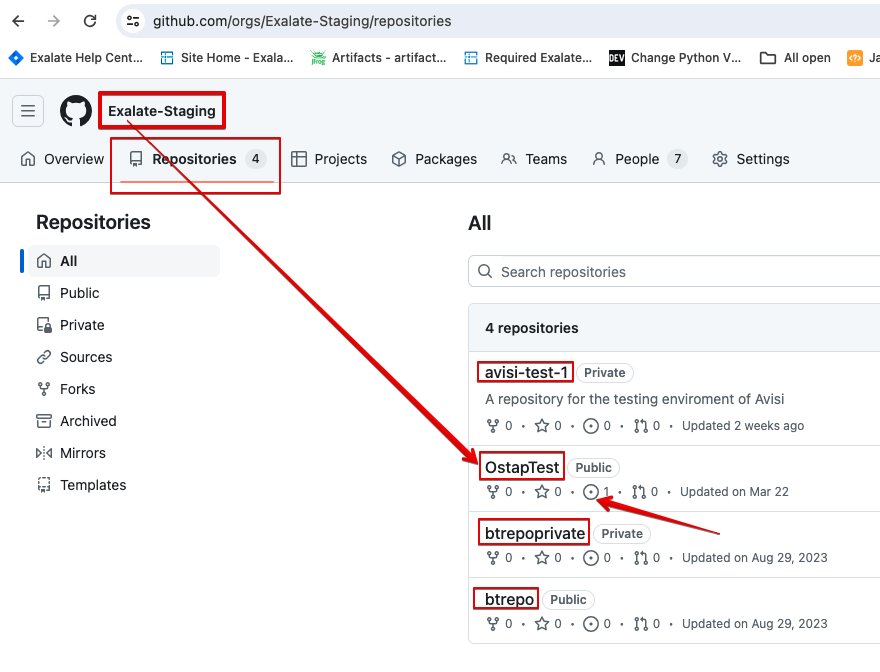
Important: When connecting entities to GitHub issues, please keep in mind that if the GitHub organization has more than one repository, the format to be used from the external instance should be: org/repoName-issue#, for example, exalate/public-43. In this example "43" is the entity URN.
TIP: How to find the Issue Number/Entity URN
Let's use this repository as an example. The OstapTest repository has 1 issue. Note that the FullRepositoryName is Exalate-Staging/OstapTest.
When you click on the issue, you see:
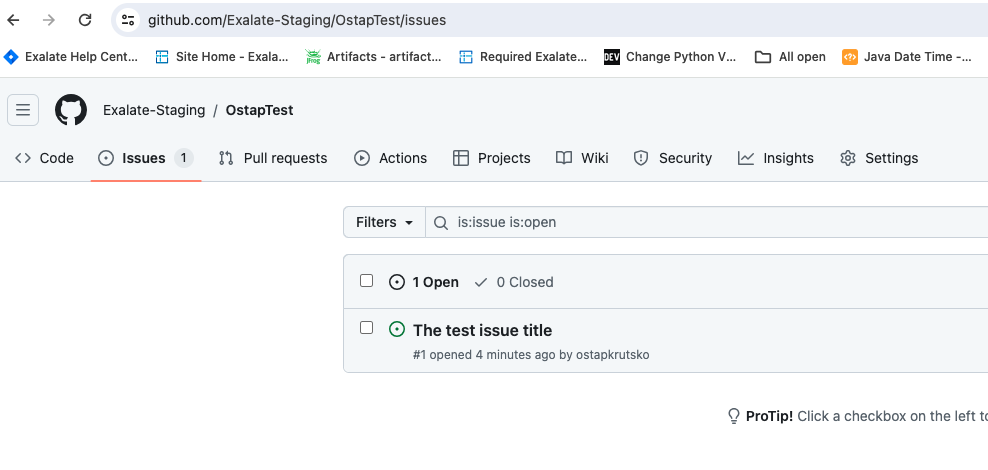
Click a second time to get more details. In this example the URN is "1".
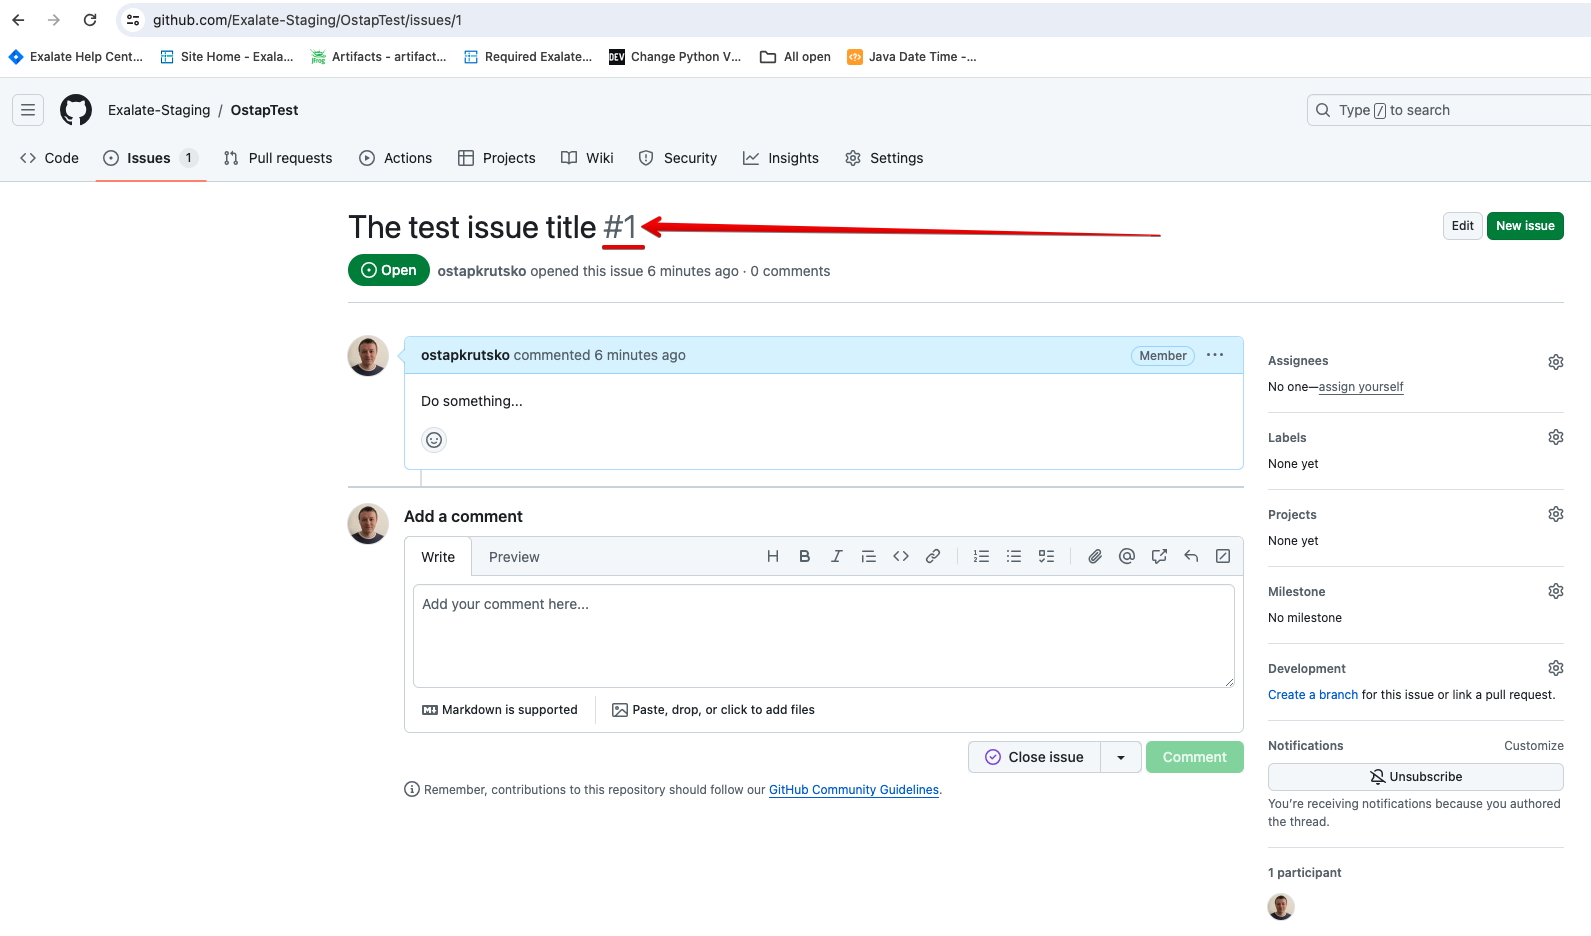
So, to make a connection from Github to jira Cloud, for example (could be another connector), you need to append the URN (1) to the repository name, as shown below:
