This article applies to Exalate Classic only. For New Exalate, refer to this documentation.
Note: Before you set up a Connection in Basic mode ensure that you don't use an older version of Exalate.
Connections in Basic mode have a set of Sync Rules, generated by Exalate.
With these connections, you can sync certain ticket types: questions, incidents, problems, and tasks. Ticket types are mirrored: questions are synced as questions, incidents as incidents, and so on.
Exalate syncs a basic set of ticket fields: summary, description, comments, and attachments.
If the entity types don't match on the destination instance, Exalate syncs an entity type based on the default entity type set in the destination instance.
All public and internal comments are synced as public.
Note: You cannot modify Sync Rules in Basic Mode.
If you want to edit/delete Sync Rules, you can upgrade the connection to Visual Mode or Script Mode.
Initiate a Connection in Basic Mode from Zendesk
Note: It doesn't matter which side you start initiating the Connection from. The Exalate UI remains the same.
1. Navigate to the Connections tab in the Exalate console.
To navigate to the Connections tab:
Click the Exalate icon in the list of apps.

2. Click Connections → Initiate connection.

3. Enter the Destination Instance URL.
The Destination Instance URL is the link to the instance you want to set up a connection with. You can directly enter the link of that instance or the Exalate URL from the General Settings tab in the Exalate admin panel.

Exalate suggests available Configuration Modes based on the destination instance.
4. Select Basic.
5. Click Next.
6. Confirm if you have admin access to the destination instance.
Further steps are different if you have or don't have admin access to the destination instance.
- Select Yes, I have admin access if you have admin access to the destination instance. You are redirected to the destination instance to establish a connection.
- Select No, I don't have admin access if you don't have admin access to the destination instance. You generate an invitation for the destination instance admin so they could establish a connection on their end.

Steps for: Yes, I have Admin Access
Click Yes, I have admin access & Initiate the connection.
Note: You will be required to verify access on the destination instance. After that, complete the following steps on the destination instance.
7. Select the project or repository where you want to sync entities.
Note: Selecting the project or repository is not applicable to all platforms. In this case, the Connection is established after the previous step.
 8. Click Confirm.
The Connection has been set up.
Steps for: No, I don't have Admin Access
Click No, I have admin access & Initiate the connection.
7. Click Copy invitation code.
You can send the invitation code to the destination instance admin.

8. Click Done.
Note: Complete the following steps on the destination instance.
9. Click on Accept Invitation under the Connections tab in the Exalate Admin Console in the destination instance and Paste the invitation code.
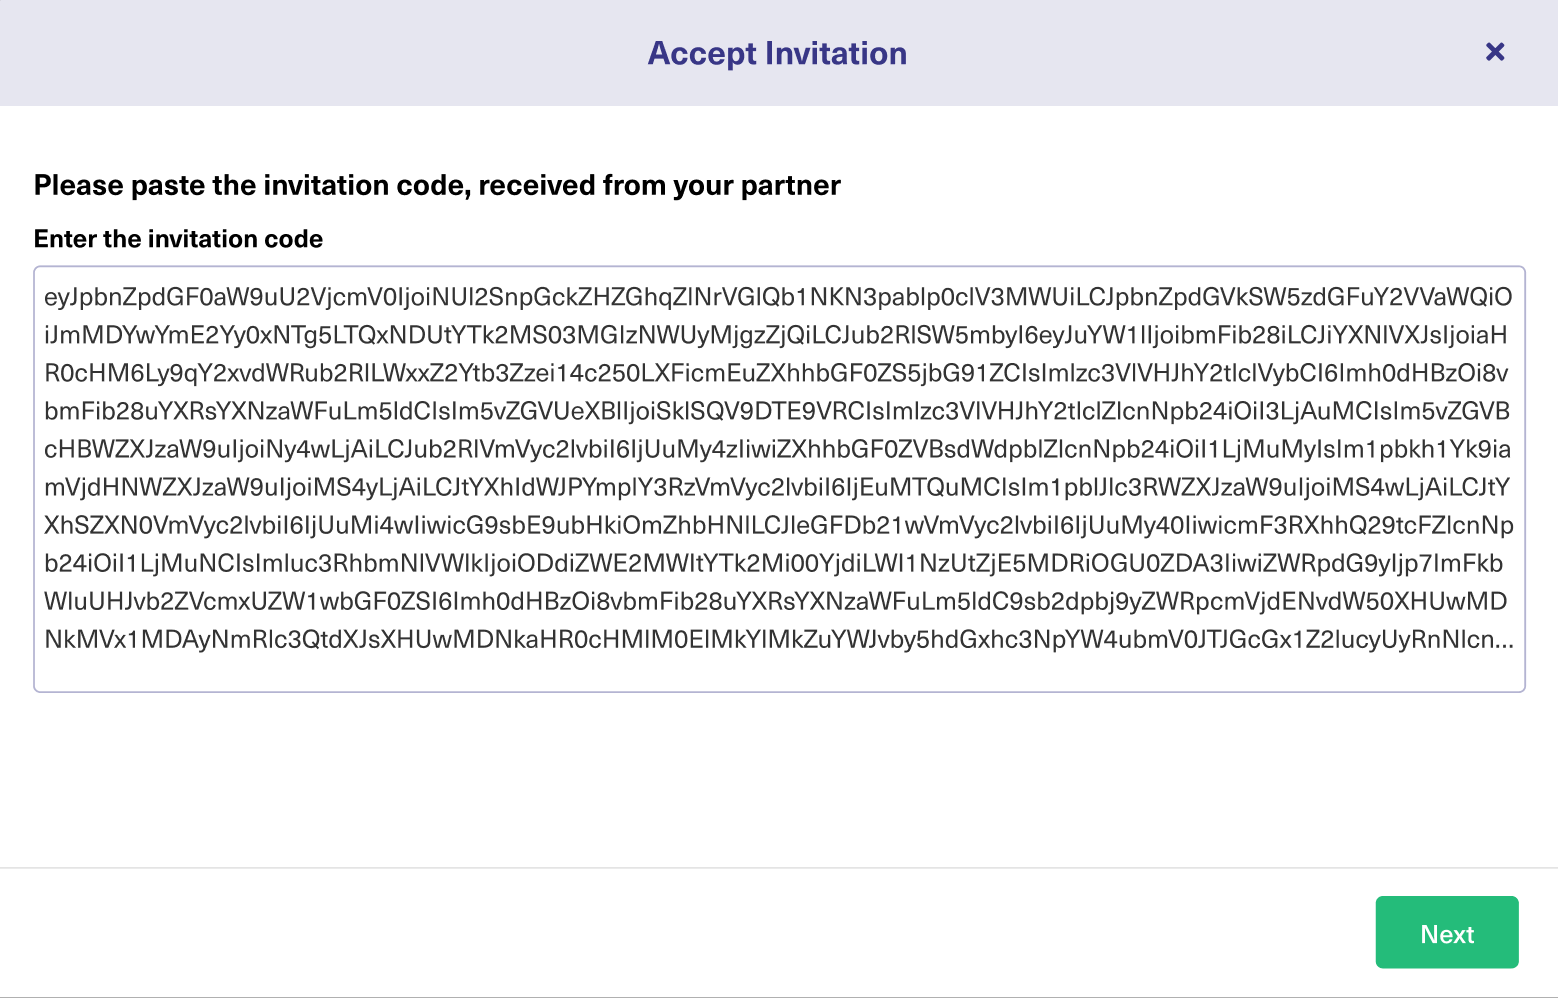
12. Click Next.
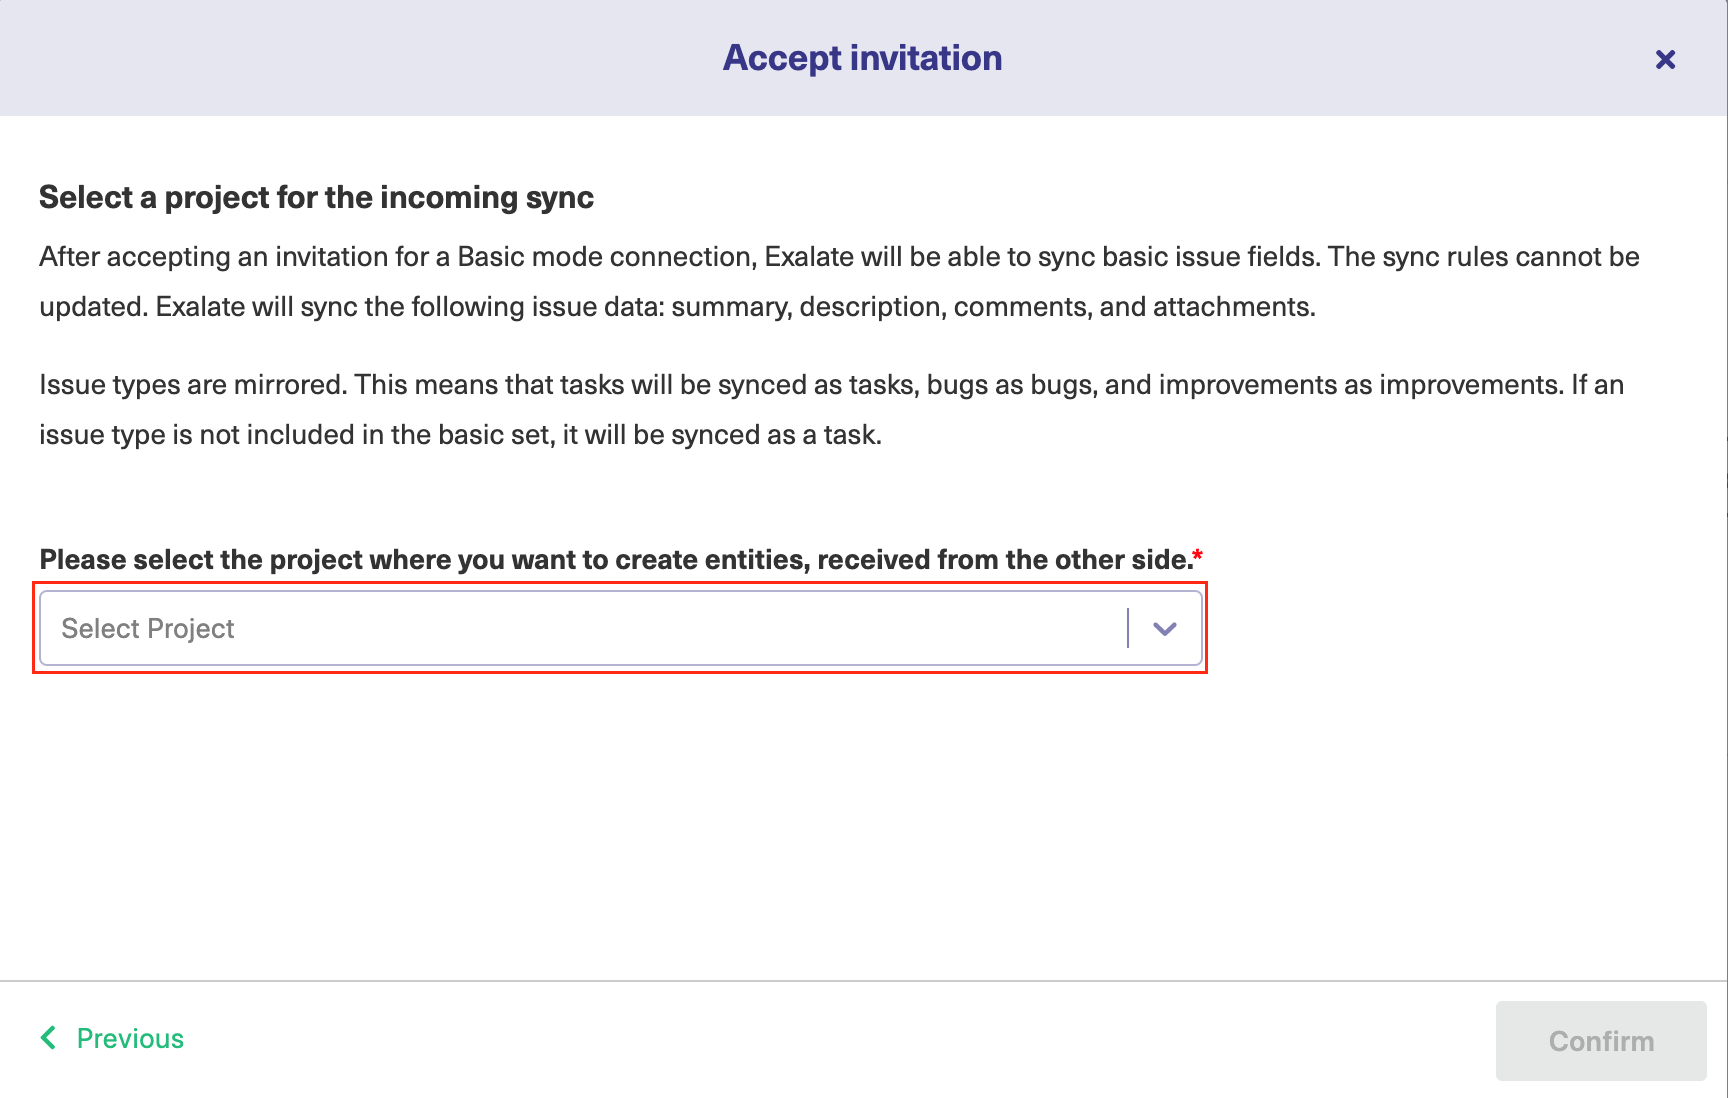
13. Select the project where you want to sync issues.
Note: Selecting the project is not applicable to all platforms. In this case, the Connection is established after the previous step.
14. Click Confirm.
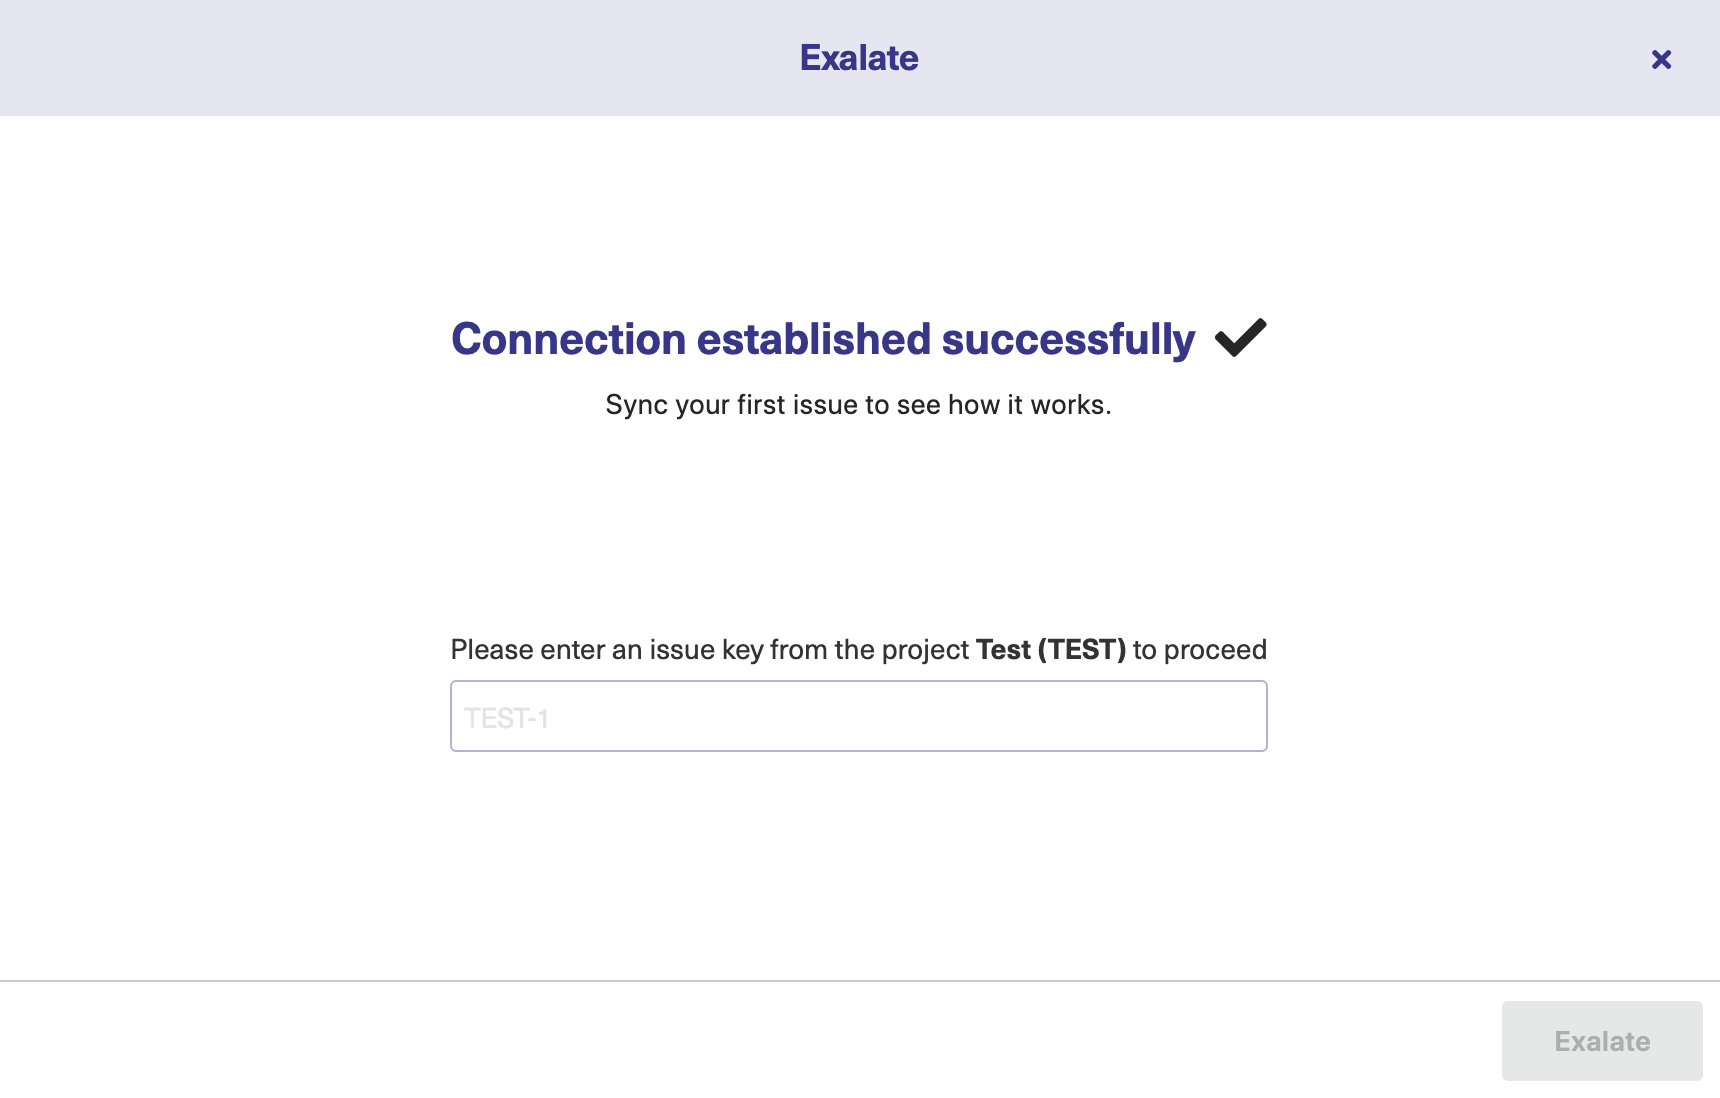
The Connection has been set up.
Start Synchronizing
You can sync your first entity in Exalate to see how it works: enter the entity URN on the previous screen and click Exalate.
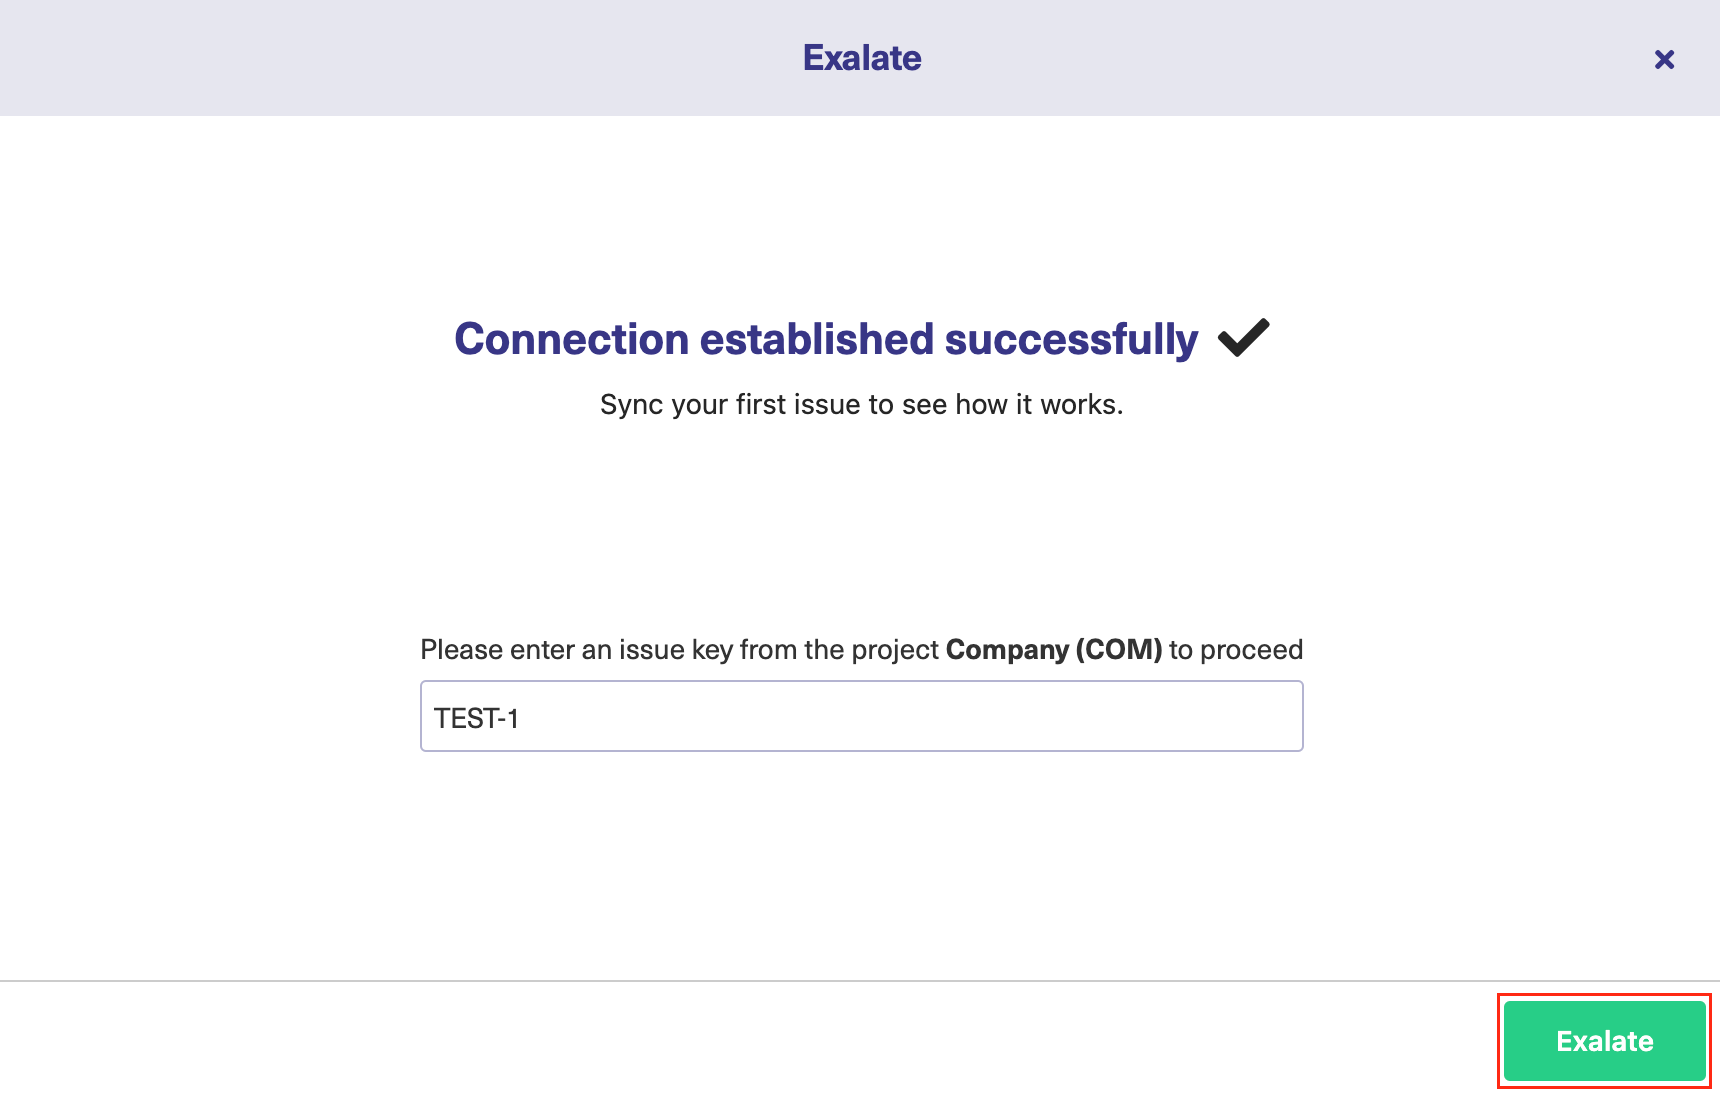
When syncing your first entity, you see the status of your sync. The links to both entities are displayed at the bottom as shown below. You can open them up to see more details.
![]()
What's Next?
Next, you can choose to
- sit back and relax while the sync works!
- Manually synchronize entities.
- Connect an entity.
- Sync entities in bulk.
- Create a trigger.