This article applies to Exalate Classic only. For New Exalate, refer to this documentation.
By default, Exalate sets the Salesforce user who installed the app as the Proxy user. However, you can change this user to fit your specifications.
First you'll need to create the user who will become the proxy user, keep in mind that this is the user that Exalate will use to update the tickets on behalf of the remote side of the integration.
You may also opt to use an API integration user as a proxy user, given that this user has no UI you must first:
- Create the User.
- Ensure the user has all the required permissions stated below:

- After user is created you will receive an email with a password change link.
- Change the password and complete the authentication process.

Once you have created/chosen who will be the Proxy user you may assign the Exalate Admin permission set:
Assign Exalate Admin permission set
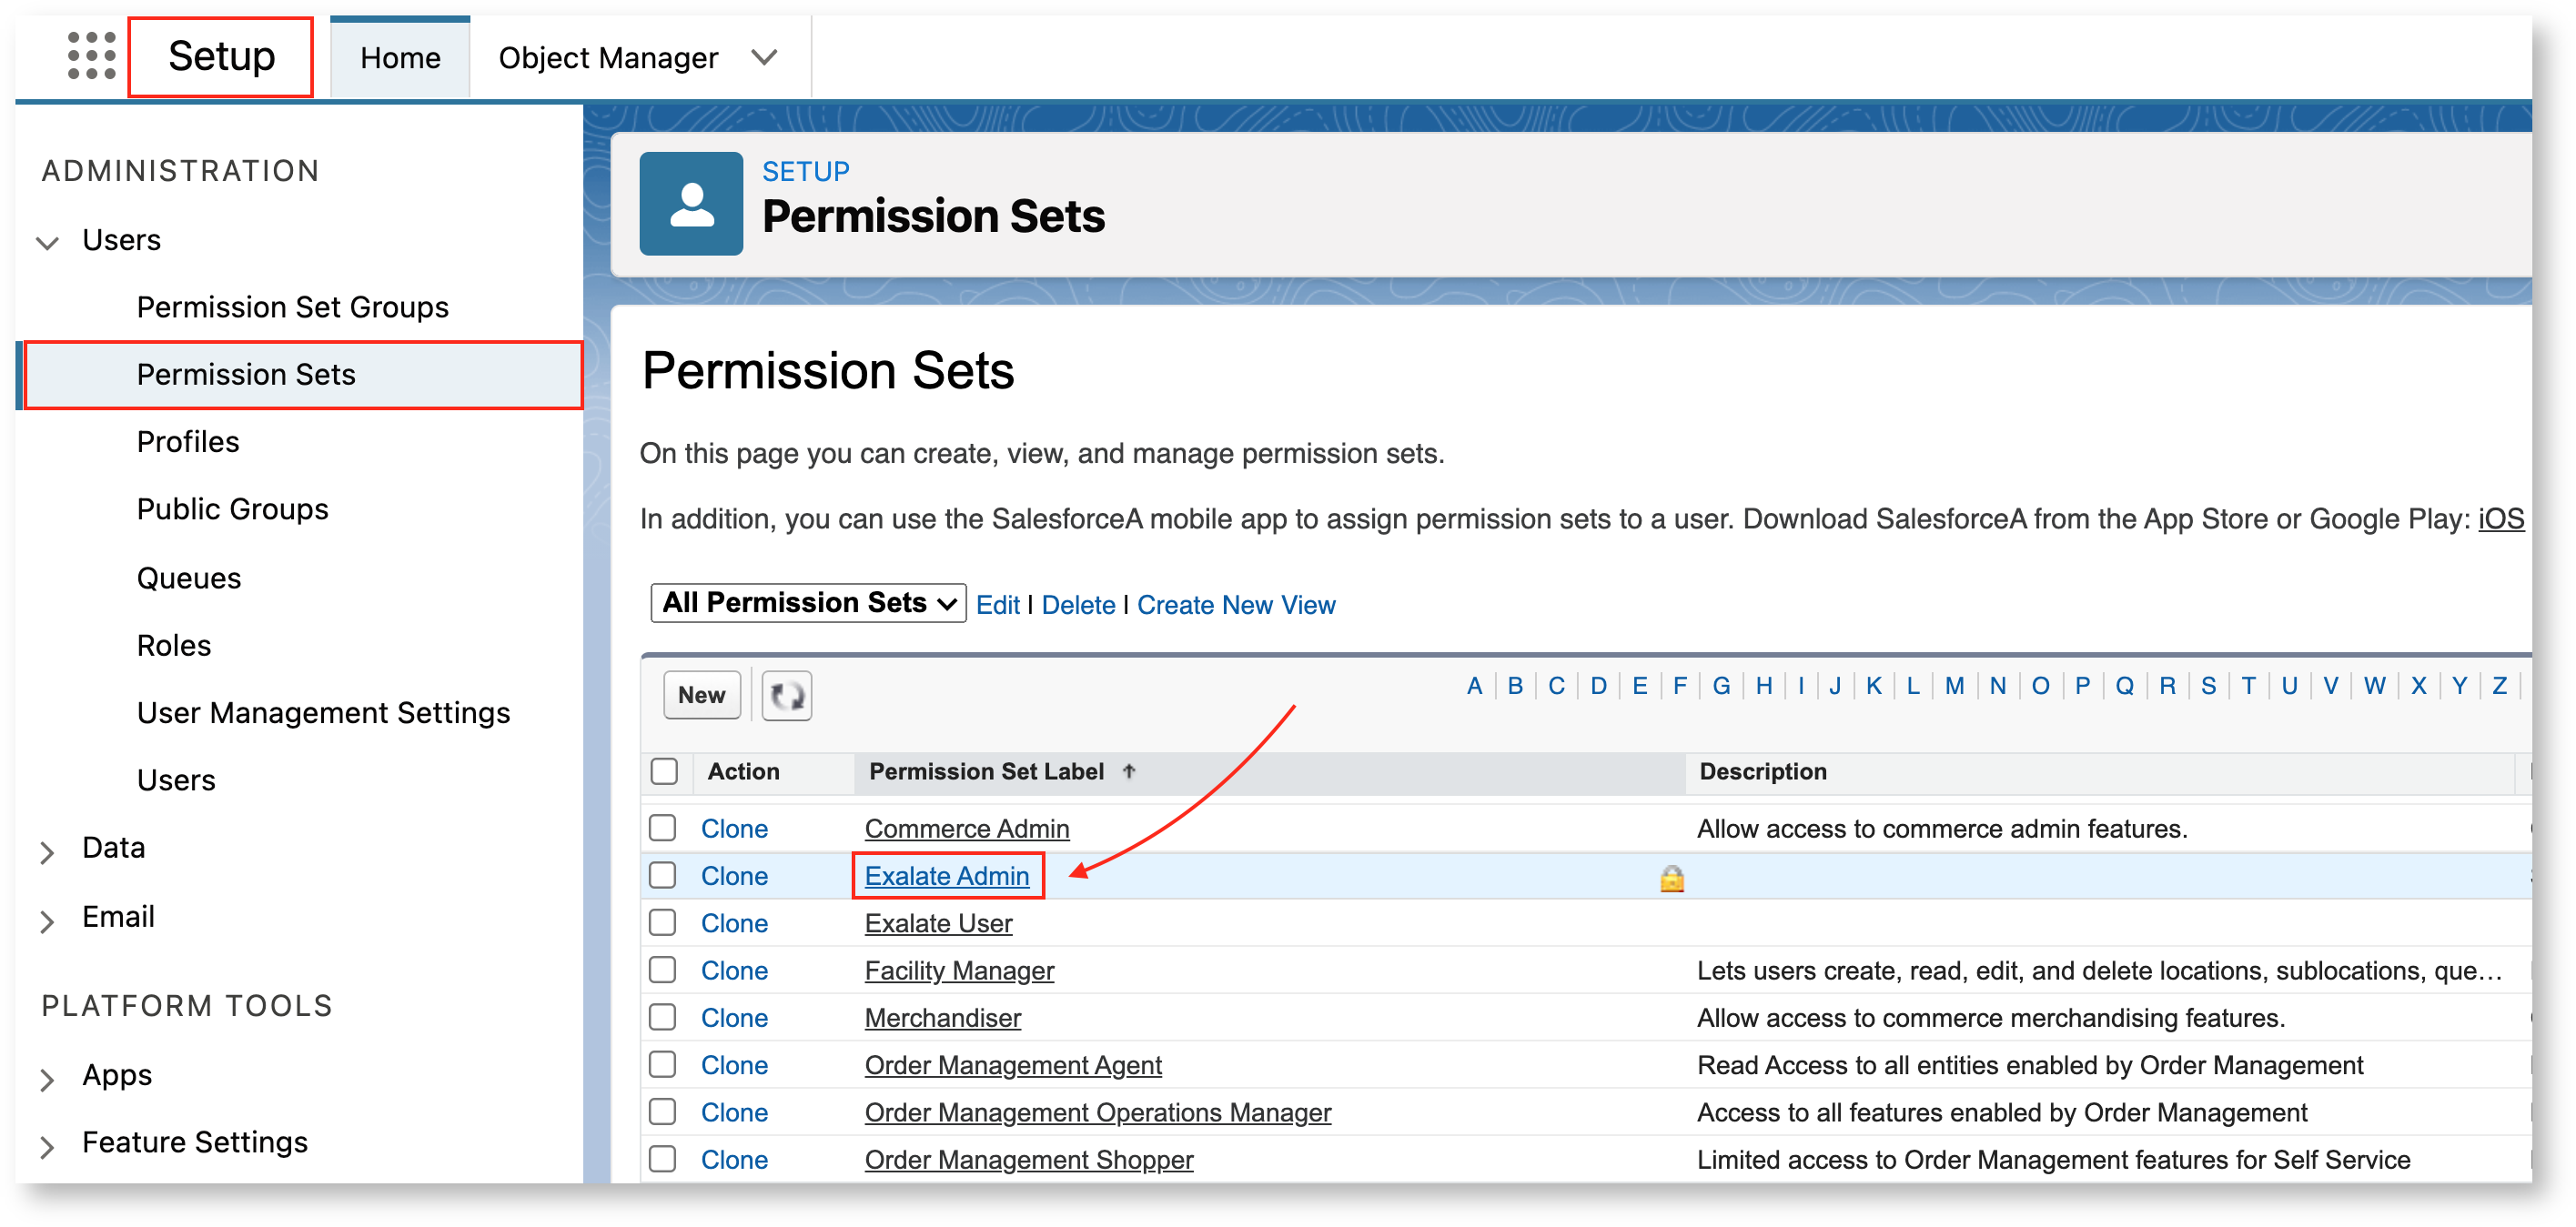
- Go to Setup -> Users -> Permissions sets -> Exalate Admin.

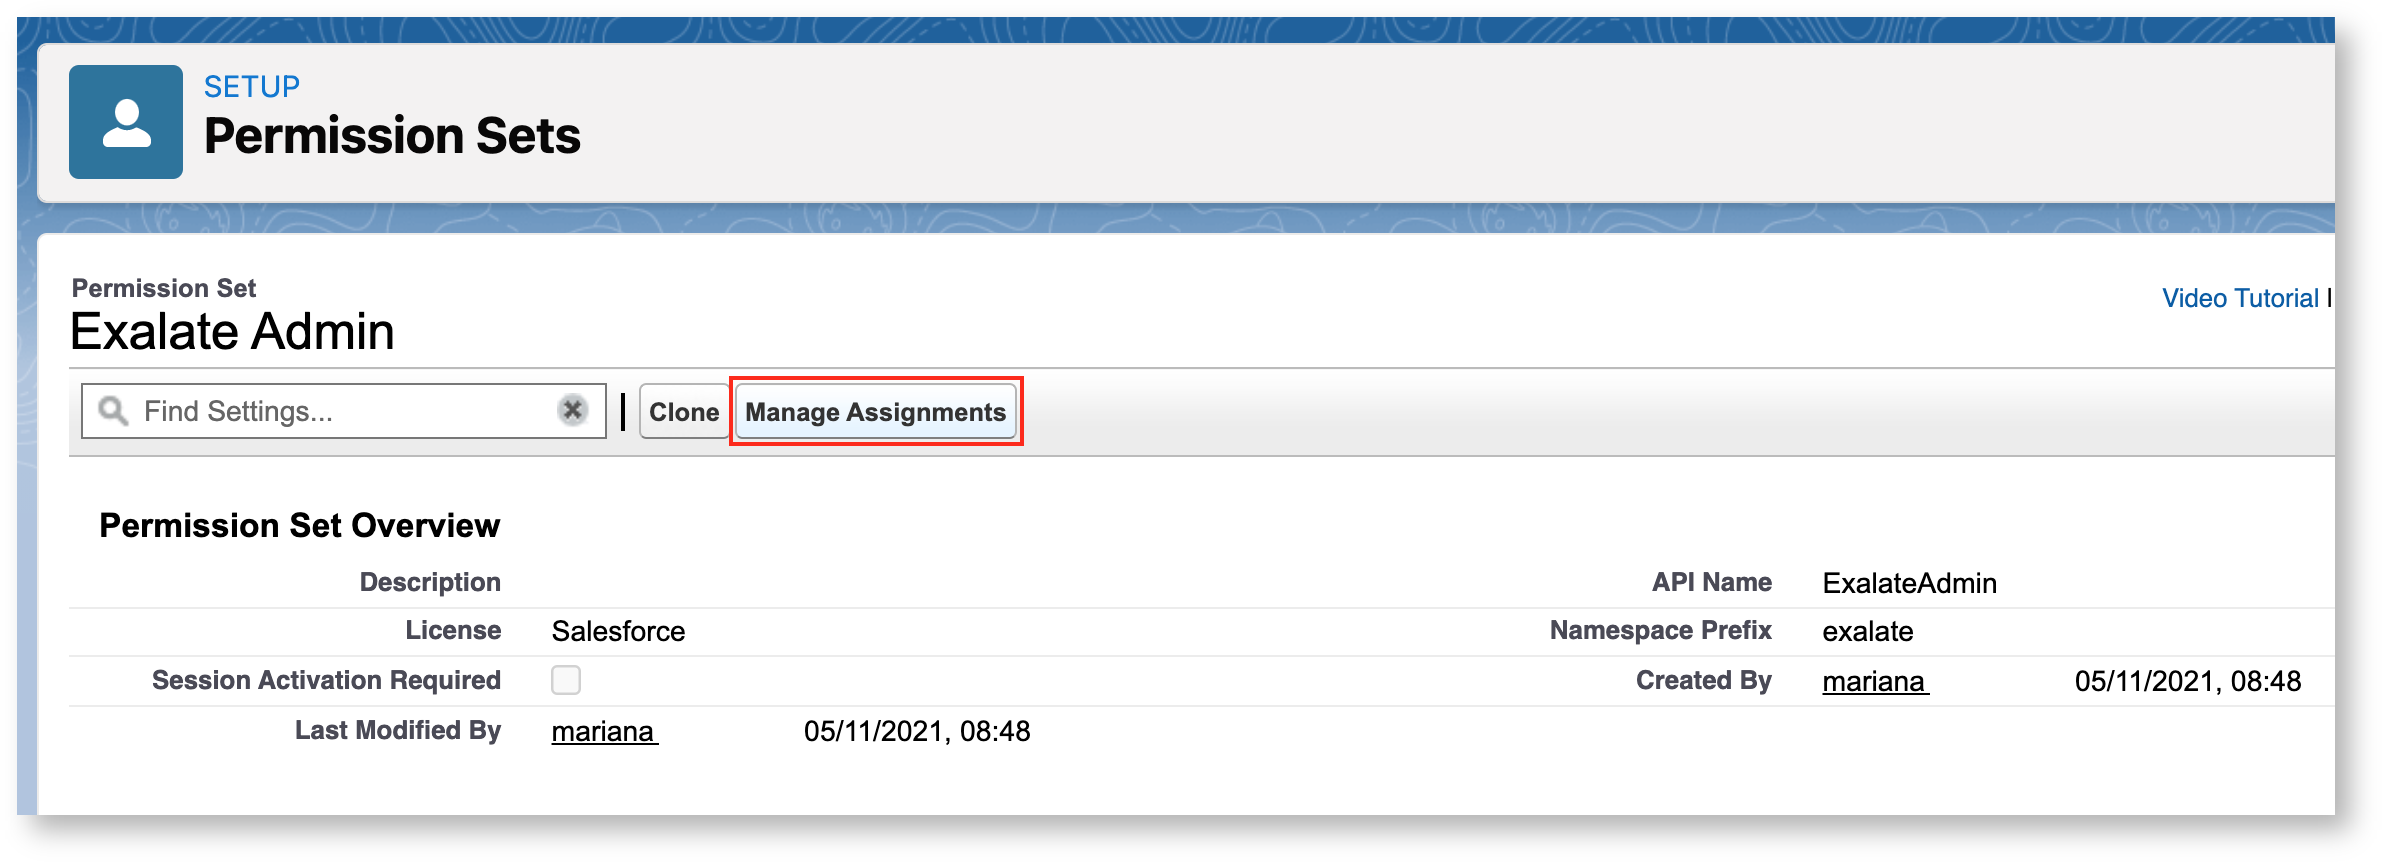
- Click Manage Assignments.
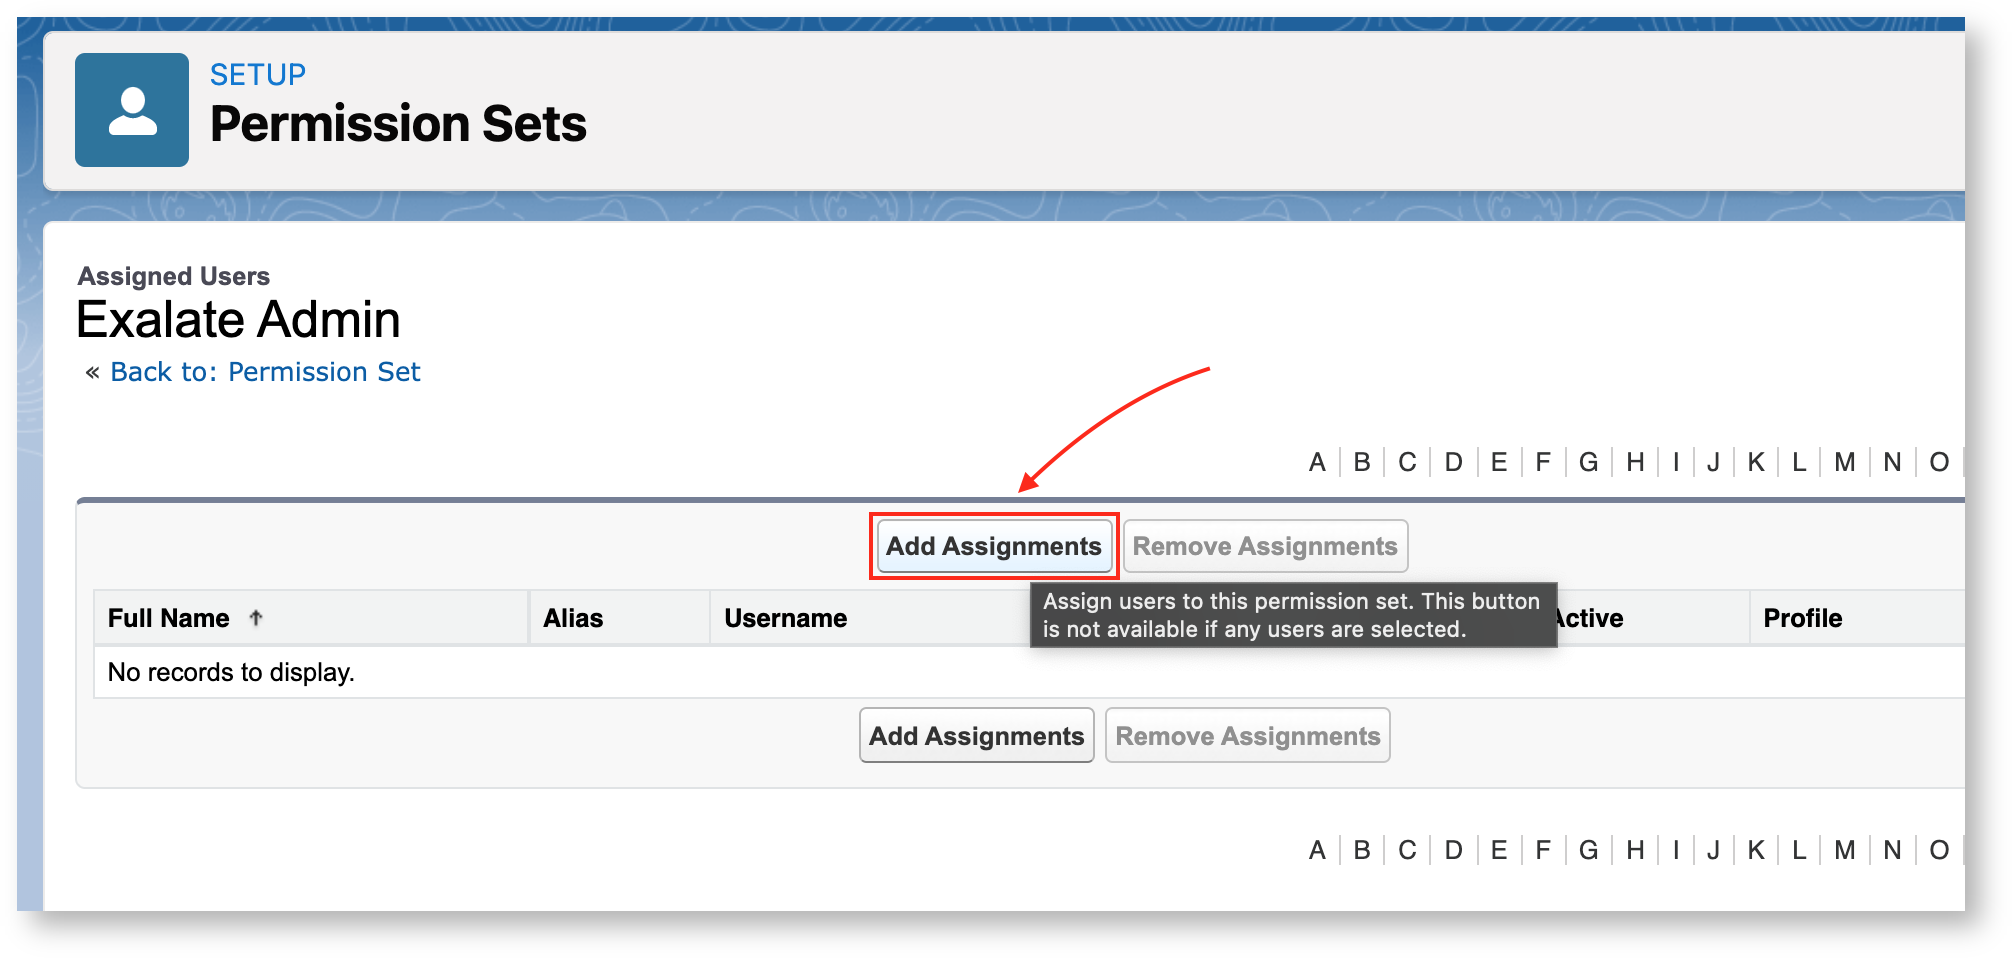
- Click Add Assignments.

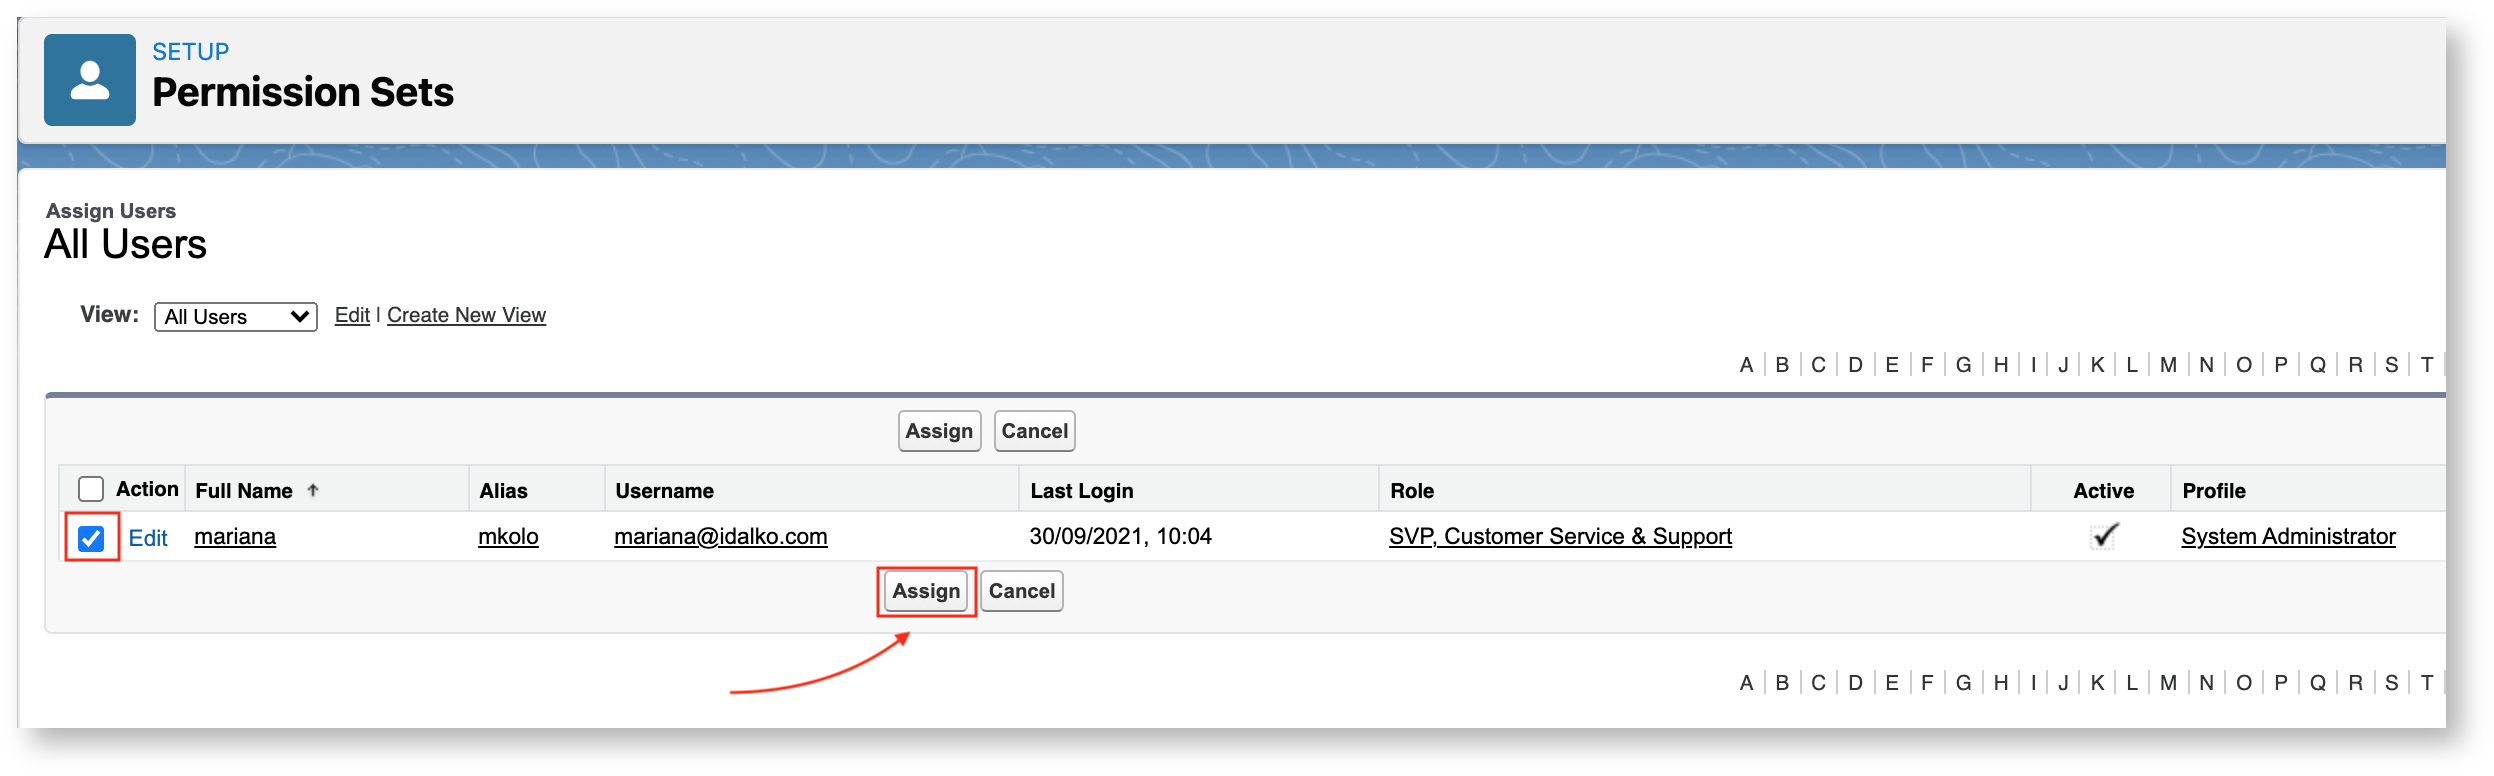
- Select a user you want to give permissions to and click Assign to grant access to the Exalate console.
- Click Done.
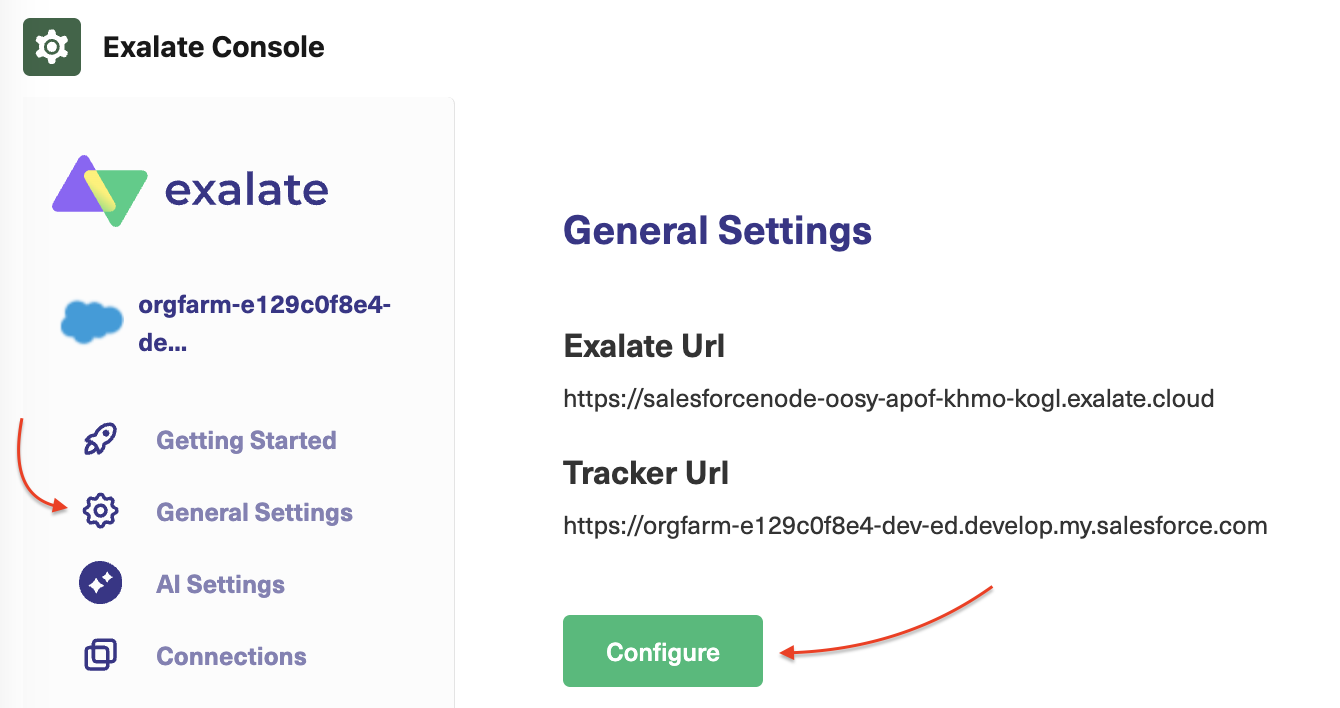
- Go to your Exalate console and access the General Settings tab, then click on Configure:
- On this window you will see the Proxy User field below:
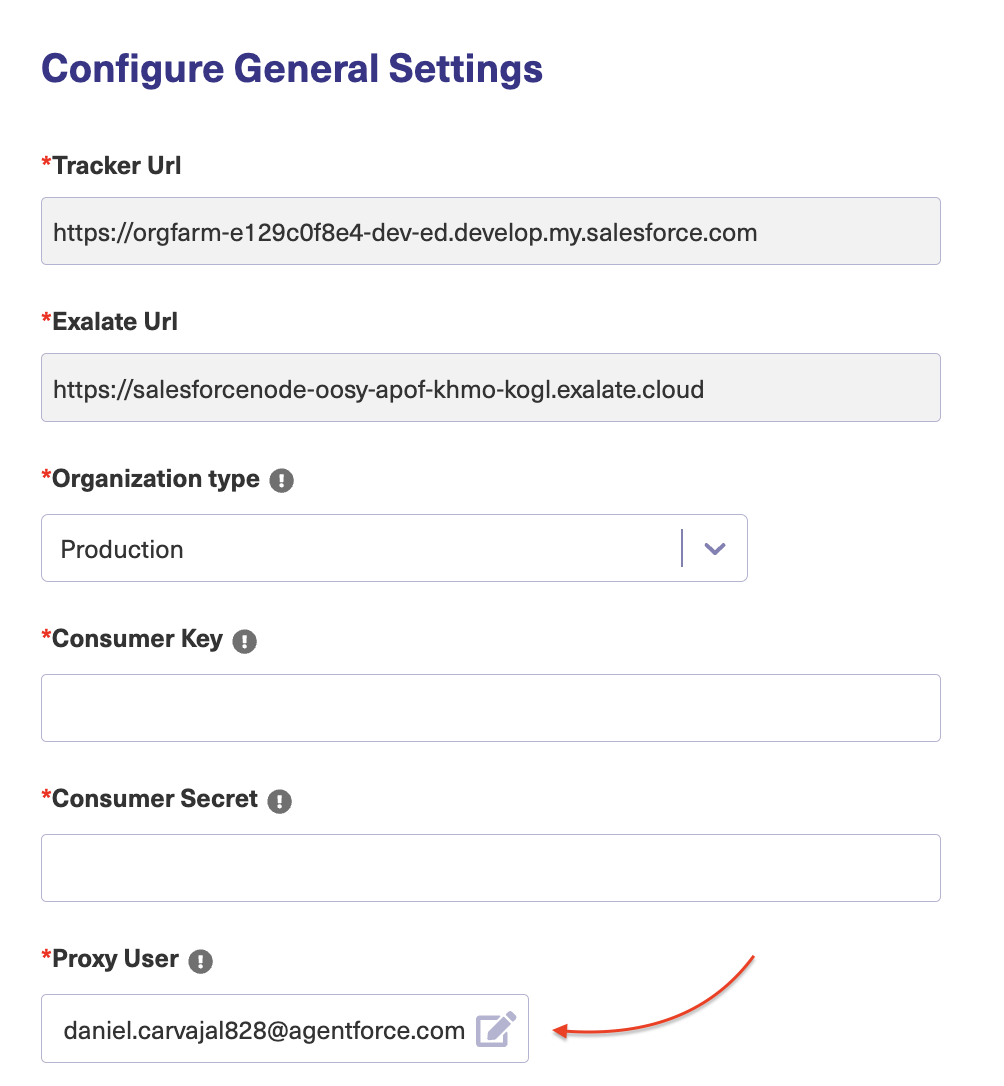
- Click on the Pencil Icon to edit the proxy user, you will be prompted with a Salesforce login page to login, the user who you log in with will become the new proxy user.