Before we start the synchronization process:
Test your Connection from Salesforce
Manual synchronization in Salesforce happens via the Exalate button in the Sync Status Panel present under the Salesforce Object view.
Note: The Sync Status Panel is available under the specific entity (i.e issue, work item, tickets, Cases, etc) view in Jira, Zendesk, Azure DevOps, and Salesforce.
For other platforms like GitHub, ServiceNow, HP ALM/QC including Jira, Zendesk, Azure DevOps, and Salesforce this button is available under the Exalate admin console in the Entity Sync Status tab.
Exalate the Entities from Salesforce.
- Open the particular Salesforce entity.
There is an Exalate panel under the entity view.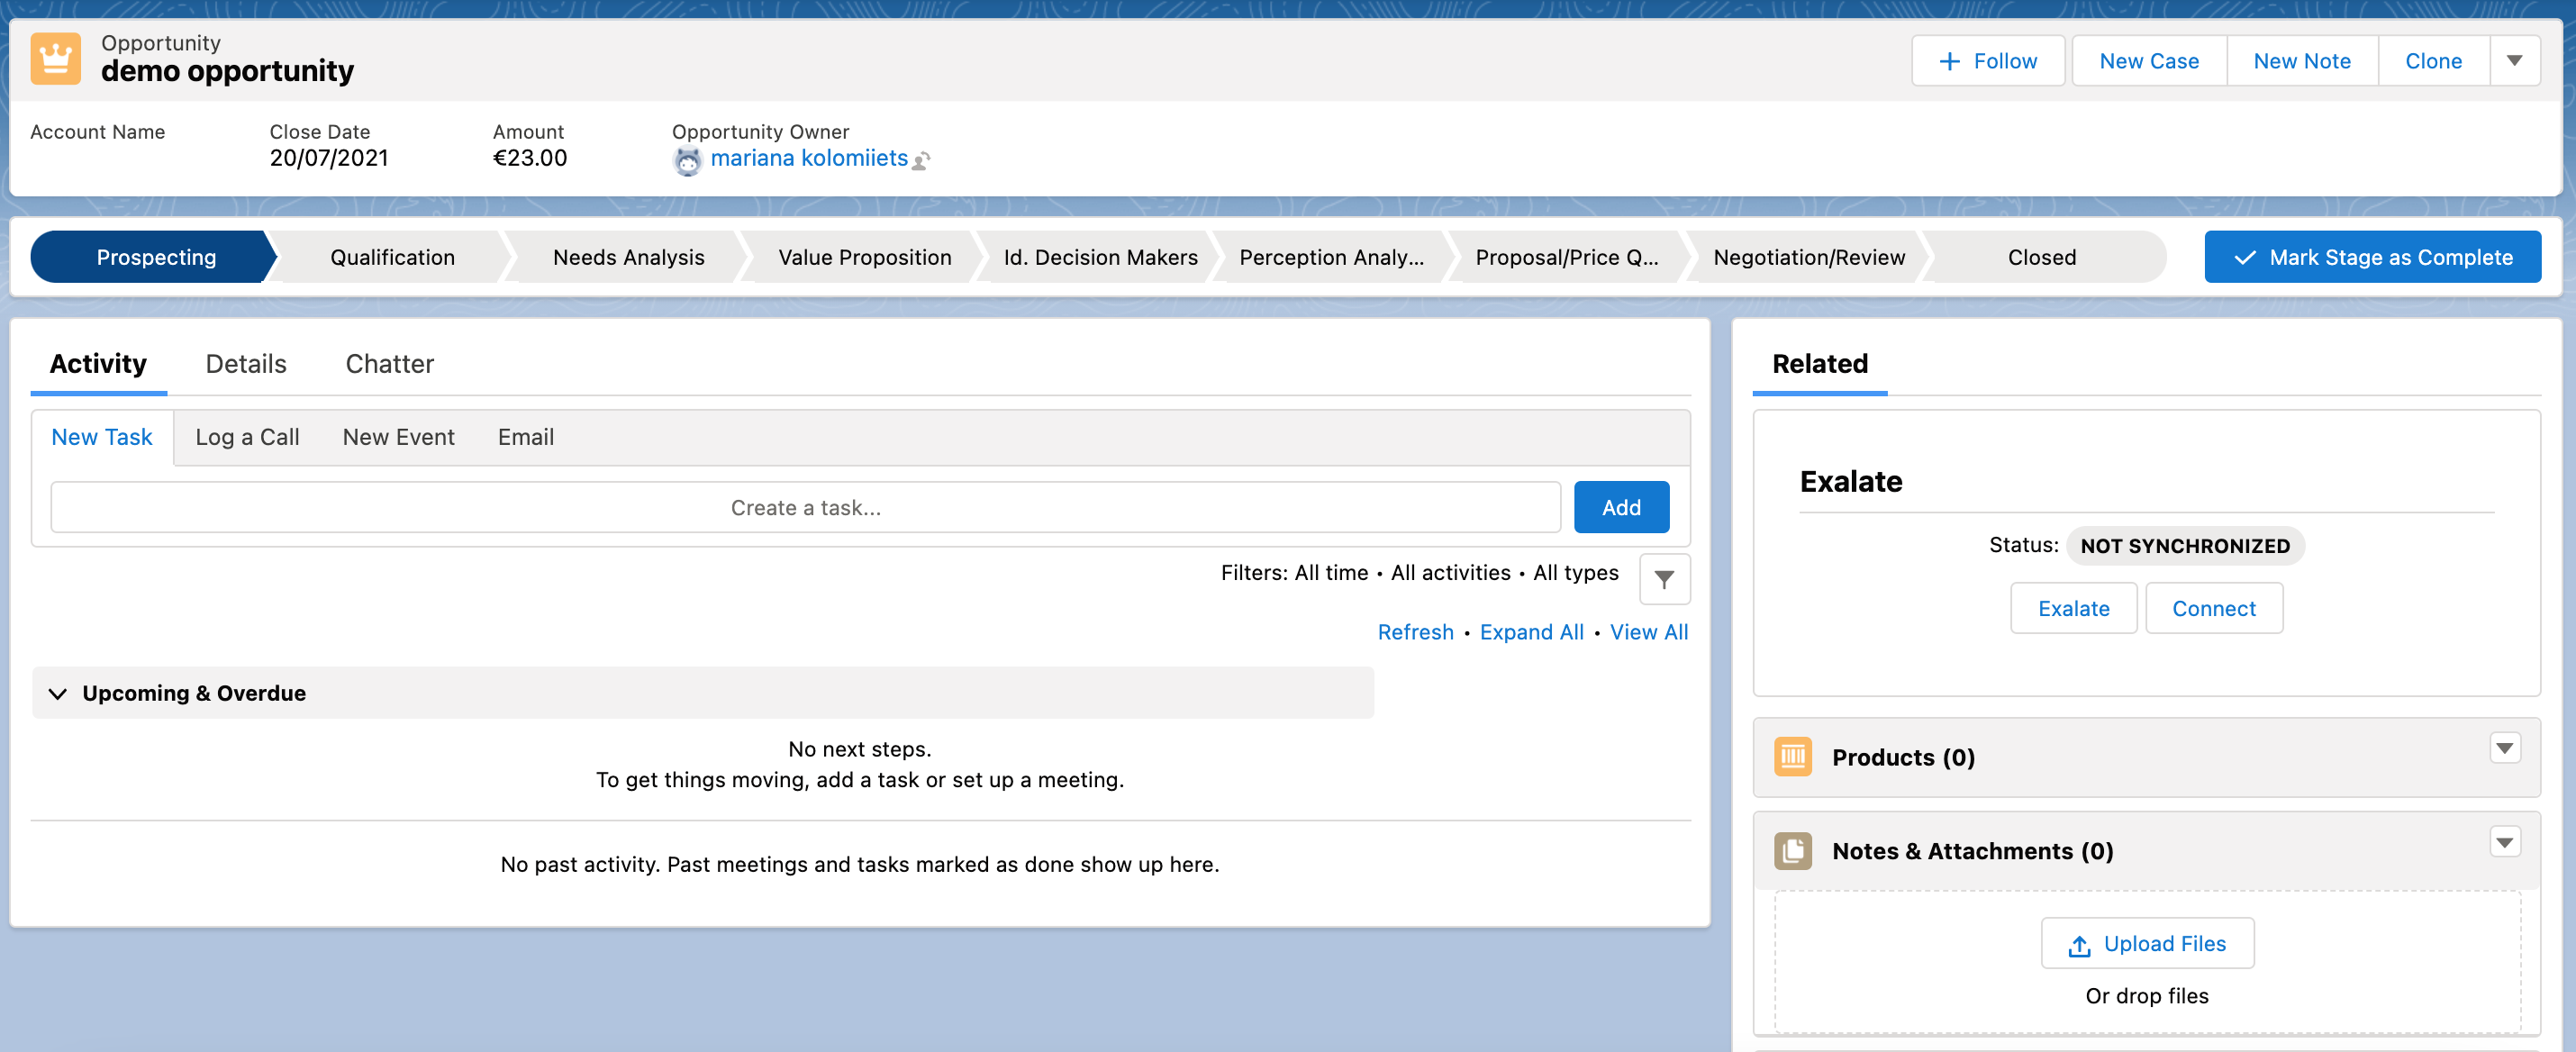 Note: Learn how to add the sync panel to Salesforce entity views.
- Exalate the Entity
You can see 2 buttons at the bottom on the Exalate panel: Exalate & Connect. If the entity is not synchronized the following status will be displayed.
Exalate allows you to synchronize & create a new entity on the destination instance.
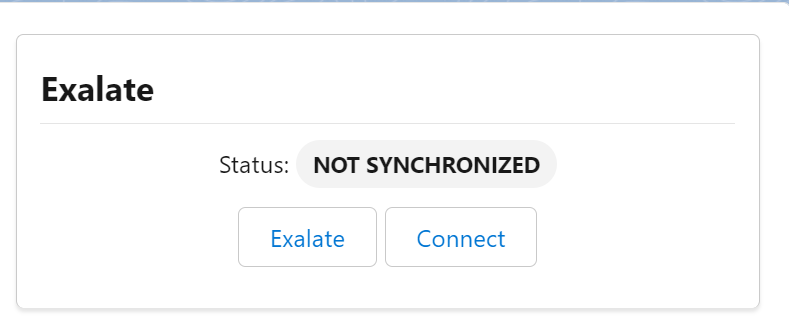
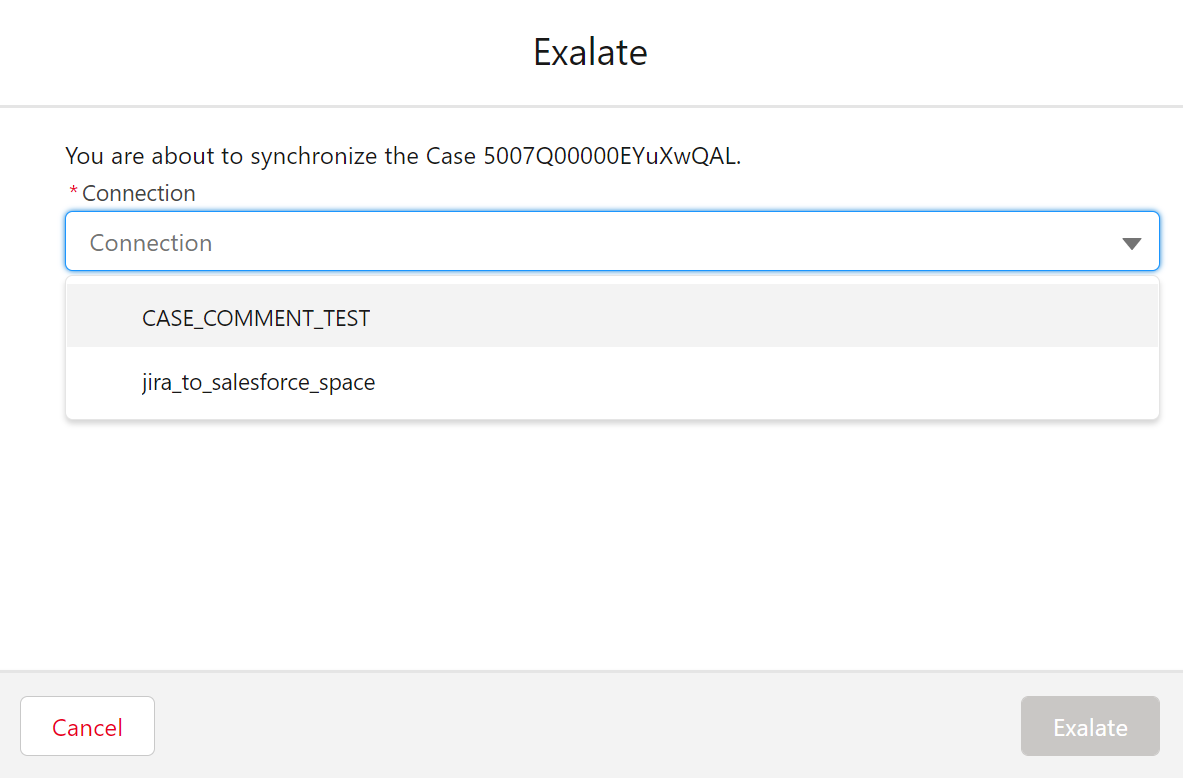
Connect allows you to connect 2 existing entities present in both instances.- To Exalate an entity, click the Exalate button.
- Choose the name of the Connection you have created.
- Click Submit.


You will be able to see the progress of the synchronization within the panel in the form of sync statuses.