This article applies to Exalate Classic only. For New Exalate, refer to this documentation.
Navigating through the Exalate Menu Panel is required for all the administrative tasks related to the Exalate application.
In case the Exalate App is not embedded in your work management system, you can access it directly using the Exalate Node URL. The menu panel is located on the left side of the screen.

If you are using Exalate on Jira, Zendesk, or any other platform that supports the embedded Exalate version, you need to first access the Exalate app through your system's interface. You can do this just like you access other third-party apps in your system. Once you open the Exalate app, you can find the Exalate Menu Panel on the left side of the screen.
Jira

Azure

Zendesk

Salesforce

The look and feel may show some differences depending on the work management system, but the options remain essentially the same.
Getting Started
To get you up and running smoothly, use the Getting Started tab as your go-to guide.
- Establish a Connection: Learn step-by-step how to establish your first connection between different systems like Jira, Azure DevOps, etc.
- Customize Sync Rules: Discover how to maintain and oversee your existing connections and define your sync rules.
- Test Integration: Learn how to verify that your connections and syncs work as expected.
- Automate Sync: Understand the power of triggers – the rules that tell Exalate when to sync. We'll show you how to set them up to automate your data flow.

Dashboard
The Dashboard provides you with a clear, visual representation of your synchronization activity. It helps you understand the scope of your integrations by tracking the total number of entities connected by Exalate on your specific node.

The Sync Activity offers a direct view of your synced entities, showing you daily, weekly, monthly, and quarterly trends. This means you can easily monitor how your integration is growing over time. For instance, the Monthly activity shows your overall synchronization activity for the entire month.

If you connect more entities through Exalate, the number on your dashboard will naturally go up.

If no new entities are synced and existing ones remain linked, the count will stay steady.

When entities are "unexalated" (meaning they are no longer synchronized) or if entities are deleted from your instance, the number of connected entities on your dashboard will decrease.

General Settings
The options within the General Settings vary depending on the platform you use. Please see below for specific options for your platform.
Azure DevOps (Server & Service)
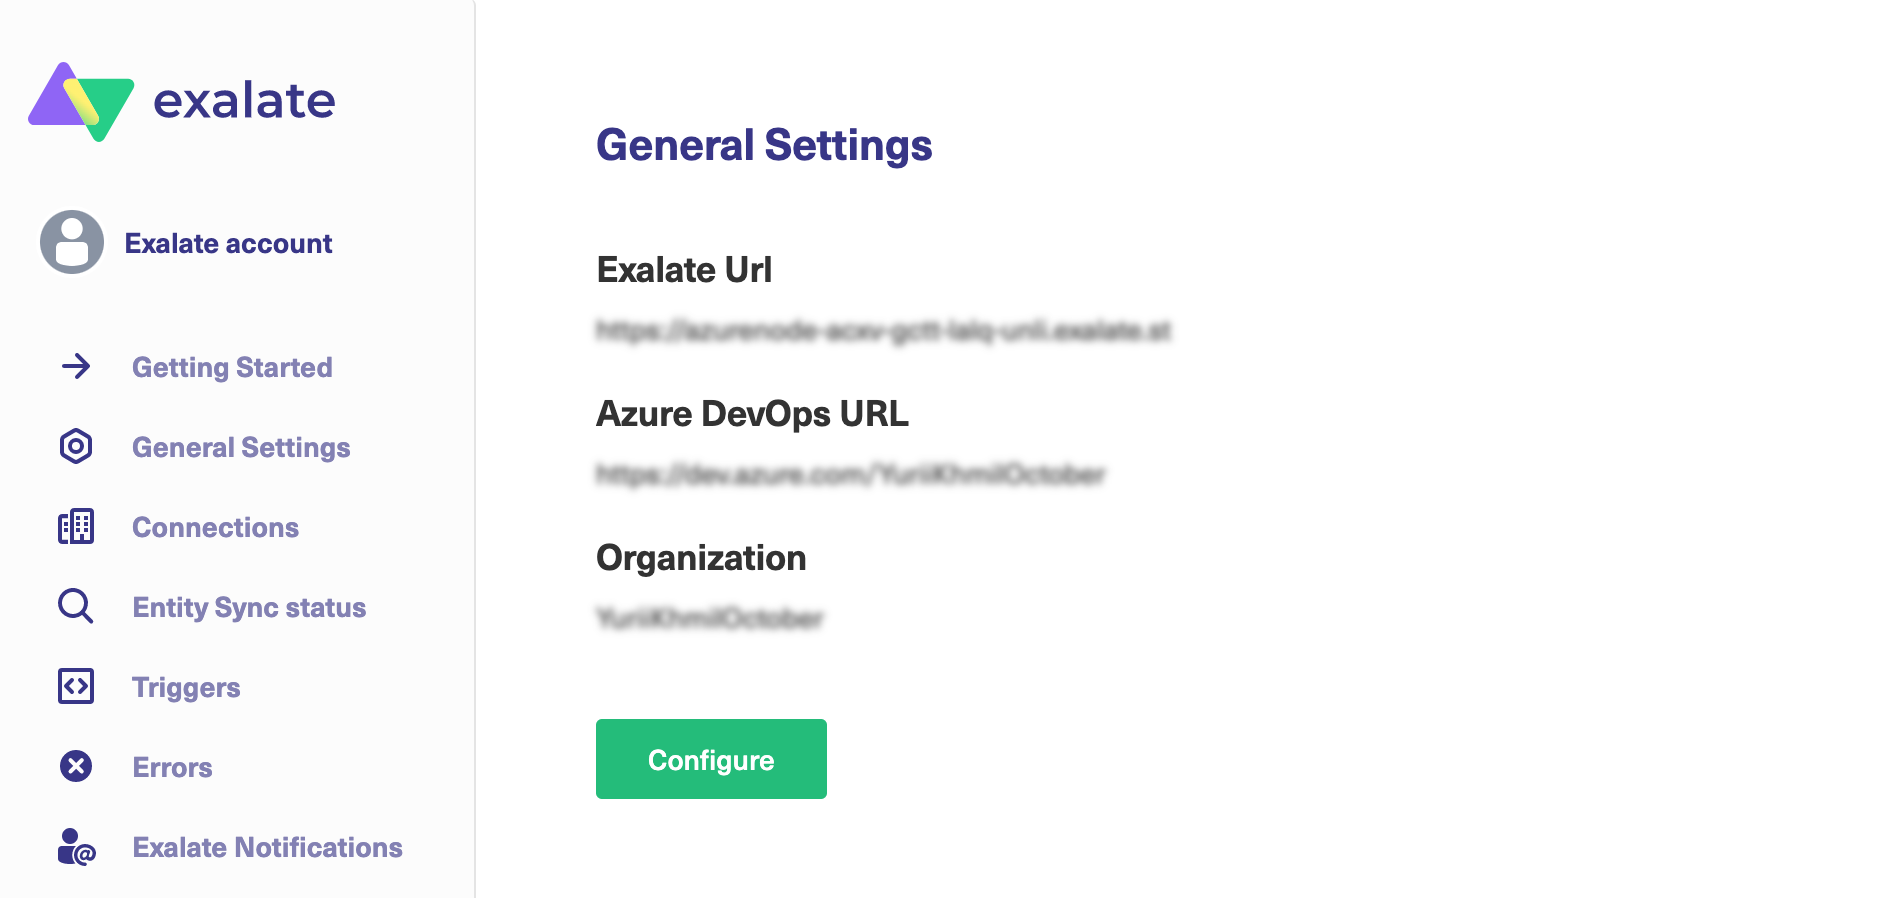
- Exalate URL - your Exalate node URL.
- Azure DevOps URL - a link that you use to access your Azure DevOps.
- Organization - the Azure DevOps organization used to install Exalate.
- Configure - Exalate proxy user personal access token configuration.
GitHub
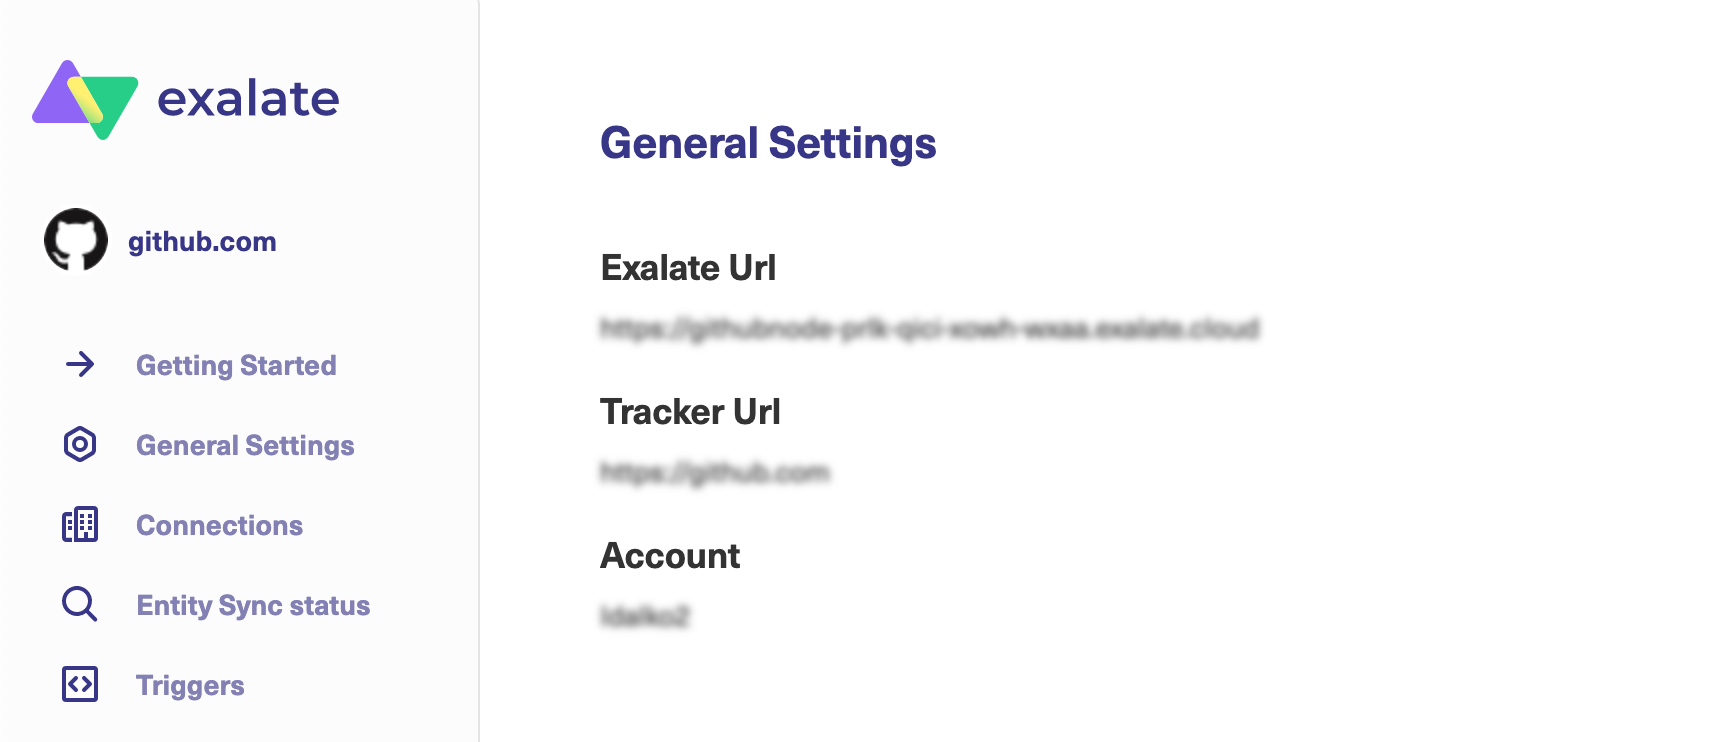
- Exalate URL - your Exalate node URL.
- Tracker URL - GitHub URL.
- Account - the GitHub account used to install Exalate.
Jira Cloud

- Exalate URL - your Exalate node URL.
- Show Exalate and Connect actions - the toggle controls how the Exalate and Connect buttons are displayed on the issue view. If the toggle is active, the buttons are visible to the users on the issue view.
- Show Unexalate action - the toggle controls if the Unexalate button is visible on the issue view. If enabled, the users can see the Unexalate button in case the issue was previously Exalated.
- Show sync panel only for admin users - the toggle controls if the Sync Panel is displayed for all users, or only for admin users.
Note: The Sync panel provides information on the connection and the current sync status directly on the issue view. You can also enable a remote issue link to be displayed there. |
- Hide inactive connections - this toggle allows you to hide/show inactive connections in the Connections tab.
- Allow project admins to set up basic connections - this toggle controls if the project admin users can initiate basic connections on the project level.
Jira On-Premise

- Proxy User- a user that can carry out any changes, such as creating issues, updating data, adding comments and attachments, etc. You can use an existing Jira user or create a new one.
- Email Notifications - use the toggle to enable/disable email notifications. If enabled, email notifications are sent once every hour.
- In-Jira Notifications - pop-up messages with confirmation of successful actions, alerts, errors, and other information related to Exalate.
- Authentication required - relevant only for Exalate v.3.x and lower. Toggle to enable or disable authentication to your instance and secure the connection. If you set the authentication as required, you need to share the credentials with the remote instance so that it can authenticate to your instance.
- Polling Interval(in seconds) - a time interval in seconds used to poll the destination instance in case of a Private - Public connection.
- Show Exalate and Connect actions - the toggle controls how the Exalate and Connect buttons are displayed on the issue view. If the toggle is active, the buttons are visible to the users on the issue view.
- Show Unexalate action - this toggle controls how the Unexalate button is visible on the issue view. If enabled, the users are to see the Unexalate button in case the issue was previously Exalated.
- Hide inactive connections - this toggle allows you to hide/show inactive connections in the Connections tab.
- Display URL - your Jira URL.
- Configure - click the Configure button to adjust General Settings.
Salesforce
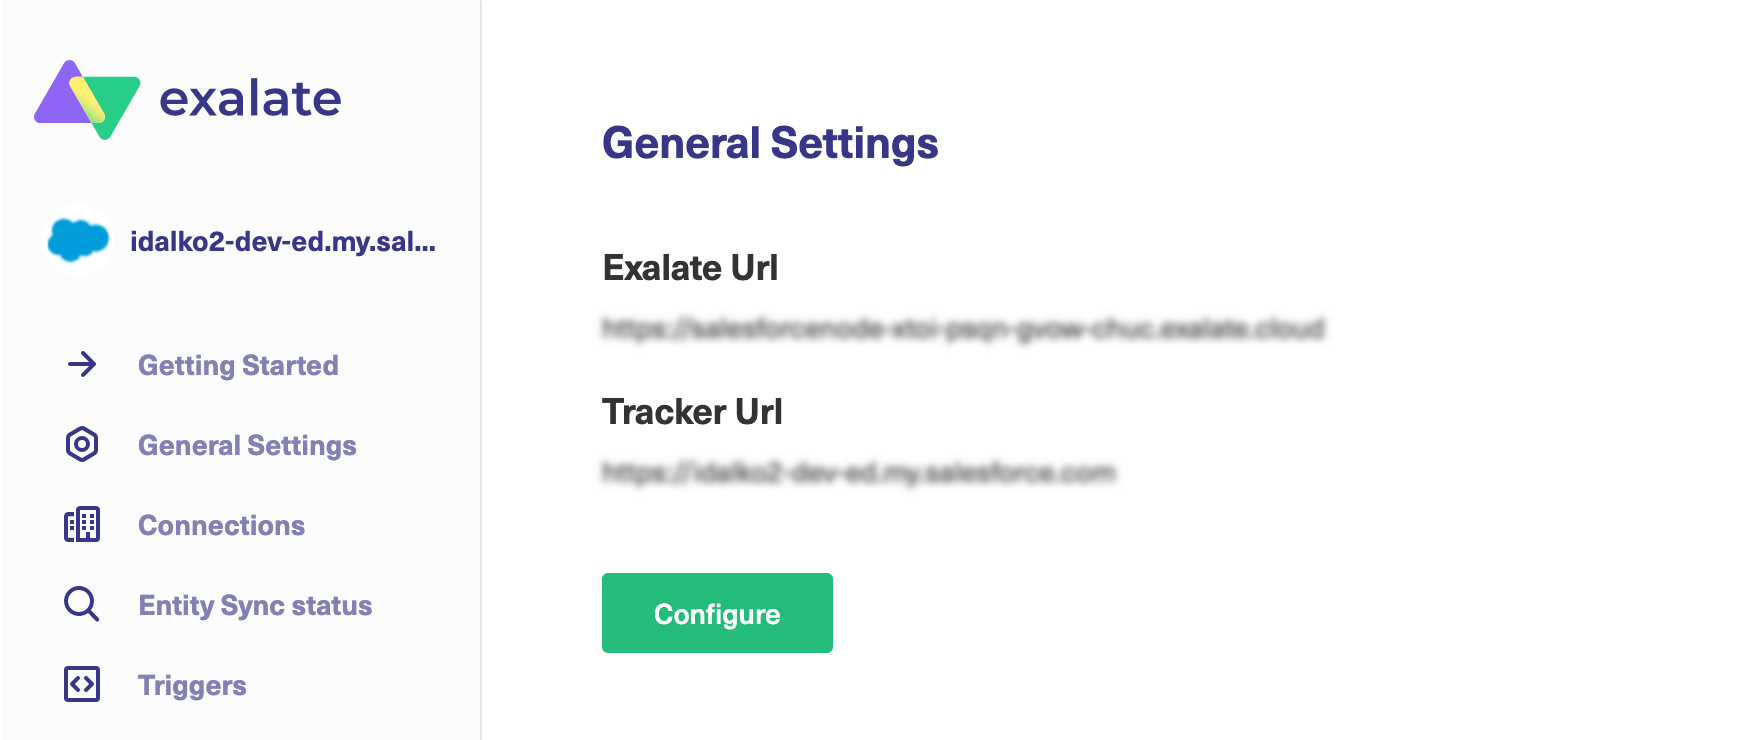
- Exalate URL - your Exalate Node URL.
- Tracker URL - your Salesforce instance URL.
- Configure - here you can set or modify the Organization type, Consumer Key, and Consumer Secret information.
ServiceNow
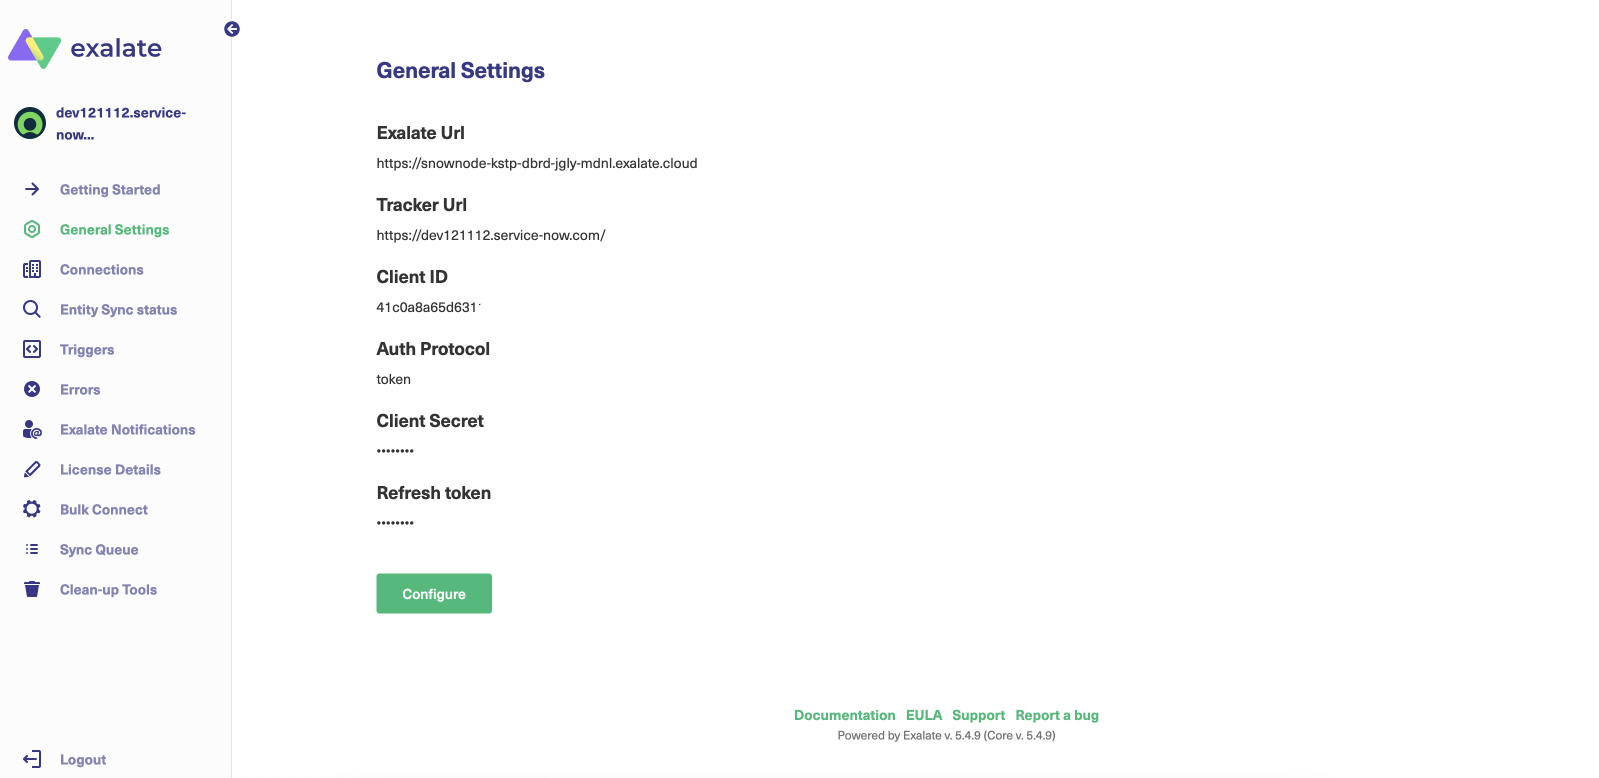
- Exalate URL - your Exalate Node URL.
- Tracker URL - your ServiceNow instance URL.
- Client ID - your ServiceNow Client ID.
- Auth Protocol - either Token or Basic auth.
- Client Secret - your ServiceNow Client Secret.
- Refresh Token - your ServiceNow token.
Zendesk
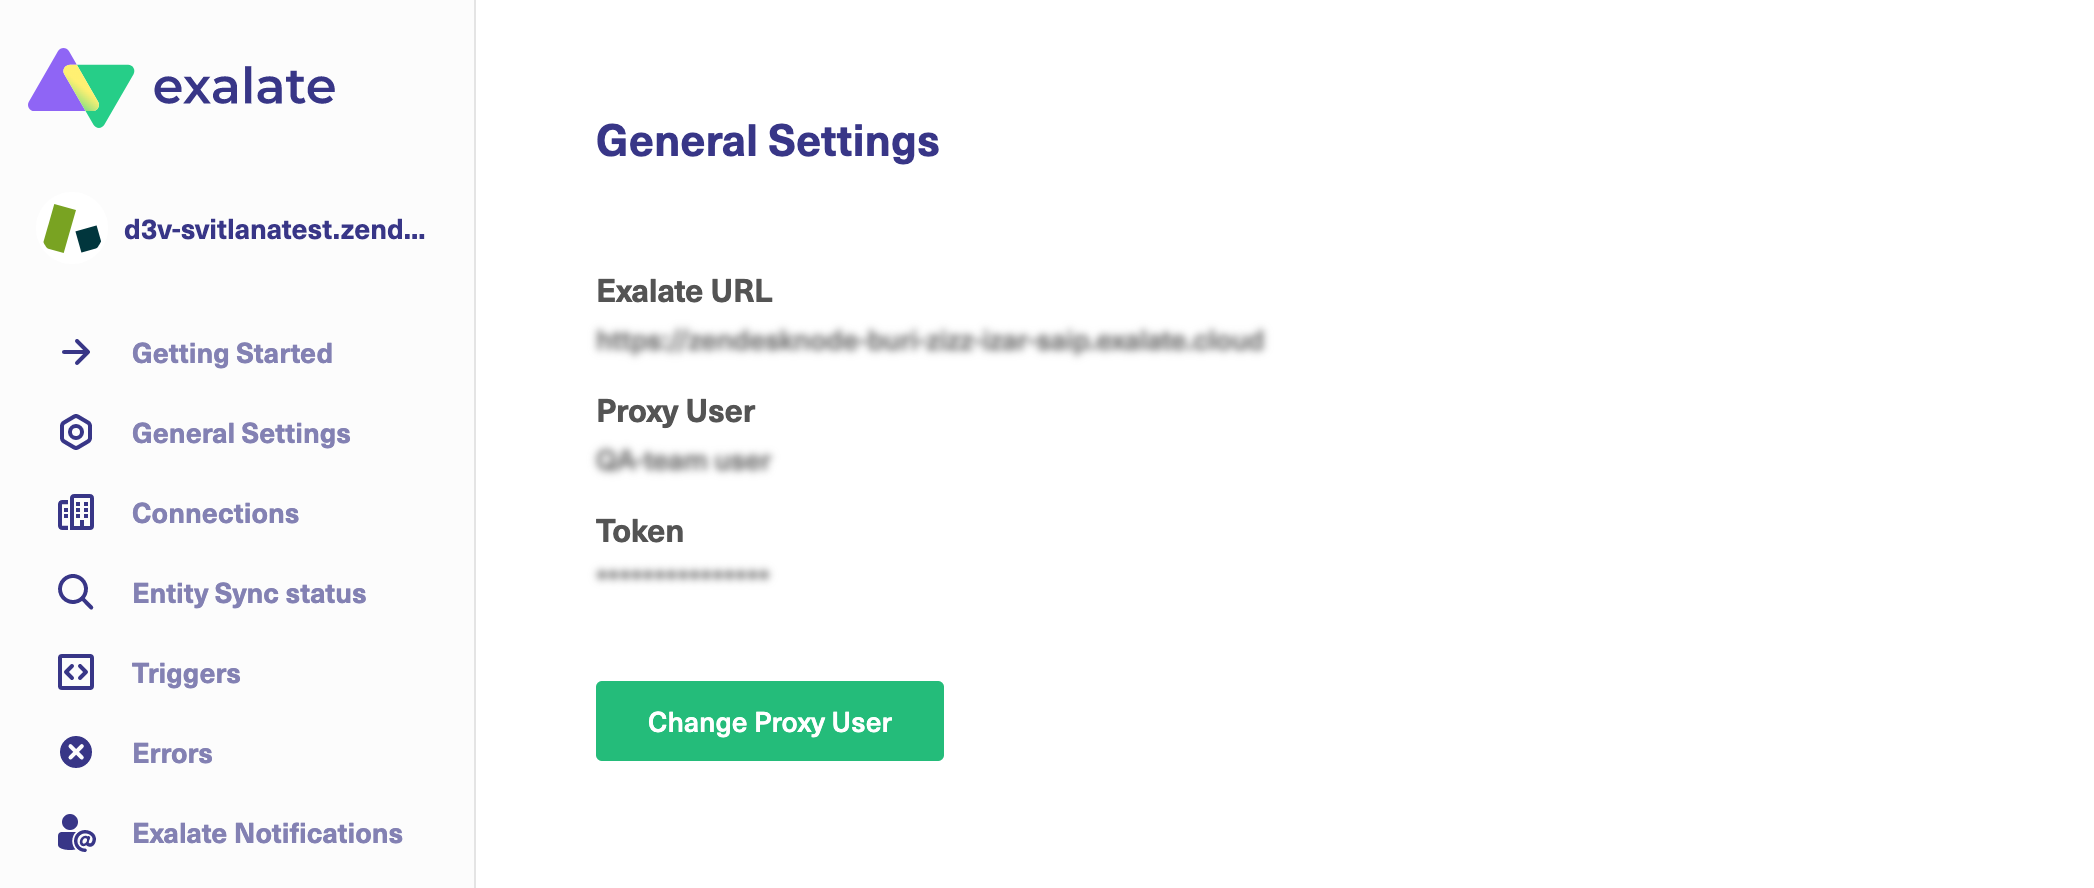
- Exalate URL - your Exalate node URL.
- Proxy user- a dedicated Zendesk agent. Exalate performs ticket changes on behalf of this user.
- Token - access token generated by the proxy user.
- Change Proxy user - this button allows you to change the current proxy user.
Freshdesk & Freshservice

- Exalate URL - your Exalate node URL.
- Tracker URL - your Freshdesk / Freshservice instance URL.
- Tracker User - a proxy user that is used by Exalate to communicate with Freshdesk / Freshservice. This user carries out changes such as creating tickets, updating data, adding notes and attachments, etc.
- API Key - a unique API key that acts as a password for the proxy user.
- Configure - click the Configure button to adjust General Settings.
Asana

- Exalate Node URL - your Exalate node URL.
- Asana URL - your Asana instance URL.
- Password/ API Token- a unique API key that acts as a password for the proxy user.
- Configure - click the Configure button to adjust General Settings.
Connections
You can find a list of all the created connections under the Connections tab. If you do not have any connections yet, this is the place where you can create and configure one.
Under the Connections tab, you can find the following options:
- Initiate Connection: Click this button to create a new connection.
- Accept Invitation: If the connection has been initiated from the other instance, you can accept the connection invitation by clicking the corresponding button.
- Refresh: Use the Refresh button to instantly refresh the connections screen without reloading the whole page.
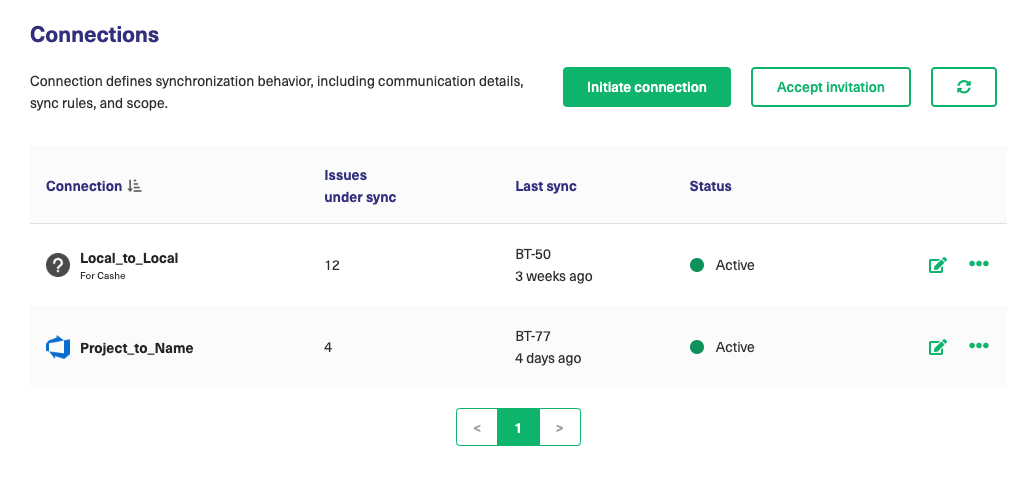
Note: You can click on any of the column headers to sort, in ascending or descending order, Connection types, Issues under sync, Last sync, and Status.
Once you have established a connection, there are several available options available from the icons on the right side:

- Edit Connection: This option allows you to modify the connection Sync Rules, add a trigger, view statistics, and general connection information, as well as add a connection description.
- Deactivate: Use this option to deactivate a connection. When you deactivate a connection, it stays in the connection list with the deactivated status. You can activate it anytime by clicking the Activate button.
- Delete Connection: You can delete a connection from the connections list by clicking this button. When deleting a connection, the synchronization information as well as the configurations is removed. You can see a warning with the connection information and a confirmation screen whenever deleting a connection.
- Exalate: By clicking Exalate, you can start the synchronization of a specific entity right away. Enter the entity key and click Exalate to proceed with the sync.
Exalate Notifications
Under the Exalate Notifications tab, you can add users who will receive email notifications every time Exalate raises a synchronization error.
Click Create to add a user's name and email to the list of notification recipients.
You can choose to unsubscribe by removing users from the list of administrators in this panel.

Errors
Here you can find a list of errors when the synchronization is blocked. The errors can be related to a single issue error or a Connection-level error that blocks the entire Connection.
There could also be an instance-wide error that blocks all the Connections within that instance.
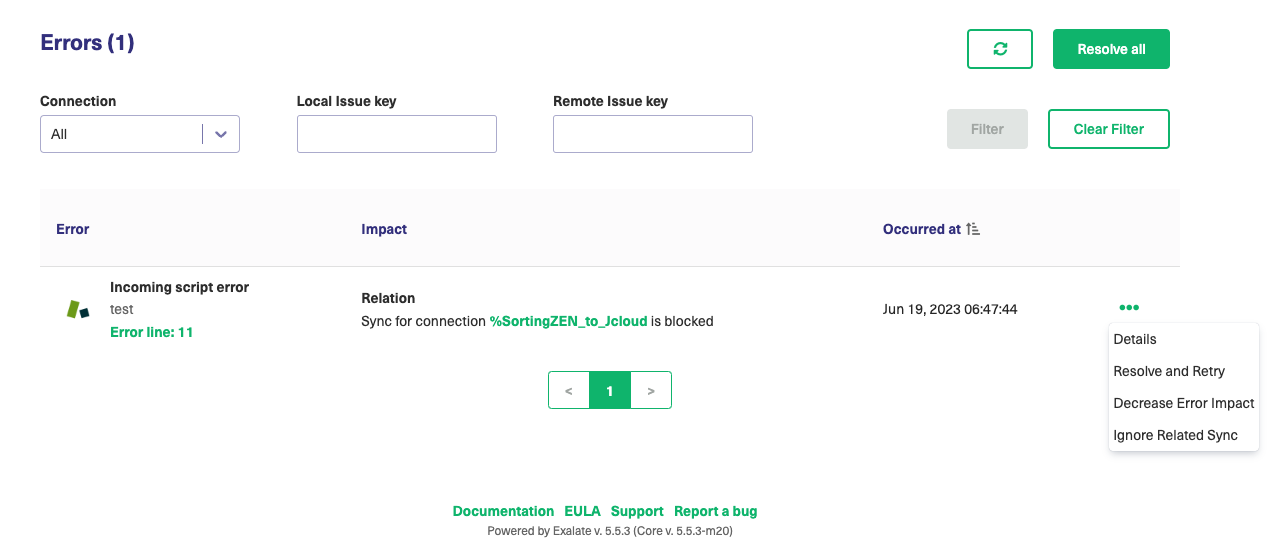
You can manage these errors and find the error details. Error overview includes an error summary description, its impact level, and the time when the error occurred.
Click the "..." to access the following options:
- Error Details: find out more information on every specific error.
- Resolve and Retry: start sync again once the error has been fixed.
- Decrease Error Impact: decreases the error impact level.
- Ignore Related Sync: ignores the error related to the sync.
Note: You can click on any of the column headers to sort, in ascending or descending order, Error, Impact, and Occurred at.
Note: For more information, please see error handling.
Sync Queues
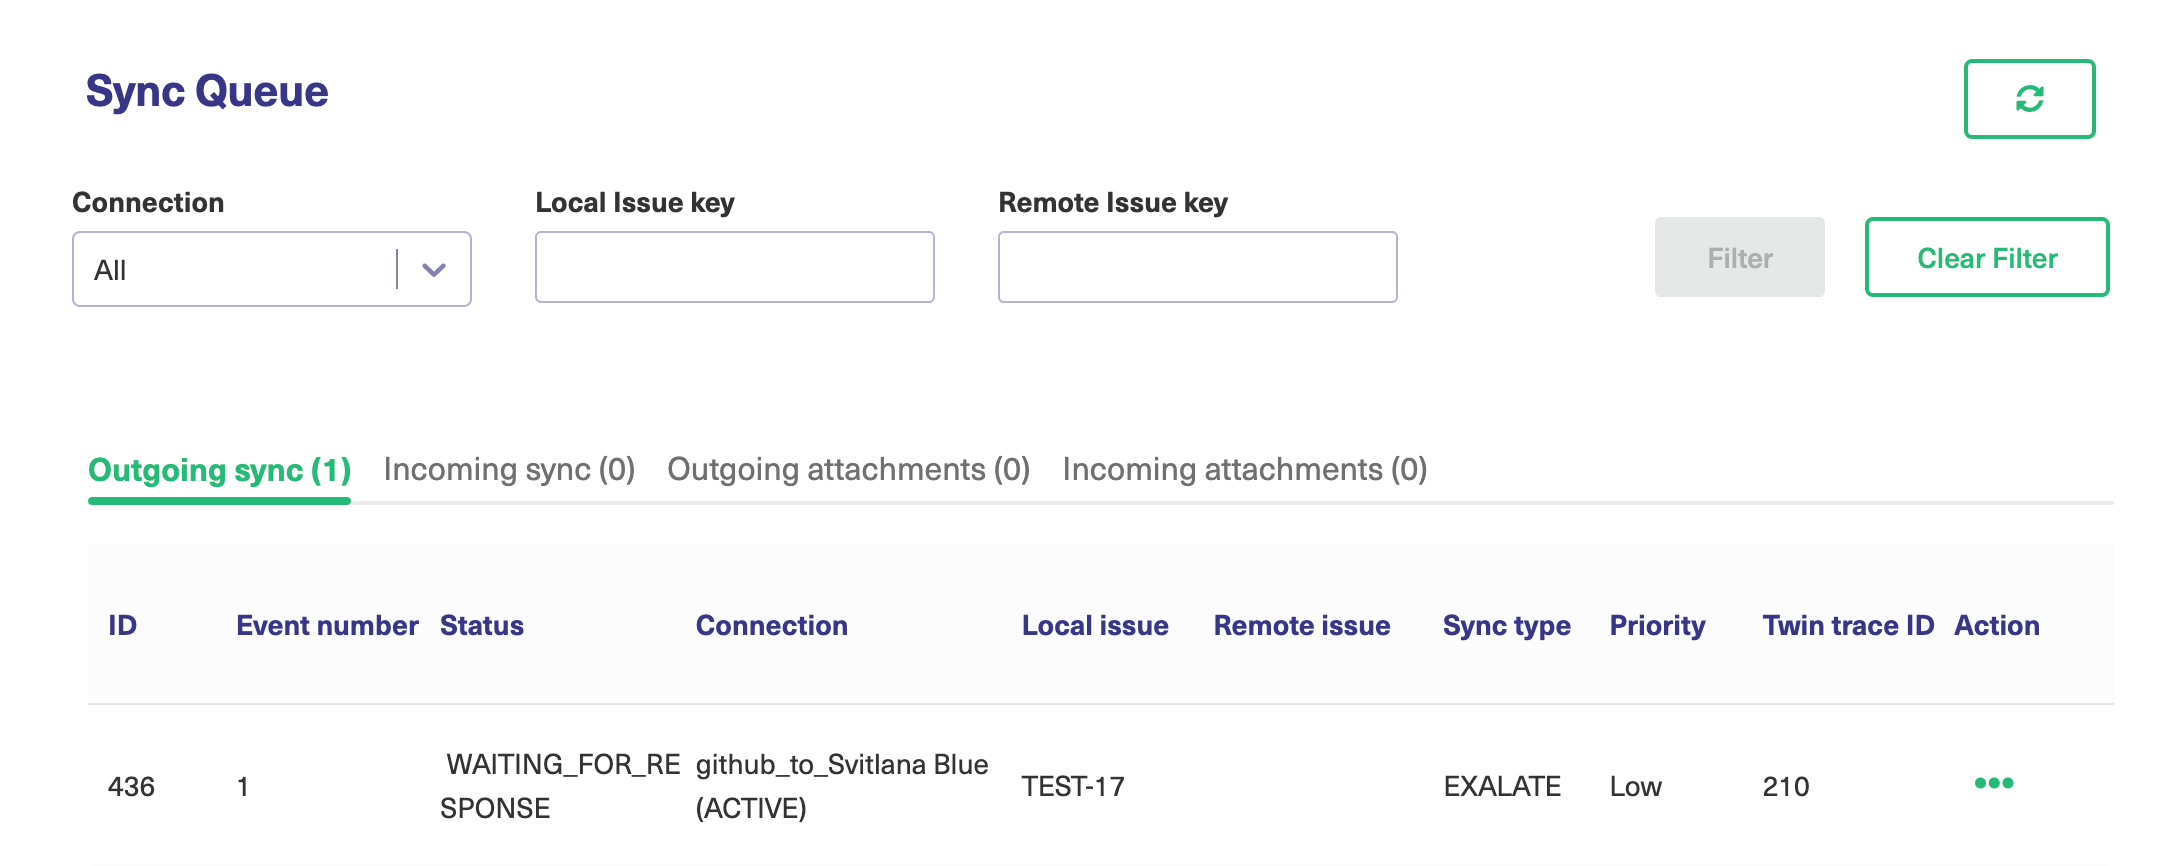
The Exalate app provides a Sync Queue utility to monitor outgoing and incoming synchronization messages that are in progress. You can find it in the Exalate admin menu as a separate tab.
The tool stores data related to the synchronization that is under processing. You can also track attachment synchronization separately.

The Sync Queue can be filtered by Connection name or even a particular Local or Remote entity ID.
You can also click on any of the column headers to sort, in ascending or descending order, ID, Event Number, Status, Connection, Sync type, and Twin trace ID.
This can be really useful when there is a big amount of issues under synchronization and you need to find out the information on something specific.

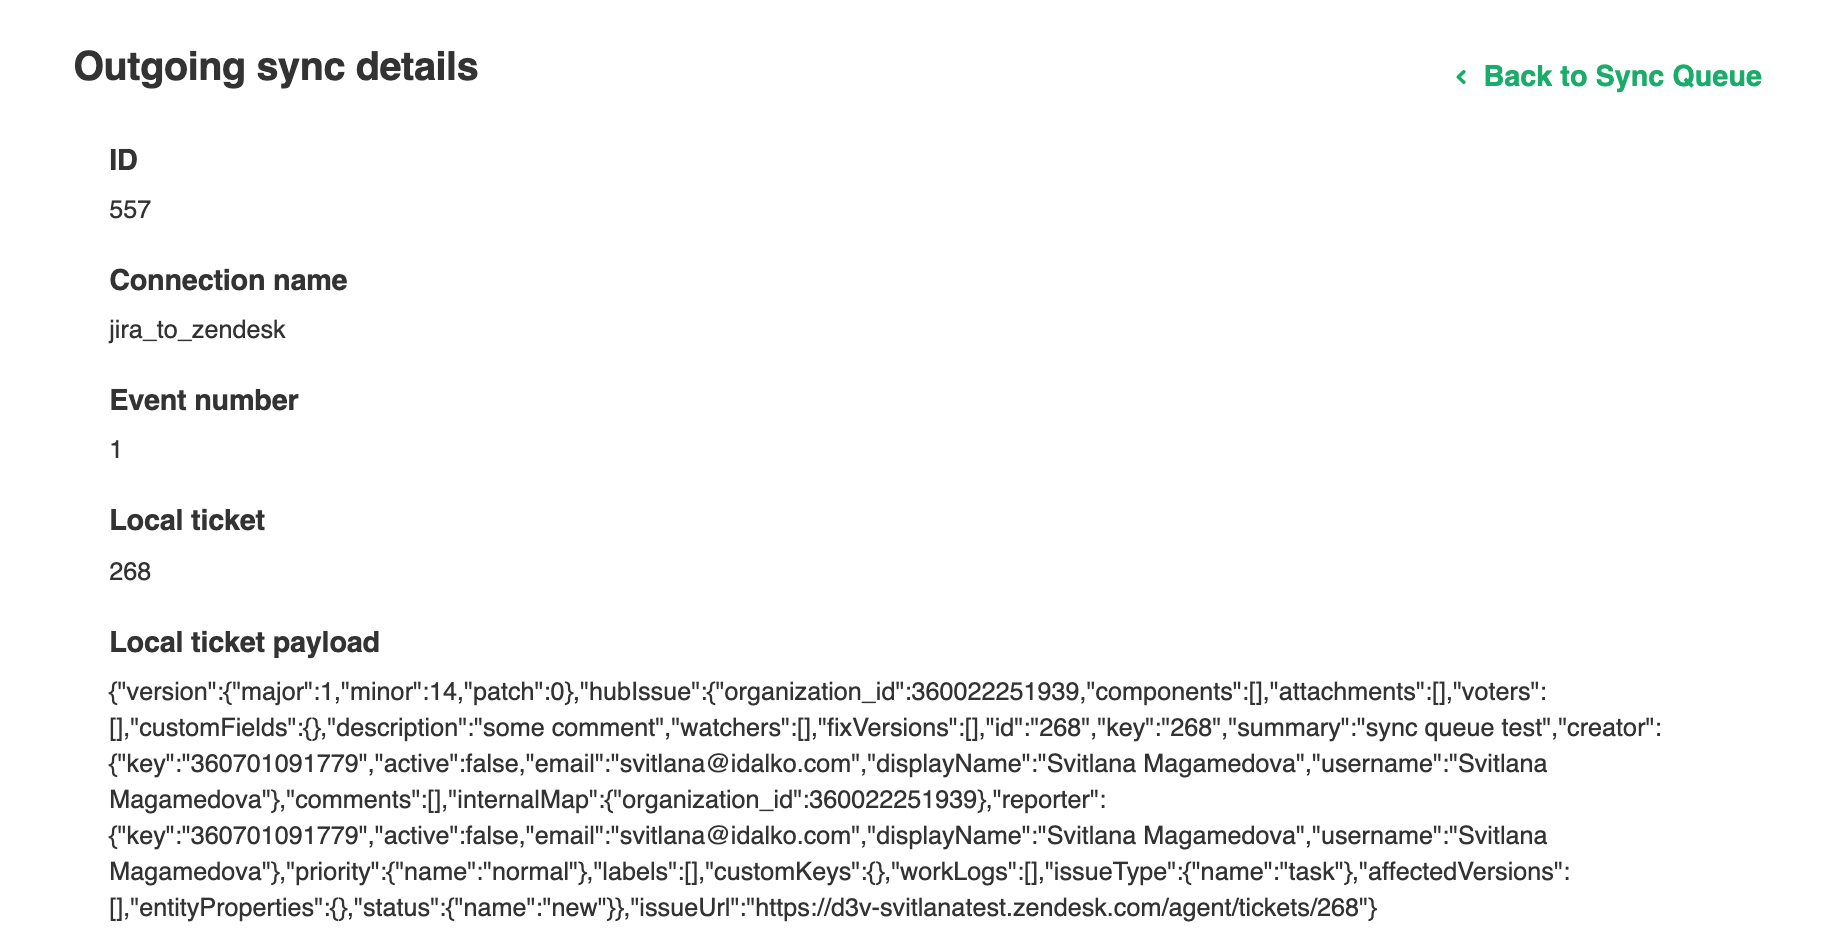
The Outgoing sync tab displays outgoing synchronization events queued in the In progress status.
Exalate creates a Sync Event once the local issue has been updated. You can find all processing sync events under this tab.
The Incoming sync tab displays incoming synchronization requests queued in the In progress status.
Exalate creates Sync Request once the remote issue was updated. You can see all processing sync requests under this tab.

Outgoing attachments display outgoing sync events of the attachments that are in progress.
Incoming attachments display incoming sync events of the attachments that are in progress.
Usage
- Track all synchronizations that are under processing.
- When you use Bulk Exalate or Bulk Connect to sync a big amount of issues at a time you can track the synchronization progress.
- Troubleshooting: you can get details of the queued synchronization events or requests.
Usually, the support engineer requests data from the Sync Queue to get more context of an issue.
Below you can see an example of the outgoing sync event details
Bulk Connect
If you have an existing entity and you want to connect it with the existing entity on the other side, you can use the Bulk Connect operation. Under this tab, you can upload a simple mapping file and sync a set of existing issues within just one operation.
To know more about how to perform this operation, please read the guide on how to perform the Bulk Connect operation.

Triggers
Here you can configure automatic synchronization by creating triggers. Each trigger includes a search query with specific parameters. If the entity fits a search query, it is triggered for synchronization automatically.

Note: You can use the sorting feature to sort triggers in ascending or descending order by Entity type, then sync via Connection, and Status. The sorting icon appears once you click on one of these headers.
For more information, please see how to create Triggers.
Entity Sync Status
Under this tab, you can see the sync status of any entity and start synchronization. Enter an entity URN and click Search to find out the current status of this entity.
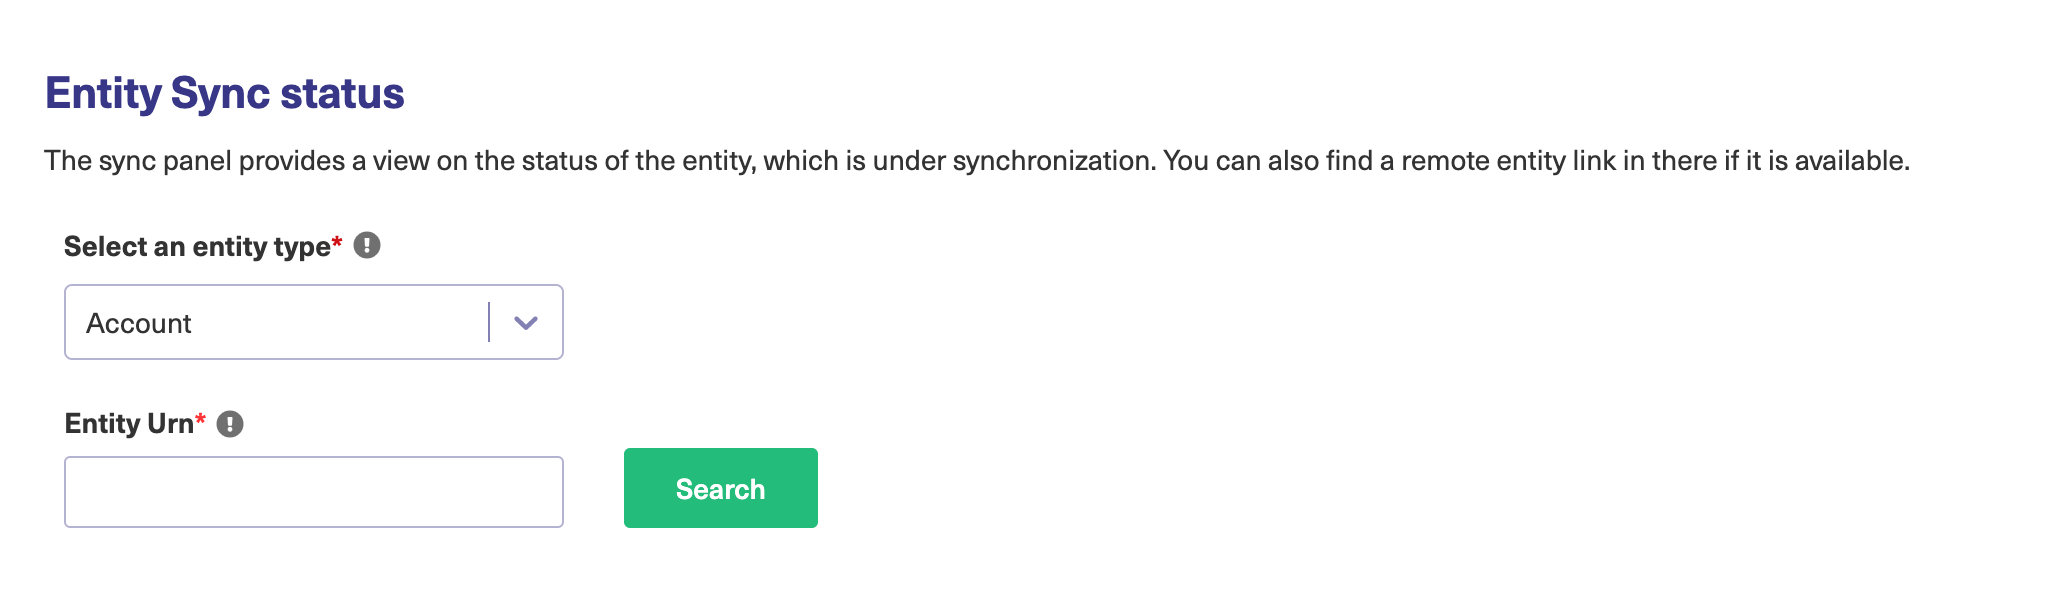
If the entity is already under sync, you can Unexalate it from here. If the entity has not been synchronized yet, you can Exalate or Connect it by clicking the corresponding button.
To know more about the Entity Sync status on different platforms, visit this page.
License Details

Here you can manage your Exalate license information, and read your license type, status, and expiration date.
Clean-up Tools
Under this tab, you can stop synchronization and remove synchronization-related metadata on both sides. Usually, this tool is used to resolve unhandled synchronization problems. The two available options let you clean up by Connection or clean up by Entity.
Learn to use the Clean-up Tools.
More Integrations
The More integrations tab provides a comprehensive overview of all the systems Exalate can integrate with, allowing you to quickly identify new opportunities for synchronization.
