Important: You cannot toggle between the different modes. To do so, you need to create a new Connection in Visual mode, Script mode, or Basic mode.
Note: Before you set up a Connection in Visual mode ensure that:
- your instance is public.
- you have admin access to the destination instance.
- you are either in the Evaluation (trial) period or have a Paid license.
Initiate a Connection in Visual Mode from Zendesk
Note: It doesn't matter which side you start initiating the Connection from. The Exalate UI remains the same.
Note: We are exploring ways to enhance or replace Visual Mode with an AI-Configuration mode for a better user experience. Check the Beta label added to the Visual mode screens. Your feedback is crucial, so let us know what you think.
1. Navigate to the Connections tab in the Exalate console.
To navigate to the Connections tab:
1. Click Exalate in the list of apps.

2. Click Connections.
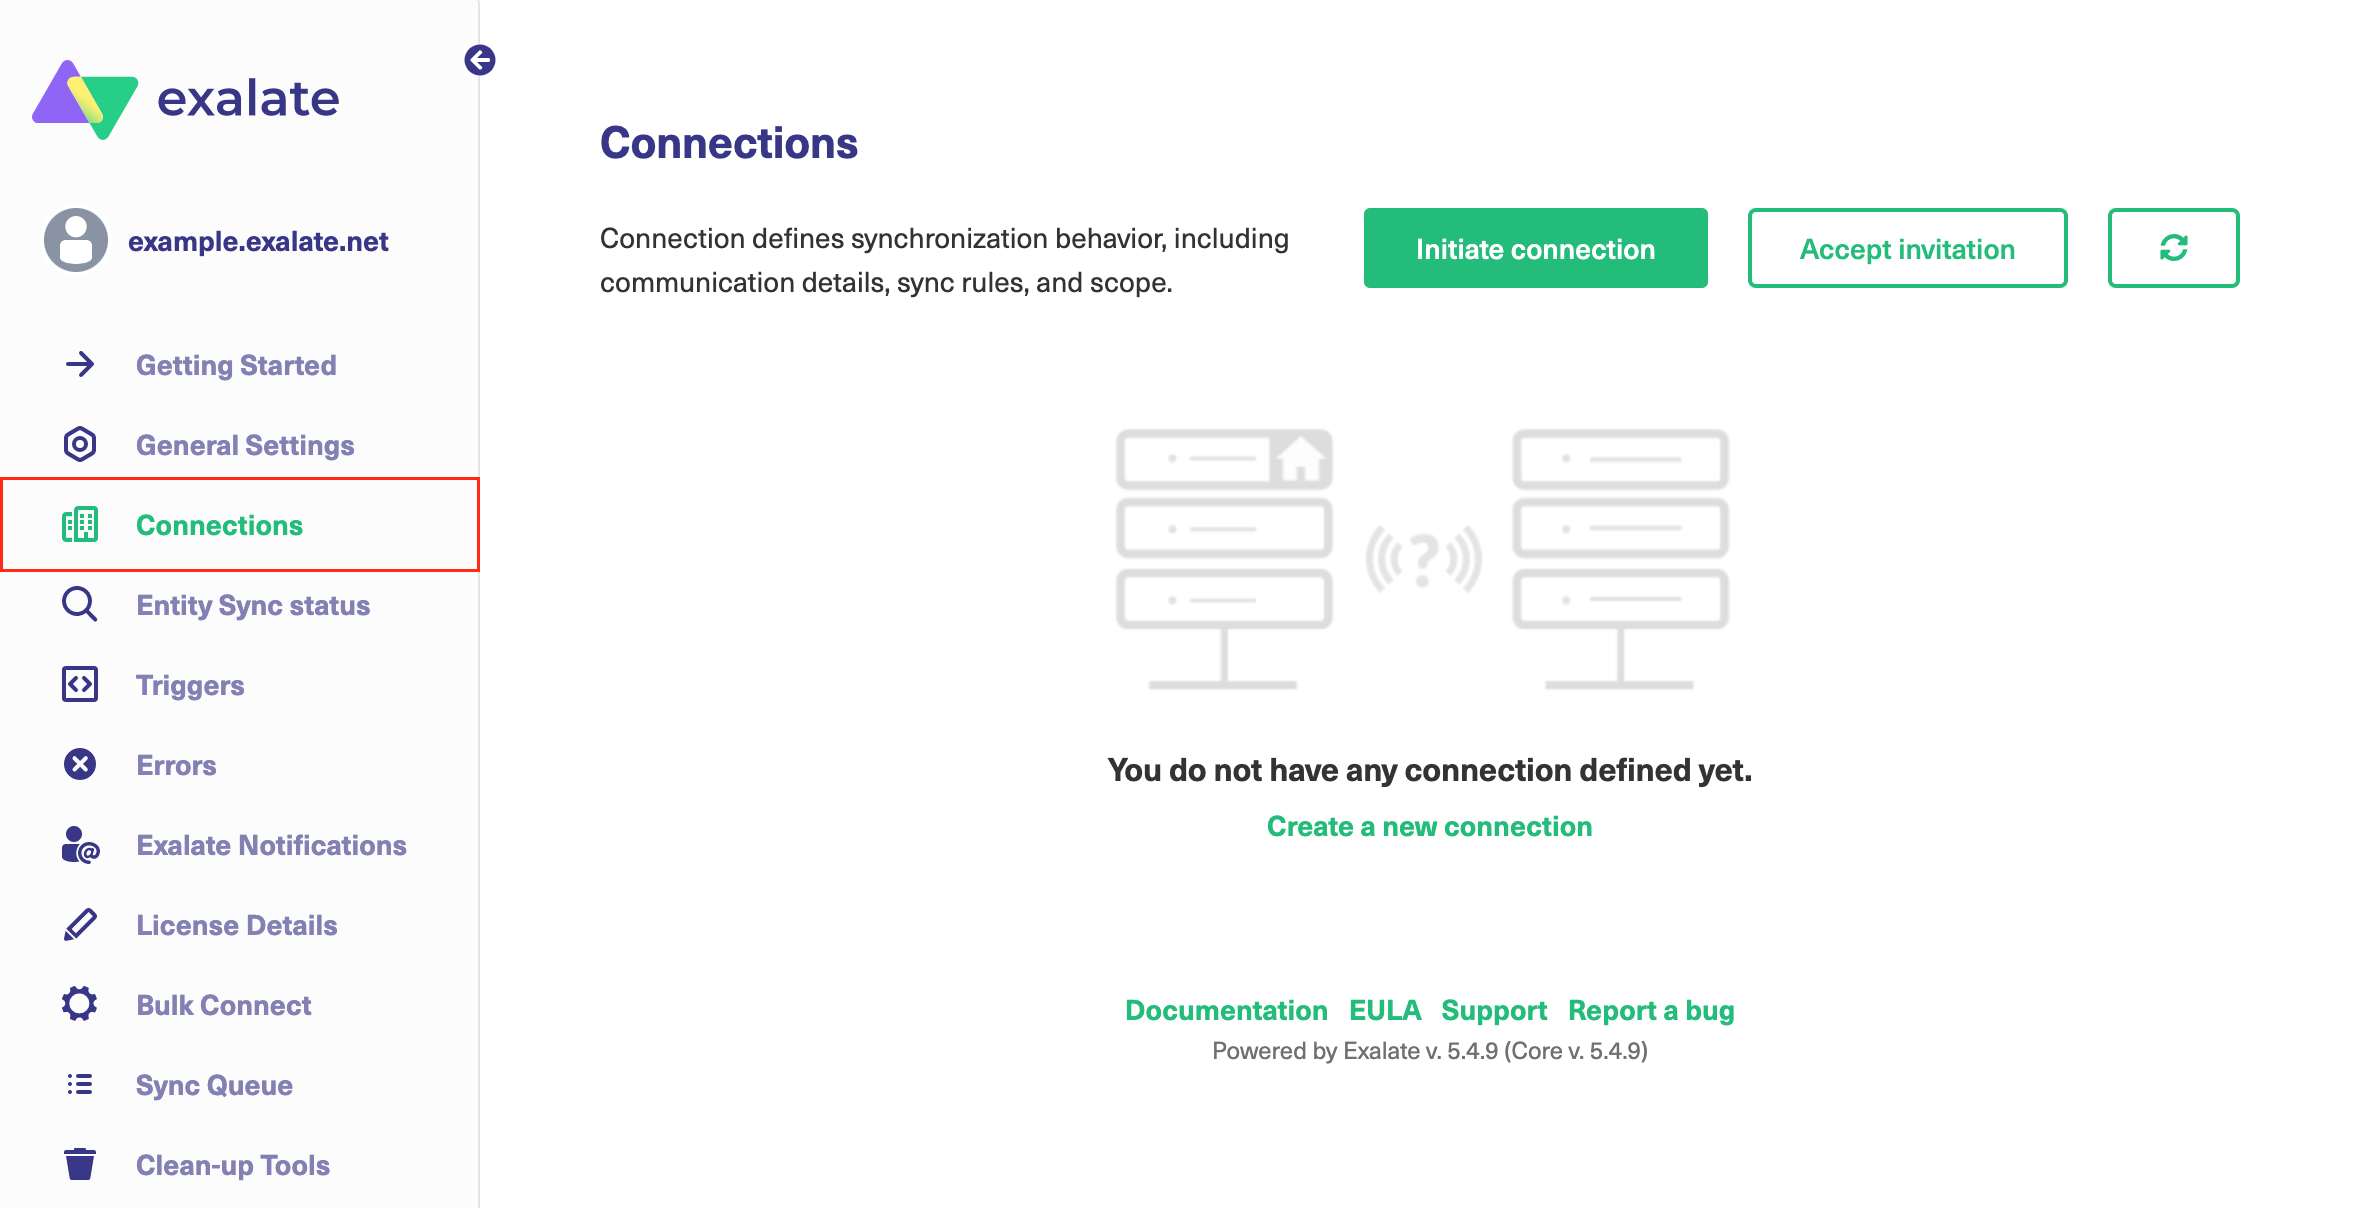
2. Click Initiate Connection.

3. Enter the Destination Instance URL.
The Destination Instance URL is the link to the instance you want to set up a connection with. You can directly enter the link of that instance or the Exalate URL from the General Settings tab in the Exalate admin panel.

Exalate suggests available Configuration Modes based on the destination instance..
4. Select the Configuration Mode. In this case, Visual Mode.
Note: We are exploring ways to enhance or replace Visual Mode with an AI-Configuration mode for a better user experience. Check the Beta label added to the Visual mode screens. Your feedback is crucial, so let us know what you think.
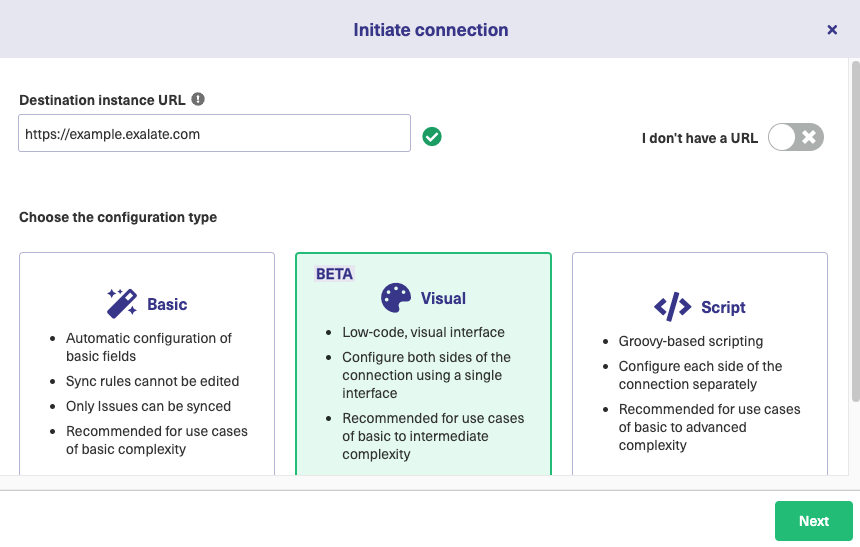
5. Click Next.
6. Enter the Connection Information
Field | Description |
|---|---|
Local instance short name | A short name for your instance |
Destination instance short name | A short name for the destination instance |
Connection name | Name of the connection |
Description | Description of the connection |

7. Click Next.
8. Click Verify admin access to confirm you have admin rights to the destination instance. Then click Initiate.
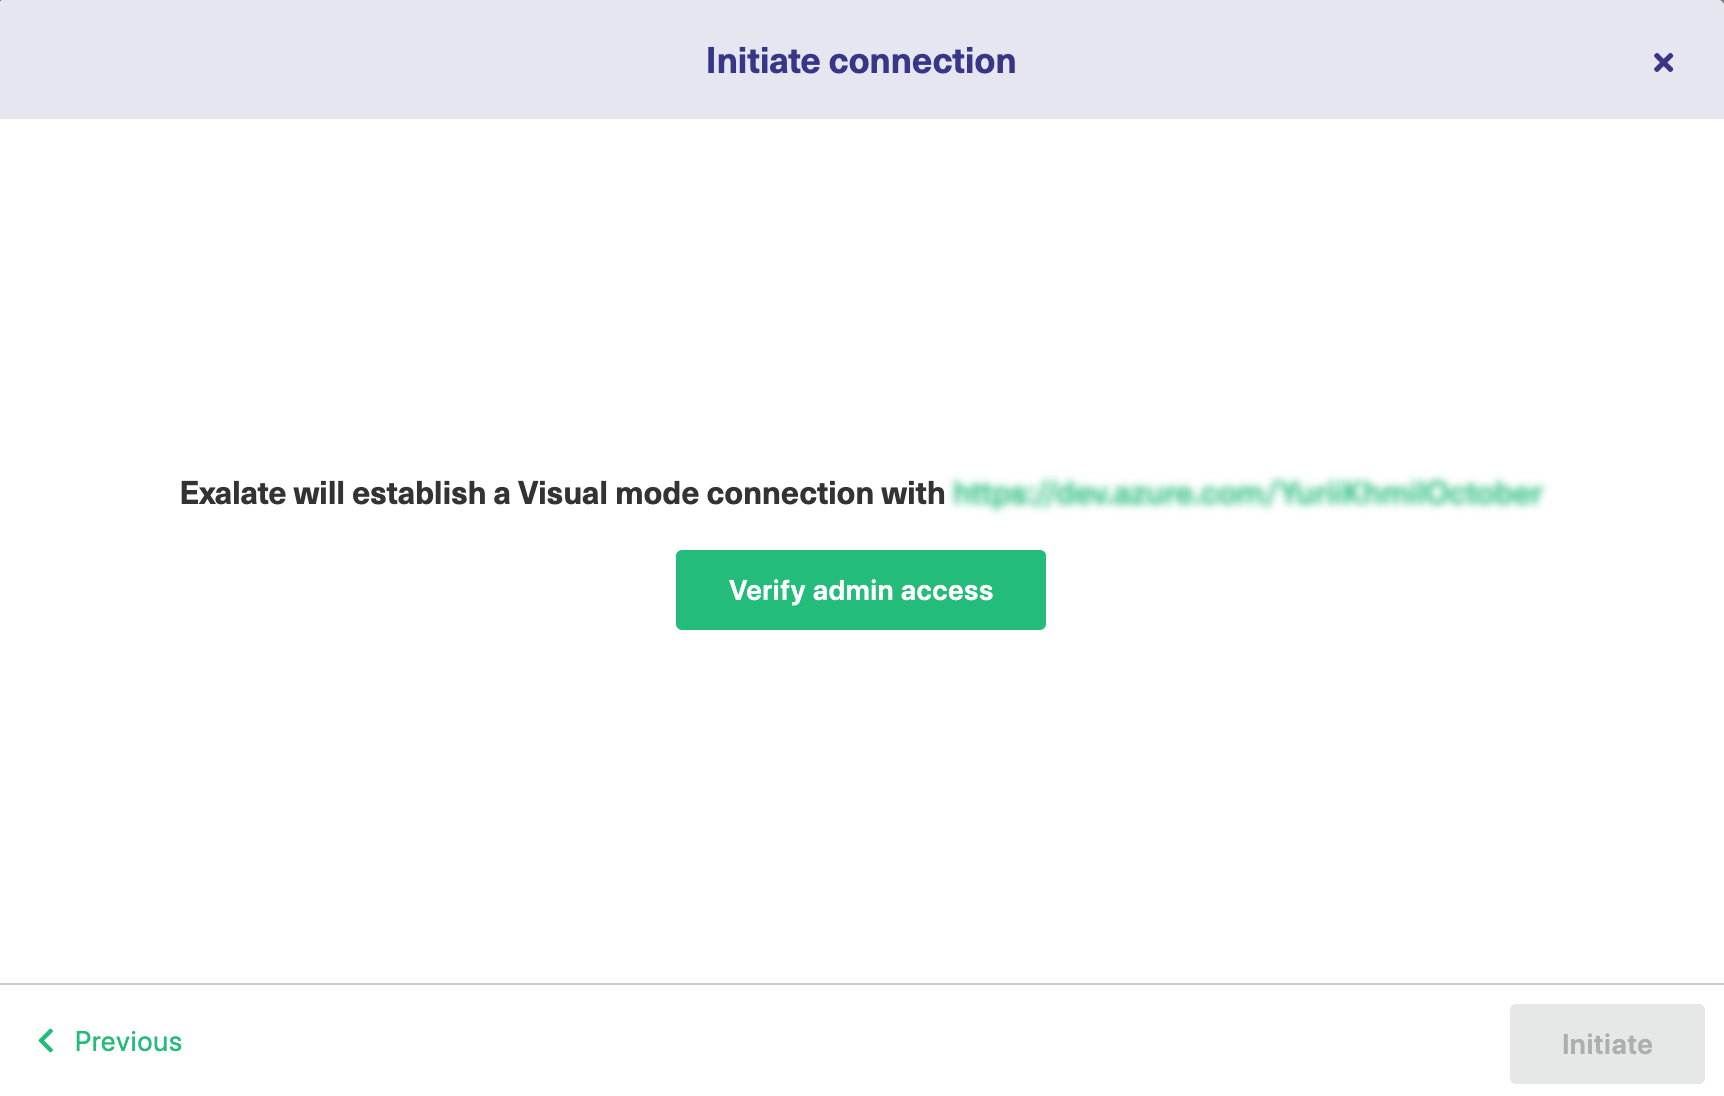
9. Click Accept to finish the verification process.
You see a pop-up window within the remote instance to finish the verification. You are also notified about the permissions that the destination instance user has.
The destination instance user has different permissions based on the platforms to be synced.
10. Click Initiate.

11. The Connection has been set up.
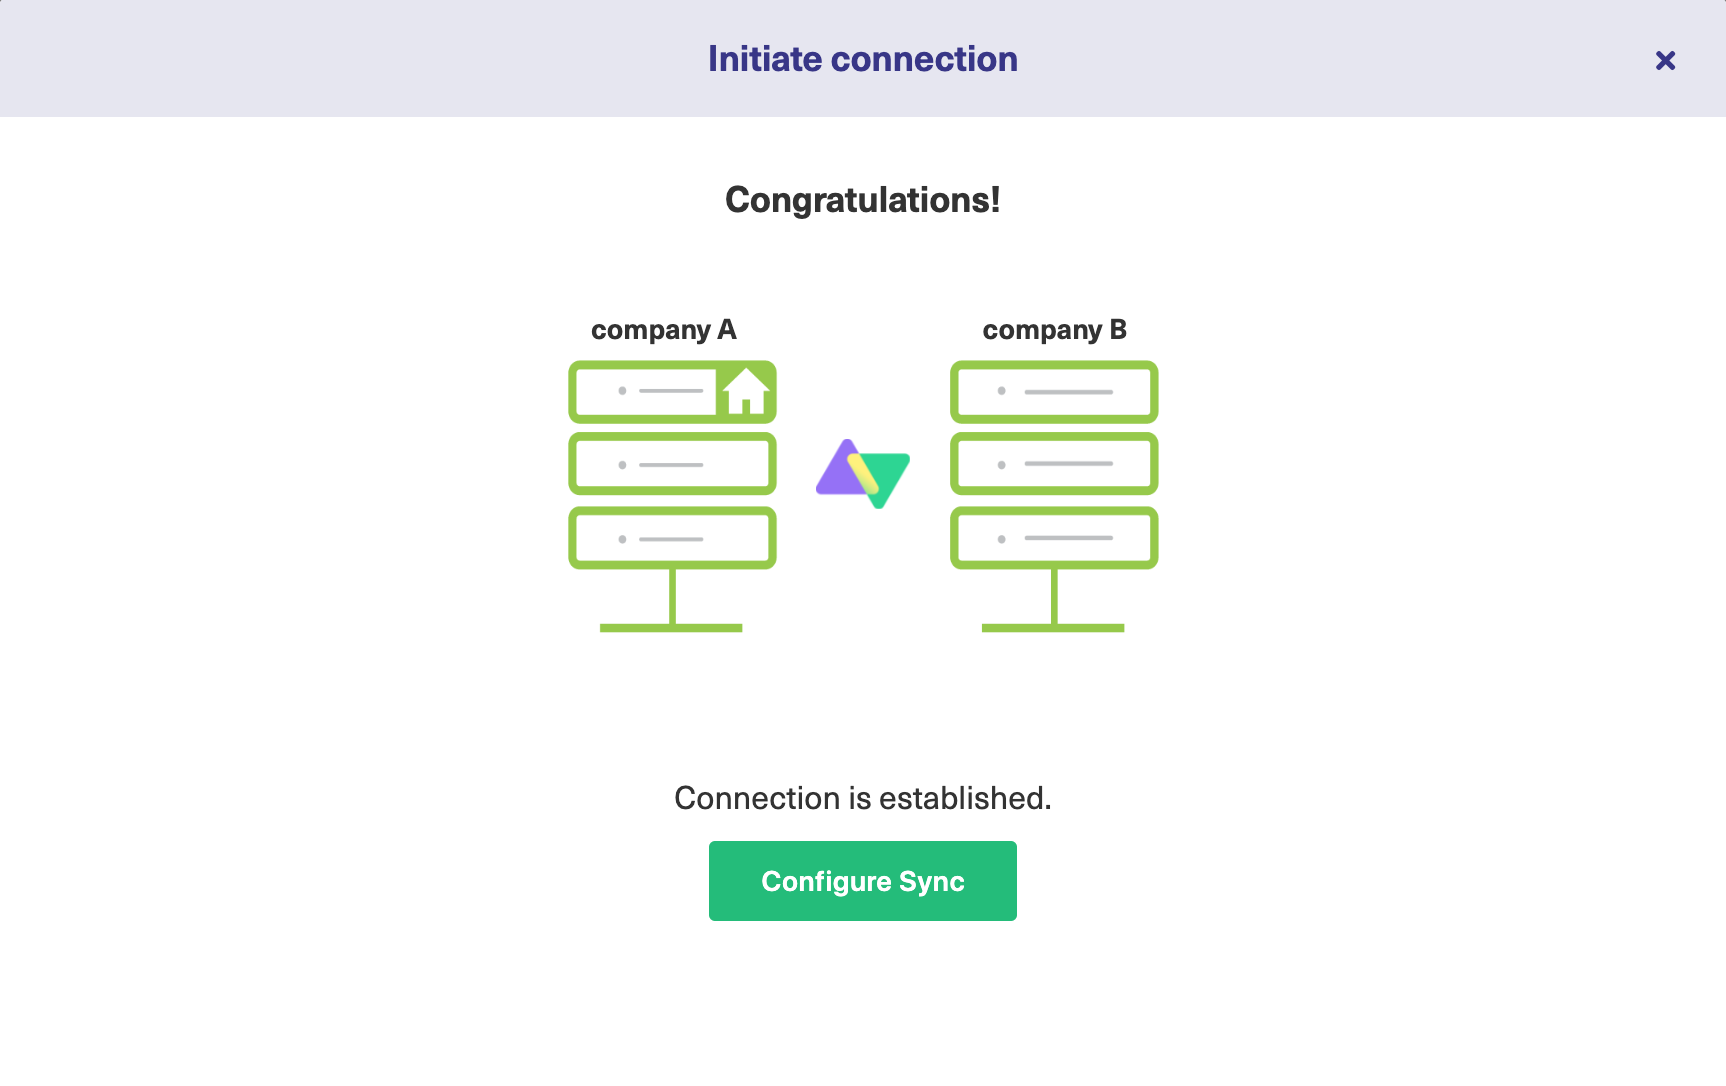
Configure the Sync (Scope)
1. Click Configure Sync to start configuring the connection.
You can even configure an existing connection by navigating to the Connections tab. Then click the Edit Connection ![]() icon in front of the Connection name.
icon in front of the Connection name.
2. Select Project on both sides.
Select the projects you want to use for the Connection, at both ends.
Note: Projects are not applicable to Zendesk in which case only the Filter Entities screen are visible.

3. Click Filter entities (Optional)
With this option, you can decide what information must be synchronized.

Set the Filters
You can also choose to have multiple filter options.
Filter example:
Status = Open, Hold
Type = Task
Priority = Urgent
In this case, the following combinations are synced:
1) Task with the Open status and Urgent priority
2) Task with the Hold status and Urgent priority
4. Set the Sync Method
 This option allows you to decide how information must be synced between the task management systems. You can choose from the following options:
Manual
The issue is synchronized manually.
Automatic
The issue is synchronized automatically based on the entities you have filtered in the previous step.
Disabled
The synchronization is disabled.
The arrows decide the direction of the synchronization.
5. Click Next to configure the field mappings.
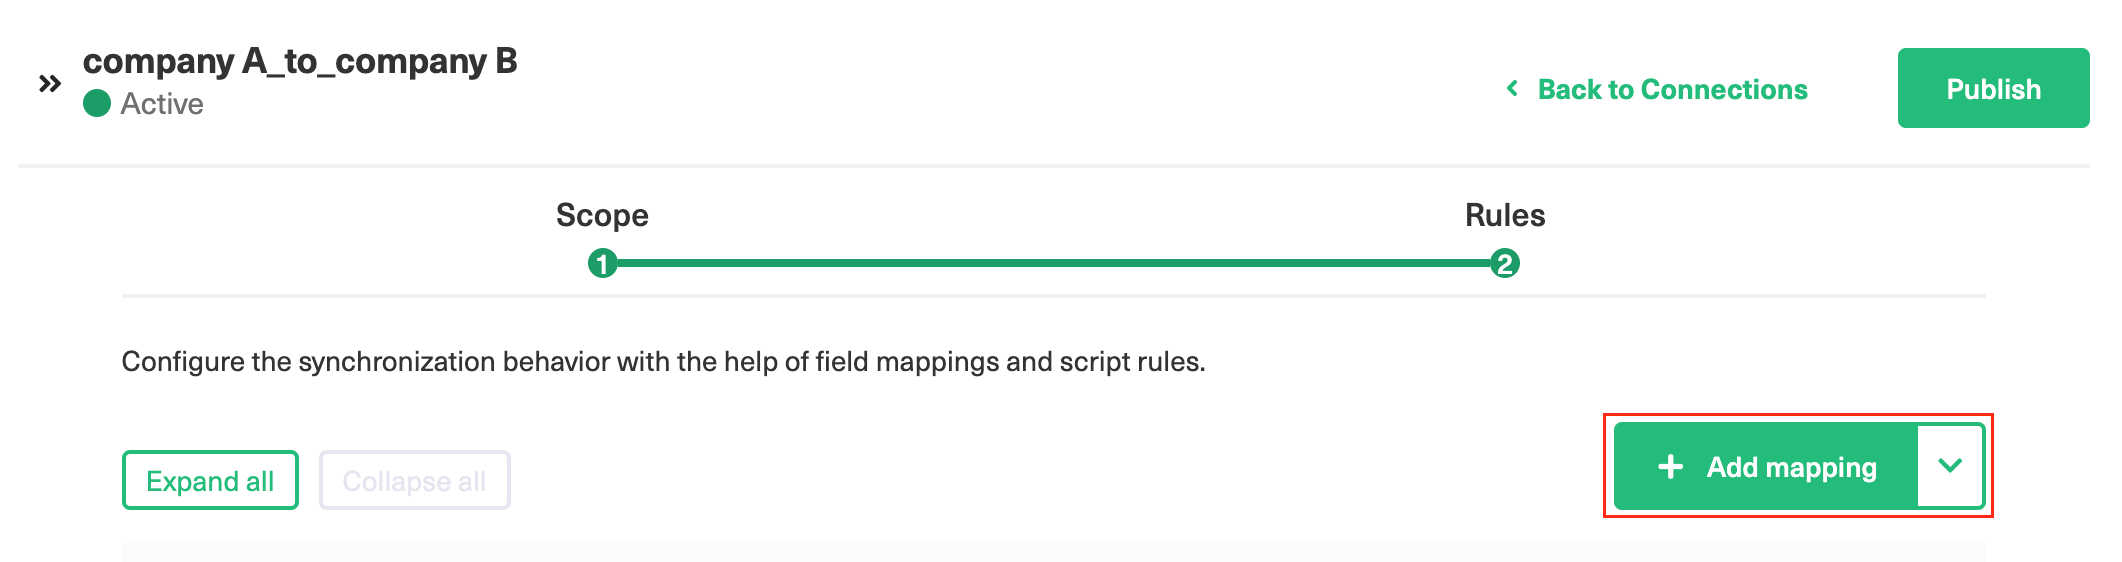
Add the Field Mappings (Rules)
Rules denote the mapping between different entities & decide what must be synchronized. There are predefined default mappings for basic fields in every Visual mode Connection.
You can access these mappings by clicking Next after configuring the sync. The Rules section consists of these mappings.

Note: The above is just an example of mapping. The actual mappings depend on the platforms under sync.
The top bar displays the local instance's short name and the remote instance's short name. These are the names you provided while setting up a connection.
It also has a Sync direction. The arrows indicate the direction, whether uni or bi-directional. You can choose to Expand all or Collapse all the mappings.
You can Edit connection ![]() or Delete mapping . You can also drag and drop them, up or down to re-prioritize.
or Delete mapping . You can also drag and drop them, up or down to re-prioritize.
Edit Mappings
For instance, if you want to edit the Tags ↔ Labels mapping, click the Edit mapping ![]() icon.
icon.
An Edit mapping dialog box opens.

Select the new fields to be mapped on both sides from the drop-down list. You can also edit the Sync direction. Sync direction allows you to control your sync in a specific direction, where the arrows indicate the direction.
Delete Mappings
You can delete a certain mapping if you don't want it.
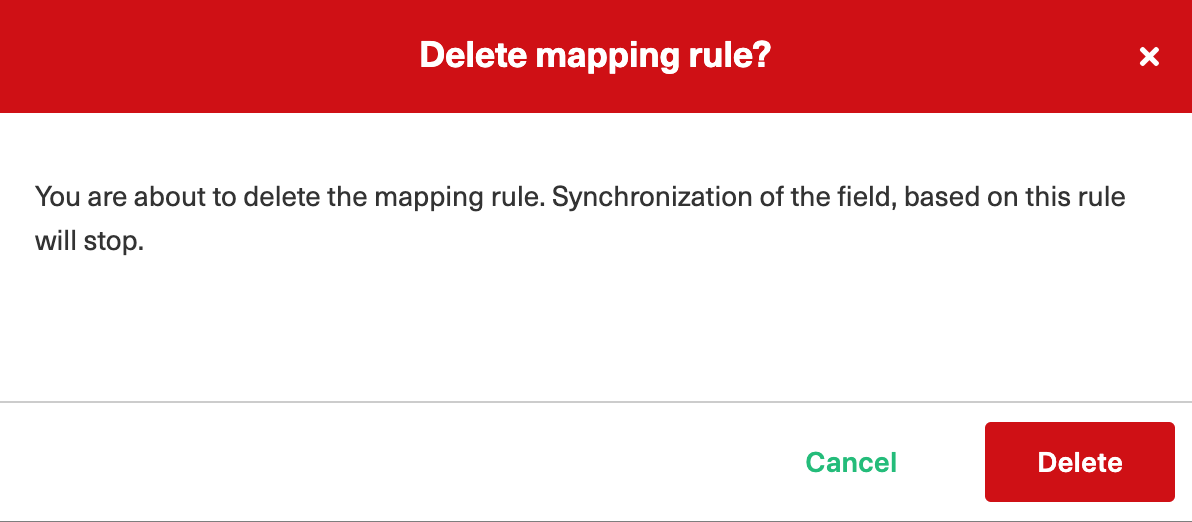
Clicking the bin icon opens up a prompt to ensure you really want to delete the mapping. Click Delete to confirm the deletion.
Add New Mappings
To add a new mapping, click the Add mapping button.
An Add mapping dialog box opens.
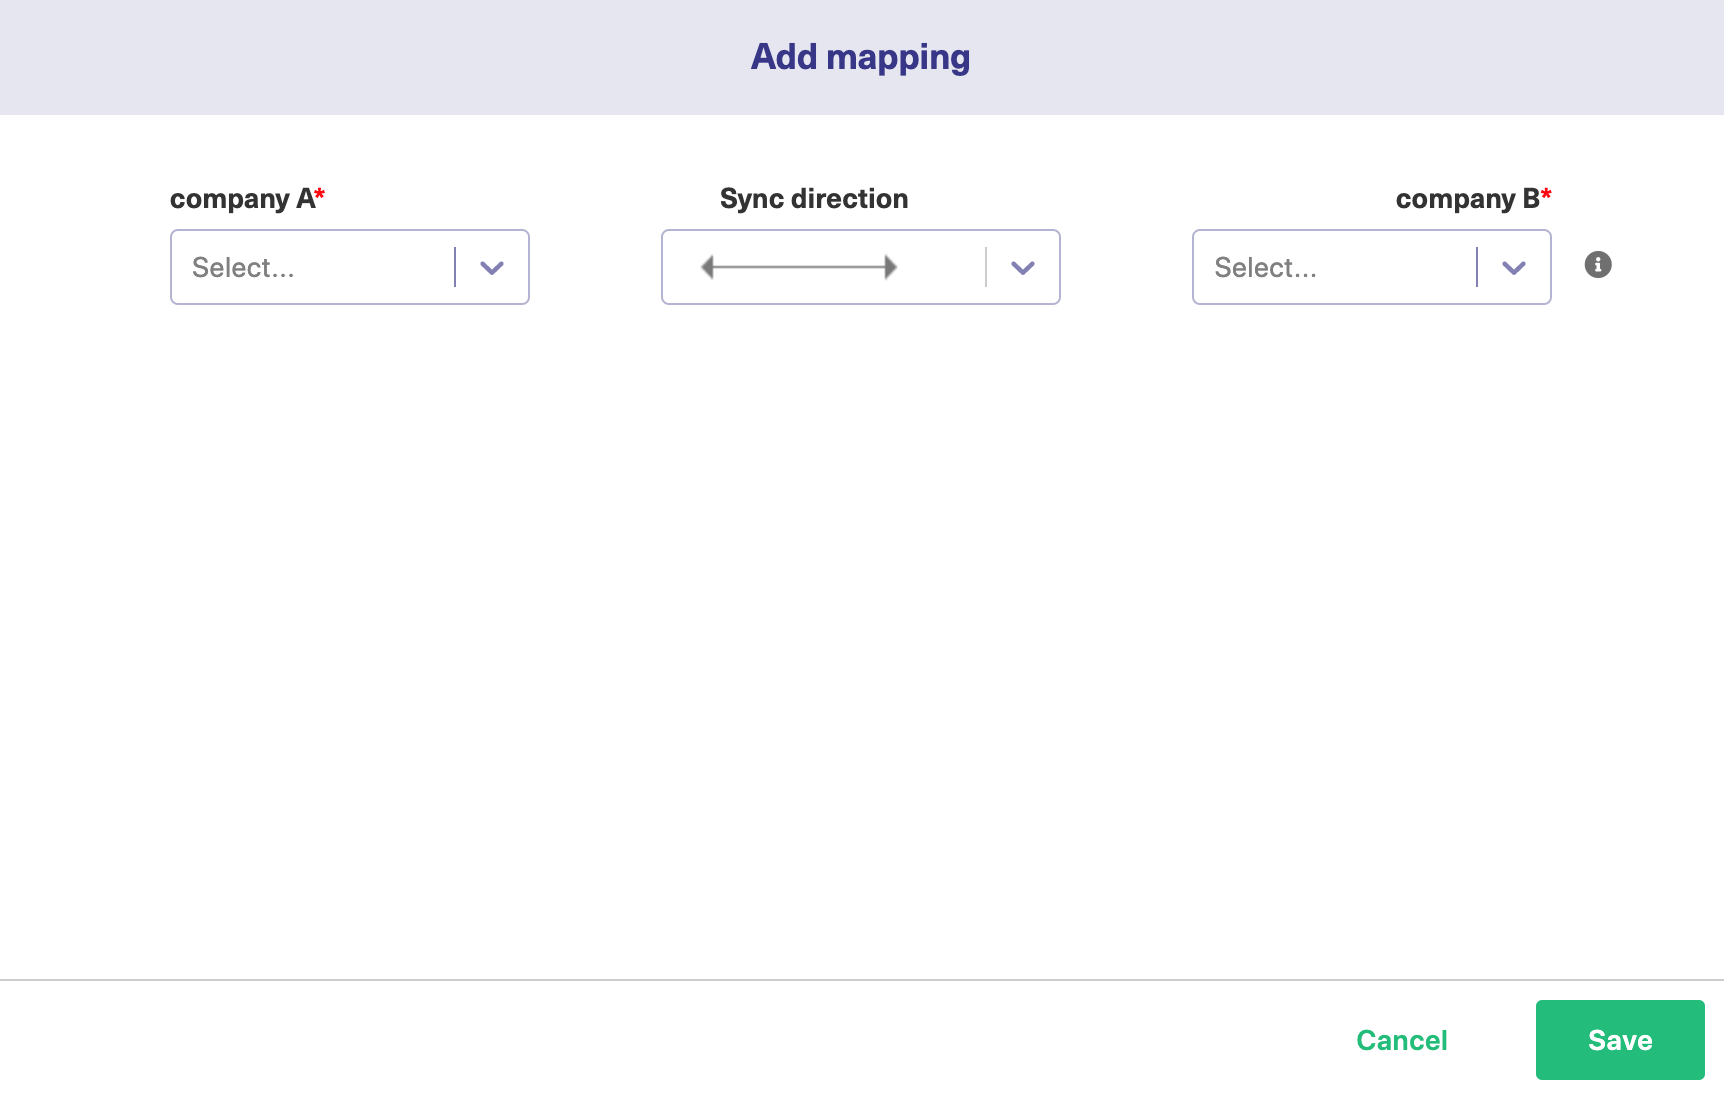
Select the required fields at both ends from a drop-down list. You can choose to keep the Sync direction as it is by default or edit it. Sync direction allows you to control your sync in a specific direction, where the arrows indicate the direction.
You can add sub-mappings by clicking the plus icon.
You can also specify what to do if the selected values do not match.
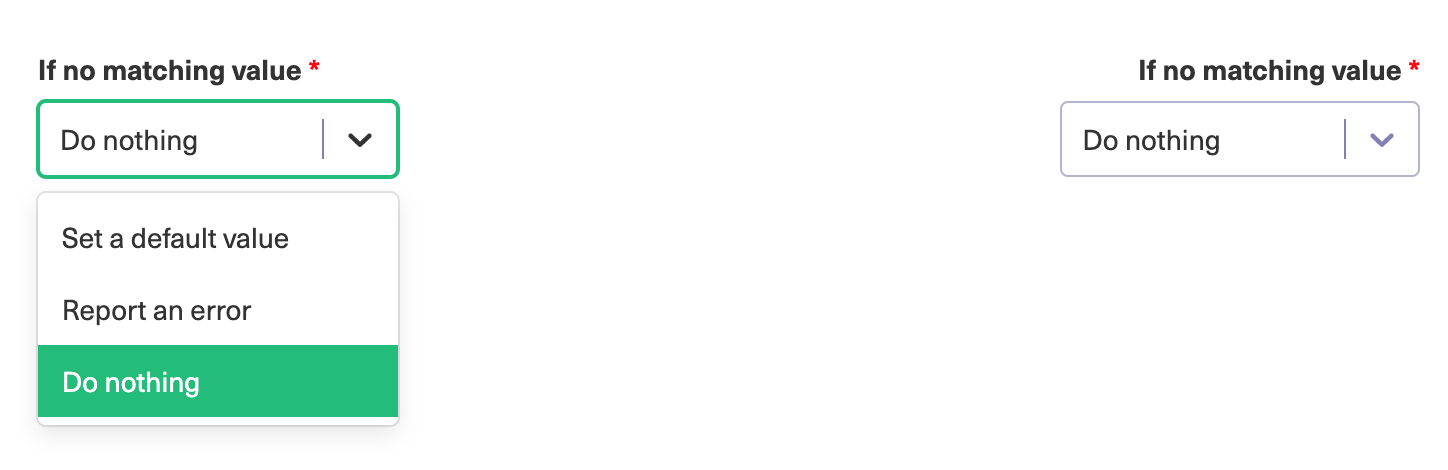
If no matching value is found you can choose to:
Option | If the value doesn't exist |
|---|---|
Set a default value | Fields are set to a default value you specify |
Report an error | An error appears & is displayed on the Errors tab. The synchronization is blocked in this case. |
Do nothing | The values stay the same |
Save the changes whenever you are ready.
Custom field mappings
When you set up a Visual mode connection, Exalate fetches some of the custom fields for you. These are available through a drop-down list while adding a mapping.
If you don't find the custom field, there is always an option to add Scripts.
The following are the supported custom field types:
Text:
- Jira Cloud: Text Field (multi-line), Text Field (single line)
- ADO: Text (single line), Text (multiple lines)
- Zendesk: Text, Multi-line, Date, Number, Decimal
Option:
- Jira Cloud: Radio Buttons, Select List (single choice)
- ADO: Picklist (string), Picklist (integer)
- Zendesk: Drop-down
User:
- Jira Cloud, on-prem: User Picker (single user)
- ADO: Identity
- Zendesk: - Not supported
Add Scripts for Advanced Configuration (Optional)
For advanced synchronization use cases, you can add Groovy Scripts to your Visual mode Connection.
To do so, click the arrow on the Add Mapping button. Select Add Script.
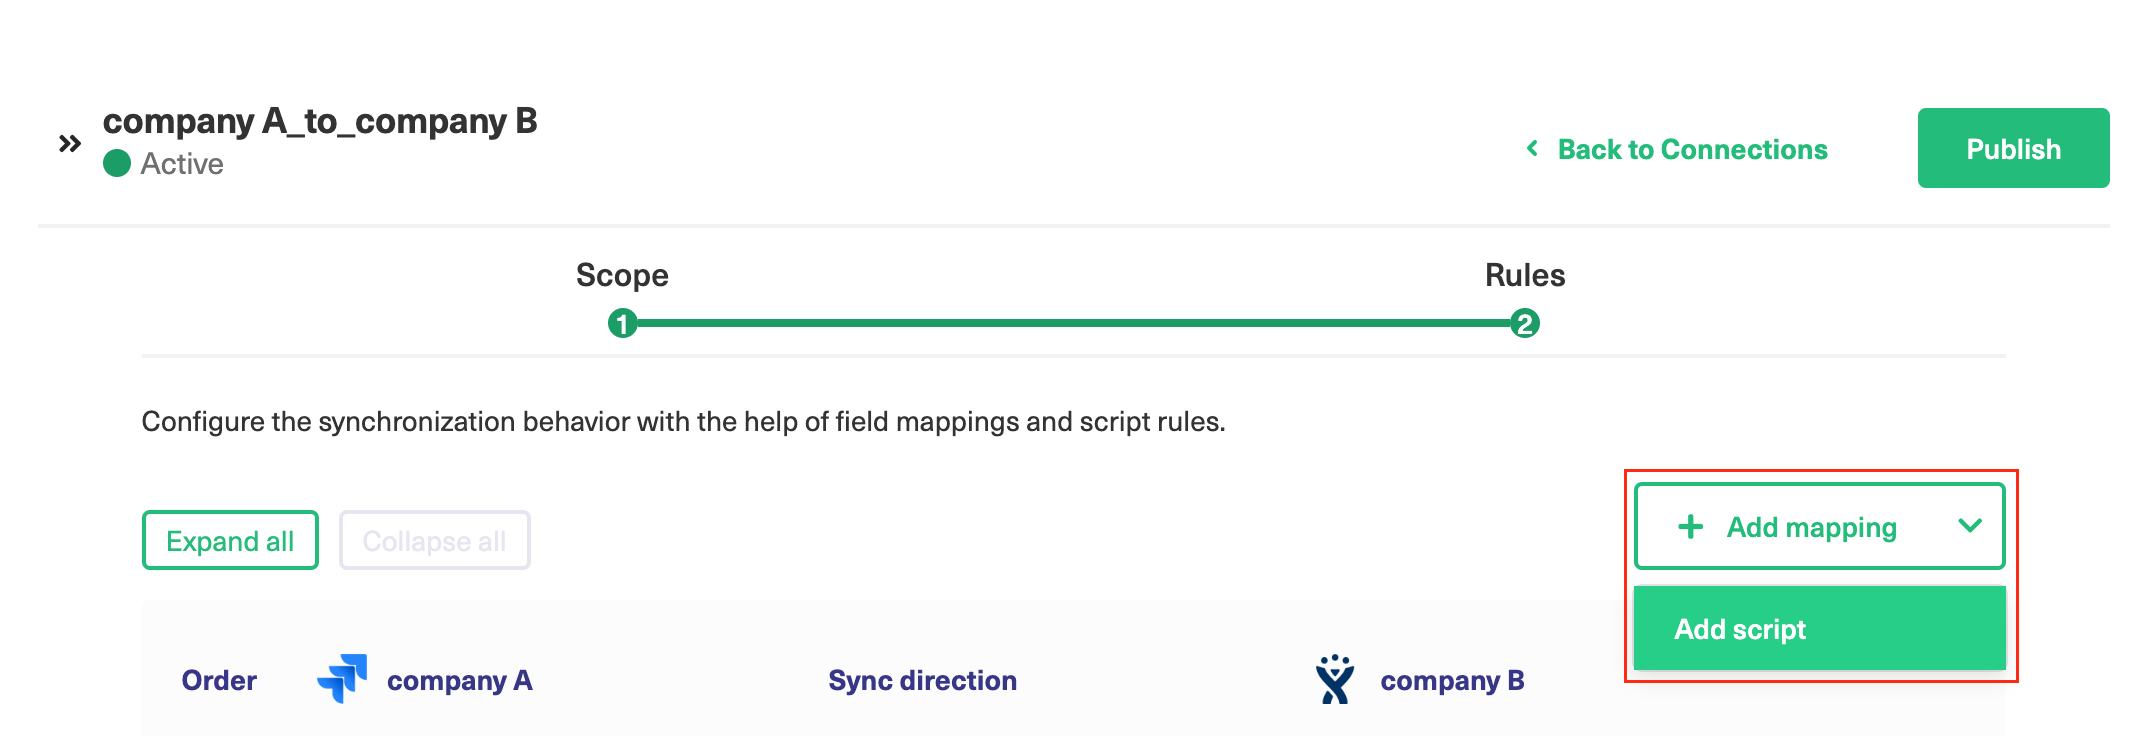
There is a default Script in the dialog box. You can edit it or simply delete the entire Script to start writing from scratch. Click Save when you finish adding the Scripts.
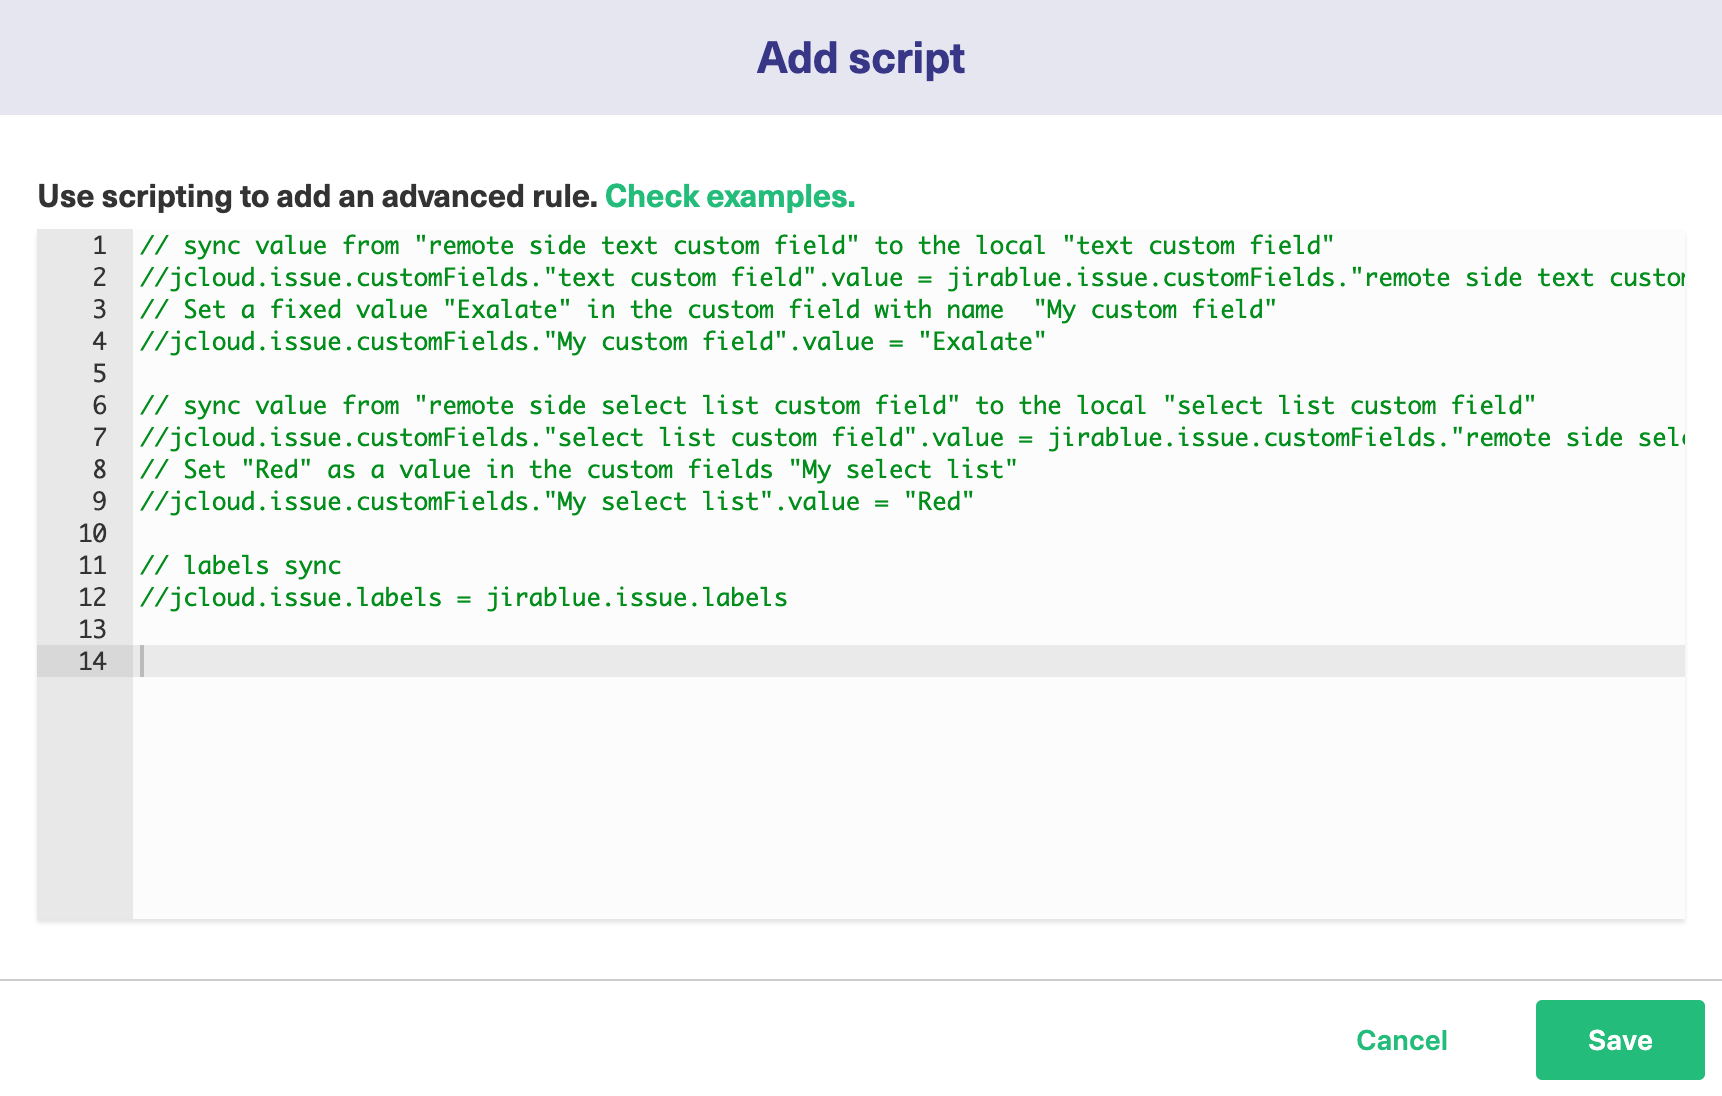
Script Syntax:
As a general rule of thumb, the Scripts follow the following syntax:
|
Where,
1. your_instance_shortname is the source instance.
2. remote_instance_shortname is the destination instance.
These are the names you provided while setting up the Connection.

3. This is followed by other issue properties, each separated with a "." operator.
Publish the Changes
To save the changes made to the Scope and Rules section and apply them to the Connection you have created, click Publish.
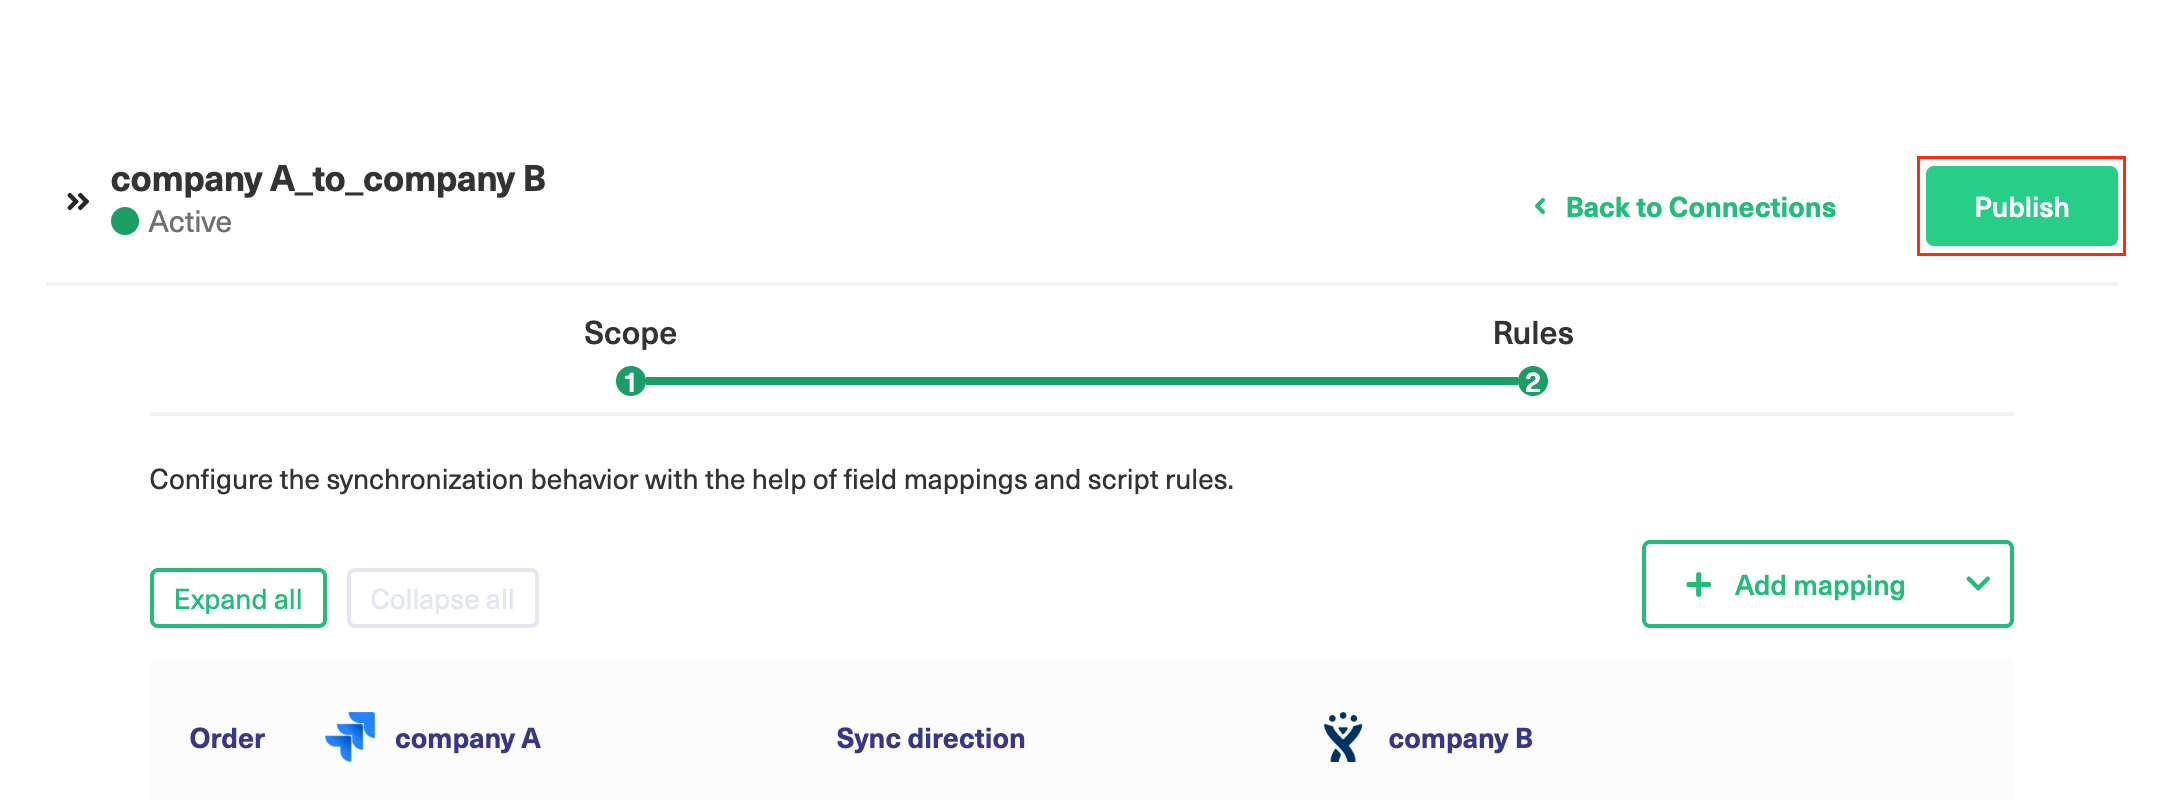
Note: You can also use these hotkeys to publish a connection:
- Ctrl+S on Windows or Linux
- Cmd+S on Mac
Note: Configuration changes made to the Connection are applied on the next synchronization.