Test your Connection (Manual Synchronization):
Once, the Connection has been set up, you can test your Connection by synchronizing entities.
Test your Connection from Jira Cloud
Manual synchronization in Jira Cloud happens via the Exalate button in the Sync Status Panel present under the issue view.
Note: The Sync Status Panel is available under the specific entity (i.e issue, work item, tickets, Cases, etc) view in Jira, Zendesk, Azure DevOps, and Salesforce.
For other platforms like GitHub, ServiceNow, HP ALM/QC including Jira, Zendesk, Azure DevOps, and Salesforce this button is available under the Exalate admin console in the Entity Sync Status tab.
Exalate the Issue from Jira
- Create an issue in Jira.
Open the issue.
There is an Exalate Sync Panel under every issue view. Open it.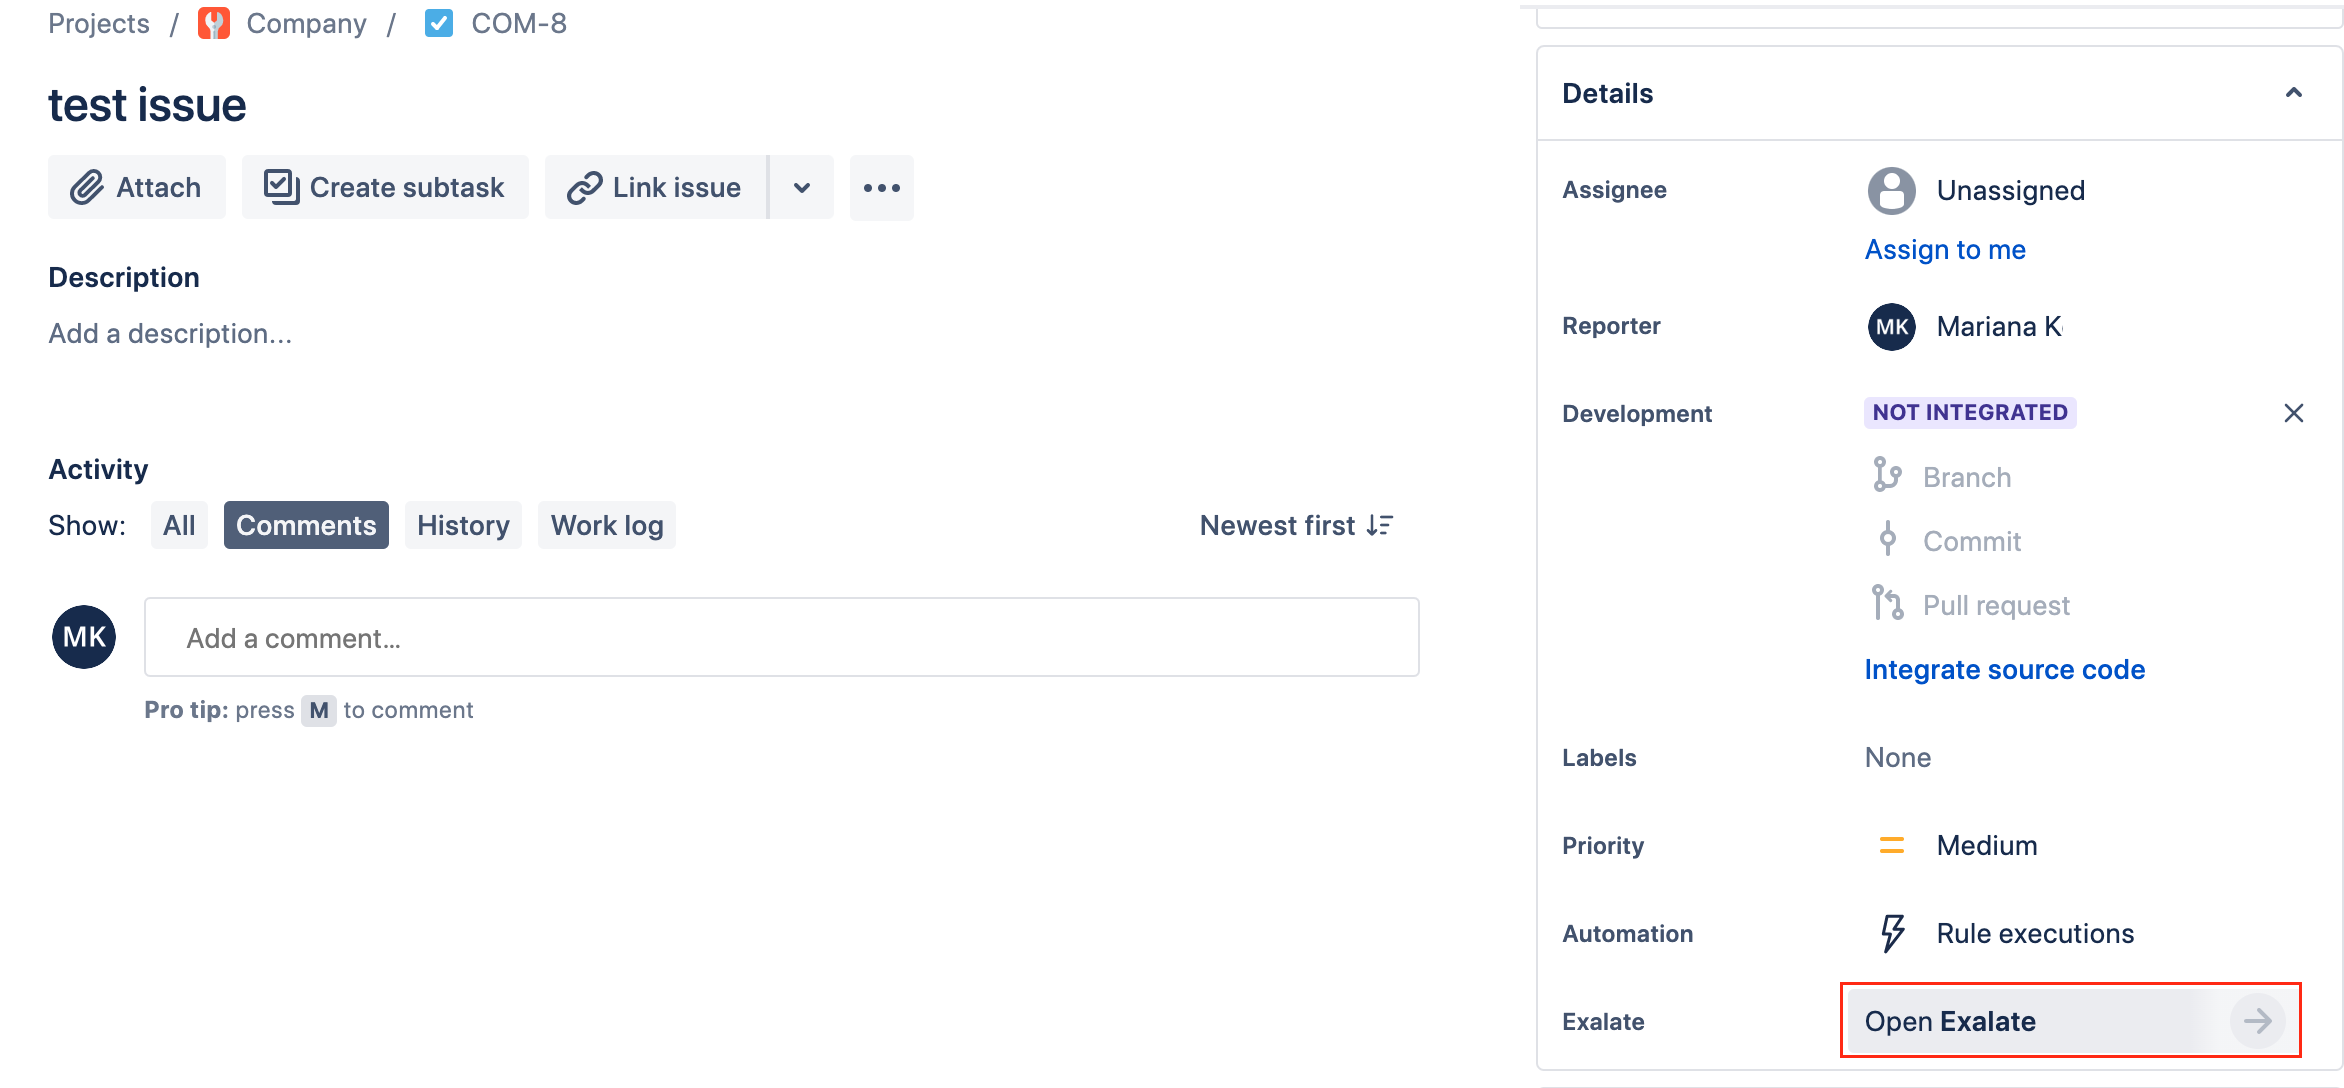
- Exalate the Issue
You can see 2 buttons on the Exalate panel: Exalate and Connect.
Exalate allows you to synchronize and create a new entity on the destination instance.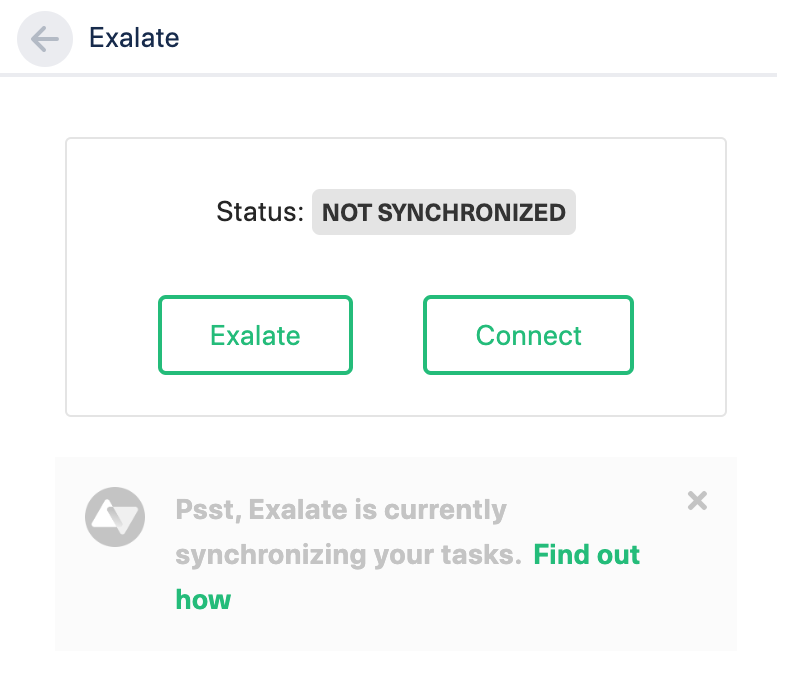
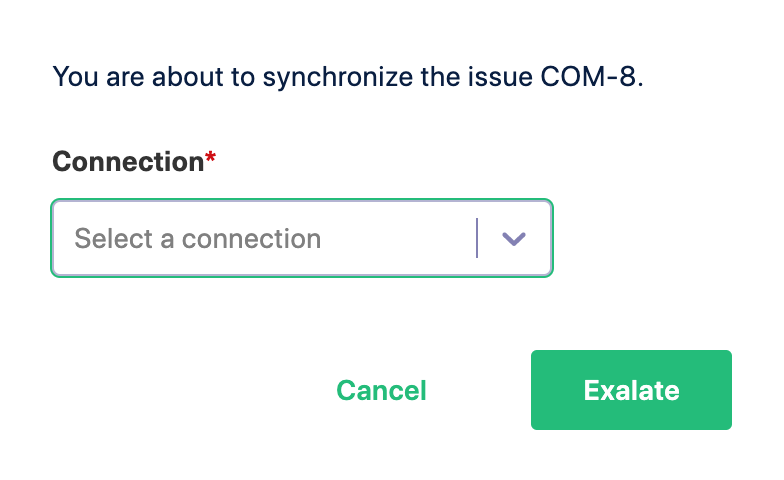
Connect allows you to connect 2 existing entities present in both instances.- To Exalate an issue, click the Exalate button.
- Choose the name of the Connection you have created.
- Click Submit.


You can see the progress of the synchronization within the Exalate Sync Status panel. This status is also visible in the Entity Sync status tab on the Exalate admin panel.
Test your Connection from Jira On-premise
Manual synchronization in Jira On-premise happens via the Exalate button in the Sync Status Panel present under the issue view.
Note: The Sync Status Panel is available under the specific entity (i.e issue, work item, tickets, Cases, etc) view in Jira, Zendesk, Azure DevOps, and Salesforce.
For other platforms like GitHub, ServiceNow, HP ALM/QC including Jira, Zendesk, Azure DevOps, and Salesforce this button is available under the Exalate admin console in the Entity Sync Status tab.
Exalate the Issue from Jira
- Create an issue in Jira.
Open the issue. - The Exalate issue operation is located under More tab on the issue view
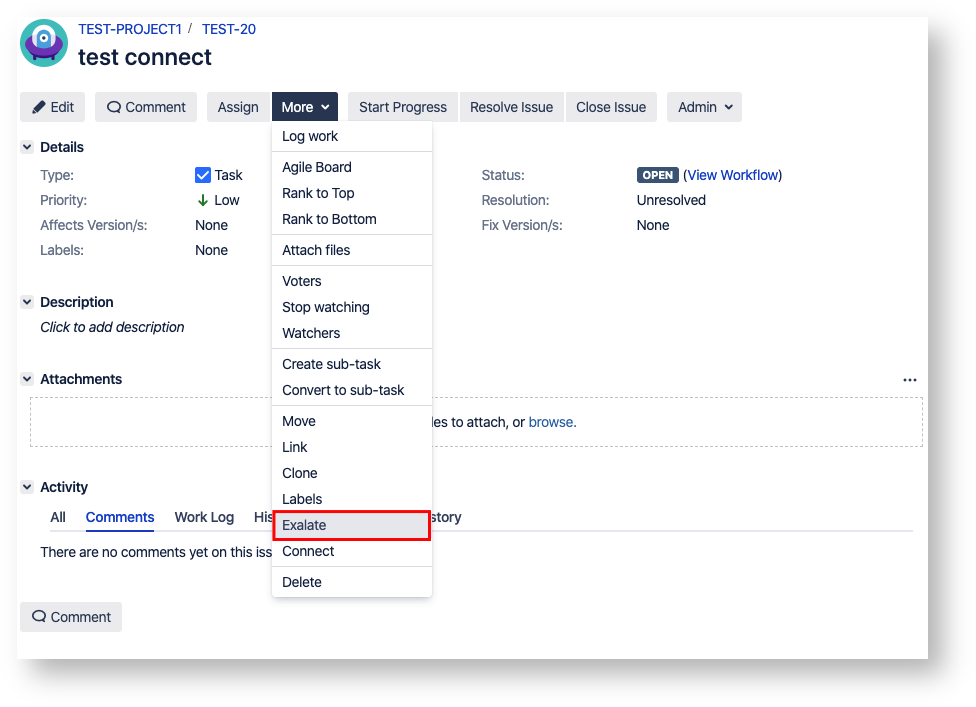

- Exalate the Issue
You can see 2 buttons on the Exalate panel: Exalate & Connect.
Exalate allows you to synchronize and create a new entity on the destination instance.
Connect allows you to connect 2 existing entities present in both instances.
- To Exalate an issue, click the Exalate button.
- Choose the name of the Connection you have created.
- Click Submit.


You are able to see the progress of the synchronization within the Exalate panel. This status is also visible in the Entity Sync status tab on the Exalate admin panel.
Test your Connection from Azure DevOps
Manual synchronization in Azure DevOps happens via the Exalate button in the Sync Status Panel present under the work item view.
Note: The Sync Status Panel is available under the specific entity (i.e issue, work item, tickets, Cases, etc) view in Jira, Zendesk, Azure DevOps, and Salesforce.
For other platforms like GitHub, ServiceNow, HP ALM/QC including Jira, Zendesk, Azure DevOps, and Salesforce this button is available under the Exalate admin console in the Entity Sync Status tab.
Exalate the Work Item from Azure DevOps
- Open a Work Item in Azure DevOps and find an Exalate Sync Panel
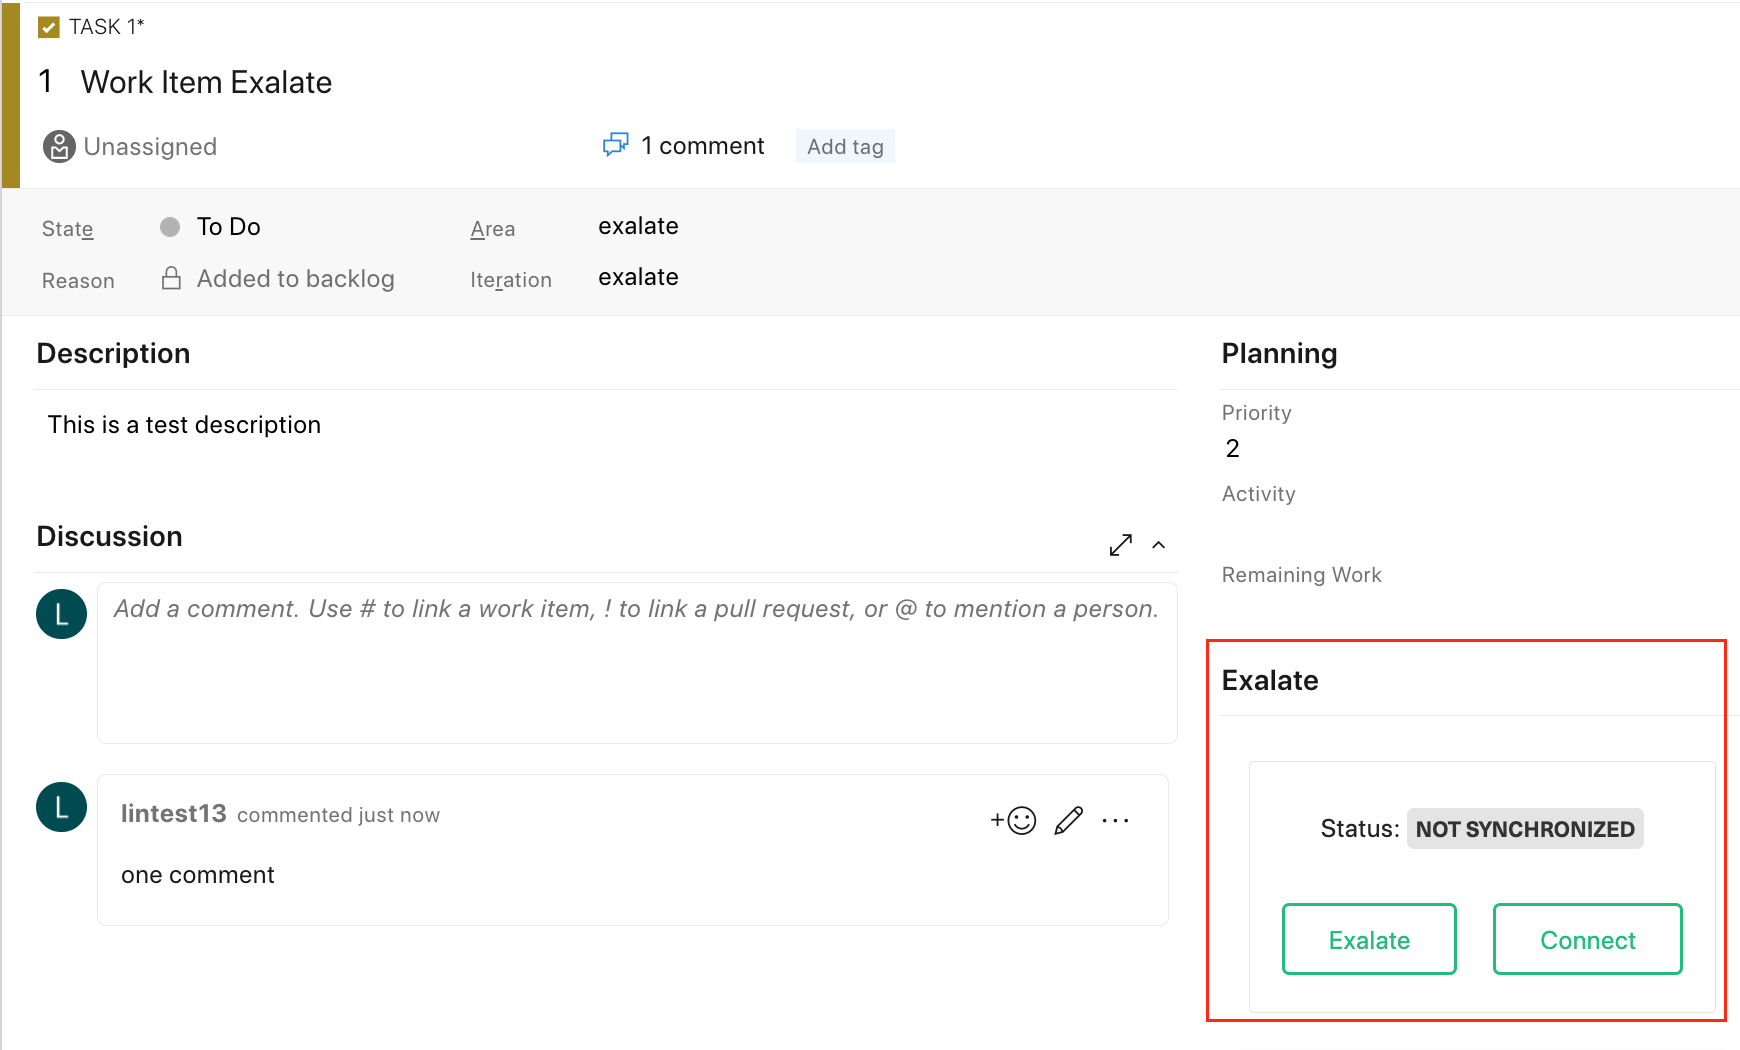
- Exalate the Issue
You can see 2 buttons on the Exalate panel: Exalate & Connect.
Exalate allows you to synchronize & create a new entity on the destination instance.
Connect allows you to connect 2 existing entities present in both instances.- To Exalate an issue, click the Exalate button.
- Choose the name of the Connection you have created.
- Click Submit.

You are able to see the progress of the synchronization within the Exalate panel. This status is also visible in the Entity Sync status tab on the Exalate admin panel.
Manual synchronization in Azure DevOps Server can be performed directly from the Exalate Console.
Exalate provides two methods to manually synchronize work items in Azure DevOps Server:
1. Entity Sync Panel – Synchronize work items from the Entity Sync Panel in Azure DevOps Server. (Refer to the dedicated section for detailed instructions.)
2. Connections Screen – Initiate synchronization from the Connections screen in the Exalate Console.
Synchronizing a Work Item from the Connections Screen
1. Open the Connections screen in the Exalate Console.

2. Click the Exalate button on the desired connection. A popup window appears.
3. Select the target project, then enter the work item key for the item you want to synchronize.

3. Click Exalate to initiate synchronization.
The work item synchronization process starts immediately.

You can monitor the synchronization progress in the Exalate panel, and the same status is reflected in the Entity Sync Status tab on the Exalate Admin Panel.
Before we start the synchronization process:
Test your Connection from ServiceNow
Manual synchronization in ServiceNow happens via the Exalate button in the Entity Sync Status Panel present under the Exalate admin console.
Note: The Sync Status Panel is available under the specific entity (i.e issue, work item, tickets, Cases, etc) view in Jira, Zendesk, Azure DevOps, and Salesforce.
For other platforms like GitHub, ServiceNow, HP ALM/QC including Jira, Zendesk, Azure DevOps, and Salesforce this button is available under the Exalate admin console in the Entity Sync Status tab.
Exalate the entities from ServiceNow
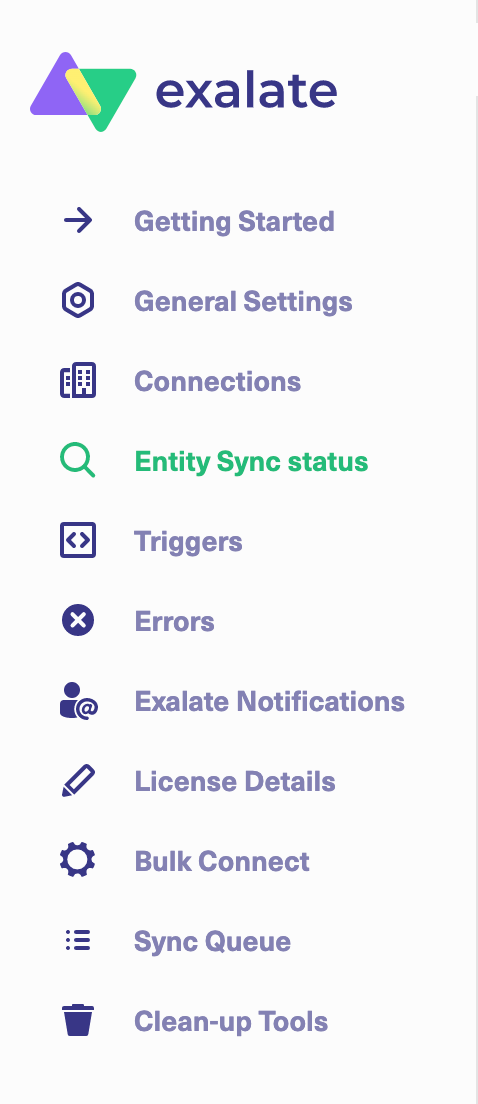
- Go to the Entity Sync status tab in the Exalate admin console.
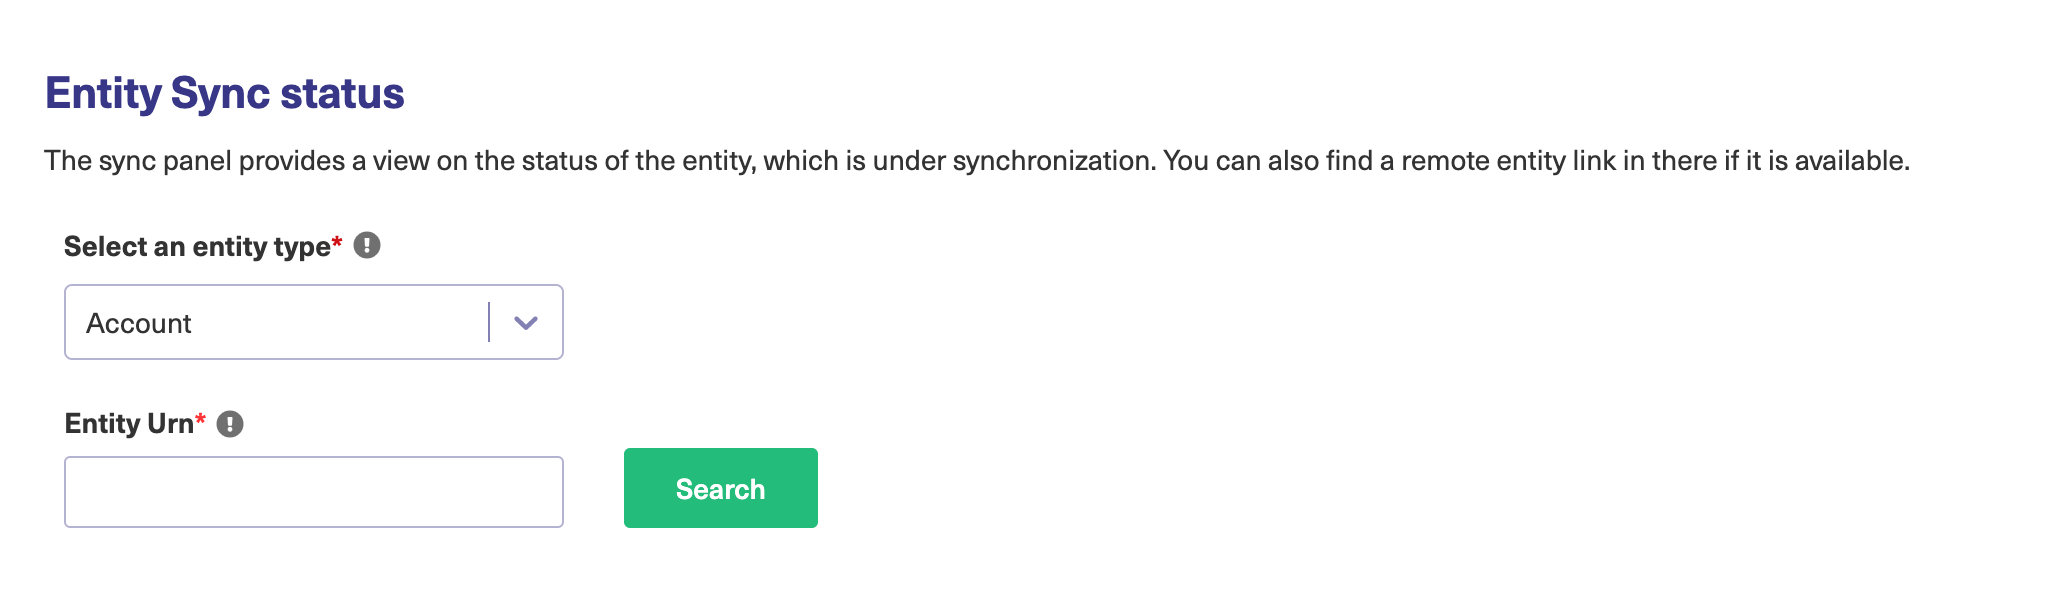
- This sync panel provides a view of the status of the entity under sync. You can also find the remote entity link in there if it is available.
Select the entity type in ServiceNow from a drop-down list. The common ones are: Incidents, Problems, Change Requests, Cases, Request Items (RITM), and Catalog Tasks.
Enter the Entity URN. Then click on the Search button.
In case the entity is already under synchronization you will see the entity status and the remote issue link in case it's available.
- Exalatethe Issue
You can see 2 buttons at the bottom on the Exalate panel: Exalate & Connect. If the entity is not synchronized the following status will be displayed.
Exalate allows you to synchronize & create a new entity on the destination instance.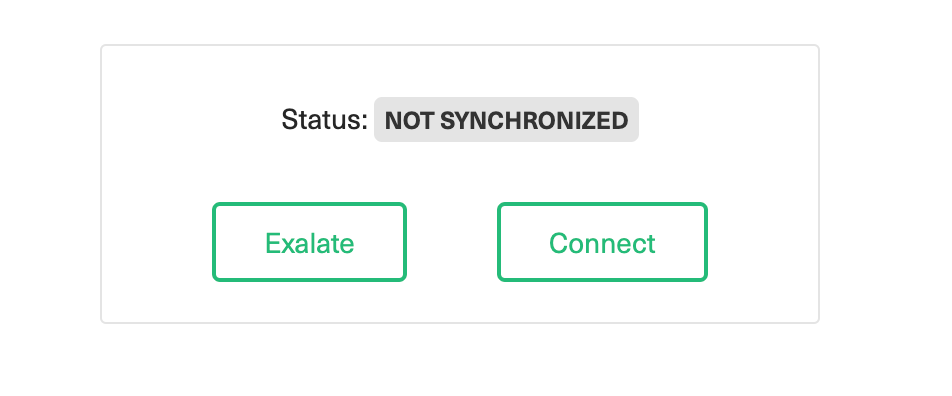
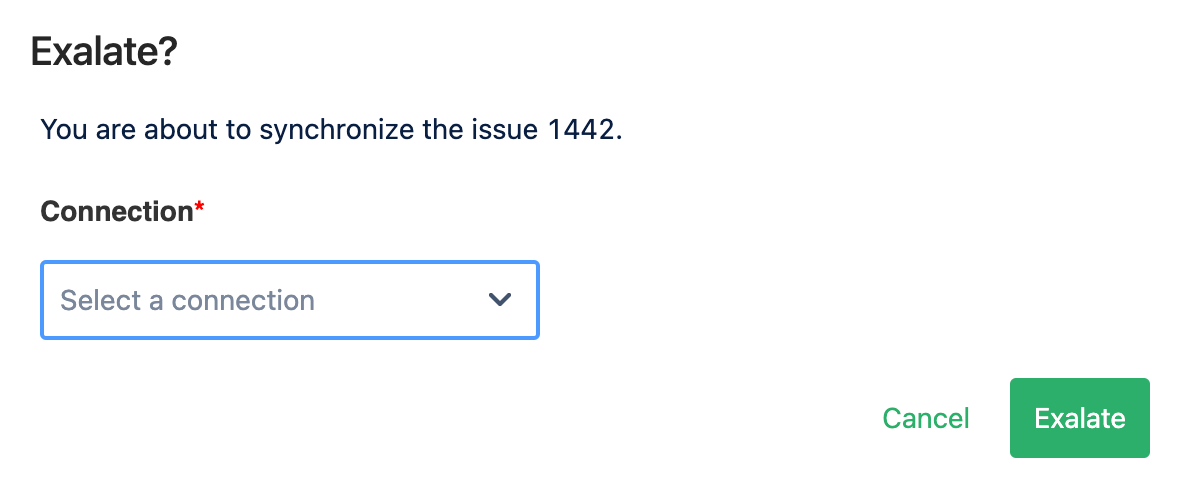
Connect allows you to connect 2 existing entities present in both instances.- To Exalate an entity, click the Exalate button.
- Choose the name of the Connection you have created.
- Click Submit.


You will be able to see the progress of the synchronization within the panel.
Test your Connection from Zendesk
Manual synchronization in Zendesk happens via the Exalate button in the Sync Status Panel present under the ticket view.
Note: The Sync Status Panel is available under the specific entity (i.e issue, work item, tickets, Cases, etc) view in Jira, Zendesk, Azure DevOps, and Salesforce.
For other platforms like GitHub, ServiceNow, HP ALM/QC including Jira, Zendesk, Azure DevOps, and Salesforce this button is available under the Exalate admin console in the Entity Sync Status tab.
Exalate the Ticket from Zendesk
- Open the ticket you want to sync.
- Click Apps → Exalate

- Exalate the Issue
You can see 2 buttons on the Exalate panel: Exalate & Connect.
Exalate allows you to synchronize & create a new entity on the destination instance.
Connect allows you to connect 2 existing entities present in both instances.- To Exalate an issue, click the Exalate button.
- Choose the name of the Connection you have created.
- Click Submit.

You are able to see the progress of the synchronization within the Exalate panel. This status is also visible in the Entity Sync status tab on the Exalate admin panel.
Note: If a Zendesk ticket has been closed, updates made on the remote side are not be synchronized.
Note: To improve Exalate performance it is possible to add a custom configuration that allows Exalate to skip certain events, like comments or pull requests sync.
It is also possible to indicate a list of specific repositories that Exalate will be working with while skipping events related to all the other repositories.
If you do not wish to sync comments, or pull requests, or you want Exalate to work with specific repositories only, feel free to contact our support team to help you with this configuration.
Before we start the synchronization process:
Test your Connection from GitHub
Manual synchronization in GitHub happens via the Exalate button in the Entity Sync Status Panel present under the Exalate admin console.
Note: The Sync Status Panel is available under the specific entity (i.e issue, work item, tickets, Cases, etc) view in Jira, Zendesk, Azure DevOps, and Salesforce.
For other platforms like GitHub, ServiceNow, HP ALM/QC including Jira, Zendesk, Azure DevOps, and Salesforce this button is available under the Exalate admin console in the Entity Sync Status tab.
Exalate the Issues from GitHub.
- Go to the Entity Sync status tab in the Exalate admin console.
- This sync panel provides a view of the status of the entity under sync. You can also find the remote entity link in there if it is available.
Select the repository from a drop-down list.
Enter the Entity URN. Then click on the Search button.
In case the entity is already under synchronization you will see the entity status and the remote issue link in case it's available.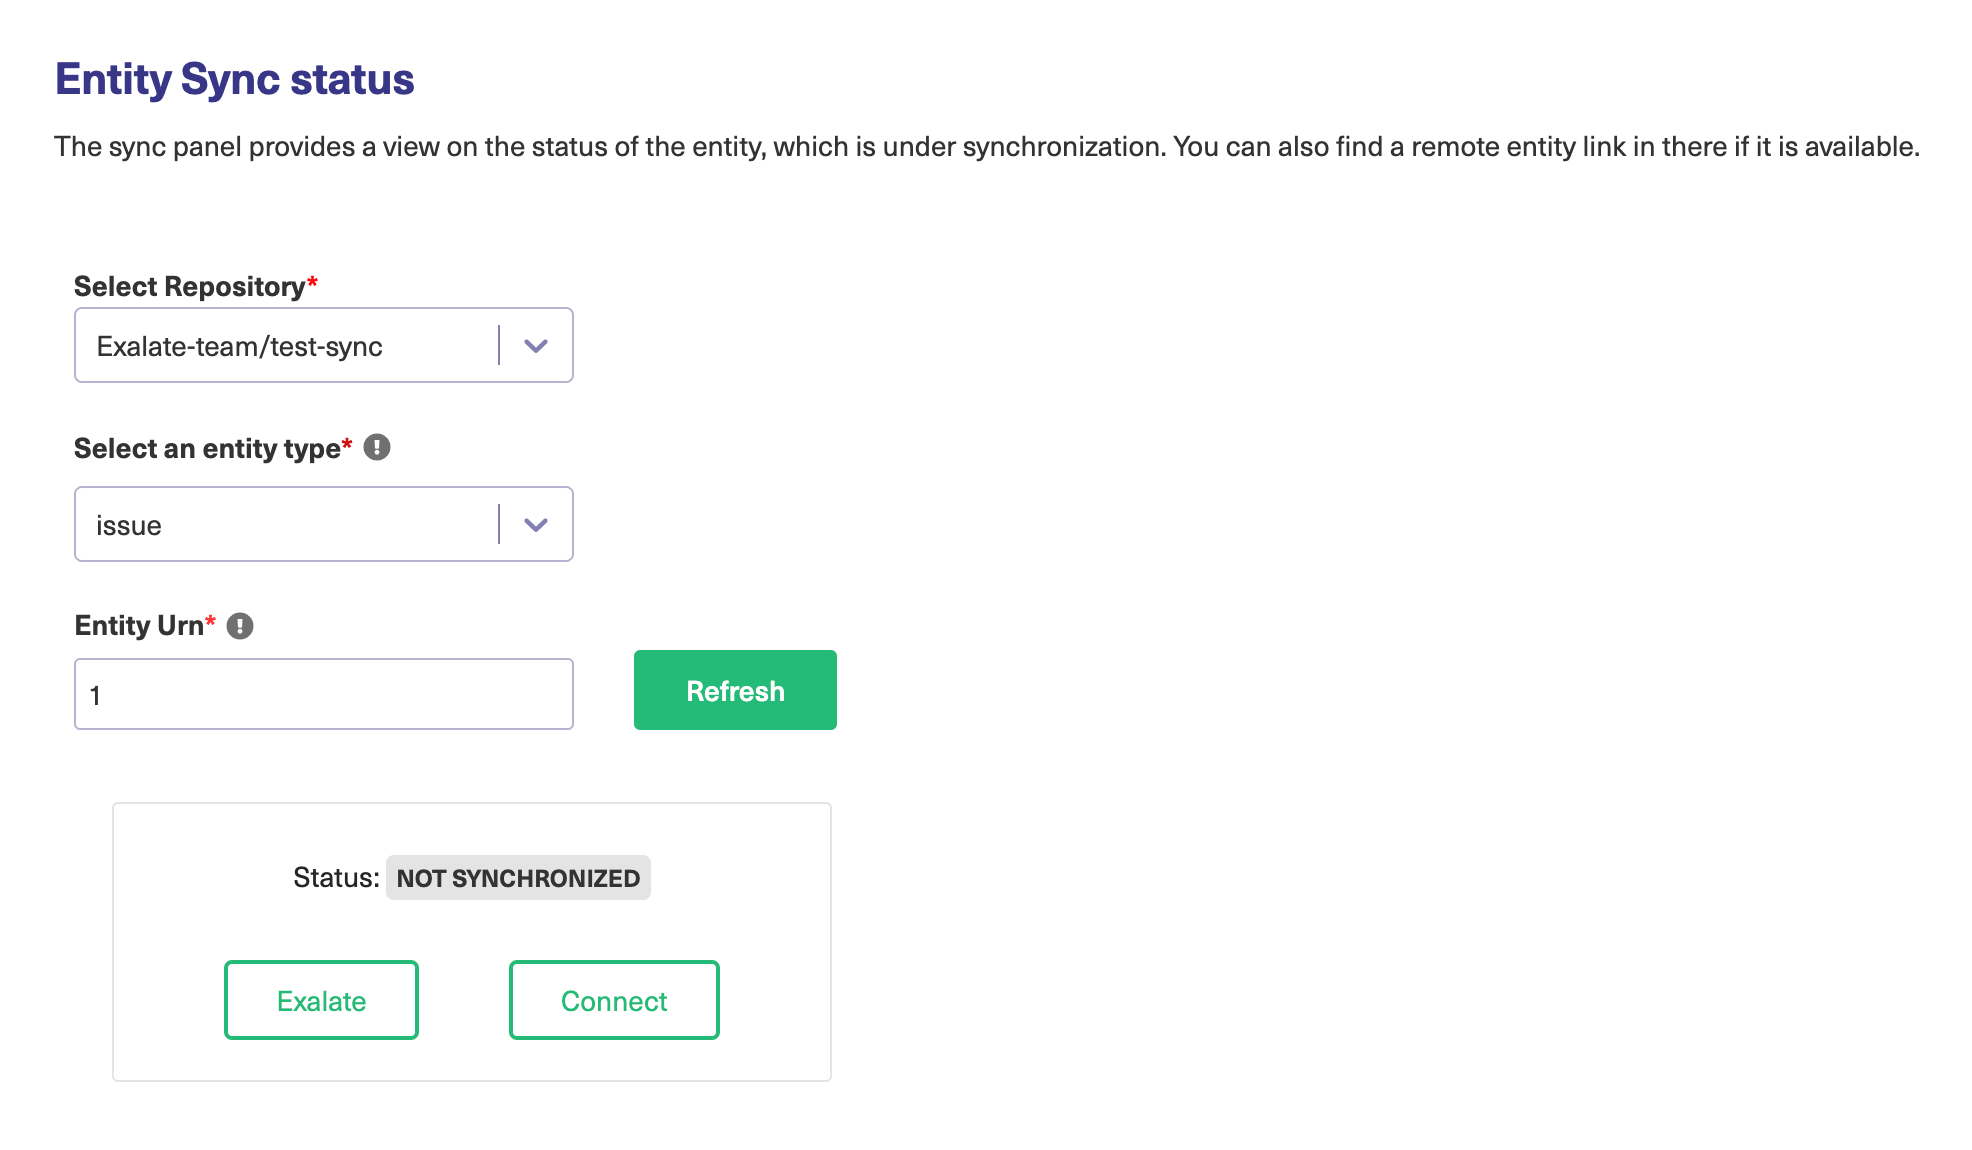
- Exalate the Issue
You can see 2 buttons at the bottom on the Exalate panel: Exalate & Connect. If the entity is not synchronized the following status will be displayed.
Exalate allows you to synchronize & create a new entity on the destination instance.
Connect allows you to connect 2 existing entities present in both instances.- To Exalate an issue, click the Exalate button.
- Choose the name of the Connection you have created.
- Click Submit.

You will be able to see the progress of the synchronization within the panel.
Before we start the synchronization process:
Test your Connection from Salesforce
Manual synchronization in Salesforce happens via the Exalate button in the Sync Status Panel present under the Salesforce Object view.
Note: The Sync Status Panel is available under the specific entity (i.e issue, work item, tickets, Cases, etc) view in Jira, Zendesk, Azure DevOps, and Salesforce.
For other platforms like GitHub, ServiceNow, HP ALM/QC including Jira, Zendesk, Azure DevOps, and Salesforce this button is available under the Exalate admin console in the Entity Sync Status tab.
Exalate the Entities from Salesforce.
- Open the particular Salesforce entity.
There is an Exalate panel under the entity view.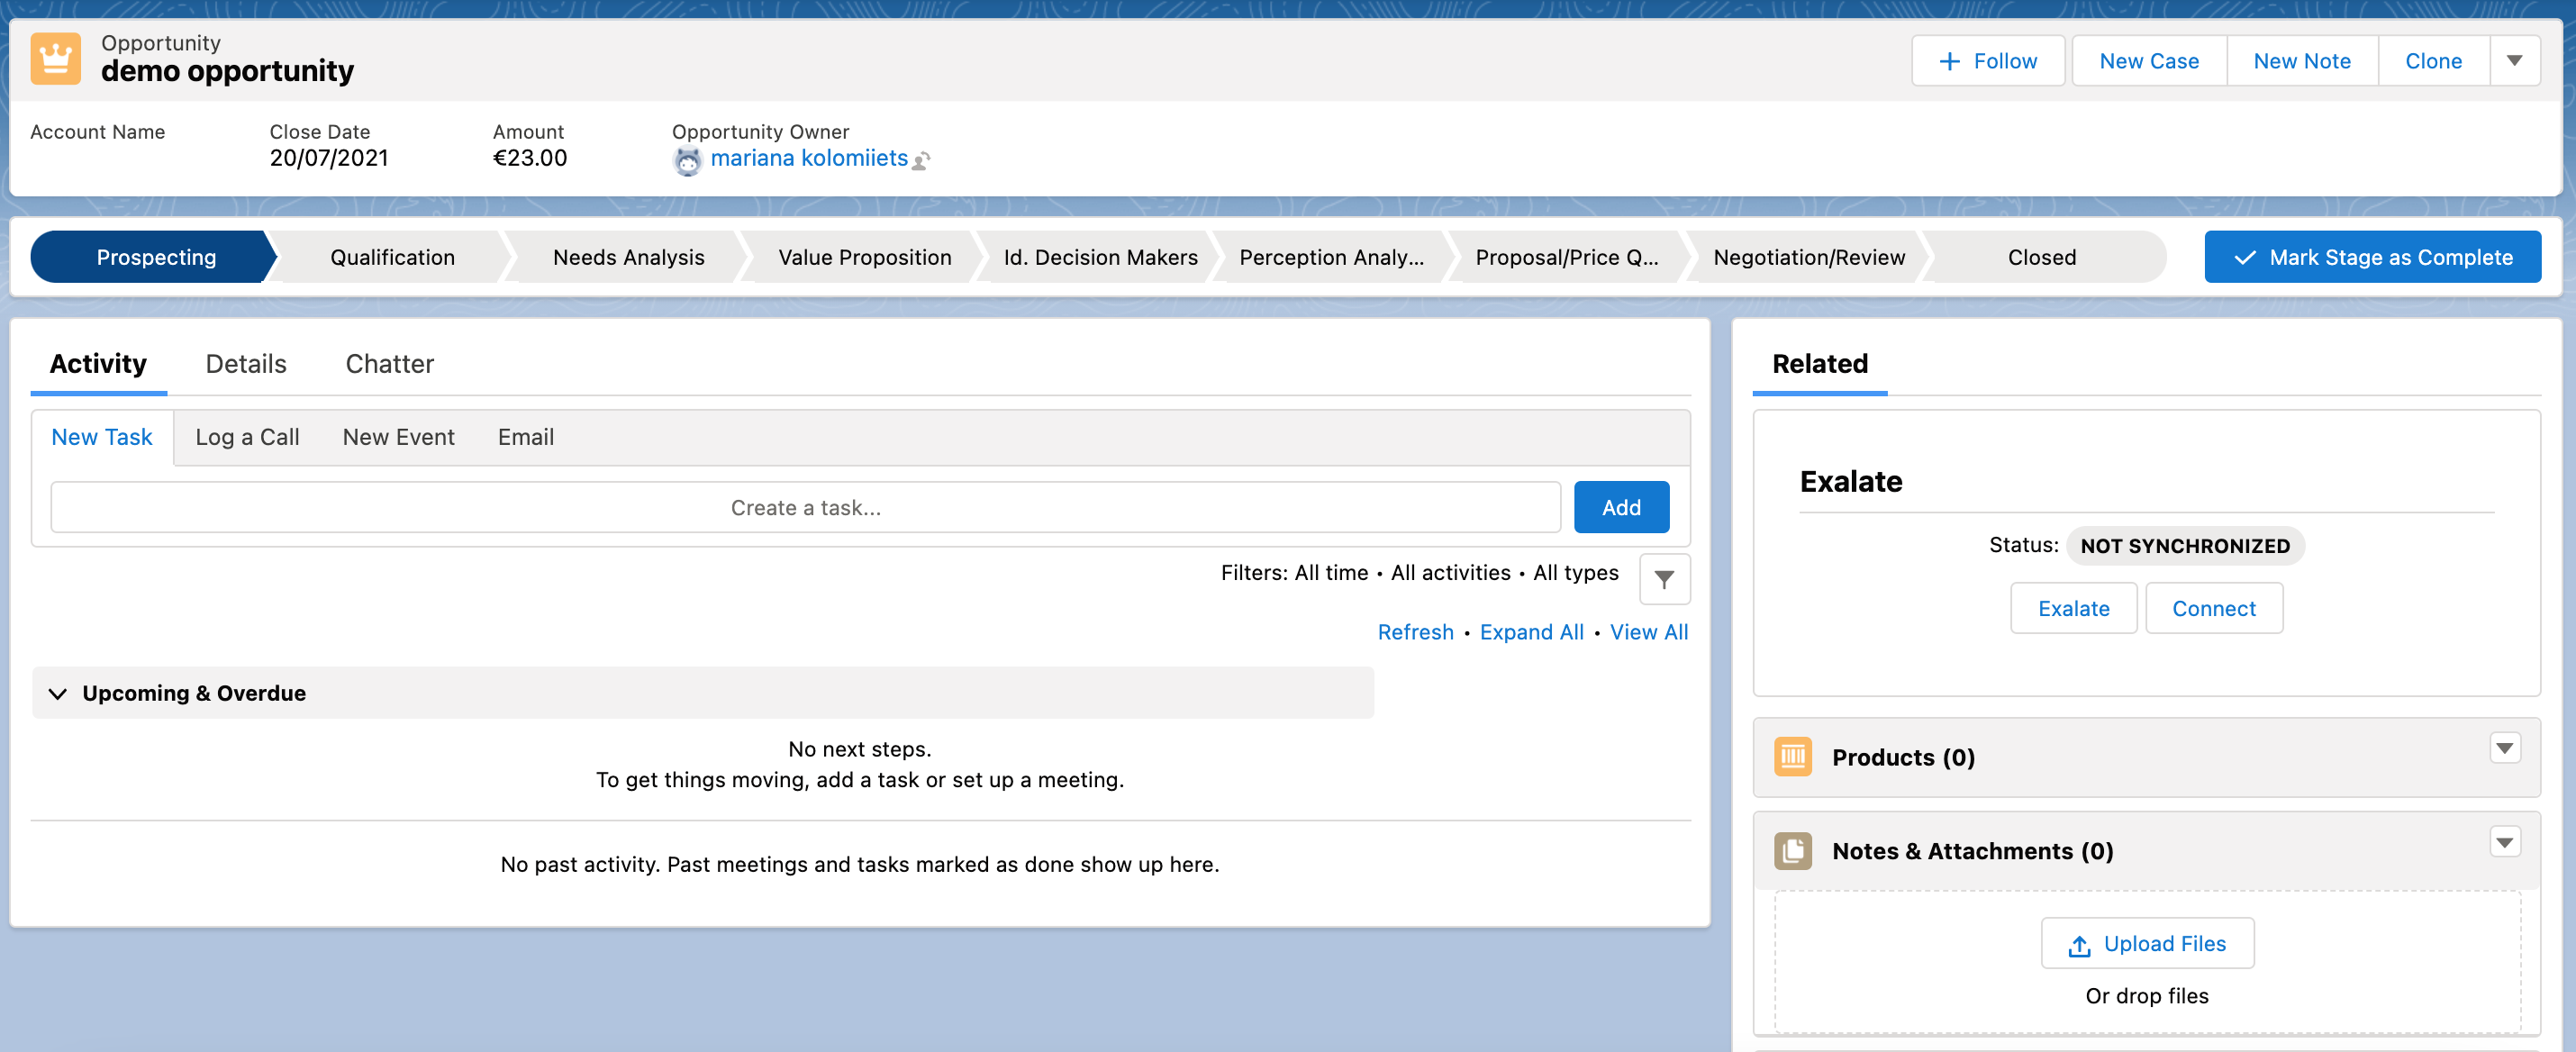 Note: Learn how to add the sync panel to Salesforce entity views.
 - Exalate the Entity
You can see 2 buttons at the bottom on the Exalate panel: Exalate & Connect. If the entity is not synchronized the following status will be displayed.
Exalate allows you to synchronize & create a new entity on the destination instance.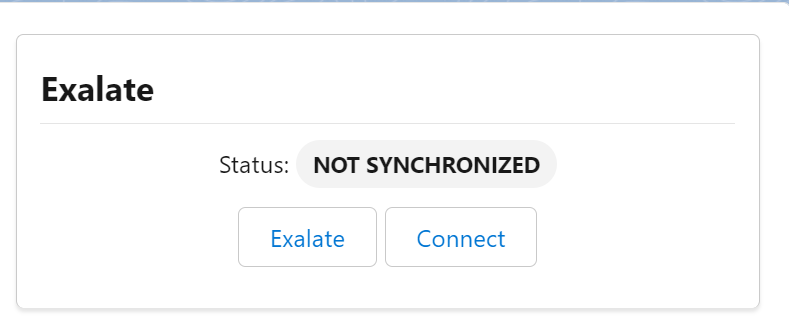
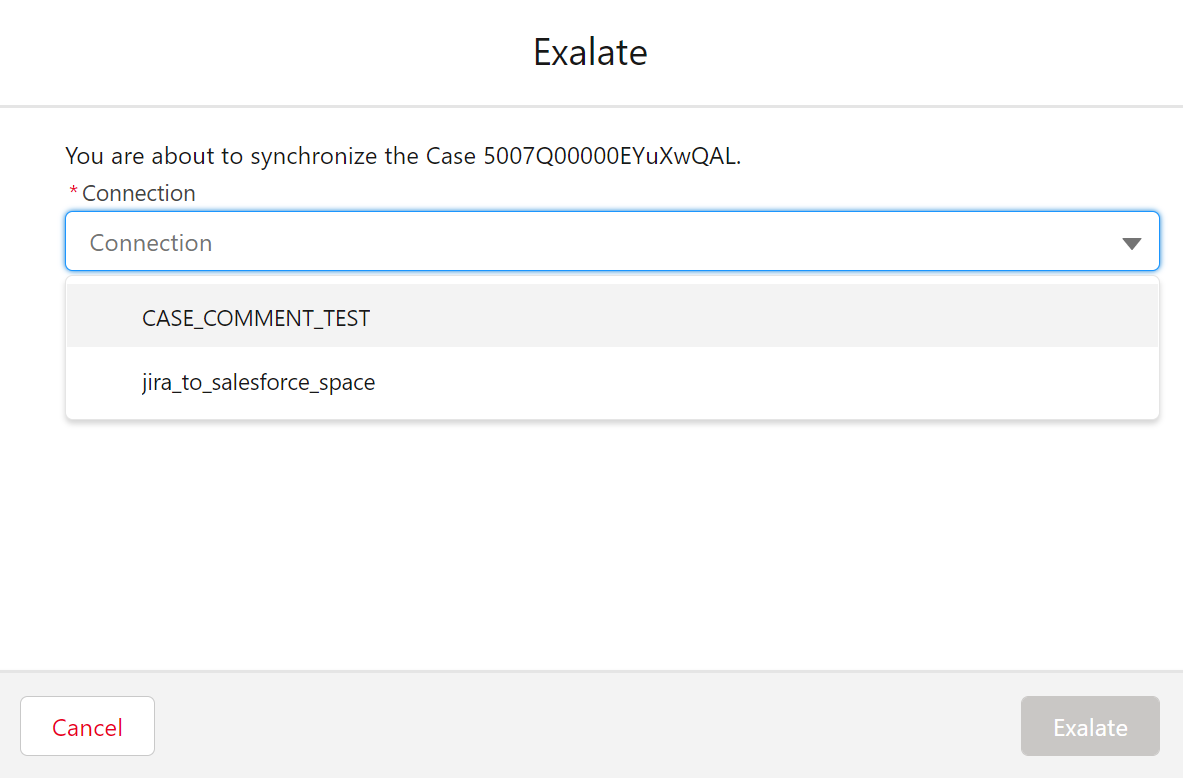
Connect allows you to connect 2 existing entities present in both instances.- To Exalate an entity, click the Exalate button.
- Choose the name of the Connection you have created.
- Click Submit.


You will be able to see the progress of the synchronization within the panel in the form of sync statuses.
Manual synchronization in Freshdesk happens via the Exalate button in the Entity Sync Status Panel present under the Exalate admin console.
Note: The Sync Status Panel is available under the specific entity (i.e, issue, work item, tickets, Cases, etc) view in Jira, Zendesk, Azure DevOps, and Salesforce.
For other platforms like Freshdesk, GitHub, ServiceNow, including Jira, Zendesk, Azure DevOps, and Salesforce, this button is available under the Exalate admin console in the Entity Sync Status tab.
Exalate the Issues from Freshdesk
- Go to the Entity Sync status tab in the Exalate admin console.
- This sync panel provides a view of the status of the entity under sync. You can also find the remote entity link in there if it is available.
Enter the ticket number. Then click on the Search button.
In case the entity is already under synchronization you see the entity status and the remote issue link in case it's available.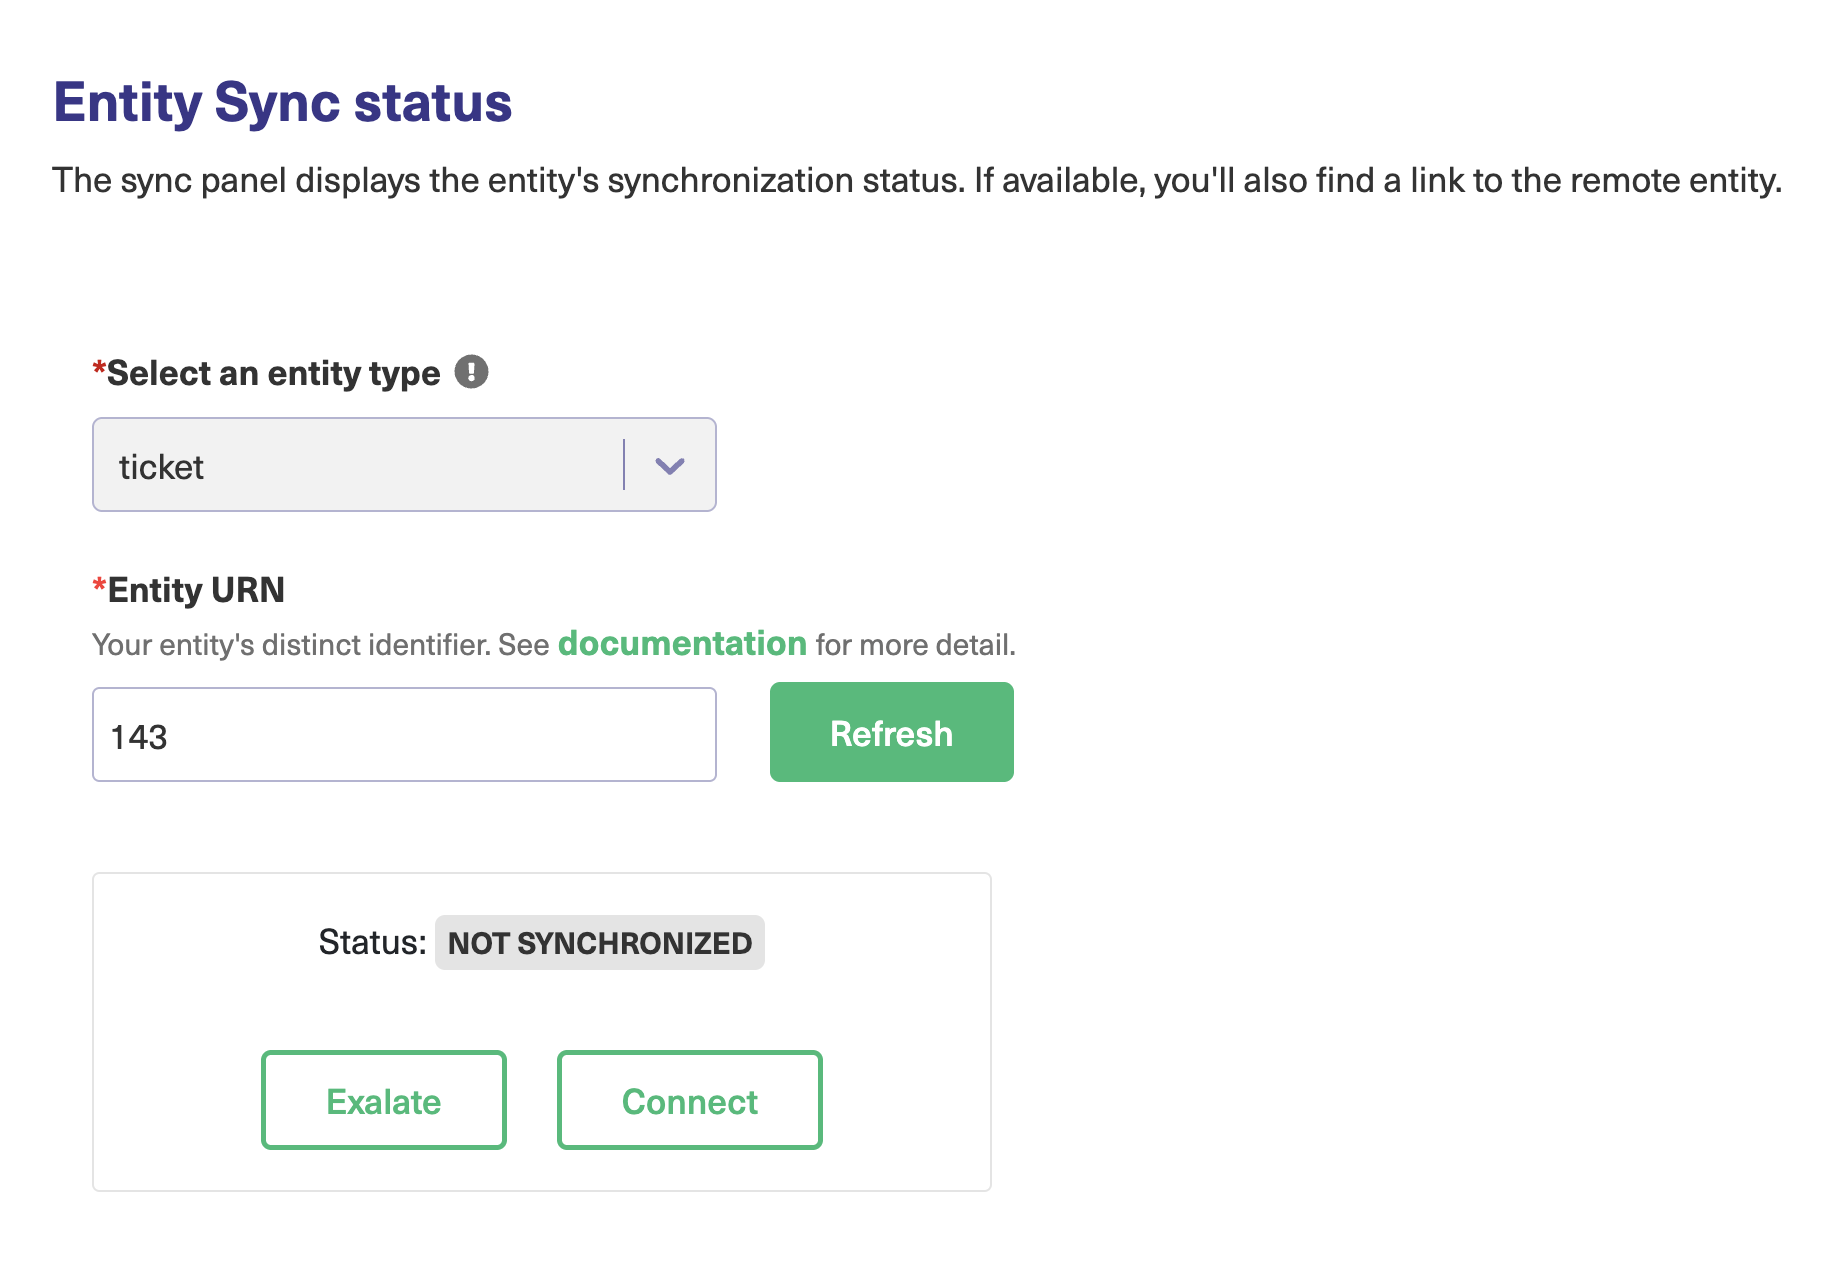
- Exalate the Issue
If the entity is not synchronized, 2 buttons at the bottom of the Exalate panel are displayed: Exalate & Connect.
Exalate allows you to synchronize & create a new entity on the destination instance.
Connect allows you to connect 2 existing entities present in both instances.- To Exalate an issue, click the Exalate button.
- Choose the name of the Connection you have created.
- Click Exalate.


You are able to see the progress of the synchronization within the panel.
Manual synchronization in Freshservice happens via the Exalate button in the Entity Sync Status Panel present under the Exalate admin console.
Note: The Sync Status Panel is available under the specific entity (i.e, issue, work item, tickets, Cases, etc) view in Jira, Zendesk, Azure DevOps, and Salesforce.
For other platforms like Freshdesk, GitHub, ServiceNow, including Jira, Zendesk, Azure DevOps, and Salesforce, this button is available under the Exalate admin console in the Entity Sync Status tab.
Exalate the Issues from Freshservice
- Go to the Entity Sync status tab in the Exalate admin console.
- This sync panel provides a view of the status of the entity under sync. You can also find the remote entity link in there if it is available.
Enter the ticket number. Then click on the Search button.
In case the entity is already under synchronization you see the entity status and the remote issue link in case it's available. - Exalate the Issue
If the entity is not synchronized, 2 buttons at the bottom of the Exalate panel are displayed: Exalate & Connect.
Exalate allows you to synchronize & create a new entity on the destination instance.
Connect allows you to connect 2 existing entities present in both instances.- To Exalate an issue, click the Exalate button.
- Choose the name of the Connection you have created.
- Click Exalate.
You are able to see the progress of the synchronization within the panel.
Important: We are moving Exalate for HP QC/ALM into basic maintenance mode. This transition period will last until June 2024, after which support will be halted completely. For more information, please see https://exalate.com/blog/end-of-support-hp/.
Before we start the synchronization process:
Test your Connection from HP ALM/QC
Manual synchronization in HP ALM/QC happens via the Exalate button in the Entity Sync Status Panel present under the Exalate admin console.
Note: The Sync Status Panel is available under the specific entity (i.e issue, work item, tickets, Cases, etc) view in Jira, Zendesk, Azure DevOps, and Salesforce.
For other platforms like GitHub, ServiceNow, HP ALM/QC including Jira, Zendesk, Azure DevOps, and Salesforce this button is available under the Exalate admin console in the Entity Sync Status tab.
Exalate the entities from HP ALM/QC
- Go to the Entity Sync status tab in the Exalate admin console.
- This sync panel provides a view of the status of the entity under sync. You can also find the remote entity link in there if it is available.
Select the entity type in HP ALM/QC, i.e either defect or test case.
In case the entity is already under synchronization you will see the entity status and the remote issue link in case it's available.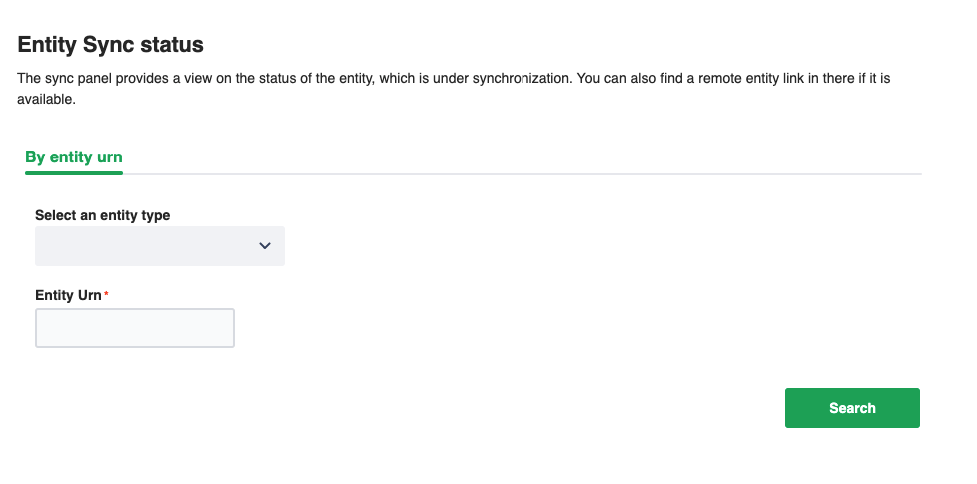
- Exalate the Issue
You can see 2 buttons at the bottom on the Exalate panel: Exalate & Connect. If the entity is not synchronized the following status will be displayed.Exalate allows you to synchronize & create a new entity on the destination instance.
Connect allows you to connect 2 existing entities present in both instances.- To Exalate an entity, click the Exalate button.
- Choose the name of the Connection you have created.
- Click Submit.

You will be able to see the progress of the synchronization within the panel.
Start Synchronizing
You can sync your first entity in Exalate to see how it works: enter the entity URN on the previous screen and click Exalate.
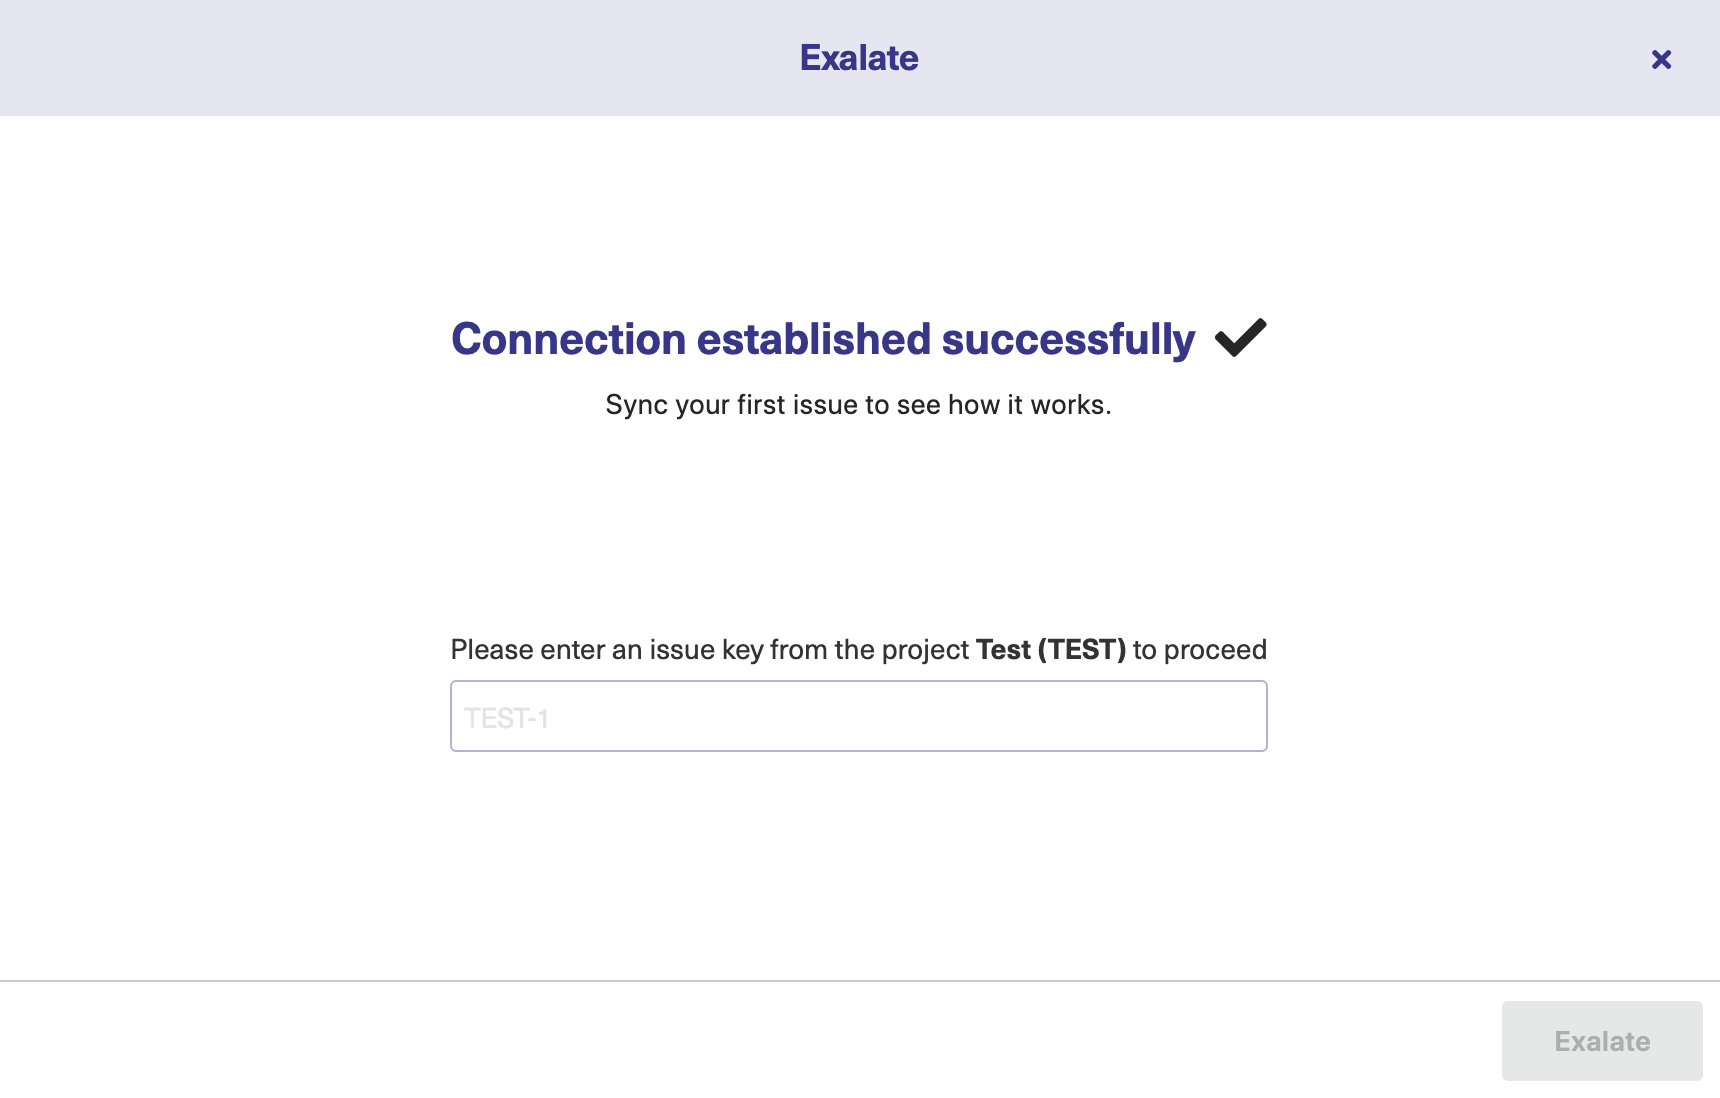
When syncing your first entity, you see the status of your sync. The links to both entities are displayed at the bottom as shown below. You can open them up to see more details.
![]()
What's Next?
Well done! You have successfully completed your synchronization journey. But there's more.
Next, you can choose to
- sit back and relax while the sync works!
- Manually synchronize entities.
- Connect an entity.
- Sync entities in bulk.
- Create a trigger.
What's Next?
Well done! You have successfully completed your "Getting Started" journey. But there's more.
Options you can consider next:
- If you have chosen to automatically start the synchronization in the previous step, sit back and relax!
- Entities will be synchronized based on the Scope Rules you have set. But if you want to set up an advanced automatic synchronization you can do so with Triggers.
- You can also read the Visual mode configuration guides.
Configure the Synchronization (Optional)
Set up Sync Rules
Once you test the Connection, you can choose to configure the synchronization behavior with the help of Sync Rules (Groovy-based scripts) and
1. Edit your Connection.
There are multiple ways to edit your connection:
- Navigate to Connections →
 Edit connection.

- If you just created a connection, select Configure sync.

2. Set up Outgoing sync and Incoming sync in the Rules tab.
Note: The Outgoing sync and Incoming sync scripts:
- are generated by default once the connection has been set up. But you can add, edit or remove these scripts to configure your sync depending on your requirements.
- are platform specific.
- are present at both the source and the destination instance to give independent control over what data needs to be sent or received.
In the Outgoing sync, you can enter scripts to specify what data you want to send.
In the Incoming sync, you can enter scripts to specify what data you want to receive.
API and Custom Fields Auto-Completion: when working with Groovy scripts you can take advantage of the auto complete feature as you write your code. You can read more about this feature here.
AI Assist is now available in the Script mode. It generates scripts based on your input considering existing configurations and Exalate's scripting API. It is important to validate and fine-tune scripts to ensure they meet your specific needs.

Automate your Synchronization through Triggers
Specify Triggers if necessary.
With triggers, you can set up automatic sync of entities that fit a specific search query.
You can create Triggers by editing the connection or by configuring the sync as shown in the previous step. You can also create them on the Exalate Admin Console under the Triggers tab.
Note: For more information on this topic, please read How to create a trigger.
Publish the changes made to the Connection
Click Publish to save a connection.
You can also use these hotkeys to publish a connection:
- Ctrl+S on Windows or Linux
- Cmd+S on Mac
What's Next?
Well done! You have successfully completed your "Getting Started" journey. But there's more.
Options you can consider next:
- Sit back and relax! Sync happens based on the Sync Rules and Triggers you have set up in this step.
- You can also read the Configuration Guides to see more synchronization examples.
- You can also read the Exalate API Reference Documentation to learn more about how to work with incoming and outgoing sync scripts (aka Sync Rules).