This article applies to Exalate Classic only. For New Exalate, refer to this documentation.
Steps to Set Up a Local Connection on Jira On-premise in Script Mode
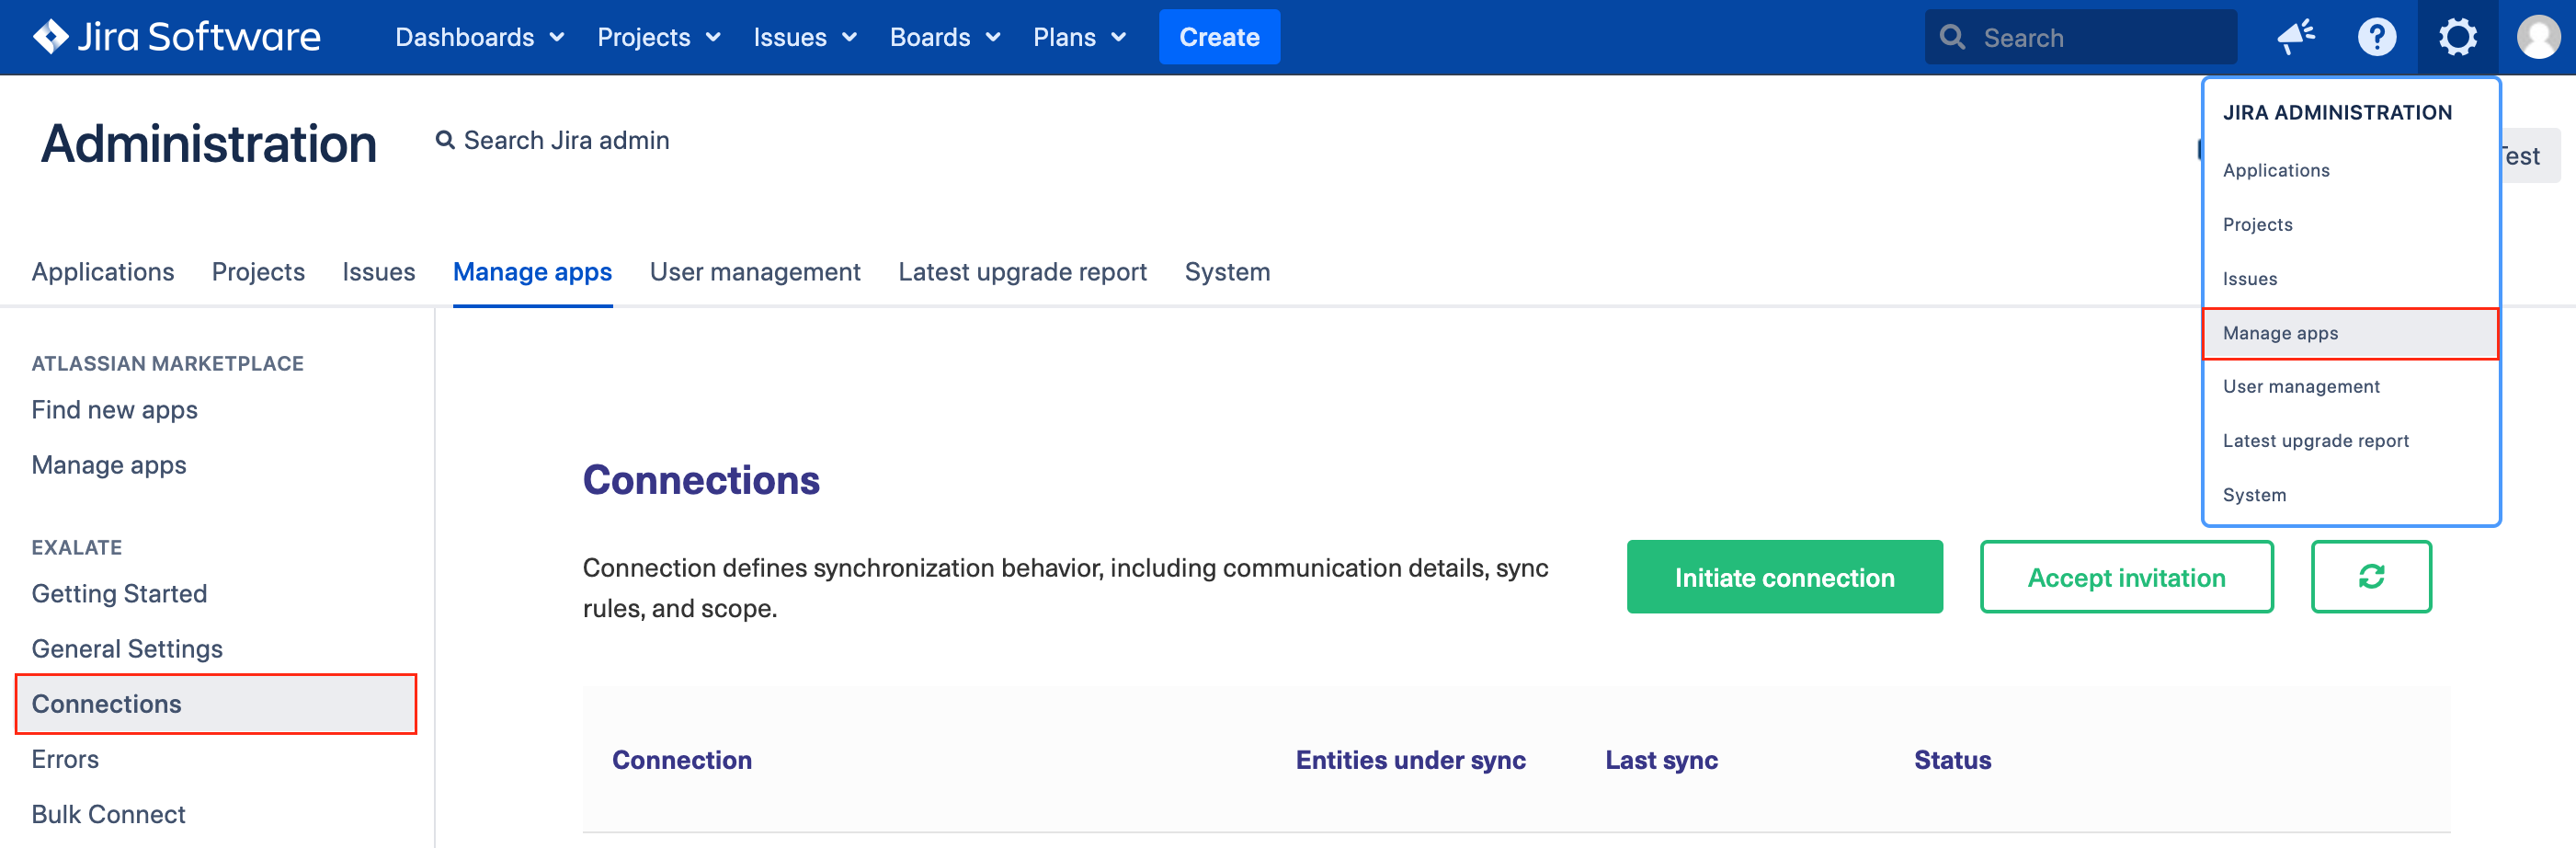
1. Navigate to the Connections tab in the Exalate console.
Click Settings → Apps & click Connections under the Exalate menu.
2. Click Initiate Connection.

3. Enter the Destination Instance URL.
The Destination Instance URL is the link to the instance you want to set up a connection with. You can directly enter the link of that instance or the Exalate URL from the General Settings tab in the Exalate admin panel.
Note: In the case of Local Connections, this will be the URL of your own instance.
Note: In the case of Local Connections, this is the URL of your own instance.
![]()
4. Select the Configuration Mode. In this case, Script Mode.

5. Click Next.
6. Enter the Connection Information
Field | Description |
|---|---|
| Local instance short name | A short name for your instance |
| Destination instance short name | A short name for the destination instance |
| Connection name | Name of the connection |
| Description | Description of the connection |

7. Click Next.
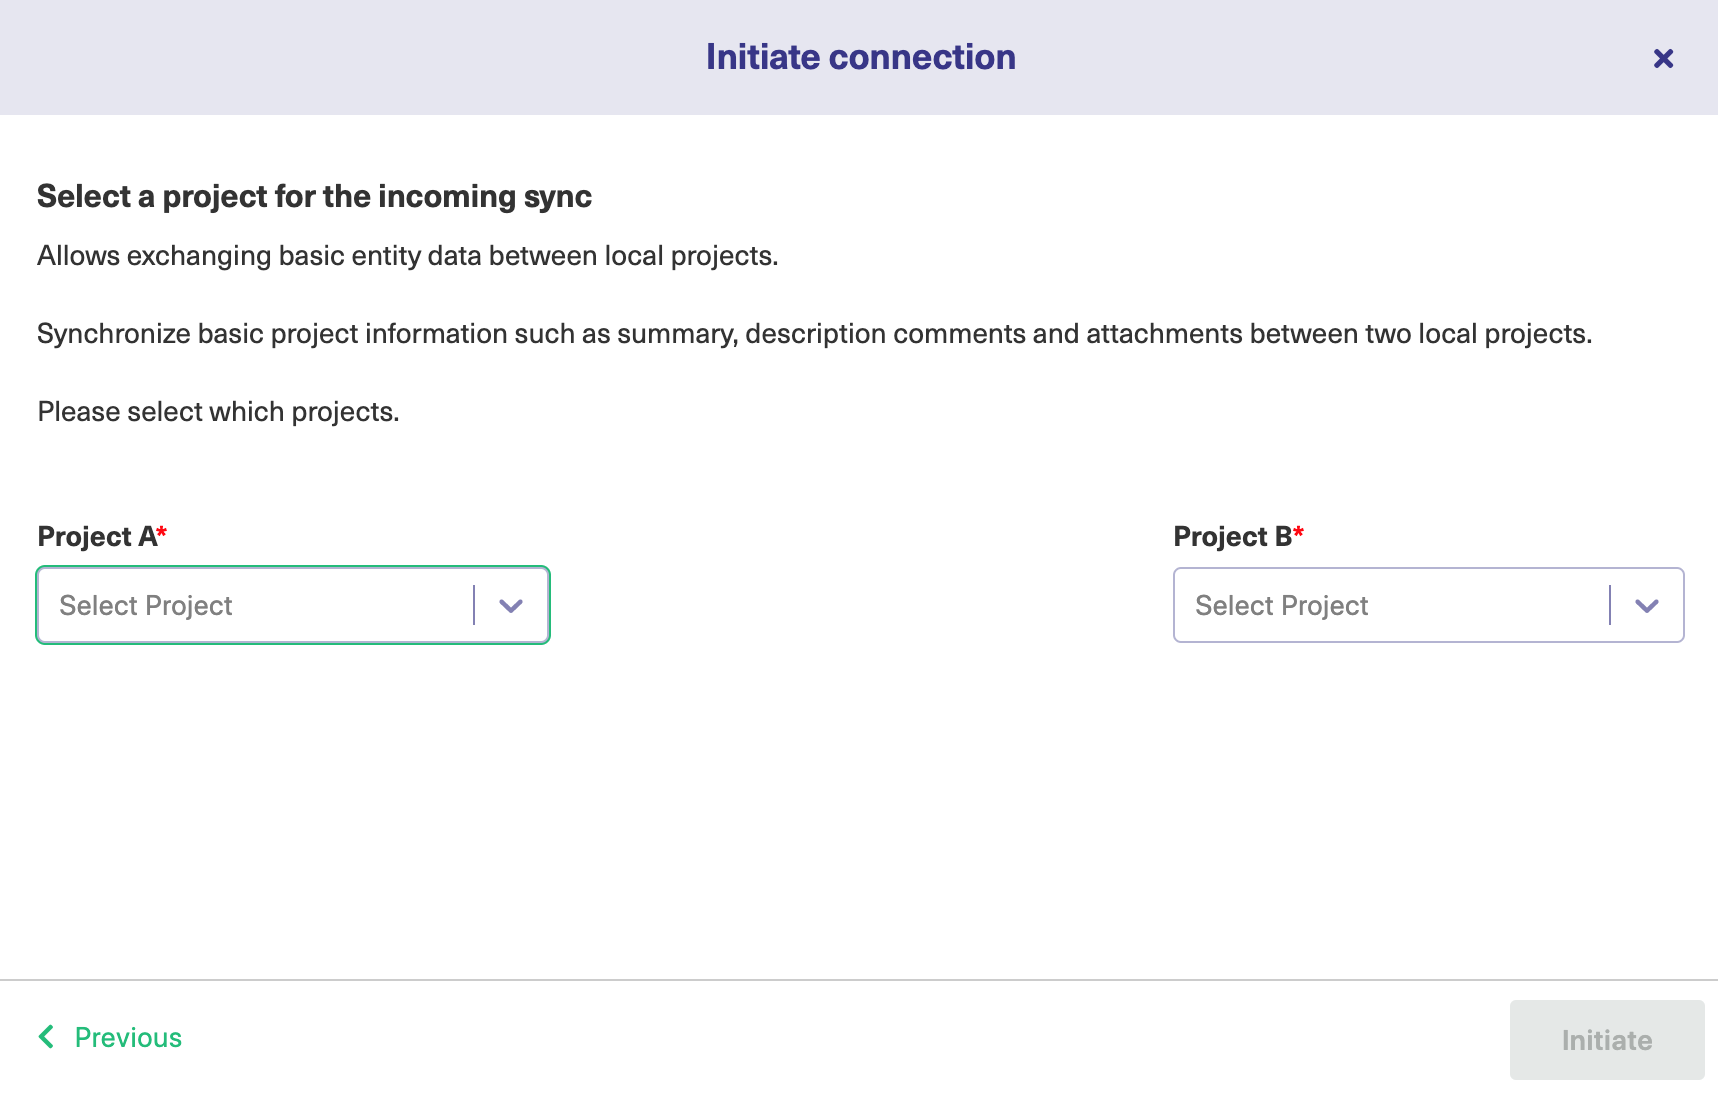
8. Select both projects within your instance that you want to set up synchronization between.
Note: For platforms that don't have the concept of a project, this option is not displayed.
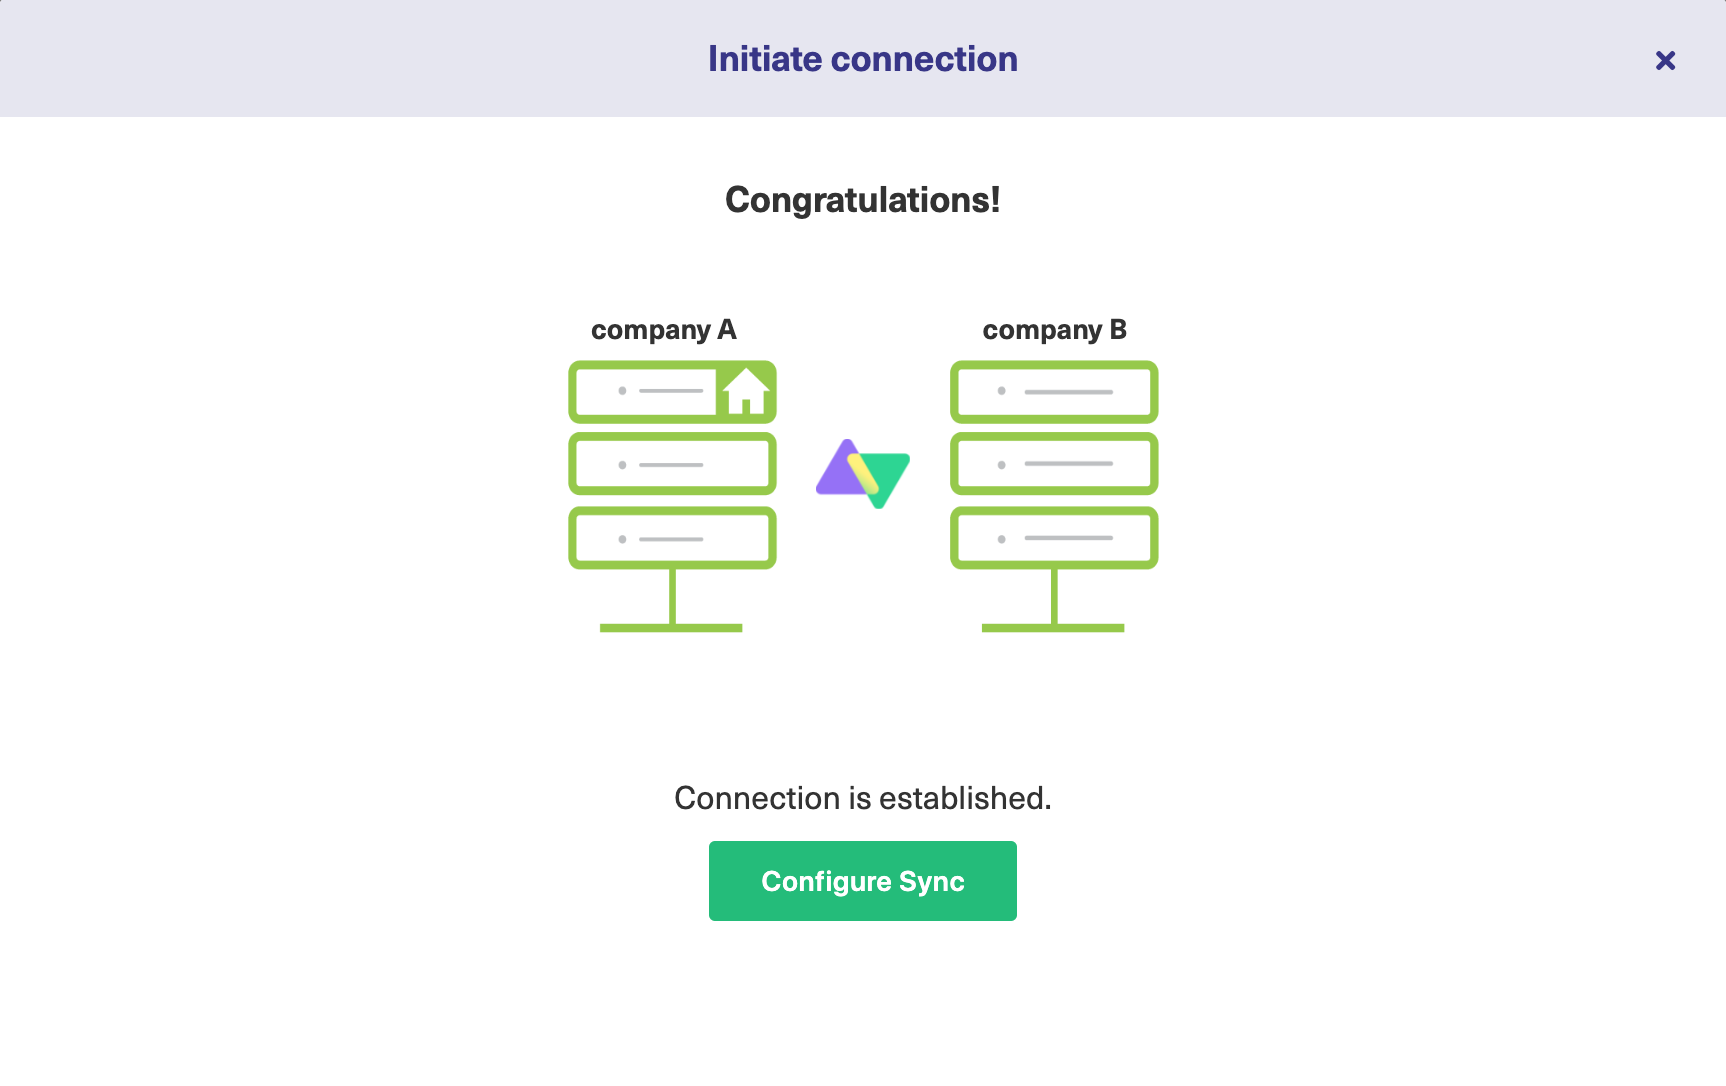
9. Click Initiate.
The Local Connection has been successfully set up.