New Exalate console streamlines the process of creating connections between different work management systems. This guide walks you through creating a connection with automated system registration and configuration.
Before You Begin
To create a connection, you'll need:
- An active account in the new Exalate console with at least one Workspace
- Access credentials for the systems you want to connect
System Requirements:
- For Azure DevOps: A Personal Access Token (PAT) with Work Items (Read & Write) scope
- For ServiceNow: Username and password
- For Freshdesk: API key
- For Freshservice: API key
- For Jira Cloud (Beta): OAuth (plus optional Forge Extension for advanced features)
- For Zendesk: API key
- For Azure DevOps Server: A Personal Access Token (PAT)
- For Salesforce: Client ID and Client Secret
- For Asana: API key
Note: Automated system registration currently supports all available systems except for GitHub. If you want to connect GitHub, you'll need to import it as a node into your workspace first before creating a connection.
Start With the Connection Wizard
1. Log in to your account.
2. From the Workspaces list, select a workspace.
3. Click Add Connections > Create New Connection.

Configure System A
1. Enter the system URL:
 New Exalate console automatically detects the system type based on the URL you enter.
2. System status check:
When you enter a URL, we check if the system is already registered:
- If the system is already part of your workspace, you'll see a confirmation message and can skip authentication.
- If the system is registered but in a different workspace, you'll see: "System registered, but not yet part of Workspace." You can continue—the system will be added to your workspace during connection creation.
- If the system is new, authentication fields appear automatically.
3. Authenticate the system:
If authentication is required, provide your credentials:
- Enter your Personal Access Token (PAT), API key, or basic authentication details, depending on your system type.
- Click Check Authentication and wait for validation. Once successful, the Next button becomes active.

4. Click Next to proceed to System B.
Configure System B
Follow the same steps as System A:
- Enter the system URL for your second system.
- Wait for automatic system type detection.
- If required, provide authentication credentials.
- Click Check Authentication to verify.
- Click Next to continue.
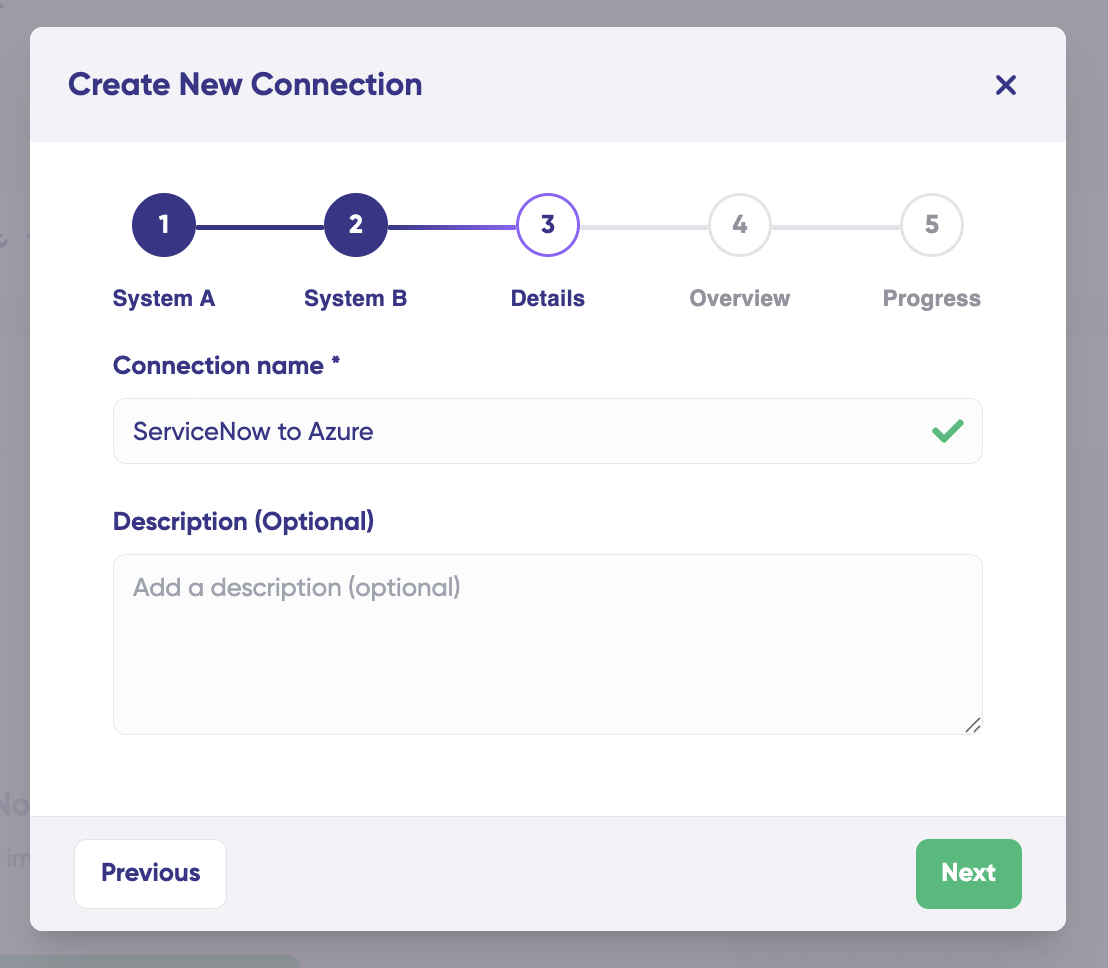
Name Your Connection
1. Connection name
Enter a unique, descriptive name for your connection. The name must be unique between these two systems.
Examples:
- "ADO-ServiceNow-ProductTeam"
- "Development-Support-Sync"
If this is not your first connection between the systems and the name already exists, you'll see an error message prompting you to choose a different name

2. Connection description (optional):
Add a brief description to help identify the connection's purpose, such as "Sync product development tasks between Azure DevOps and ServiceNow."
3. Click Next to review your configuration.
Review and Create
1. Review the details of your connection:
- System A: Verify the system type, URL, and authentication status
- System B: Verify the system type, URL, and authentication status
- Connection Details: Confirm the connection name and description
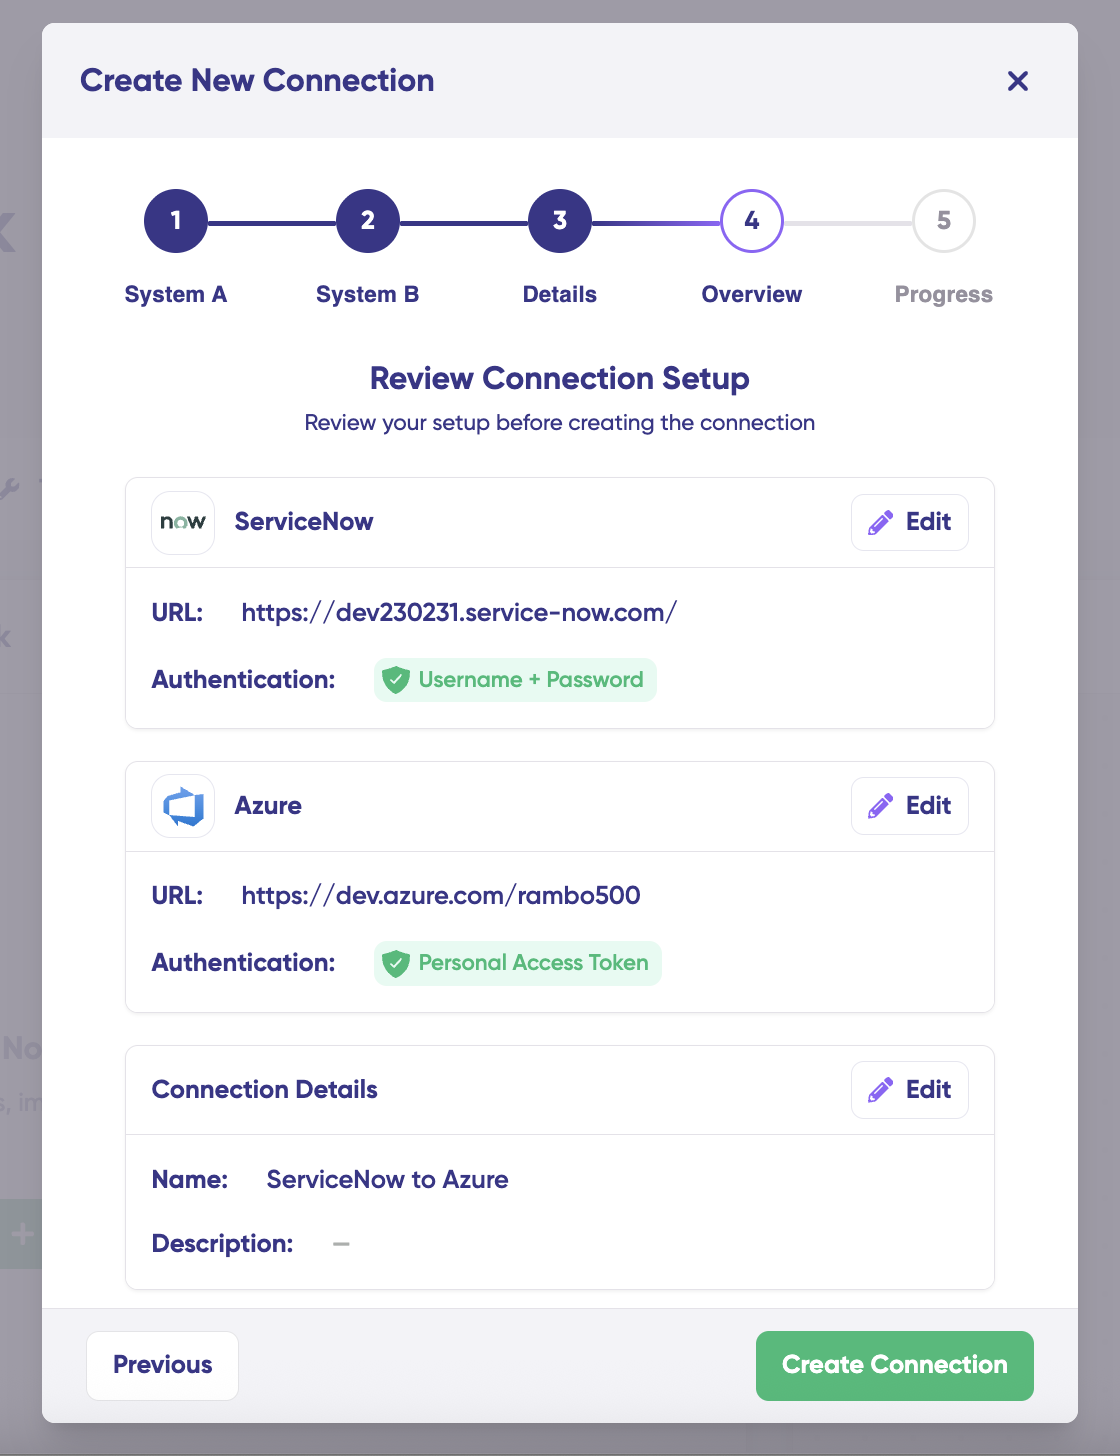

2. Click Create Connection to begin the setup process.
Monitor Progress
New Exalate automatically registers your systems and establishes the connection. You'll see real-time updates as the process completes:
System Registration:
- Validating credentials
- Checking for existing nodes
- Registering new nodes (if needed)
- Configuring node settings
Connection Establishment:
- Creating the bidirectional connection
- Finalizing setup
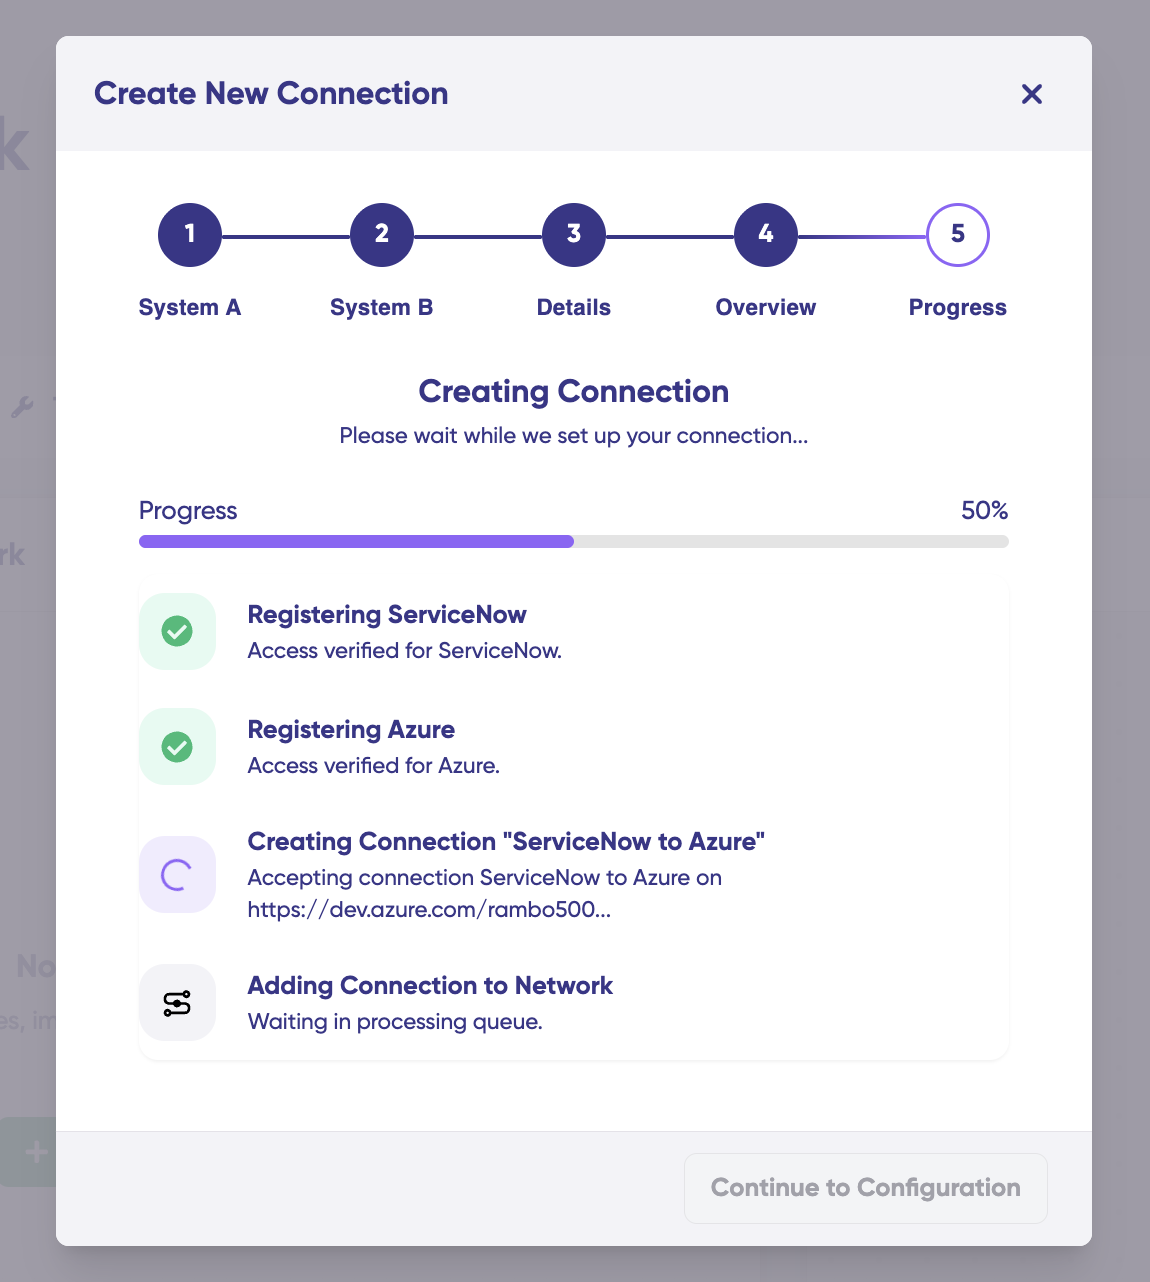

The progress screen shows the status of each step and an estimated time remaining. The process typically takes1-2 minutes.
Tip: You can close the progress modal and navigate away—the process continues in the background. Your connection will appear in the Connections list with a "Building..." status until it's ready.
When the process completes, you'll see a success message, and your connection status will change to "Ready to configure."
What's Next?
Once your connection is created, you'll need to configure it before it's ready to sync data:
- Configure project selection: Choose which projects to sync between your systems.
Note: If the concept of a project does not exist in the given system, this modal will not be shown.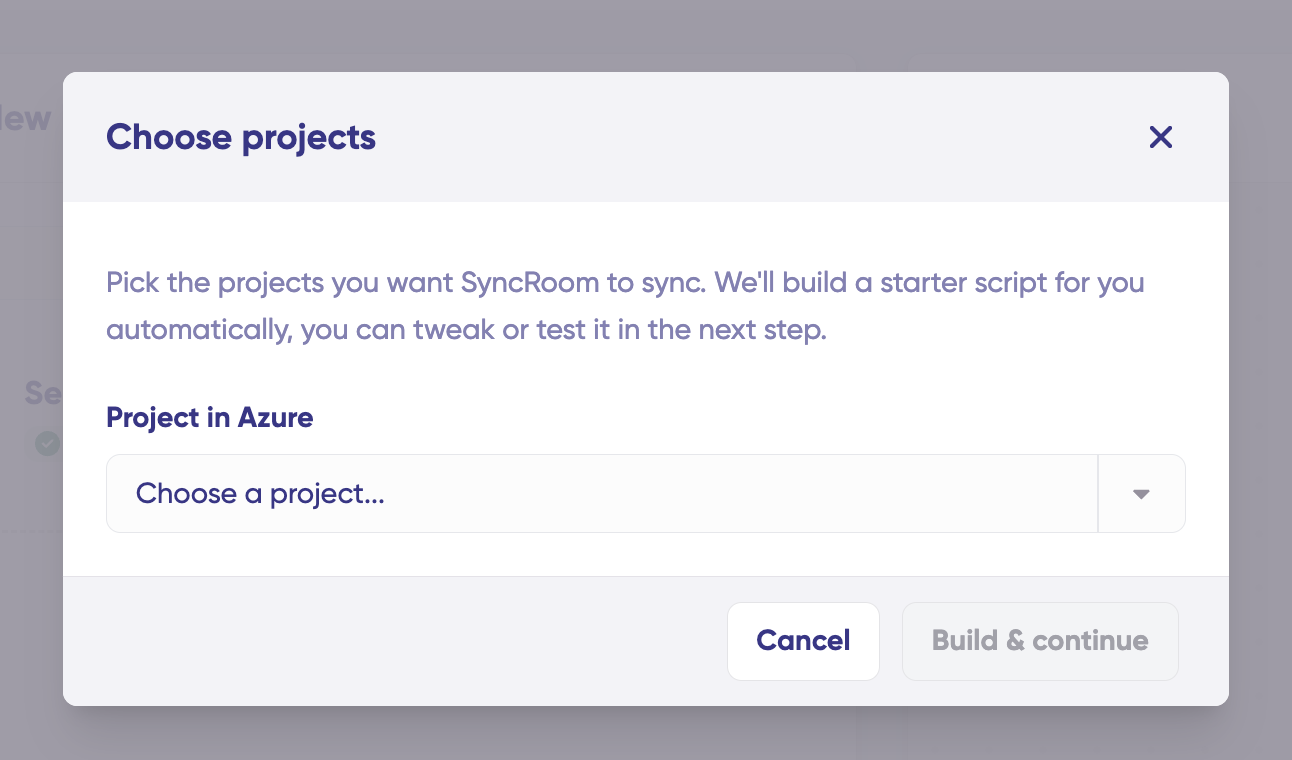
- Test your connection: Use TestRun to validate your configuration before going live.
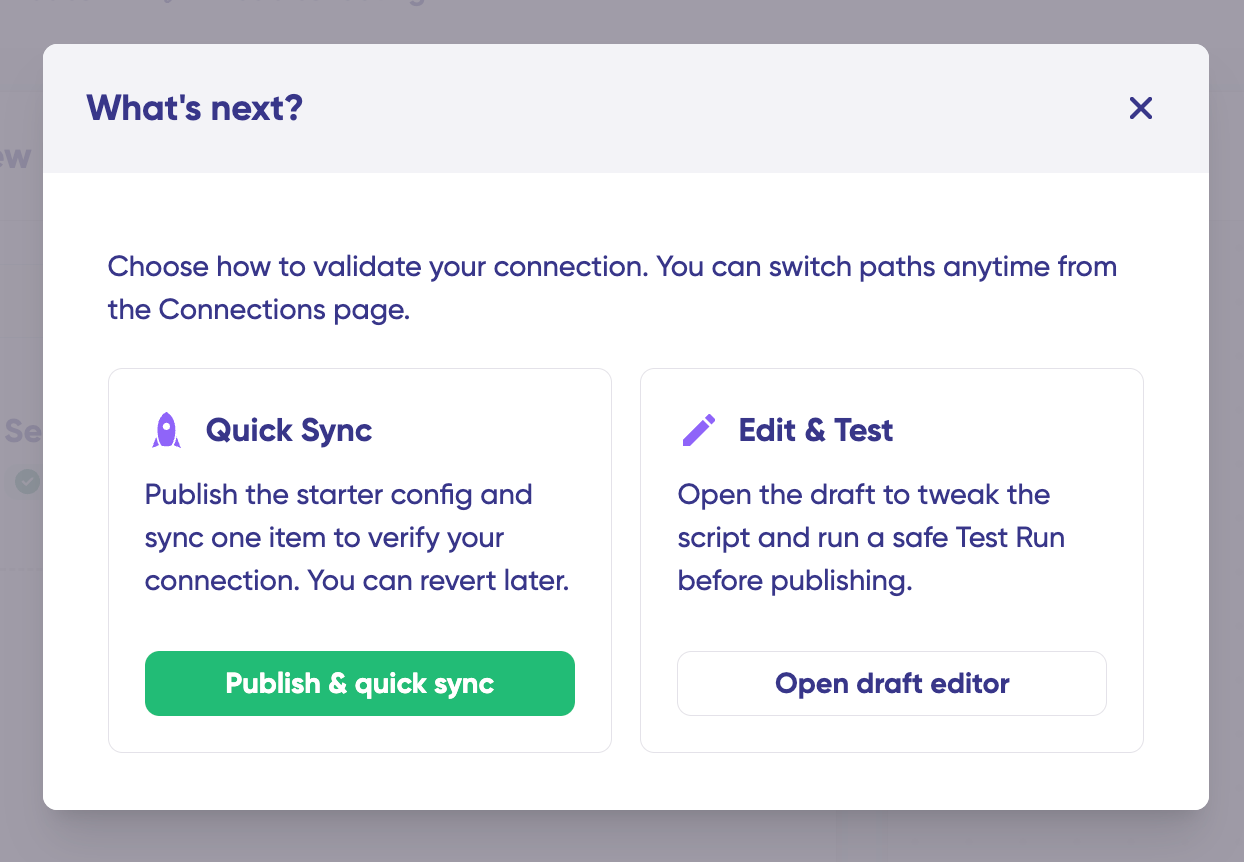
- Publish to production: Activate the connection to begin syncing data.


Refer to the Manage Connection Configuration guide for detailed steps on configuring your connection.
Video tutorial
Watch how to create your first connection and sync items between two systems in the Exalate Console.