This article applies to Exalate Classic only. For New Exalate, refer to this documentation.
To install Exalate for Azure DevOps Server, contact the Exalate team.
After receiving your request, the team collects the required configuration details and assigns an Exalate node to your Azure DevOps (ADO) Server instance. Once the setup is complete, you will receive the node URL at the email address you provided. Use this URL to log in to Exalate for your ADO instance.
Configuration Steps
1. Access the Exalate node
When you access the node for the first time, the Personal Access Token (PAT) configuration screen appears.
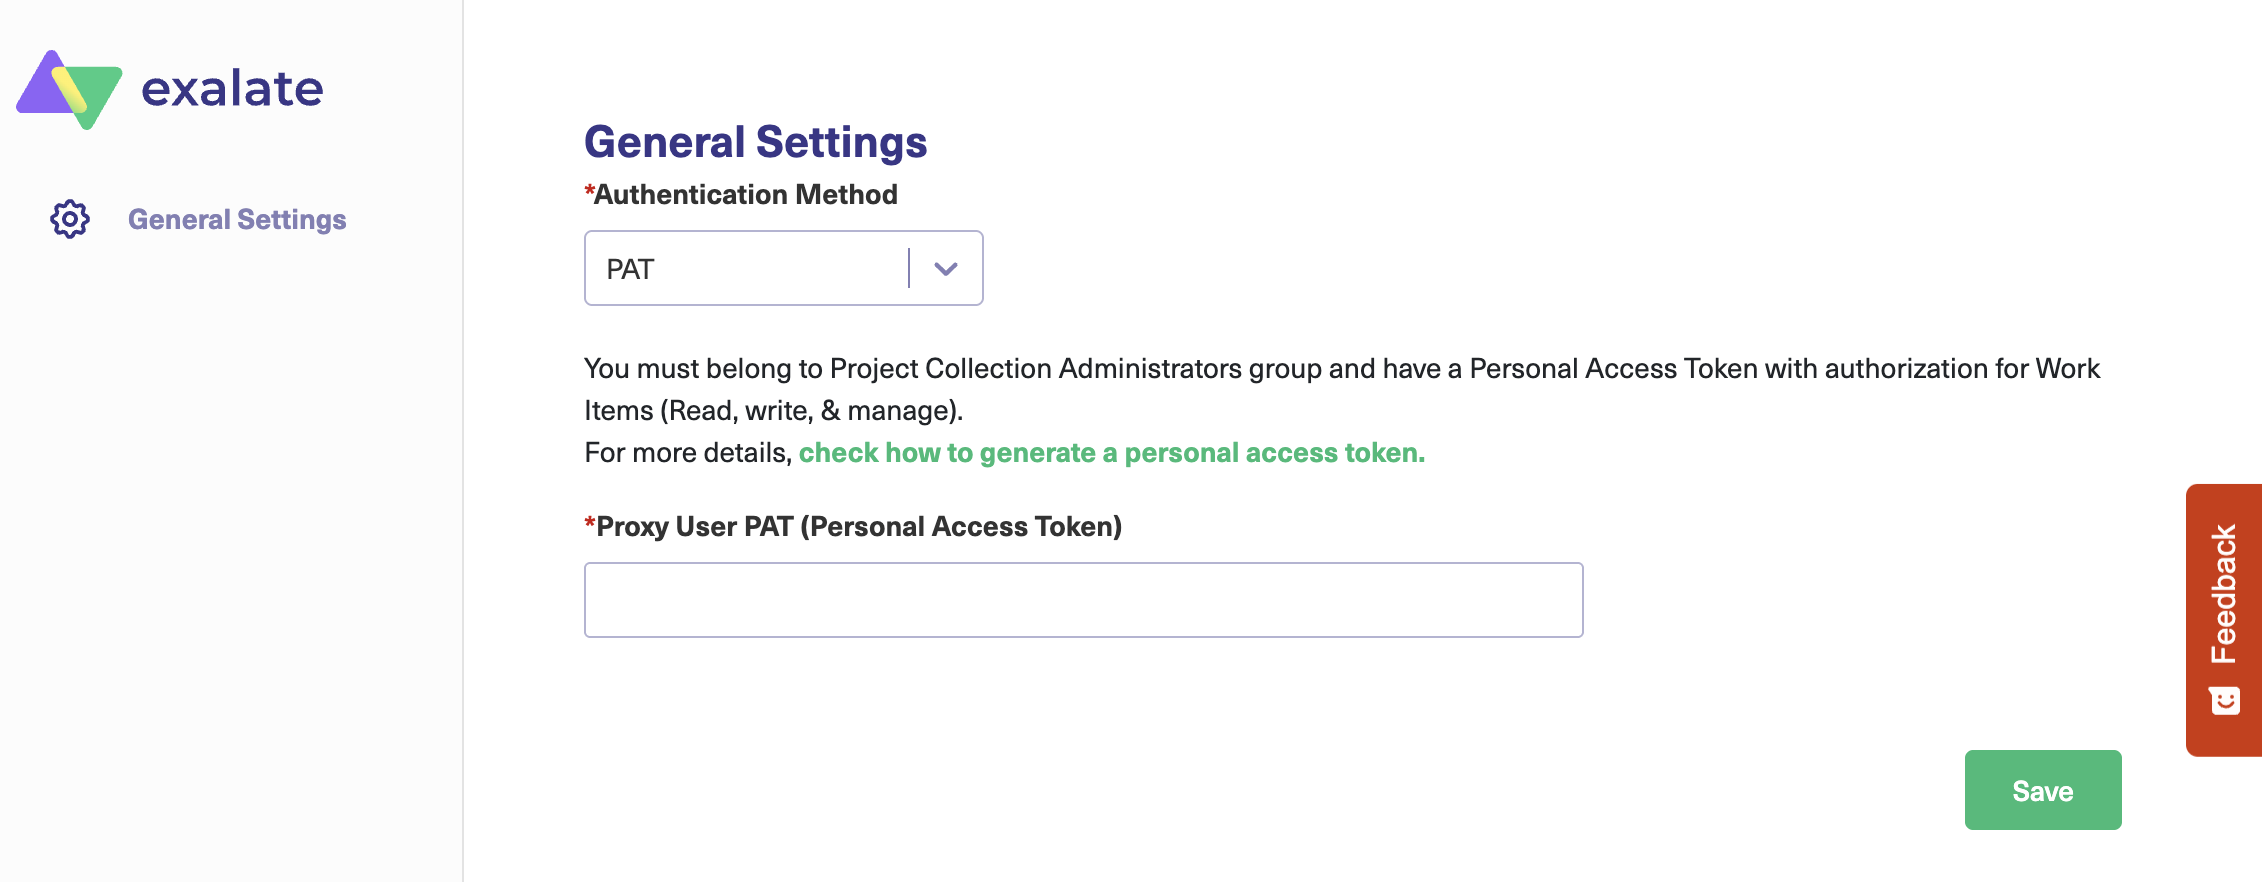
2. Add the Personal Access Token (PAT)
Enter the PAT for your ADO Server instance. Refer to How to Generate PAT in Azure DevOps Server for detailed instructions.
The PAT must have the following permissions for Exalate to function properly:
Work Items: Read & Write
Project and Team: Read
Identity: Read (for user mapping)
Code: Read (if synchronizing repository links)
3. Save the configuration
Click Save to link your Azure DevOps instance with the assigned Exalate node.
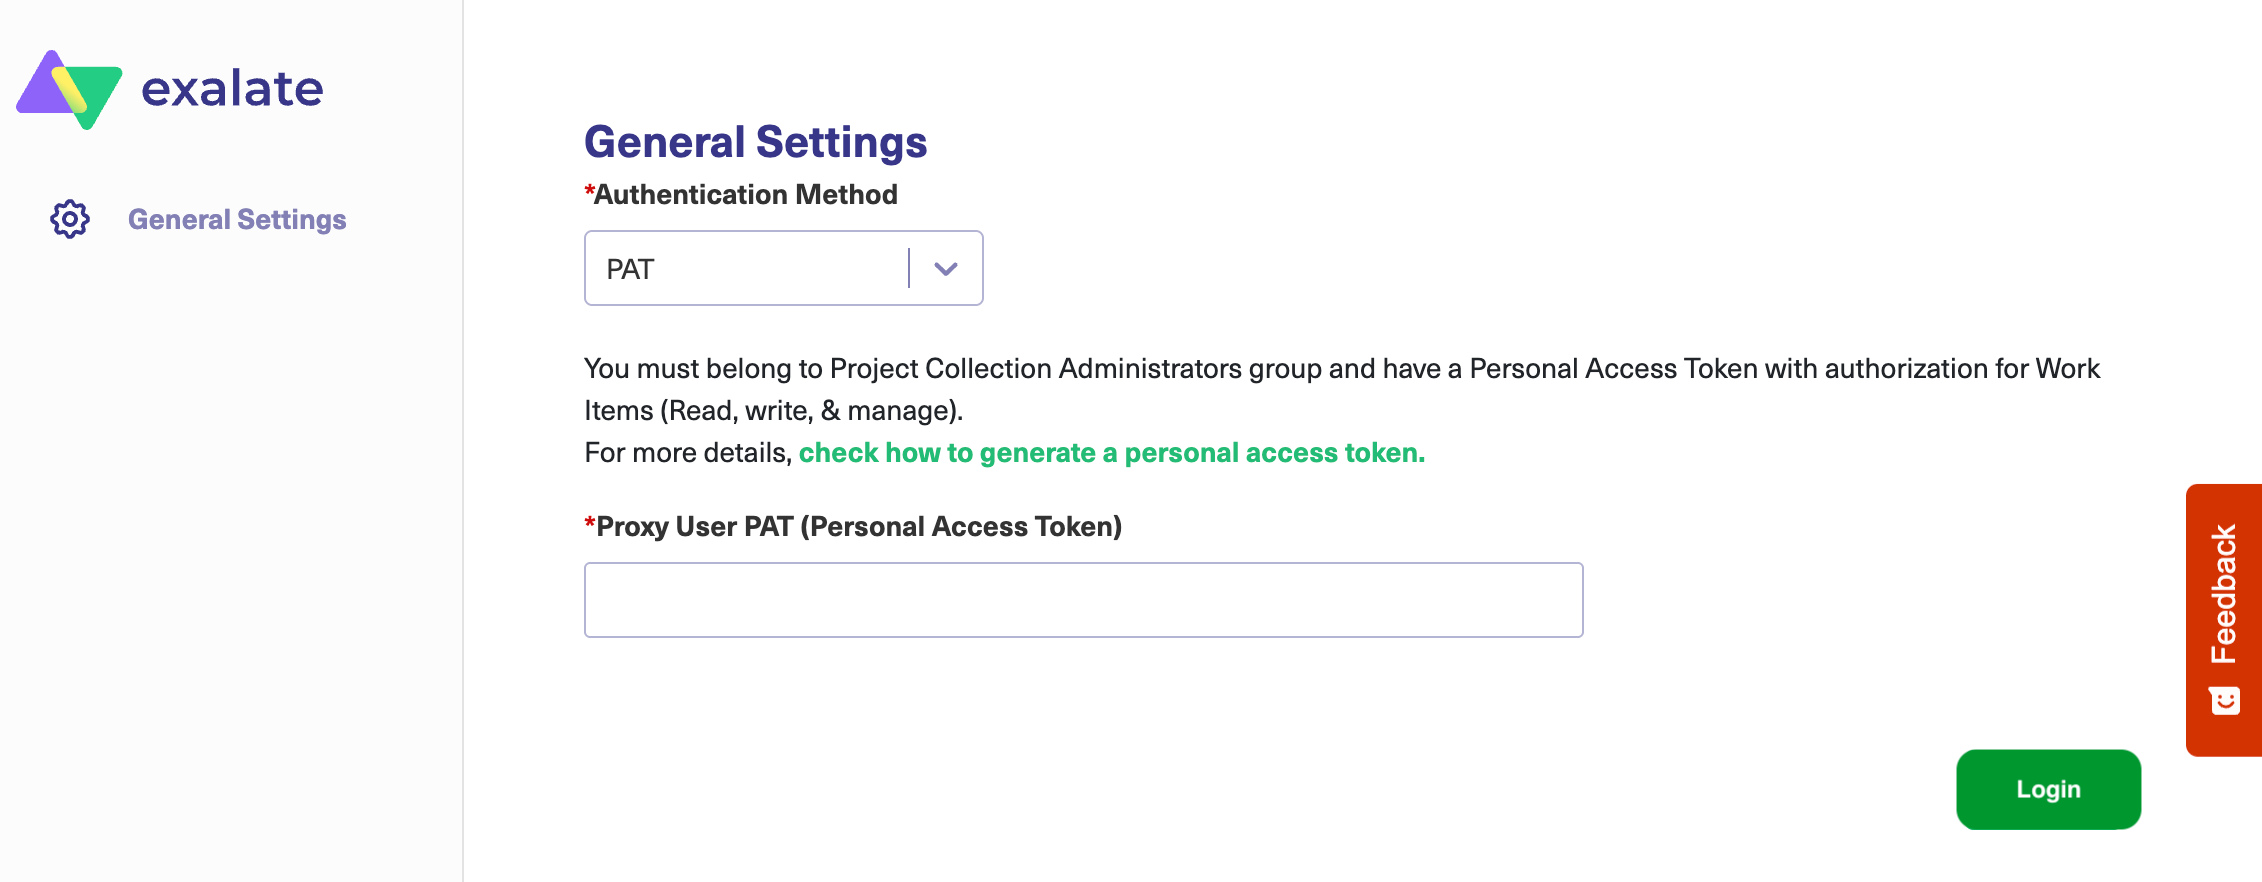
4. Authenticate with the PAT
After saving, a login screen appears. Re-enter your PAT and click Login to complete authentication.
5. You can now start using Exalate to synchronize data between your Azure DevOps Server instance and other connected platforms.